Table of Contents
Advertisement
Quick Links
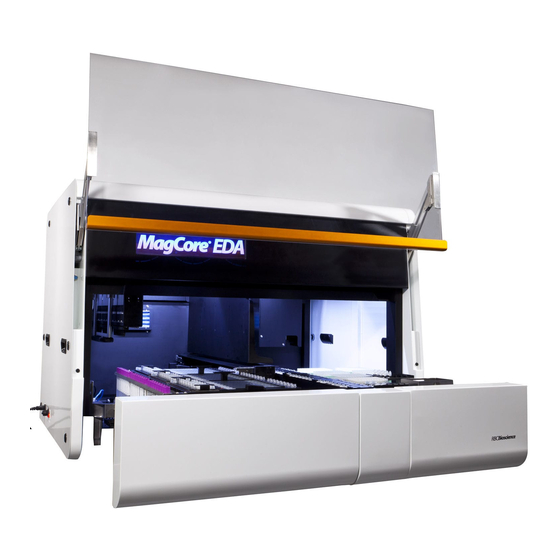
MagCore® EDA
Operation Manual
CONTENTS
━ Operating Parameters . . . . . . . . . . . . . . . . . . . . .
━ Operating Environment . . . . . . . . . . . . . . . . . . . .
━ Applications . . . . . . . . . . . . . . . . . . . . . . . . . . . .
━ EDA Only . . . . . . . . . . . . . . . . . . . . . . . . . . . . .
━ EDA Stand Set . . . . . . . . . . . . . . . . . . . . . . . . . .
━ Open Lids . . . . . . . . . . . . . . . . . . . . . . . . . . . .
━ Remove Safety Brackets . . . . . . . . . . . . . . . . . . .
━ A zone . . . . . . . . . . . . . . . . . . . . . . . . . . . . . .
━ B zone . . . . . . . . . . . . . . . . . . . . . . . . . . . . . .
━ System Overview . . . . . . . . . . . . . . . . . . . . . . .
━ Install MagCore® Cuvette . . . . . . . . . . . . . . . . . .
━ Install reagent cartridge . . . . . . . . . . . . . . . . . . . .
━ Install Tube, Tip . . . . . . . . . . . . . . . . . . . . . . . . .
━ Install PCR Rack . . . . . . . . . . . . . . . . . . . . . . . . .
━ Rack Cooling . . . . . . . . . . . . . . . . . . . . . . . . . .
━ Before Starting . . . . . . . . . . . . . . . . . . . . . . . . .
November 2022
EN-MagCore® EDA
Operation Manual-1.0.0
1
━ Start Programs . . . . . . . . . . . . . . . . . . . . . . . . .
2
━ Pause and Abort . . . . . . . . . . . . . . . . . . . . . . . .
4
5
5
━ System . . . . . . . . . . . . . . . . . . . . . . . . . . . . . .
5
━ Eject Tip . . . . . . . . . . . . . . . . . . . . . . . . . . . . .
5
━ Maintenance . . . . . . . . . . . . . . . . . . . . . . . . . .
6
6
8
10
11
12
12
12
13
14
15
15
15
16
16
17
15F, No.15, Qiaohe Rd,Zhonghe Dist, New Taipei City 235029, Taiwan
18
19
35
36
36
36
37
Advertisement
Table of Contents

Related Manuals for MagCore EDA


Summary of Contents for MagCore EDA
-
Page 1: Table Of Contents
━ Install MagCore® Cuvette . . . . . . . . . . . . . . . . . . -
Page 2: Safety Precautions
Do not place metal objects inside the MagCore® System and wipe away all spilled electric shock. Never spill liquid of any kind on the product. -
Page 3: Intended Use
Precautions The following procedure is designed to process maximum 24 samples at the same time. The MagCore® instrument can handle all numbers of samples between 1 and 24. For a detailed description of instrument setup and handling, refer to the MagCore® instrument Operator’ s Manual. - Page 4 Prevention of Cross-Contamination To minimize the risk of cross-contamination and to prevent contact with potentially infectious materials, pipetting blood samples on a designated portion of the bench or safety hood during sample preparation. To further minimize the risk of contamination, always carry out sample preparation, PCR setup, and the PCR run itself in separate rooms specially designated for each phase in the workflow.
-
Page 5: Ivd Symbols Reference
MagCore® EDA Reference Symbol IVD Symbols Reference Reference symbol Description of Symbol CE mark In Vitro Diagnostic Device Authorized representative in the European Community Manufacturer Content su cient for <n> tests Warning: electricity Instruction manual must be read before operating... -
Page 6: Specification
Specification Model System Method Cellulose Coated Magnetic Beads System Components 1. Pipetting Unit: dispensing, transferring, 2 X-Y axis model 2. Electric Control: PLC model and Arm-based main board embedded in 3. UV Light: power 8W, life duration 11,000hr 4. Contamination Prevention: HEPA filtration, Pipette tips with filter 5. -
Page 7: Unpacking
MagCore® EDA Unpacking ━ EDA Only Cut off all plastic packing belts Remove the corner protectors Disassemble each packing sides... - Page 8 Remove the screws along the metal bar on both sides of the instrument. Remove the fixing plate and metal bars Use the pallet truck or forklift to carry EDA to the area you've prepared. www.rbcbioscience.com...
-
Page 9: Eda Stand Set
MagCore® EDA ━ EDA Stand Set Cut off all plastic packing belts Remove all of the corner protectors Disassemble each packing sides... - Page 10 Remove the screws on the metal fixing plate at each corners Take out the ramps inside the standing cabinet The loading ramps can help you unload the EDA set at ease www.rbcbioscience.com...
-
Page 11: Open Lids
MagCore® EDA ━ Open Lids Turn the lock point to 90° by using a hex screwdriver, and then you can take off the lids. Be sure to take off the side lids when removing fixing plate. -
Page 12: Remove Safety Brackets
━ Remove Safety Brackets A. Piston(out)- E. Drawer- A zone A zone B. Piston(side)- F. Spectrophotometer A zone C. Piston(out)- G. Cooler- B zone EL/ER D. Piston(side)- H. Drawer- B zone B zone www.rbcbioscience.com... -
Page 13: Accessories
(Europe standard and U.S.A standard) Grease X 1 3mm O-Rings X 24 5mm O-Rings X 24 You can purchase Cat. No.P46040013: MSC100 MagCore Cuvette Set (X100) from your local distributor. Empty Cartridge X 10 Sample Tube /Elution Tube X 20 Pipette Tip X 20 10. -
Page 14: Installation
Installation 1125 mm (Door opened) 830 mm Plug in the power cord and turn on the main power Make sure that the voltage of the outlet is between 220V and 240V. Keep your hands dry. Also make sure that the machine is turned off when you insert the plug. -
Page 15: System Overview
MagCore® EDA ━ System Overview Front Door Logo Indicator Hepa Operation Area (B zone) Power Outlet Ethernet Port USB Port Main Power Switch Cooler Operation Area (A Zone) Top Service Lid PLC Module Main board Cooling fans... -
Page 16: Install Magcore® Cuvette
━ Install MagCore® Cuvette 1. Place MagCore® Cuvette into the corresponding sample well. Cuvette can only be placed in one direction. It is impossible to install it into the well if the direction is not correct. 2. Place the 200μl SP tip into the W4 of the T-Rack. -
Page 17: Install Pcr Rack
MagCore® EDA ━ Install PCR Rack All PCR racks have set direction, be sure the rack is facing the right direction. Input the tip holder to the rack and put the amount of tip you need into the 50ul Tip Rack well. -
Page 18: Before Starting
━ Before Starting Remove the cap of USB port Link Magcore EDA to computer with provided Type A connector www.rbcbioscience.com... -
Page 19: User Interface Overview
MagCore® EDA User Interface Overview A. Home- Back to main page and clear the process. B. Review Setting- Back to main page but keep the process. C. Load File- Load previously saved process. D. Setting- System status, tip ejection, maintain system. -
Page 20: Start Programs
━ Start Programs A Zone - Nucleic Acid Extration Next Log in to the EDA operating application. Setup all the required conditions and press continue. * When setting Sample Number , if value >24, then the extraction will be going to two run(1~24, 25~48) for the same condition. - Page 21 On this page, you can save the settings to make future testing more efficient. The EDA can automatically scan the sticker on the primary tubes (blood collection tube) if required. * Make sure the barcode is facing the right direction.
- Page 22 Standard Number Automatic Setup, customize your own set and inplace their value, EDA system will automatically mix up the Premix solution for you. * You only have to select PreMixA check box. * Positive and Negative control will show in slot 23 and 24.
- Page 23 Automatic Setup In the , if the volume of your PreMix is higher than the capacity of the selected tube, EDA system will automatically add an additional Premix. At Deck Layout 1-4, drag and drop the rack in to the deck.
- Page 24 Make sure refer to the number displays in Estimated Vol(ul), add the liquid in the tube to the same or higher volume, and keyin the actual volume into Manual Input(ul). When Manual Input(ul) ≥ Estimated Vol(ul), the status would show OK. * If your total tips are lower than your setup value, you need to go back to Deck Layout 1~4...
- Page 25 MagCore® EDA B Zone - Serial Dilution Make sure the link shows green light to indicate that it is connected to the machine. Serial Dilution Click the button to make the setup. Select samples in the list and click the dilute multiple.
- Page 26 In the Premix tab, select Dilute Setup to activate the Premix rack. The system automatically calculates the volume of water needed based on the dilution multiple and quantity. Switch to Deck Layout 5-10, drag and drop Template Rack, and Dilution rack in to the empty deck.
- Page 27 MagCore® EDA Make sure refer to the number displays in Estimated Vol(ul), add the liquid in the tube to the same or higher volume, and keyin the actual volume into Manual Input(ul). When Manual Input(ul) ≥ Estimated Vol(ul), the Start Confirm and check all your setup, press status would show OK.
- Page 28 A + B Zone - Extract + Assay Manual Scan Make sure the link shows green light to indicate that Confirm your settings, click Barcode it is connected to the machine. to continue the process. Extract Assay Sample Elution Click the button to start setup.
- Page 29 MagCore® EDA If require, EDA can auto-scan the primary tubes. * Make sure the barcode is facing the right direction. Auto Primary Scan Click the option. Sample Number, Set up the value for your Positive/ Negative Control, NTC Standard Number Tube Type .
- Page 30 Automatic Setup In the , another PreMixA check box is automatically added to the list if the volume of PreMix set is higher than the tube you selected can handle. The tip rack can be dragged and dropped to positions 1-4 in the deck layout. * You can click clear if you need to reset the rack position.
- Page 31 When all your setup were check up, press to start final assay process. * Make sure the door and drawer are closed. After the A and B zone settings are completed, click Execute Extraction , and the EDA starts to execute the nucleic acid extraction.
- Page 32 A + B Zone - Extract + PCR (Dilute to same concentration) Manual Scan Make sure the Link have connected. Confirm your settings, click Barcode to continue the process. Extract PCR Click the button to start setup. Sample Elution Scan Use Barcode Scanner to scan the barcode of the sticker on the tube.
- Page 33 MagCore® EDA The EDA can automatically scan the sticker on the primary tubes (blood collection tube) if required. * Make sure the barcode is facing the right direction. Auto Primary Scan Click the option. Sample Number, Set up conditions for your...
- Page 34 Automatic Setup In the , another PreMixA check box is automatically added to the list if the volume of PreMix set is higher than the tube you selected can handle. The tip rack can be dragged and dropped to positions 1-4 in the deck layout. Clear * You can click if you need to re-do the deck setting.
- Page 35 MagCore® EDA When finish the Extraction process, we can continue to start PCR assay setup preparation. Switch to Deck Layout 5-10, drag and drop PCR rack in to the empty deck. Make sure refer to the number displays in Estimated...
-
Page 36: Pause And Abort
━ Pause and Abort During program processing, you can pause or abort the current execution. Pause Press and the machine suspends operation immediately. Opening the door during execution can also suspend the execution process. When the door is closed, you can decide to continue or abort the progress. -
Page 37: Setting And Maintenance
MagCore® EDA Setting and Maintenance On the setting page, you can check the system, eject the tip, and maintain the EDA device. Maintenance includes multiple functions, such as sterilization, cleaning, simple test, alarm history, etc. Users need to perform these checks regularly to ensure the system is in good condition. -
Page 38: Maintenance
━ Maintenance UV Sterilization Replace O-Ring UV Sterilization Replace O-Ring Select to start the sterilization Select to start the procedure. procedure. Selecting the time for sterilization. * If an abnormal situation occurs, you can pause and abort the movement process. * If you want to stop the sterilization, you can pause and abort the When clicking , the system moves to the O-ring... - Page 39 MagCore® EDA Piston Test Piston Test Select to start the testing procedure. The Piston test includes three types of Tip tests. Mainly test whether the Piston O-Ring and Tip can be tightly combined and whether the tip can be taken out from the T-Rack smoothly.
- Page 40 Motor Test Heater/ Cooler Motor Test Heater/Cooler Select to start the testing procedure. Select Test to start the testing procedure. Before testing the heater, please put the thermometer into the Heat Block Well. Select the Axis in the Zone you want to test. There are two temperatures for A zone's heating, and one for cooling system.
- Page 41 Use a soft cloth sprayed with 70% alcohol for the best efficiency. * The alarm record can auto-generate and save in the EDA system file when any error happens. Warning : The tips of the Piercing Needles are extremely sharp.
- Page 42 MagCore® www.rbcbioscience.com...
- Page 43 MagCore® EDA...
- Page 44 15F, No.15, Qiaohe Rd,Zhonghe Dist, New Taipei City 235029, Taiwan TEL : +886 2 8912 1200 FAX : +86 2 8912 1300...
Need help?
Do you have a question about the EDA and is the answer not in the manual?
Questions and answers