Table of Contents
Advertisement
Available languages
Available languages
Advertisement
Chapters
Table of Contents

Subscribe to Our Youtube Channel
Related Manuals for Oster 4786


Summary of Contents for Oster 4786
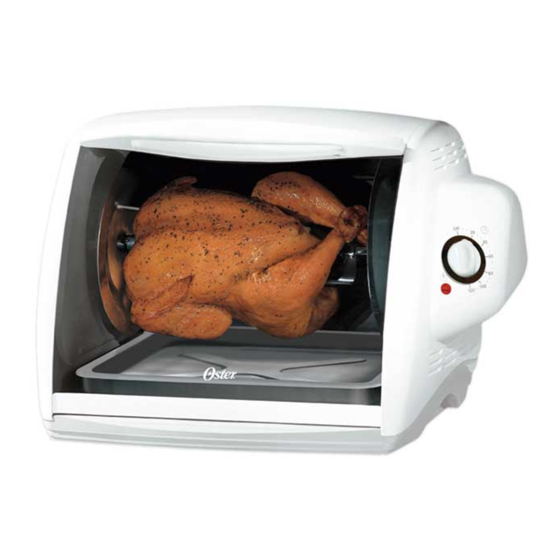
- Page 1 User Manual MODELS 4786 & 4787 HORIZONTAL ROTISSERIE P. N. 108521...
-
Page 2: Important Safeguards
Allow the Rotisserie to cool thoroughly before inserting and removing parts. • When the unit is not in use, keep the Rotisserie unplugged. • To protect against electric shock, do not place cord, plug or appliance in water or other liquids. -
Page 3: Use Of Extension Cords
3-wire cord. • Electrical Power: If electric circuit is overloaded with other appliances, your Rotisserie may not operate properly. The Rotisserie should be operated on a separate electrical circuit from other appliances. Read the following instructions before using this unit for the first time. -
Page 4: Table Of Contents
Cooking Times ......15 Rotisserie Cooking Chart ....16 Carving Tips . - Page 5 Welcome Enjoy rotisserie cooking at home in just a few, easy steps with your new OSTER We've done everything we can to make rotisserie cooking a breeze. Our instruction manual is designed to give you helpful information on operating your ®...
-
Page 6: Learning About Your Rotisserie
• Do not use the Rotisserie where it will be exposed to direct sunlight or other heat sources, such as a stove or oven. • Keep the Rotisserie out of the reach of children — it is hot! • Place the unit at least eight inches away from walls. -
Page 7: Features Of Your Rotisserie
Features of Your Horizontal Rotisserie Drip Tray Rotisserie Unit Food Basket and Cover Heat Reflector DJUSTABLE ORKS Spit Assembly... -
Page 8: Step-By-Step Instructions
Clean all parts and accessories with warm, soapy water. Rinse well and dry thoroughly. 2. Rotisserie should be placed at least 8 inches from walls and should not be positioned under cabinets. 3. Slide the drip tray into machine at the base of unit. - Page 9 step by step Step-By-Step Instructions 8. Open screws on adjustable fork then slide onto spit rod with pointed ends facing open end of spit rod. (Figure 3) 9. When cooking a chicken or turkey, reinsert spit rod through center of poultry, starting at the breast area.
- Page 10 Unplug the electric cord. 21. At the end of the cooking cycle allow the Rotisserie to cool down for a few minutes before removing hot food. Be sure to wear protective gloves or oven mitts while handling hot machine or food.
- Page 11 step by step 23. Once the unit is cooled down and while wearing protective gloves, remove drip tray. : Contents of drip tray AREFUL are very hot. (Figure 6) 24. Place platter carefully on the counter. 25. Carefully remove detachable wheel located on the right side.
-
Page 12: Using Basket Accessory
basket Using Basket Accessory 1. Make sure unit is unplugged before starting and is positioned at least 8 inches from walls and is not beneath cabinets. 2. Be sure that the basket has been washed and dried before using. Use warm, soapy water to wash and clean basket. - Page 13 14. Remove the door by undoing the safety latch and lift up and out on the right side. Always assume that both the Rotisserie and food are hot after cooking. 15. Position a plate or platter beneath the basket with one hand and secure the basket with the other hand.
-
Page 14: Cleaning And Caring For Your Rotisserie
Cleaning and Caring for Rotisserie • Be sure to clean Rotisserie and accessories before first use. • Make sure no packaging material is caught inside on the heating element. • After using Rotisserie, always allow unit to cool completely before cleaning. -
Page 15: Cooking Times
COOKING TIMES, based on test averages. Cooking times do vary because of differences in meat, shape, size and the amount of fat and bone. When cooking with the OSTER Rotisserie, use a meat ® thermometer – it takes the guesswork out of cooking. -
Page 16: Rotisserie Cooking Chart
® STER ORIZONTAL OULTRY Chicken, whole 3-1/2 to 4-1/2 lbs. Chicken, pieces with bones 2 to 3-1/2 lbs. boneless 1 to 1-1/2 lbs. Cornish Hens 2 to 3 hens Turkey, unstuffed 12 lbs. or under Turkey Burgers 1 lb. Boneless Rolled Pork Roast 3-1/2 to 7 lbs. -
Page 17: Carving Tips
carving Carving Tips Carving Poultry On a carving board, arrange the chicken or other poultry on its back with the legs to the right. Remove string or twine used to bind legs and wings for cooking. Starting at the side facing the carver, cut the leg off body by grasping the leg with your left hand pulling gently while cutting through the meat and the joint at the thigh. -
Page 18: Two-Year Limited Warranty
How to Obtain Warranty Service Take the product to an Authorized Sunbeam Service Center. You can find the nearest Authorized Sunbeam Service Center by calling 1-800-334-0759 or visit our Website at www.oster.com. DO NOT RETURN THIS PRODUCT TO THE PLACE OF PURCHASE. - Page 19 notes Notes...
-
Page 20: Product Information
©2001 Sunbeam Products, Inc. All rights reserved. OSTER Printed in China RODUCT TO THE For product questions: Sunbeam Consumer Service P. O. Box 948389 Maitland, FL 32794-8389 1-800-334-0759 www.oster.com RODUCT TO THE is a registered trademark of Sunbeam Products, Inc. - Page 21 Manual de Usuario MODELO 4786 y 4787 ASADOR HORIZONTAL P. N. 108521...
-
Page 22: Precauciones Importantes
PRECAUCIONES IMPORTANTES Cuando use aparatos eléctricos, para reducir el riesgo de incendio, electrocución y/o lesiones a personas algunas precauciones de seguridad básicas siempre deben de seguirse, incluyendo las siguientes: • LEA TODAS LAS INSTRUCCIONES, LAS ETIQUETAS EN EL PRODUCTO Y LAS ADVERTENCIAS ANTES DE USAR EL ASSADOR. -
Page 23: Utilización De Cables De Extensión
• No ponga en operación el aparato cuando está vacío. • Utilización de cables de extensión. A. El aparato está equipado con un cordón eléctrico corto como medida de seguridad para reducir el riesgo de tropezar, tirar o enredarse con un cordón más largo. B. -
Page 24: Índice
índice Índice Precauciones Importantes ....2 Utilización de Cables de Extensión ..3 Índice ......4 El Aprender de Su Asador . - Page 25 Asador sea sencilla y rápida. Nuestro manual de instrucciones está diseñado para darle información útil y consejos. Su Asador Horizontal OSTER • Sella en el interior los jugos naturales mientras que escurre las grasas no deseadas.
-
Page 26: El Aprender De Su Asador
aprendiendo El Aprender de Su Asador Antes de Usar • Lea todas las instrucciones cuidadosamente. • Asegúrese de remover cualquier material ajeno de la bandeja de goteo. • Despegue la etiqueta estática de la puerta si está presente. • Conecte el Asador en una toma de corriente adecuada. Donde Usar •... -
Page 27: Características De Su Asador
características Características de Su Asador Horizontal Bandeja para Goteo Asador Canasta para Alimentos y Tapa Reflector de Calor RINCHES JUSTABLES Ensamble de la Varilla... -
Page 28: Instrucciones Paso A Paso
paso a paso Instrucciones Paso a Paso 1. Asegúrese de que la unidad esté desconectada antes de iniciar. Lave todas las partes y accesorios del asador con agua tibia y jabonosa. Enjuáguelas y séquelas bien. 2. El asador se debe colocar por lo menos de 8 pulgadas de las paredes y no se debe colocar bajo algún mueble de cocina. - Page 29 paso a paso Instrucciones Paso a Paso 8.Abra los tornillos sobre el trinche ajustable y después deslice sobre la varilla con los extremos en punta colocados el extremo abierto de la varilla. (Figura 3) 9.Cuando cocina un pollo o un pavo, inserte de nuevo la varilla a través del centro del ave, iniciando en el área de la pechuga.
- Page 30 paso a paso 16. Cierre la puerta de vidrio. Verifique que la unidad esté colocada a por lo menos 8 pulgadas de las paredes y que no esté colocada debajo de los gabinetes. 17. Enchufe la unidad a una toma de corriente eléctrica y enciéndala ajustando el cronómetro en el tiempo de cocción deseado.
- Page 31 paso a paso 23. Después de que la unidad se enfríe, use guantes resistentes al calor y quite la bandeja del goteo. ENGA UIDADO del goteo está extremadamente caliente. (Figura 6) 24. Coloque el platón cuidadosamente sobre la mesa o sobre el mostrador. 25.
-
Page 32: Usando La Canasta
canasta Usando la Canasta 1. Verifique que la unidad esté desconectada antes de iniciar, de que esté colocada a por lo menos 8 pulgadas de las paredes y que no se encuentre debajo de los gabinetes. 2. Revise que la canasta haya sido lavada y secada antes de utilizar. - Page 33 canasta 10. Coloque la canasta dentro de la máquina en un ángulo con el extremo con punta en el lado derecho. 11. Cierre la puerta de vidrio y conecte la unidad a la toma de corriente. 12. Encienda el reloj y seleccione el tiempo de cocción deseado.
-
Page 34: Limpieza Y Cuidado Del Asador
limpieza Limpieza y Cuidados del Asador • Asegúrese de limpiar el Asador y los Accesorios antes de usarlos. • Verifique que no hay material de empaque atrapado dentro del elemento calefactor. • Después de utilizar el Asador, siempre permita que la unidad se enfríe completamente antes de limpiarla. -
Page 35: Tiempos De Cocción
Los tiempos de cocción pueden variar debido a las diferentes carnes, formas, tamaños y cantidad de grasa y hueso que ésta contenga. Cuando cocine con el Asador OSTER, ® use un termómetro de alimentos – así evita el estar adivinando el nivel de cocción. -
Page 36: Cuadro De Cocción Del Asador
UADRO DE LIMENTOS Pollo, entero Pollo, piezas con hueso sin hueso Codorniz Pavo sin rellenar Hamburguesas de Pavo UERCO Rollo sin Hueso Asado de Puerco 3-1/2 a 7 lbs. Lomo de Puerco Chuletas de Puerco con hueso sin hueso Costillas Jamón, sin Hueso Salchichón Crudo Salchichón y Salchichas Cocidas... -
Page 37: Consejos Para Rebanar Y Cortar Carnes
consejos Consejos para Rebanar y Cortar Carnes Rebanando Aves Sobre una tabla para cortar, coloque el pollo u otra ave sobre su espalda con las patas hacia la derecha. Quite la cadena o la guita usada para atar las piernas y las alas para el cocinar. Empezando por el lado que quede enfrente del cuchillo, corte una pierna del cuerpo agarrando la pierna con su mano izquierda, jale gentilmente mientras corta completamente la carne y la articulación en el muslo. -
Page 38: Garantía Limitada De Dos Años
Garantía Limitada de Dos Años COMPRÓ. DONDE Consumeraffairs@consumer.sunbeam.com. envíe 1-800-334-0759 instrucciones Autorizado. Sunbeam otra. provincia tener puede también usted caso. aplicarse tanto implícita, consecuentes incidentales jurisdicciones garantía presente implícita garantía Excepto implícita. causados consecuentes tornados. huracanes factores cubre Sunbeam desensamblaje, inadecuados, negligente daños... - Page 39 notas Notas...
-
Page 40: Información Sobre Los Productos
UGAR ONDE LO OMPRÓ Para preguntas sobre los productos: Sunbeam Consumer Service P. O. Box 948389 Maitland, FL 32794-8389 1-800-334-0759 www.oster.com NVÍE EL RODUCTO A LA IRECCIÓN NTERIOR ©2001 Sunbeam Products, Inc. Todos los derechos reservados. OSTER ® es una marca registrada de Sunbeam Products, Inc.
Need help?
Do you have a question about the 4786 and is the answer not in the manual?
Questions and answers