Advertisement
Quick Links
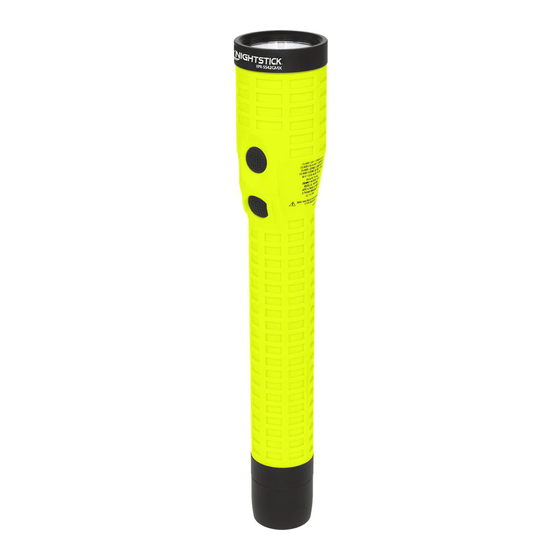
Instruction Manual
XPR-5542
US PATENT 9,713,217
THE XPR-5542 IS APPROVED FOR USE
Bayco Products, Inc.
Wylie, TX 75098
Ex ia FLASHLIGHT FOR USE IN HAZARDOUS LOCATIONS
E 467756
UL listed for use with Bayco Li-ion Battery Pack 5500-BATT
ID 5012927
CLASS I DIV 1 GRPS A-D T4
INTRINSICALLY SAFEÉ
CLASS II & III DIV 1 GRPS E-G
CLASS I ZONE 0 GRP IIC T4
CLASS II ZONE 20 IIIC T135ºC
2575
II 2 G Ex ia IIC T4 Gb
WARNINGS - INTRINSICALLY SAFE
y Warning: To prevent ignition of a hazardous atmosphere, do not locate the charger for
this product in the hazardous environment. The charger for this product must be located in
an area known to be non-hazardous ONLY.
y Warning: To prevent ignition of a hazardous atmosphere, do not attempt to charge this
product in the hazardous environment. This task must ONLY be performed in an area
known to be non-hazardous.
y Warning: Lithium-ion batteries must be used and charged properly. Improper use can
result in serious injury, fire, or death.
y Warning: Use only the included and approved 5500-BATT rechargeable battery pack
from Bayco Products.
y Warning: Do NOT attempt to use any other rechargeable or non-rechargeable batteries
with this light.
y Warning: To prevent ignition of a hazardous atmosphere, do not open the lens bezel in
the hazardous environment. This task must ONLY be performed in an area known to be
non-hazardous.
y Warning: When exchanging the rechargeable battery pack, use only the approved 5500-
BATT rechargeable battery pack from Bayco Products.
y Warning: To prevent ignition of a hazardous atmosphere, the rechargeable battery pack
must only be exchanged in an area known to be non-hazardous.
y Warning: Do not expose the rechargeable battery pack to water or salt water, or allow
the battery pack to get wet.
y Warning: Do not store the rechargeable battery pack with metallic objects that may
cause a short circuit.
y Warning: Substitution of components may impair intrinsic safety.
SPECIAL INSTRUCTIONS FOR INTRINSIC SAFETY
For personal safety, always confirm the rating of any known hazardous or potentially
hazardous location where the light is to be used.
INITIAL USE
Warning: To prevent ignition of a hazardous atmosphere, do not attempt to charge
this product in the hazardous environment. This task must ONLY be performed in an
area known to be non-hazardous.
Fully charge the XPR-5542 before the first use, or if the battery is new or has been unused
for several months. The maximum charge time required is approximately 6 hours.
DAILY USE
WARNING: TO PREVENT IGNITION OF A HAZARDOUS ATMOSPHERE, DO NOT
ATTEMPT TO CHARGE THIS PRODUCT IN THE HAZARDOUS ENVIRONMENT. THIS
TASK MUST ONLY BE PERFORMED IN AN AREA KNOWN TO BE NON-HAZARDOUS.
y Use only the supplied Nightstick charger, 5500-BATT rechargeable battery pack and AC
or DC adapter. For best performance, charge the 5542 when the flashlight beam starts
to dim.
y Connect the AC power adapter to the charger. The LED indicator will not be illuminated
at this point.
y With the flashlight facing forward, slide the 5542 into the charger until the contacts snap
into place.
y The LED indicator changes to constant red indicating the 5542 is properly inserted into the
charger and is in fact charging. The LED indicator remains red until the battery is fully charged.
At full charge, the LED indicator turns green.
y The total time to full charge the 5542 varies depending on the remaining charge in the
battery pack.
XPR-5542
Ex ia IIC T4 Gb
DEMKO 16 ATEX 1815
y To confirm a full charge, keep the 5542 in the charger and turn it on. The LED indicator
IECEx UL 16.0168
will change to red. Turn off the 5542. If the 5542 is fully charged, the LED indicator will
-20ºC ≤ Tamb ≤ +40ºC
turn green. If not, it remains red until the charge is completed and the LED indicator turns
3.7V/Cell 5500-BATT
green. The 5542 will now be fully charged.
U
= 4.75V
REPLACING LITHIUM-ION RECHARGEABLE BATTERY
m
WARNING: TO PREVENT IGNITION OF A HAZARDOUS ATMOSPHERE, DO NOT
OPEN THE LENS BEZEL IN THE HAZARDOUS ENVIRONMENT. THIS TASK MUST
ONLY BE PERFORMED IN AN AREA KNOWN TO BE NON-HAZARDOUS.
WARNING: WHEN EXCHANGING THE RECHARGEABLE BATTERY PACK, USE
ONLY THE APPROVED 5500-BATT RECHARGEABLE BATTERY PACK FROM BAYCO
PRODUCTS.
WARNING: TO PREVENT IGNITION OF A HAZARDOUS ATMOSPHERE, THE
RECHARGEABLE BATTERY PACK MUST ONLY BE EXCHANGED IN AN AREA
KNOWN TO BE NON-HAZARDOUS.
y Loosen the locking screw located on the side of the tail cap. CAUTION: Do NOT attempt
to completely remove the locking screw. Doing so is not necessary and may damage the
threads. The screw simply needs to be loosened enough to allow the tail-cap to unscrew.
y Unscrew the tail-cap from the housing in a counter-clockwise direction.
y Turn the light upside down and carefully shake the light in order to remove the battery.
Allow the battery to slide into your hand.
y Next, allow the 5500-BATT rechargeable battery pack to slide out of the light paying close
attention to the battery pack's orientation within the handle.
y Using only the approved replacement 5500-BATT rechargeable battery pack from Bayco
Products, slide the new battery pack into the handle of the light using the directional arrow
marked on the side of the pack to be a guide to proper battery orientation.
y Replace the tail-cap by screwing it onto the housing in a clockwise direction.
y Tighten locking screw. CAUTION: Do NOT over-tighten. Doing so may damage the
threads and impact the light's Intrinsic Safety.
OPERATION
THE XPR-5542 HAS SEVEN LIGHT MODES:
y Momentary flashlight
y Full brightness flashlight
y Medium brightness flashlight
y Low brightness flashlight
y Floodlight
y Dual-light
y Strobe
The XPR-5542 has two body switches providing access to all modes.
Momentary Flashlight Mode
Lightly press the top body switch for momentary operation. Release the switch to turn
the light off.
Constant-on
Press the top body switch until it clicks and then release for constant-on in high-brightness
mode. Press and release the top body switch again to turn the light off.
Select Brightness Level
Press and hold down the top body switch. The light will cycle from high to medium to
low and then back up again at a rate of approximately one mode per second. The light will
continue to cycle up and down through the various modes as long as the top body switch
is held down. When the desired brightness level is reached, simply release the top body
switch, and the light will remain in that brightness mode. Press and release the top body
switch to turn the light off.
Floodlight
Press the bottom body switch until it clicks and then release for floodlight mode. Press
and release the bottom body switch again to turn the light off.
Advertisement

Related Manuals for NightStick XPR-5542


Summary of Contents for NightStick XPR-5542
- Page 1 Strobe Fully charge the XPR-5542 before the first use, or if the battery is new or has been unused The XPR-5542 has two body switches providing access to all modes. for several months. The maximum charge time required is approximately 6 hours.
- Page 2 Dual-Light Dual-Light allows the user to turn on both the Flashlight (at any brightness level) and the Floodlight, at the same time. First select the appropriate brightness level of the flashlight using the directions above. Next press and release the bottom switch to activate the floodlight.
Need help?
Do you have a question about the XPR-5542 and is the answer not in the manual?
Questions and answers