
Related Manuals for serva BlueStain


Summary of Contents for serva BlueStain
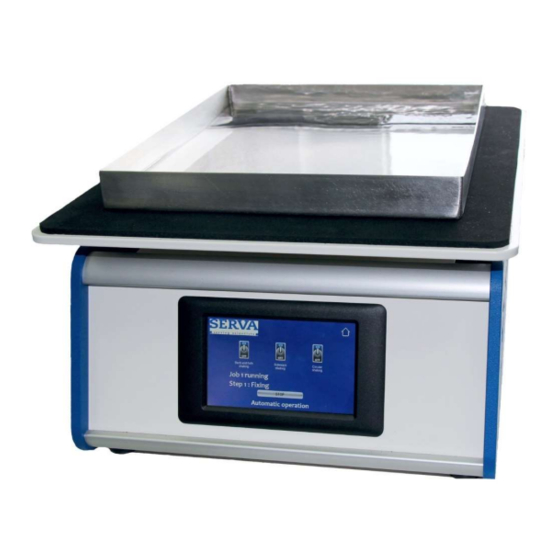
- Page 1 SERVA BlueLine Instruments for Electrophoresis SERVA BlueStain Automatic Gel Stainer Instruction manual Cat. No. BST-01...
- Page 3 By using the packing list, please check after unpacking, if all parts of the device are complete and the device is undamaged. If this is the case, please inform SERVA Electrophoresis GmbH at once. The warranty period is 12 months and starts at delivery. We ask for setting the packing material aside until warranty period is expired.
- Page 4 It refers to both transport, operation and maintenance of the device. The security definitions above bespeak the degree of the endangerment. The accompanying text explains and indicates to possible preventions. SERVA assistance Assistance Contact Sales Team (Germany) Contact your local sales representative to receive product information, to arrange demonstrations or to inquire quotations and product samples.
- Page 5 After any modification, warranty and CE certification becomes null and void. Additionally, these modifications may represent a potential source of danger. SERVA is not responsible for any harm or injury that was caused by device modification, improper use or unspecified applications.
- Page 6 550138 BlueStainE Ver 0323...
-
Page 7: Table Of Contents
Table of Contents Introduction Installation Packing list Operation conditions Specifications Set up / hose renewal 2.4.1 Pump setup 2.4.2 Tray setup 2.4.3 Valve setup Operation User Interface Modi of the Main Menu 3.2.1 Run Selected job 3.2.2 Load / Edit Job 3.2.3 Manual Operation 3.2.4 Level tray 3.2.5 Toggle Buzzer... -
Page 8: Introduction
The built-in mechanism is maintenance-free. The SERVA BlueStain is suitable for the whole range of currently applied staining methods. The simple operation, the robust mechanics and the results achieved with the device make it an indispensable tool in your laboratory. -
Page 9: Installation
2.4.1 Pump setup For easy renewal of the pump hose, the SERVA BlueStain obtains a lever to open and close the pump. Move the lever to the left to open the pump. Remove both reducer on each side of the pump hose. - Page 10 WARNING Other cables or hoses on the back can be pinched Do not force closing of the pump head if the resistance is too strong. The moving rollers can, for example, cause a pinched power cable to strip and causing an electric shock. Use the screw to set the appropriate contact pressure for the hose.
-
Page 11: Tray Setup
2.4.2 Tray setup Place the tray onto the shaking table with the out-/inlet facing to the rear right side. Use thin hose to connect table out-/inlet to reducer. 2.4.3 Valve setup Fix thin hose at right reducer with a zip tie. Connect thin hose to valve inlet port (unnumbered position in the middle) and fix it with a zip tie. -
Page 12: Operation
3 Operation Important Information: Always wear powder free disposable gloves when handling gels and staining solutions. 3.1 User Interface In this section, the user interface is explained and displayed using images. In the following sections, the operation modi are explained and referred to this section. ... -
Page 13: Modi Of The Main Menu
3.2 Modi of the Main Menu After booting, main menu is displayed. In the upper left corner, the last selected job with information is displayed. In the lower left corner, the current logged-in user is shown. Date and time are in the lower right corner. In the middle, eight icons show the possible modi that can be activated by pressing the icons on the screen:... -
Page 14: Load / Edit Job
3.2.2 Load / Edit Job The SERVA BlueStain is delivered with pre-programmed staining protocols for the most common SERVA staining kits. Please note: It is not possible to delete one single step. To program a new job it is always better to use an empty job and copy it to the desired place later. - Page 15 Select Job To load a job, any user can enter this mode. Select the programmed job using the up/down arrows and press the button “Select job”. The selected job is activated, visible in the main menu and ready to get started by “Run selected job”...
-
Page 16: Manual Operation
Copy / Delete Job To copy or delete a job press the button “Copy / Delete Job”. Please note that the Superuser must be logged in to copy or delete programs 1-5. Enter the program number to be deleted and press “Delete complete job”. After confirmation, the program is reset, and all steps are empty. -
Page 17: Level Tray
3.2.4 Level tray By pressing the “Level tray” button of the main menu, you can level the tray. First press “Initialize device” to start the initializing procedure that is ending in the saved zero position. Place a water level into the mid of the tray. Tilt the tray using the arrow buttons until the tray is levelled. - Page 18 Press the “Superuser login” button to enter the superuser mode. The Superuser is password secured. It is 12321 by default. The Superuser can edit the jobs 1-5 and has more possibilities to change the settings. As logged in Superuser, the main menu changes and reveals the icon “Settings”...
-
Page 19: Pre-Programmed Staining Jobs
Recommendation: Use the same port for one chemical (SERVA default: Silver solution Port5 ; Developer Port6 ; Stop solution Port7 ; water Port9 ; waste Port10) as residues in the hoses can interfere or inhibit other solutions. -
Page 20: Program No1 Silver Staining Kit
3.3.1 Program No1 Silver Staining Kit SERVA Silver Staining Kit SDS (35076) or Native PAGE (35077) acc.Blum 0.65mm Preparation Step 1 For SDS gels use the Fixing Solution. For native gels use 20% Trichloroacetic acid. Both are ready to use and 5x reusable. Fill 250ml into a beaker. Insert pipe no1. -
Page 21: Program No2 Csf Silver Staining Kit
3.3.2 Program No2 CSF Silver Staining Kit SERVA CSF Silver Staining Kit (43398) alkaline 0.65mm Preparation Step 1 Fill 250ml Fixing solution I into a beaker. Insert pipe no1. Beaker size 250ml. Step 2/3 Prepare 500ml 30% (v/v) Ethanol solution. Insert pipe no2. -
Page 22: Program No3 Hpe™ Silver Staining Kit
3.3.3 Program No3 HPE™ Silver Staining Kit SERVA HPE™ Silver Staining Kit (43395) MS compatible 0.65mm Preparation Step 1 Prepare 250ml Solution 1 (37.5ml Ethanol (not included) + 2.5g citric acid + 212.5ml dest. water). Insert pipe no1. Beaker size 250ml. -
Page 23: Program No4 Your Own Program
Sodiumthiosulfate + 25ml Glutaraldehyde + 79ml Ethanol (not included) + 96ml dest. water). Insert pipe no4. Beaker size 250ml. 3.3.4 Program No4 Your Own Program Manual Protocol Adjustment Service: Inquire info@serva.de 3.3.5 Program No5 Cleaning Program ! Use after each staining job ! Preparation Step 1-9 Fill 2.500ml dest. -
Page 24: Pharma Upgrade Kit
With the pharma upgrade kit, the SERVA BlueStain is FDA CFR Part11 ready. When ordering, the SERVA BlueStain will be upgraded with a new firmware prior to shipping and a thermal printer will be included in the shipping for documentation printouts. -
Page 25: Installing Printer
4.2.2 Installing printer Place the printer next to the SERVA BlueStain. Connect the data cable on the backside of the stainer. Connect the data cable on the backside of the printer and connect it with the mains. After power-on, the printer is ready. -
Page 26: Additional Superuser Options
4.2.3 Additional SUPERUSER options A second setting page is available in the pharma upgrade. Enter the Superuser settings (see 3.2.8.) and press “Next Page”. The automatic screen lock with the desired time after that the lock will be activated can be activated. -
Page 27: Printing And Usb Export
4.2.4 Printing and USB export In the “Job finished” screen and in the “Job logfiles overview”, the audit trailed files can be printed or exported to an USB device by pressing the corresponding buttons. The printer has to be connected an on, the USB device has to be plugged in at the rear side of the stainer. - Page 28 SERVA Electrophoresis GmbH Adress Carl-Benz-Str. 7, 69115 Heidelberg, Germany Web site www.serva.de Email info@serva.de Customer care Germany Phone: 06221 13840-46, Fax: 06221 13840-10 Customer care International Phone: +49 6221 13840-47, Fax: +49 6221 13840-10 Technical service Phone: +49 6221 13840-44...
Need help?
Do you have a question about the BlueStain and is the answer not in the manual?
Questions and answers