Table of Contents
Advertisement
Quick Links
Advertisement
Table of Contents

Related Manuals for serva BIO-5000 Plus VIS Gel Scanner


Summary of Contents for serva BIO-5000 Plus VIS Gel Scanner
- Page 1 INSTRUCTION MANUAL BIO-5000 Plus VIS Gel Scanner Gel Scanner for Visible Stainings (Cat. No. BIO-5000P) SERVA Electrophoresis GmbH Carl-Benz-Str. 7 D-69115 Heidelberg Phone +49-6221-138400, Fax +49-6221-1384010 e-mail: info@serva.de http://www.serva.de...
-
Page 2: Table Of Contents
Contents 1. Introduction 2. Features of the Microtek Bio-5000 Plus 2.1. Specifications 2.2. System Requirements 2.3. Scanner Description 2.4. Packing List 3. Installation 3.1. Software Installation 3.2. Arrestor for Transport 3.2.1. Unlock the Scanner 3.2.2. Shipping the Scanner 3.3. Connect Scanner 3.4. -
Page 3: Introduction
1. Introduction The Bio-5000 Plus is a combined flatbed and film scanner for electrophoresis gels and film formats as large as 21.6 x 26.0 cm that also offers additional functionality to scan reflective art or prints as large as 21.6 x 35.6 cm. The Bio-5000 Plus is equipped with Microtek's patented Emulsion Direct Imaging Technology (E.D.I.T.) for delivering distortion-free images in transparency scanning. -
Page 4: Features Of The Microtek Bio-5000 Plus
2. Features of the Microtek Bio-5000 Plus 2.1. Specifications Scanning Modes Color and grayscale in a single scanning pass True 48-bit color (approx. 281 x 1012 colors) 16-bit grayscale (approx. 65,536 shades of gray) Scanning Area Reflective: Max. 216 mm x 356 mm) Min. -
Page 5: Scanner Description
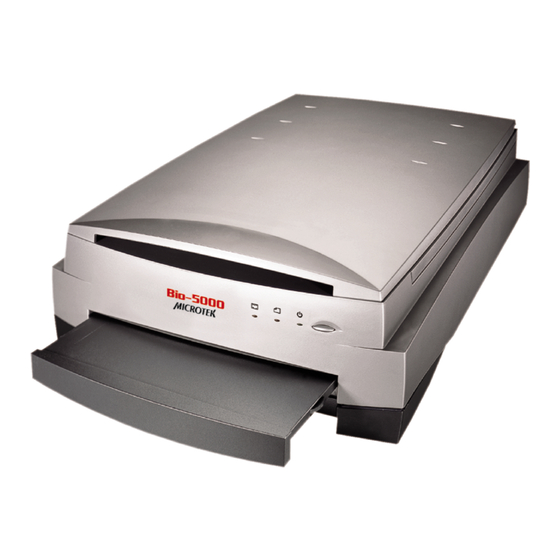
2.3. Scanner Description... -
Page 6: Packing List
2.4. Packing List • Bio-5000 scanner Plus • Hi-speed USB cable • Power cord • Vinyl stickers with Microtek logo • Software CDs • 2 Leak-free glass holders 3. Installation 3.1. Software Installation Important: Do not remove the yellow sticker from your scanner until you are told to do so. -
Page 7: Shipping The Scanner
When successfully unlocked, the screw will push out a little, protruding slightly from the bottom of the scanner. 3.2.2. Shipping the Scanner If you have to transport the scanner, you will need to lock the scanner back. Follow the steps below: 1. -
Page 8: Positioning The Originals
ScanWizard Bio is the scanner controller software for Bio-5000 Plus. The four windows of ScanWizard Bio are shown here to familiarize you with the interface and to prepare you for the material in the next session on Scanning. ScanWizard Bio can be launched as a stand-alone by clicking the program icon, or it can be launched by using the File-Import or File-Acquire command from your image-editing program. -
Page 9: Positioning Electrophoresis Gels
insert the holder into the lower compartment of the Bio-5000 Plus. Note: The Leak-Free Glass Holders require regular cleaning. To clean, use mild glass cleaning solution, and wipe the glass plate gently with lint-free, lens-cleaning cloth to prevent leaving fiber residue. 4.1. -
Page 10: Positioning Transparent Film
4.2. Positioning Transparent Film This procedure applies when you use the lower scan bed of the Bio-5000 Plus to scan transparencies, such as positive or negative film. Using the Leak-Free Glass Holder 1. Place the film to be scanned face down on top of the glass surface of the Leak- 2. -
Page 11: Scanning Procedures
5. Scanning Procedures 5.1. Scanning Electrophoresis Gels 1. Insert the Leak-Free Glass Holder with the electrophoresis gel into the transparency bay of the scanner. Make sure that nothing is on the scanner glass surface. 2. Launch ScanWizard Bio either as a stand-alone by clicking on the program icon, or by using the File-Import or File-Acquire command from your image-editing program. -
Page 12: Scanning Transparent Film
pressed, such as entering the file name, specifying a folder name of your own, etc. When you have completed the settings, press the Done/Save button, and the scanner will automatically scan and save your image based on your settings. 5.2. Scanning Transparent Film 1. - Page 13 Choose Negative Film to scan negatives, or choose Positive Film to scan positives. 4. Click the Overview button to perform a preliminary scan of your original. 5. Select the Scan Frame tool from the Toolbar in the Preview window, and choose the area to be scanned by dragging a rectangle around it.
-
Page 14: Scanning Reflective Originals
5.3. Scanning Reflective Originals 1. Raise the scanner lid, and place the reflective original to be scanned face down on the scanner glass bed, towards the front of the scanner. Center the top of the original along the horizontal ruler on the scanner. 2. -
Page 15: Scanning Originals Applied With Auto Focus
c) Adjust the scan frame settings if necessary. 8. Adjust image quality if necessary, using the Advanced Image Correction (AIC) tools. 9. If the colors in your reflective original are faded and need restoring, check the “Automatic Color Restoration” box in the Settings window. 10. - Page 16 1. Follow steps 1 to 3 in the previous scanning scenarios to place your scan material (electrophoresis gel, reflective or film), and to launch ScanWizard Bio. 2. Click the Overview button to perform a preliminary scan of the image. If this is the first time to scan your scan material, you can see a flashing frame (enclosed by dotted lines) together with a default Auto Focus target sign ( ) appearing on the...
-
Page 17: Important For Scanning Electrophoresis Gels
Note: The AF frame works only in the area defined by the scan frame. 4. In the Preview window, click the Prescan button. This will give you a more detailed view of the image area in which the AF function is applied. 5. -
Page 18: File Format
7. File Format When your image file is, for example, a "16-bit TIFF" file this means that image intensities are encoded with 16 bit numbers, giving 65,536 (2 to the power of 16) possible different values for each pixel. In contrast, an 8-bit image file only stores 256 different values per pixel. -
Page 19: Order Information
8. Order Information Product Cat. No. GelScan 6.0 GS-V60 GelScan 6.0 Pro GS-V60P GelScan 6.0 HTS GS-V60HTS Important Specifications, software bundles, and accessories are subject to change without notice. Not responsible for typographic errors. 9. FCC Compliance Statement This equipment has been tested and found to comply with the limits for a Class B digital device, pursuant to Part 15 of the FCC rules.
Need help?
Do you have a question about the BIO-5000 Plus VIS Gel Scanner and is the answer not in the manual?
Questions and answers