
Subscribe to Our Youtube Channel
Related Manuals for Living & Co MFC100-U1501B/C14E-AU(5)


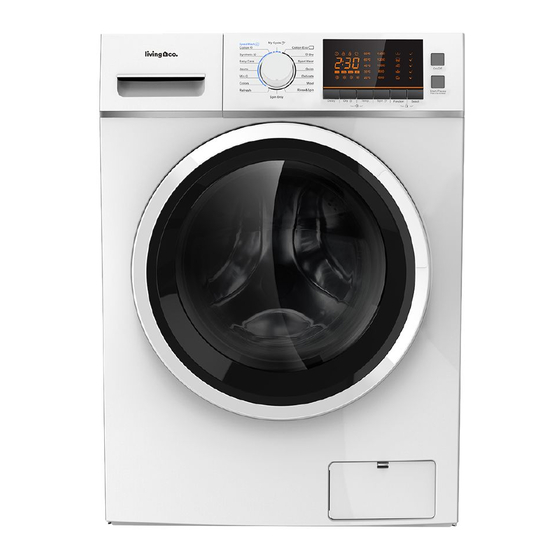
Summary of Contents for Living & Co MFC100-U1501B/C14E-AU(5)
- Page 1 Washing Machine Model MFC100-U1501B/C14E-AU(5) User Manual AFTER SALES SUPPORT 0800 422 274...
-
Page 2: Table Of Contents
TABLE OF CONTENTS 1. Safety instructions P. 3 2. Product overview P. 6 3. Installing the product P. 7 4. Operating the washing machine P. 10 5. Maintenance P. 18 6. Troubleshooting P. 20 7. Technical specifications P. 21 8. Notices P. 21... -
Page 3: Safety Instructions
1. Safety instructions For your safety, the information in this manual must be followed to minimize the risk of fire or explosion, electric shock, or to prevent property damage, personal injury or loss of life. Electric shock! • If the supply cord is damaged, it must be replaced by the manufacturer, its service agent or similarly qualified persons in order to avoid a hazard. - Page 4 • The glass door may be very hot during the operation. Keep children and pets far away from the machine during the operation. Risk of explosion! • Do not wash or dry articles that have been cleaned in, washed in, soaked in, or dabbed with combustible or explosive substances such as wax, oil, paint and gasoline. Otherwise, it may cause fire or explosion.
- Page 5 1. Transport bolts must be reinstalled to the machine by a qualified person. 2. The remaining water should be drained out of the machine. 3. Handle the machine carefully. Never hold any protruded part on the machine while lifting it. The machine door cannot be used as a handle for carrying or moving the machine.
-
Page 6: Product Overview
2. Product overview 2.1 Main parts Top cover Water supply hose Control panel Power supply cord Detergent drawer Drum Door Filter Drain hose 2.2 Accessories 4 x Hole plug 1 x Inlet hose 1 x User manual 4 x Acoustic sponges (Optional) -
Page 7: Installing The Product
3. Installing the product 3.1 Selecting a location Before installing the appliance, select a location that matches the following criteria: Rigid, dry, and level surface Not exposed to direct sunlight Has sufficient ventilation Has a room temperature above 0°C Far away from heat sources such as coal or gas. Ensure that the appliance is not placed on the power cord. - Page 8 3.4 Levelling the washing machine Important: The lock nuts on all four feet must be screwed tightly against the housing. 1. Loosen the lock nut. 2. Turn the foot until it reaches the floor. 3. Adjust the legs and lock the nuts again with a spanner. Make sure the machine is level and steady after the adjustment.
- Page 9 3.7 Installing the acoustic sponges You may install the acoustic sponges, which can effectively reduce the noise caused by the machine while it is working. 1. L ay the machine on the floor as shown above, putting some soft material like foam or clothes between the machine and floor as a protection. 2. Stick the 2 longer sponges to the longer edges at the bottom of machine. 3. Stick the 2 shorter sponges to the shorter edges at the bottom of machine.
-
Page 10: Operating The Washing Machine
4. Operating the washing machine 4.1 Quick start guide Caution! • Before using the washing machine, make sure it has been installed properly. • Before washing clothes for the first time, you must run a complete cycle of washing machine without clothes. 1. Before washing earth Main terminal wash Softener Prewash Plug in machine Turn on tap Load clothes Close door... - Page 11 4.2 Preparing your laundry Please check the washing label on each garment and follow the washing instructions on it. Use detergent suitable for machine washing. Check washing labels Remove all items from Tie up loose strings, close pockets zippers Put small items into the Turn thick clothes inside out Separate clothes with mesh bags different textures...
- Page 12 4.3 Detergent drawer Prewash detergent Main wash detergent Softener Pull out the drawer Notes: • Add detergent to compartment I only if you are going to use the Prewash function. • Do not put laundry beads into the detergent drawer. Program Program Cotton...
- Page 13 4.4 Control Panel On/Off Start/Pause Turn the appliance on and off. Start or pause the wash cycle. Options Programs Select additional washing options. Select a program suitable for the laundry type. Display The display shows settings, estimated remaining time, options and status messages.
- Page 14 4.5 Options Delay To use the Delay function: 1. Select a program 2. Press the Delay button to choose the delay time (between 0 and 24 hours.) 3. Press [Start/Pause] to commence the delay operation On/Off Choose the Program Setting time Start To cancel the Delay function: Press and hold the Delay button until the display shows 0H.
- Page 15 Child Lock Use this function to prevent misuse by children. On/Off Start Press and hold [Extra Rinse] and [Pre Wash] for 3 seconds until you hear a beep • When the Child Lock is activated, the display will alternately show “CL” and the remaining time. • Pressing any other button will cause the Child Lock indicator to flash for 3 seconds. When the program ends, “CL”...
- Page 16 My Cycle To let the machine memorize the currently selected program: Press and hold [Spin] for 3 seconds. The default cycle is cotton. 4.7 Programs Various programs are available to suit different laundry types. Program Description Cotton Wash hard-wearing textiles, heat-resistant textiles made of cotton or linen. Synthetic Wash synthetic clothes such as shirts and coats.
- Page 17 4.8 Program selection guide Program Load (kg) Water temperature Wash Time (°C) 10.0 Default 10.0 Cotton 10.0 1:28 Synthetic 1:25 Baby Care 10.0 1:42 Jeans 10.0 1:35 10.0 1:20 Colors 1:01 Drain Only 0:01 Spin Only 10.0 0:12 Rinse & Spin 10.0 0:20 Wool...
-
Page 18: Maintenance
5. Maintenance 5.1 Cleaning Warning! Before maintenance, pull out the power plug and turn off the water supply tap. 5.1.1 Cleaning the cabinet Proper maintenance of the appliance can extend its working life. The surface can be cleaned with diluted non-abrasive neutral detergents when necessary. If there is any water overflow, use a wet cloth to wipe it off immediately. Avoid scraping the appliance’s surface with sharp objects. Note: • Do not use formic acid, its diluted solvents, or any equivalent. 5.1.2 Cleaning the drum Any rust left inside the drum by metal objects must be removed immediately with chlorine-free detergents. - Page 19 5.1.5 Cleaning the detergent drawer 1. Press down the arrow location on the softener cover inside the drawer. 2. Lift the clip up and take out the drawer. Then wash all grooves with water. 3. Reinstall the softener cover and push the drawer back into position. Press A and pull out Clean the drawer Clean inside the...
-
Page 20: Troubleshooting
Caution! There may be hot water in the filter while the machine is in use, depending on the selected program. Never open the filter cover during a wash cycle. Always wait until the machine has finished the wash cycle and is empty. Make sure that the filter cover is tightly secured during replacement. 6. Troubleshooting If the machine has a problem, follow the guide below to fix it. If you are unable to fix it, contact the after sales support. Problem Possible cause Solution... -
Page 21: Technical Specifications
7. Technical specifications Power Supply 220-240V~, 50Hz Maximum Current Standard Water Pressure 0.05MPa~1MPa Model Washing Dimensions Net Weight Rated Power Capacity (W*D*H) (mm) MFC100-U1501B/ 10.0kg 595*565*850 72kg 2000W C14E-AU(5) 8. Notices 8.1 Compliance This product has been fully tested and meets all requirements as set out by standards AS/NZS 60335.2.7:2020 and AS/NZS 60335.1:2020. - Page 22 Read the manual. It will help you get the STOP best out of your product. BEFORE RETURNING Still have questions? TO STORE Call After Sales Support 0800 422 274 Warranty We pride ourselves on producing a range of quality products that are both packed with features and completely reliable.
Need help?
Do you have a question about the MFC100-U1501B/C14E-AU(5) and is the answer not in the manual?
Questions and answers