Advertisement
Advertisement

Related Manuals for Living & Co 55WM-330


Summary of Contents for Living & Co 55WM-330
- Page 1 TOP LOAD WASHING MACHINE 5.5kg Instruction Manual 55WM-330 0800 422 274 N13275...
-
Page 2: Table Of Contents
Contents General Safety Instructions Product Overview Getting Started: Installation Features Instructions FAQs and Troubleshooting Other Useful Information 0800 422 274... -
Page 3: General Safety Instructions
General Safety Instructions IMPORTANT SAFETY INSTRUCTIONS READ CAREFULLY AND KEEP FOR FUTURE REFERENCE Read this manual thoroughly before first use, even if you are familiar with this type of product. The safety precautions enclosed herein reduce the risk of fire, electric shock and injury when correctly adhered to. - Page 4 General Safety Instructions (Cont.) Installation • Install the washing machine on a flat surface to avoid overturning during use. • If the machine must be placed on carpet, make sure the ventilation openings in the base are not obstructed. • Connect the washing machine to the water mains using new hose sets. Do not reuse old hose sets.
- Page 5 General Safety Instructions (Cont.) Warnings Do not let children climb into the Do not wash clothes that washing machine or peer into the have residue of flammable rotating spin barrel. materials. Do not use the appliance if the Regularly clean the power plug power cord or plug is damaged to remove dust and dirt and to avoid an electric shock, short...
- Page 6 General Safety Instructions (Cont.) To avoid electric shock, fire and Do not pull out or insert the plug malfunction, do not install this with wet hands to avoid electric machine shock. in a damp place. No wet hands No dampness Cautions Do not allow children to lay or sit Ensure the water inlet hoses...
-
Page 7: Product Overview
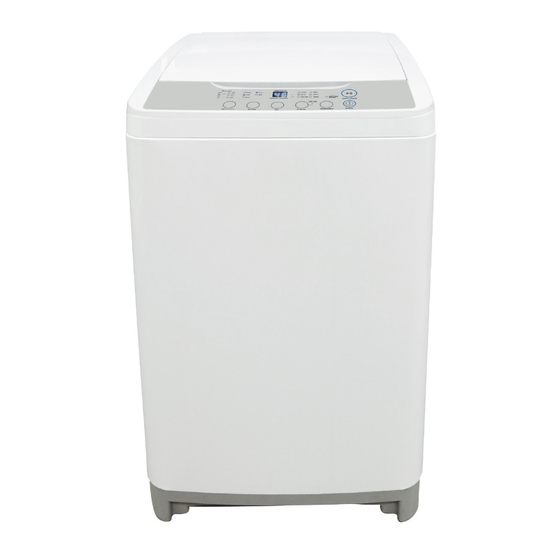
Product Overview Scope of delivery Front view Parts list 1 Lid 2 Control panel 3 Housing 4 Detergent box 5 Wash/spin tub 6 Softener dispenser 7 Lint filter 8 Pulsator 9 Adjustable leg (1) 10 Water supply hose connections 11 Hose clip 12 Drain hose connection 13 Drain pump filter Top view... -
Page 8: Getting Started: Installation
Getting Started: Installation Unpacking • This product has been packaged to protect it against transportation damage. Keep the original packaging carton and materials in a safe place. It will help prevent any damage if the product needs to be transported in the future. In the event it is to be disposed of, please recycle all packaging materials where possible. - Page 9 Getting Started: Installation (Cont.) Connecting the water inlet hoses Install the water inlet hoses to your hot and cold water taps, as described below. • Check and ensure that the sealing washers are firmly in place. • Attach the straight end of the hose to your water taps. Make sure to attach the hot water supply hose (with markings) to the hot water tap and the cold water supply hose (with...
- Page 10 Getting Started: Installation (Cont.) CAUTION! When tightening the clamping nut, take care not to damage the water inlet valve joint. Apply force evenly and do not twist the water inlet valve. CAUTION! Use only the new (supplied) hoses with your new appliance. Do not use a hose from an existing machine, or one that has been used previously.
- Page 11 Getting Started: Installation (Cont.) CAUTION! • While the washer is in use, ensure the height of the drain hose is at least 70cm, oth- erwise the washer will not work well, or water may flow out in the course of washing. •...
-
Page 12: Features
Features PANTONE 653c The control panel Pantone Cool Grey 11C Detergent indicators Indicator lights • These indicate how • The wash process indicator lights indicate the current Pantone Cool Grey 4C much powder detergent wash process (delay, soak, wash, rinse, spin). to use. - Page 13 Features (Cont.) Time and preset indicators Start/Pause button • Press this button This indicator shows the This indicator shows during to start the washer presetting when the washing will remaining time during washing. operation. be finished. • During operation, press this button to stop the washer When setting soak and wash temporarily;...
-
Page 14: Instructions
Instructions Before you start washing A Make sure the washer is stable and level. If necessary, adjust the On the back adjustable leg to stabilise the washer (see page 8). B Make sure the water inlet hoses are properly installed (see page 9). C Plug the machine into a nearby power point. - Page 15 Instructions (Cont.) Program selection guide Default settings for wash processes Program Suitable items Number of Spin time Wash time rinses (minutes) Custom All kinds of clothes 10 minutes 5 minutes Normal * 5–12 minutes # 5–6 minutes # Normally soiled cottons Heavy Heavily soiled cottons 7–14 minutes #...
- Page 16 Instructions (Cont.) Customising a program This washing machine is equipped with a fuzzy logic function that will automatically choose the correct water level and wash and spin times for the NORMAL and HEAVY DUTY programs, and the correct water level for the CUSTOM and QUICK programs. If you want to adjust these values yourself, proceed as follows: 1.
- Page 17 Instructions (Cont.) The blanket program Use this program for washing blankets or other bulky items. It will automatically select the highest water level, but you can adjust this manually down to a lower level according to the size of your bulky item(s). 1.
- Page 18 Instructions (Cont.) Delayed washing This washing machine has a 0–24 hour delay start function which you can set to determine the time when the washing program will finish. NOTES: * This function is not available for the DELICATE program. * To avoid water leakage when using this function, make sure the water taps are open, the drain hose is properly installed and the washing load and detergent are properly prepared.
- Page 19 Instructions (Cont.) Other functions Hot / cold / warm water wash This top load washing machine must be connected to both a cold and a hot water tap. With both hoses connected to a cold and hot water tap, you can set the washer to use either just cold water for a cold water wash, or just hot water for a hot water wash, or both hot and cold water for a warm water wash.
- Page 20 Instructions (Cont.) Load sensor (fuzzy control) This washing machine is equipped with a fuzzy logic function that will automatically detect the weight of your wash and choose the correct water level and wash and spin times for the NORMAL and HEAVY DUTY programs, and the correct water level for the CUSTOM and QUICK programs.
-
Page 21: Faqs And Troubleshooting
FAQs and Troubleshooting Not all unusual incidents you may encounter with your washing machine are faults, or cause for concern. Check in the list below what issues may arise and why. Also check in the table on the following page for solutions to other common problems. •... - Page 22 FAQs and Troubleshooting (Cont.) Error messages When the following problems occur, the microcomputer inside the washer will detect the abnormal condition. An electronic buzzer will sound for approximately 10 seconds, an error message will flash as shown below and the washer will stop operating. Type of problem Error message Where to check •...
-
Page 23: Other Useful Information
Other Useful Information Cleaning and care To prolong the service life of the washing machine, keep it in good condition and perform regular maintenance. For any type of cleaning and maintenance, make sure the washing machine is disconnected from the mains power supply. Cleaning the washing machine (when required) Use a soft cloth to wipe any water or dirt off the washer lid and housing. - Page 24 Other Useful Information (Cont.) IMPORTANT! If you frequently use a COLD wash cycle, you will need to clean the inside of your washing machine regularly (every three months), especially if you use a fabric softener. Liquid detergents can cause detergent scum to build up around the outside of the inner tub, which cold water will not remove and which can cause bacteria, unpleasant odours, and eventually soiling of your wash load.
- Page 25 Other Useful Information (Cont.) Drain pump maintenance We recommend that you clean the drain pump filter regularly (at least once a month) to avoid blockages created by bobby pins, coins and excess lint. Proceed as follows: Disconnect the washer from the power source. If necessary, wait until the water has cooled down.
- Page 26 Other Useful Information (Cont.) Specifications and technical parameters Dimensions 52cm (W) x 54.5cm (D) x 95.2cm (H) Capacity (max. weight of dry wash load) 5.5kg Weight 31kg Water quantity (High) Power source 230-240V, 50Hz Power consumption 330W Required water pressure 0.03MPa –...
- Page 27 This page has been left blank intentionally. 0800 422 274...
- Page 28 Warranty We pride ourselves on producing a range of quality home appliances that are both packed with features and completely reliable. We are so confident in our products, we back them up with a 1 year warranty. Now you too can relax knowing that you are covered. Customer Helpline NZ: 0800 422 274 This Product is covered by 1 year warranty when accompanied by proof of purchase.
Need help?
Do you have a question about the 55WM-330 and is the answer not in the manual?
Questions and answers
Where is the lint catcher located? on a 55WM-330 washing maching. What page in the manual is it ?
Hi I have an issue where there are shards of broken white plastic in the washing machine and now the filter is filled with limescale. Any idea of what this could be it is not a foreign object from any of our clothes.