Table of Contents
Advertisement
Quick Links
Advertisement
Table of Contents

Related Manuals for Oregon Scientific MP100 128MB


Summary of Contents for Oregon Scientific MP100 128MB
- Page 1 Model: MP 100 User Manual Mode d’emploi Bedienungsanleitung 5/18/04, 2:10 PM...
-
Page 2: Table Of Contents
DIGITAL MP3 PLAYER (MP100) USER MANUAL CONTENTS Introduction ... 1 Product Overview ... 2 Front / Back..2 Getting Started ... 3 Windows 98 Driver Installation ... 3 Connecting the Player to Your Computer ... 3 Charging the Battery ... 4 File Transfer ... - Page 3 Formatting Your Player ... 14 Copyright ... 15 Safety and Care ... 15 Troubleshooting ... 16 Hardware ... 16 Software ... 16 Caution ... 17 Technical Specifications ... 17 About Oregon Scientific ... 18 FCC Notice ... 18 5/18/04, 2:06 PM...
-
Page 4: Introduction
INTRODUCTION Congratulations on your selection of the MP100. This full-featured pendant-sized MP3 Music Player offers a variety of features including multi-format data storage support, and you can also transfer files easily via a USB2.0 connection. Your player supports multiple audio standards such as Windows Media Audio combines various playback and audio enhancing features into a compact design that you can comfortably wear around your neck. -
Page 5: Product Overview
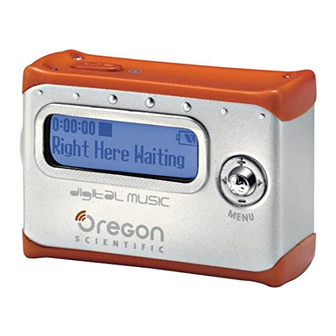
PRODUCT OVERVIEW FRONT / BACK PLAY / STOP / ONOFF Start and pause playback / stop playback / power on or off. LCD Screen MENU button Press to enter menu settings /confirm selection. • VOL Increase / decrease playback volume. •... -
Page 6: Getting Started
WINDOWS 98 DRIVER INSTALLATION (FOR WIN 98SE USERS ONLY) Windows ME, 2000, XP Users When you connect your MP3 player to your PC, it will appear as a removable drive. (i.e., Removable Disk (H:)) Windows 98SE Users Installing the MP100 driver software will allow your computer to recognize your MP3 player each time it is connected to the computer. -
Page 7: Charging The Battery
FILE TRANSFER After connecting your MP3 player to the computer, the computer will detect and identify the device as a removable storage drive, allowing you to drag and drop files between your computer and your player. -
Page 8: Power On / Off
A welcome screen will greet you. After a few seconds the unit will enter STOP mode . NOTE: In STOP mode, a power saving feature will cause your MP3 player to automatically shut off if no key is pressed for 1 minute. POWER OFF To turn the power off, press and hold mode until after the "Good Bye"... -
Page 9: Playback
MAIN MENU HOLD On / Off Normal, One, All, Ran, RPT Ran. Normal, Rock, Jazz, Classic, Pop One / All BACKLIT DISP CONTRAST SCROLL Total, Free, Firmware version LANG TIME NOTE: If no key is pressed for 5 seconds during menu navigation, the player will return to the screen last accessed. -
Page 10: Pause
When the player is playing back a music track, press the display. STOP When the MP3 player is in playback or pause mode, press and hold to stop the song. will appear on the display. SKIP / FAST FORWARD / REWIND You can skip tracks or fast forward / rewind the current track. -
Page 11: Repeat
REPEAT You can select one of five repeat patterns when listening to your music. Icon Description Pattern Normal All tracks are played once from the first song to the last Repeat the current track. You can press skip to the next track. Play all tracks once repeatedly. -
Page 12: Equalizer (Eq)
EQUALIZER (EQ) You can choose from 5 equalizer settings when playing back music they are: Icon To change the equalizer settings: 1. Press and hold MENU until the menu settings screen shows. 2. Press repeatedly to scroll to "EQ", then press MENU to select it. -
Page 13: Contrast
To adjust the backlight settings: 1. Press and hold MENU until the menu settings screen shows. 2. Press repeatedly to scroll to "DISP" then press MENU to select it. 3. Press repeatedly to select the "BACKLIT" setting, then press MENU to select it. 4. -
Page 14: Memory Status And Firmware Version
3. Press repeatedly to select "SCROLL", then press MENU to select it. 4. Press to scroll between "OFF, 1, 2, 3, 4" speed levels. 5. Press MENU to confirm your selection. MEMORY STATUS AND FIRMWARE VERSION You can check the status of your player's memory and firmware version by selecting to show: •... -
Page 15: Playing Time
4. Press repeatedly to scroll through the different language options, then press MENU to choose one. PLAYING TIME While listening to a song, you can display either the elapsed or remaining time. To switch time display settings: 1. Press and hold MENU until the menu settings screen shows. 2. -
Page 16: Button Hold
To unlock all buttons 1. Press MENU and then DELETING FILES If you choose to delete a file, you can do so through the MP3 player or computer. NOTE: Please be careful when deleting files, once erased they cannot be retrieved. -
Page 17: Reset
MENU to confirm, "All files deleted" will be displayed to confirm the deletion. RESET Occasionally the MP3 player may not function correctly and will need to be reset. When the power is on, press and hold RESET until the power turns off. Turn the power on to begin operation again. -
Page 18: Copyright
COPYRIGHT Users are also asked to note that the transfer of memory containing data or MP3 files protected under copyright laws are only permissible within the restrictions imposed. SAFETY AND CARE This product is designed to give you years of service if handled properly. Observe the following guidelines: •... -
Page 19: Troubleshooting
TROUBLESHOOTING HARDWARE Music skips tracks. The music file may be corrupt or an unsupported format. First check to make sure it is a supported format. If the format is correct, delete the file and transfer the music from your PC to player again. The player will not start or shuts off soon after it starts. -
Page 20: Caution
2. Double Click the drive that contains the CDROM. 3. Follow the on screen instructions to complete the installation process. NOTE: Do not attach the player to your PC until after the software has been installed. CAUTION In case of electrostatic discharge, the product may not function properly and will require a manual reset. -
Page 21: About Oregon Scientific
ABOUT OREGON SCIENTIFIC Visit our website (www.oregonscientific.com) to learn more about other Oregon Scientific products such as digital cameras, projection clocks, health and fitness gear, and weather stations. The website also includes contact information for our customer service department, in case you need to reach us. - Page 22 Caution: Modification -The FCC requires the user to be notified that any changes or modifications made to this device that are not expressly approved by Oregon Scientific, Inc. may void the user 's authority to operate the equipment. Interface cable -Use the shielded cable sold or provided by Oregon Scientific, Inc.
- Page 23 © 2004 Oregon Scientific. All rights reserved. 086-003394-010 5/18/04, 2:06 PM...
Need help?
Do you have a question about the MP100 128MB and is the answer not in the manual?
Questions and answers