Table of Contents
Advertisement
Quick Links
Advertisement
Table of Contents

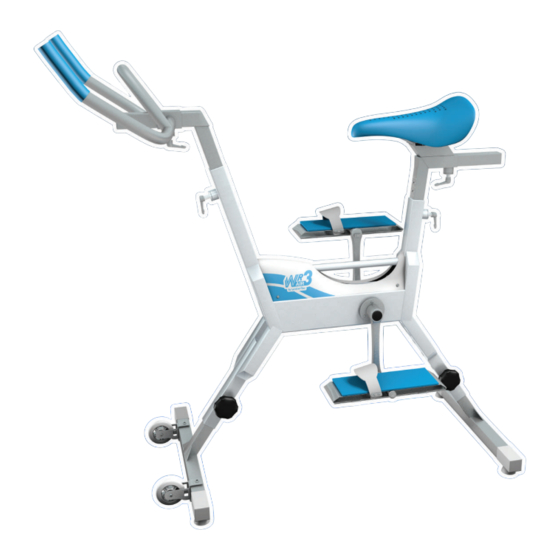
Summary of Contents for Waterflex WR 3 AIR
- Page 1 USER’S MANUAL / Keep this user’s manual...
-
Page 3: Safety Precautions
Safety Precautions For your safety, please read these instructions before use ! Assembly this product properly using original parts according to the installation instruction. Before assembly, inspect whether packages are in good condition and whether spare parts are complete in accordance with transport precautions and the list of spare parts. -
Page 4: Exploded View
Exploded view Tools Note: use these tools only to assemble this exercise bike WARNING: Keep the tools away from babies and children... -
Page 5: Part List
Part List N° Quantity Frame Front foot tube Rear foot tube Handlebar post Saddle post Handle bar Saddle frame M16 round fasten handle “L” shape fasten handle / L- Left pedal Right pedal Crank (A) Crank (B) Locknut of pedal axel (A) Locknut of pedal axel (B) Wheel (A-B) -
Page 6: Installation
Installation Step 1 : (16) (17), (18) (19). Install 16 to the front tube with 17, 18 and 19. Step 2 : (1), (8). Install the front foot tube (2) onto the main frame (1), then adjust it with knob (8). Step 3 : (1), (8). - Page 7 Installation Step 4 : (1), “Click-and-turn” (9) . Install handlebar tube (4) and seat tube (5) onto the main frame (1), then adjust their position with the «Click-and-turn» handles (9). Step 5 : (4), “Click-and-turn” (9). Install the handlebar (6) onto its support (4) then fix it with the «Click-and-turn»...
- Page 8 Installation Step 7 : (10/11) (12/13) (14/15). Lock the pedals (10/11) on the cranks (12/13) with the lock-nuts (14/15). Step 8 : (20) “Click-and-turn” (9). Lock training bar (20) on the frame (5) with the «Click-and-turn» handle (9). Height adjustment knob To modify the height of your aquabike, pull the round adjustment knob to unlock (see on your right).
- Page 9 Maintenance advices 7,6. , inox WARNING Check the pH of the water on each utilisations. The pH water should be between 6.7 and 7.6. Any damages caused by a wrong pH balance cancel the warranty. (For anodized aluminum, inox parts, and silicone parts) AISI 316L, 2001/95/EC pH (6,7/7,6).
- Page 10 Training advices Exercises instructions The Warm Up Phase This stage helps get the blood flowing around the body and the muscles working properly. It will also reduce the risk of cramp and muscle injury. It is advisable to do a few stretching exercises as shown below.
-
Page 11: Warranty
The warranty is rendered null and void in the event of a repair carried out to the equipment by a person not approved by Waterflex. Faulty parts must be returned to Waterflex within the warranty period in order to be covered. The warranty does not cover labor, the cost of unauthorized replacement, or the cost of transporting the parts in question. - Page 12 Conseils www.waterflex.fr Assistance / SAV http://support.waterflex.fr Waterflex est une marque du groupe Poolstar www.poolstar.fr...


Need help?
Do you have a question about the WR 3 AIR and is the answer not in the manual?
Questions and answers