Advertisement
Quick Links
For real-time statistics:
1. Press "Menu" and enter "Display". Go to "Graph Type" and select
Statistics. Return to main display screen.
2. Displays Maximum, Minimum, Average, Standard Deviation, Total
Readings, and Number Overrange.
3. To subtract background and set current reading to zero, press the
"Offset" button. Press "Offset" again to cancel.
4. Press "Reset" to clear the Statistics.
For pass/fail tracking:
1. Press "Menu" and enter "Display". Go to "Graph Type" and select
Pass/Fail. Return to main display screen.
2. Set Upper and Lower tolerance limits. If reading is out of range, an
appropriate warning will be displayed on the screen.
6
Math Functions
To apply a fixed offset to measurements:
1. Press "Menu" and enter "Functions". Go to "Fixed Offset".
2. Set to value to subtract from all subsequent measurements.
To apply a scale factor to measurements:
1. Press "Menu" and enter "Functions". Go to "Scale Factor".
2. Set to value by which to multiply all subsequent measurements.
3. Useful when working with beam splitters.
To compare against a reference measurement:
1. Press "Menu" and enter "Functions". Go to "Normalize".
2. Set to reference value by which to normalize all subsequent
measurements.
To display as power/energy density:
1. Press "Menu" and enter "Functions". Go to "Density".
2. Select beam shape and size.
3. Measurements will be shown as cm².
Ophir Optronics Solutions LTD.
Science Based Industry Park P.O.B. 45021, Jerusalem 9145001, Israel
Phone +972-2-5484444
https://www.ophiropt.com/photonics
rev 1.16-2/17.Feb.19/be Ophir P/N 1J06061
STARBRIGHT
Quick Reference
1
Getting Started
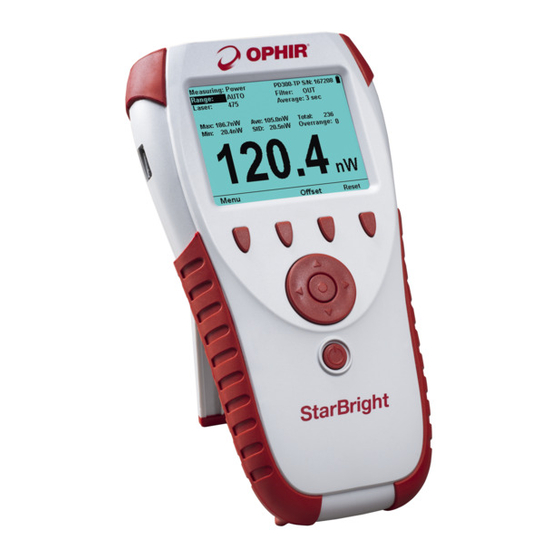
The StarBright is equipped with "soft keys". That is, the
functions of the keys change as indicated by the legend
above each key. It is also equipped with 4 navigation keys
and a round enter key in the center.
To connect sensor to the StarBright meter:
Insert the 15 pin D type connector of the measuring sensor
cable into the socket marked "Sensor Input" on the rear
panel of the StarBright meter.
To switch the StarBright on:
To switch on, briefly press the on/off/backlight switch
(leftmost key). The unit will switch on, and the display
will appear. The backlight for the StarBright's LCD
can be configured to toggle between full, half, and low
illumination. This toggling will be performed by briefly
pressing the on/off switch after the StarBright has been
switched on. To switch the StarBright off, press the on/off
switch and hold it for ~ 2 seconds until the display blanks.
To set general instrument settings:
1. Disconnect the sensor. Use the Navigation keys to select
the parameter to change and press Enter. Change the
setting with the Navigation keys. Press Enter to save.
2. "RS232 Baud": Set baud rate for PC communication
through its COM port.
3. "Max An. Output": Set desired max analog output.
4. "Language": Set to desired language.
5. "Line Frequency": Set to 50Hz or 60Hz, depending
on the electrical power grid of the area that you are in.
6. "Date and Time": Set to correct date and time.
7. The StarBright automatically saves the current settings
for next power up.
To zero instrument:
1. Disconnect the sensor.
2. Make sure instrument is not in an electrically noisy
environment and is undisturbed.
3. Press "Zero" and "Start". Wait until "Zeroing completed
successfully" appears.
Advertisement

Related Manuals for OPHIR mks StarBright


Summary of Contents for OPHIR mks StarBright
- Page 1 Science Based Industry Park P.O.B. 45021, Jerusalem 9145001, Israel 2. Make sure instrument is not in an electrically noisy Phone +972-2-5484444 environment and is undisturbed. https://www.ophiropt.com/photonics 3. Press “Zero” and “Start”. Wait until “Zeroing completed rev 1.16-2/17.Feb.19/be Ophir P/N 1J06061 successfully” appears.
- Page 2 Thermal Sensors 2. Set “Wavelength” to the correct laser wavelength. If the wavelength threshold with your laser pulses. If the slide is damaged, then either you want is not among the wavelengths listed, select one and press enlarge your beam or lower the laser energy until damage is no longer 2.1.
Need help?
Do you have a question about the mks StarBright and is the answer not in the manual?
Questions and answers