
Related Manuals for OPHIR ORION


Summary of Contents for OPHIR ORION
- Page 1 ORION ORION LASER POWER METER USER MANUAL OPHIR OPTRONICS www.ophiropt.com/photonics...
-
Page 2: Table Of Contents
Setting up PD300 to display user chosen wavelengths.. 28 Selecting Settings from the Orion PD Screen ....29 Special Photodiode Heads ........... 34 Chapter 6 Using the Orion PE with Energy Heads..35 Pyroelectric and Photodiode Energy Heads ....35 Selecting Settings and Saving Defaults......36... - Page 3 Chapter 8 Calibration, Maintenance and Troubleshooting... 48 Calibration of Thermopile Heads......... 48 Calibration of Photodiode type Heads....... 53 Calibration of Pyroelectric and Photodiode Heads..55 Error Messages............... 58 Troubleshooting............... 58 Chapter 9 Orion Specifications........... 60 System/Display Specifications..........60 Head Specifications ............... 61...
-
Page 4: Chapter 1 Introduction: How To Use This Manual
This manual tells you what you need to know to make full use of the Orion for all your laser measurement needs. It includes a "Quick Reference", (Chapter 2) to allow you to perform basic measurements immediately, without reading the whole manual. -
Page 5: Chapter 2 Quick Reference
"Head Input" on the rear panel of the Orion display. (See Figure 1) Figure 1 Orion Rear Panel View To switch the Orion on: 1. Push up the slide switch on the left side of the Orion display. (See Figure 2). - Page 6 To switch the Orion off: 1. Return the slide switch to its original position. 2. If you wish to save the current Orion configuration, use the "config" function before switching off. Refer to the main body of the manual for details.
-
Page 7: Orion Th - Thermal Heads
2.2.1 Use of the Orion TH with thermal type heads To set to the type of laser being used: 1. While the Orion TH is off, plug in the head then switch it on again. 2. From bargraph measurement screen, press the leftmost button and press "config". -
Page 8: Photodiode Heads
“next” twice to return to the bargraph screen. 2. Press "offset" again to cancel. See Section 4.4.2.1. for full details. To use the Orion TH to fine tune Laser power: 1. From the bargraph power measurement screen press the rightmost button twice then press "tune". - Page 9 2.3.2 To choose manual or automatic ranging or dBm 1. From the bargraph measurement screen, press the rightmost button then press “config”. 2. Select RANGE: and with “value” choose the appropriate manual range, autorange (logarithmic scale). 3. Press "exit" and then press “yes” if you want the choice to be the startup default or “no”...
- Page 10 2. Press "offset" again to cancel. See Section 4.4.2.1 for more details. To use the Orion PD to fine tune laser power: 1. From the bargraph power measurement screen press the rightmost button twice then press "tune".
-
Page 11: Pyroelectric And Photodiode Energy Heads
2.4 Pyroelectric and Photodiode Energy Heads 2.4.1 Selecting Chosen Wavelengths (not applicable to BB heads) 1. From the bargraph display, press the rightmost button twice, press “more” then press “wavelength” then “go”. 2. Press "select", "change" then "up" and "down" to change the first wavelength desired. - Page 12 rightmost button, press “config”, press “exit” and “yes”.
- Page 13 2. Press "select" until the laser wavelength is highlighted. Now press value to select the laser wavelength you want to be the default. The Orion PE will now be correctly calibrated for the absorption of the detector at the wavelength of the laser type selected.
- Page 14 To use the Orion PE to measure Laser Energy Press the rightmost button once then press "config" then “select” until RANGE is highlighted. Press “value” to choose the correct energy range, then press exit.
-
Page 15: Chapter 3 The Orion Display Unit
You can subtract background. You can also zero the Orion at the touch of a button. The main instructions are clearly shown on the screen so you should not have to refer to this manual very often. -
Page 16: Soft Keys And Rightmost Button
When no head is plugged in and the Orion is turned on, the display indicates "No Head Connected" and gives the user the opportunity to change the power line frequency or rezero the instrument. - Page 17 Some functions operate when the key is pressed and are canceled when the key is pressed again. The keys show reverse highlighting when operational. Pressing the same key again cancels the operation and the highlighting. Figure 3 Orion Rear Panel View Figure 4. Orion Top View...
-
Page 18: Power Up And Shut Down
3.5.1 Line Frequency The Orion is factory set for 50 Hz. If your country uses 60 Hz you must reset the line frequency. To reset the line frequency: 1. - Page 19 Orion can identify that no head is connected. "No Head Connected" will be displayed. 2. Turn on the Orion, and let it run for at least 30 seconds before performing zero adjustment. 3. Press "go".
-
Page 20: Backlight
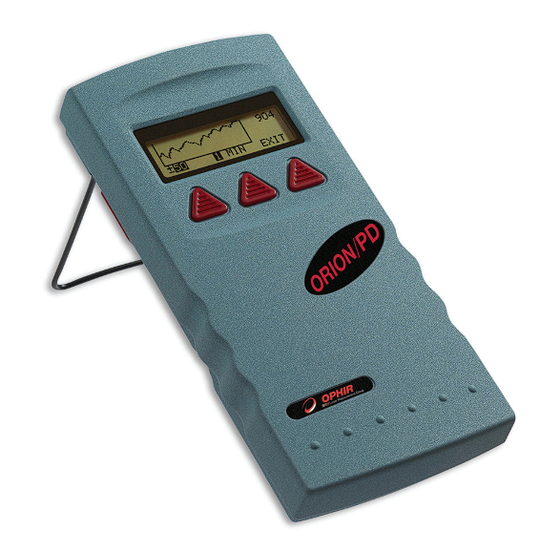
The kickstand folds away in a recessed slot when not in use. When the Orion is folded flat, it is only 203 x 95 x 35 mm, the most compact unit of this type on the market. -
Page 21: Chart Recording
3.9 Chart Recording The instrument provides an analog voltage output via a 2.5mm pin jack labeled "AN OUT" on the rear panel (See figure 3). This is useful for driving chart recorders and other analog devices. The voltage is proportional to the reading on the display and scaled such that full scale equals 1.00 volts. -
Page 22: Chapter 4 Orion Th Operation With Thermopile Heads
Chapter 4 Orion TH Operation with Thermopile Absorber Heads Warning: Before using the head for power or energy measurement, check that your laser power, energy and energy density do not exceed the head ratings. See tables in section 9.2 Head Specifications. -
Page 23: Selecting Settings From The Orion Th Screen
4.2 Selecting Settings from the Orion TH Screen The Orion TH can be set to various chosen settings while operating. In addition, it can be set so that it will be in the desired configuration when turned on the next time. -
Page 24: Power Measurement
The next section describes the procedure for basic power measurement 4.3.1 Power Measurement, Basic Operation 1. Switch the Orion TH on by means of the switch on the left side. (See Figure 4). The Orion TH will enter the mode of operation last saved with the "configure"... - Page 25 Now press the rightmost key again to return to the bargraph screen. The Orion TH will now read zero, and the 0.1 Watt background will be subtracted from all subsequent readings. The laser power reading will thus be 20.4 Watts.
-
Page 26: Bc20 Heads For Scanned Beams
This allows you to devote all your attention to tuning the laser, without having to worry about the Orion TH settings. To use the Orion TH to fine tune laser power: 1. - Page 27 sections. However, many of the functions of the BC20 head are the same as the PD300. This section only describes the PD300 functions which are different from ordinary PD300 functions. For standard PD300 functions, please refer to chapter 5. 4.4.1 General Description Model BC20 scanned beam laser power meter has become the industry standard for measuring scanned laser beams as well as hard to reach static beams.
- Page 28 4. Press "exit" when all selections have been made and press "yes" to save all current Nova settings. 4.4.3 Measuring Scanned Beams with the BC20 1. Verify that the head is plugged in. 2. Set to the proper power range or autorange. 3.
-
Page 29: Chapter 5 Orion Pd Operation With Photodiode Heads
The Orion PD display unit amplifies this signal and indicates the power level received by the head. Due to the superior circuitry of the Orion PD, the noise level is very low, and the PD300 series heads with the Orion PD display have a large dynamic range from nanowatts to hundreds of milliwatts. -
Page 30: Setting Up Pd300 To Display User Chosen Wavelengths
When the additional filter is installed, the maximum power is on the order of 300mW or 3W with model PD300-3W. The PD300 saturates when the output current exceeds 1.3mA so the exact maximum power depends on the sensitivity of the detector at the wavelength used. -
Page 31: Selecting Settings From The Orion Pd Screen
5.3 Selecting Settings from the Orion PD Screen The Orion PD can conveniently be set to various chosen parameters from the screen. In addition these settings can be saved as startup defaults so the head will be in the desired configuration when turned on. - Page 32 If you wish the Orion PD to be in manual mode when switched on, save this configuration before switching off. See Section 5.3. dBm - The Orion PD allows the measurement to be made in units of dBm which is a logarithmic scale. dBm units are defined as:...
- Page 33 Depending on what powers you wish to measure, you should choose to work with the removable filter installed or not. For this purpose, the Orion PD has a "filter" setting and uses the proper correction curve depending on whether the filter is installed or not.
- Page 34 In this case, the true power is 20.5 - 0.1 = 20.4 mW. To subtract the background, press the rightmost button and press "offset" while the laser is blocked. The Orion PD will now read zero (0.0), and the 0.1 mW background will be subtracted from all subsequent readings.
- Page 35 This allows you to devote all your attention to tuning the laser, without having to worry about the Orion PD settings. To use the Orion PD to fine tune laser power: 1.
-
Page 36: Special Photodiode Heads
5.4 Special Photodiode Heads 5.4.1 PD300-BB Radiometer Head In addition to photodiode heads for individual wavelengths, Ophir also supplies heads for measuring the output of broadband light sources. The PD300-BB head has spectrally flat response from 400 to 1000nm and therefore can give the true total power of any broadband light source in that spectral region. -
Page 37: Chapter 6 Using The Orion Pe With Energy Heads
They can also measure at higher repetition rates than was possible before. The Orion PE display amplifies this signal and indicates the energy received by the head. The photodiode based PD10 head also uses the same circuitry but can measure much lower energies due to the sensitivity of the photodiode. -
Page 38: Selecting Settings And Saving Defaults
6.2 Selecting Settings from the Orion PE Screen and Saving Defaults The Orion PE can conveniently be set to various chosen parameters from the screen. In addition, it can be set to startup defaults so it will be in the desired configuration when turned on. - Page 39 As was mentioned before, the Ophir pyroelectric heads can measure long as well as short pulses. In order to do this, the user must indicate to the Orion PE if the laser pulses are going to be longer or shorter than the maximum wavelength in the short pulse mode.
- Page 40 Orion PE and not over those emitted by the laser. Example: If the user's laser is pulsing at 300Hz, and the user selects to average over 1s, the Orion PE will collect 15 pulses of the 300 emitted during that period, and will average over those 15 pulses.
- Page 41 6.2.3.4 Saving Default Settings If you are planning to do repetitive measurements most of the time, you can set up the Orion PE so that it automatically goes into the measurement mode you want upon startup. Since these desired settings are saved in the head "smart connector", you can save different settings for different...
- Page 42 2. Press "select" until the laser wavelength is highlighted. Now press value to select the laser wavelength you want to be the default. The Orion PE will now be correctly calibrated for the absorption of the detector at the wavelength of the laser type selected. If you wish to choose another wavelength, See Section 6.2.1...
-
Page 43: Energy Measurement
3. Press the rightmost button and press “config”. With “value” choose the correct wavelength. Note that only wavelengths compatible with the diffuser setting are visible. (All wavelengths for diffuser IN have a D suffix, e.g. 106D = 1.06µm, diffuser in). Press “exit”. If you wish to save these settings as the defaults, press “yes”... - Page 44 Orion PE will collect pulses at up to 15Hz and will then display the average of those pulses. When a new pulse triggers the Orion PE, a "T" will appear in the upper left corner of the screen. At over 5 Hg, the "T"...
-
Page 45: Measuring Repeating Pulses Of High Energy
It enables the user to see on the scope pulses proportional to energy up to the maximum pulse rating of the head . Unlike the Orion PE display, which samples at the maximum rate, the scope adapter shows every single pulse. -
Page 46: Energy Log
"reset" is pressed. To use the Orion PE for graphical display of energy: 1. Make sure that the Orion PE is in the correct energy measurement range. If not, press the right button, “config”, change the range and exit. - Page 47 Note: Zoom can only be pressed after at least one pulse has been recorded. 4. Pressing any button will show you the menu of further options: The center button is the "stats" button. Press this button once to show the legends then again to show the statistics of the measurements until now.
-
Page 48: Chapter 7 Circuit Description
Chapter 7 Circuit Description The ORION has three circuit boards: an analog processor, a digital processor and a power supply. Analog Processor: The signal from the detector head enters the analog processor board and passes through EMI protection components to a differential transimpedance preamplifier. - Page 49 The Orion and associated heads have extensive circuitry both to reject outside electromagnetic and electrostatic interference. The Orion and associated heads are fully CE qualified and are extremely resistant to EMI. If there is still some interference in an unusually high EMI environment, it is recommended to use the Orion without the charger plugged in.
-
Page 50: Chapter 8 Calibration, Maintenance And Troubleshooting
8.1.1 Absorber types Method Calibration of Ophir Power Meters 8.1.1.1 Types of Ophir Laser Absorbers Two types of absorber surface are used in Ophir thermal measuring heads. 1. Surface Absorbers: BB (broadband) absorber On standard, high power density, broadband Ophir power monitor heads, a special refractory coating is used to provide high absorptivity from the UV through the IR. - Page 51 2. Volume absorbers P (pulse) type absorber The models with the P suffix, for use with pulsed lasers, have a special absorbing glass with an absorbance of 95 +2% over the operating range. Since the surface is a glass, its reflectivity does not change even if damaged or melted locally.
- Page 52 Absorption of Ophir Thermal Absorbers vs. Wavelength 8.1.1.2 Method of Calibration The absorption of the various Ophir thermal absorbers can vary from disc to disc. Therefore, all Ophir absorbers are individually calibrated against NIST traceable standards. Ophir power/energy meters with the broadband or P type absorbers are individually calibrated by laser at several wavelengths against a NIST calibrated standard meter.
- Page 53 8.1.2 Linearity and Accuracy of Ophir Thermal Heads 8.1.2.1 Linearity The linearity of most Ophir thermal detectors is specified to be 1% over the specified power range of each particular instrument. The linearity is tested by electrical substitution heating. Models of up to 30 watts maximum rating are...
- Page 54 8.1.3 Calibration Factor For models equipped with the Ophir CAL resistor, the calibration factor is determined at the factory by the following procedure. After calibration of the sensor as described above in Section 8.1.1.2, electrical power is applied to the CAL resistor. The calibration factor is given by the formula: CAL factor = reading on meter / applied electrical power.
-
Page 55: Calibration Of Photodiode Type Heads
When the user selects his wavelength on the Orion PE, the correction factor for that wavelength is applied. The BC20 head does not have a calibration curve. It is calibrated at the fixed wavelengths that are available with that instrument. - Page 56 The linearity of the photodiode detector is extremely high and errors due to this factor can be ignored. The maximum error due to the above factors is given in Table 4 below. WAVE ERROR, FILTER OUT* LENGTH PD300 PD300- PD300- PD300- 3A-IS 200 -...
-
Page 57: Calibration Of Pyroelectric And Photodiode Heads
30,000 inch/sec. 8.3 Calibration of Pyroelectric and Photodiode Energy Heads Several types of absorber are used in Ophir pyroelectric and photodiode energy heads: 1. Metallic type: The type with no suffix in the name have a partially reflective multilayer metallic coating which absorbs approximately 50% and whose absorption graph is shown in graph 2 below. - Page 58 When the user selects his wavelength on the Orion PE, the correction factor for that wavelength is applied. The PD10 heads are calibrated in a two step fashion. First...
- Page 59 5 below. In addition to the above errors, the reading of pyroelectric heads changes with frequency. The Orion PE has a built in correction for this error. For frequencies above 50% of maximum frequency, inaccuracies in this correction can increase the total error by up to 3%.
-
Page 60: Error Messages
Orion should be connected to the charger. It will operate normally and charge slowly while connected to the charger. When connected to the charger while turned off, the Orion will charge faster, in about 14 hours. 8.5 Troubleshooting 8.5.1 Orion Display... - Page 61 Section 3.5.2. 8.5.3 Replacing Battery 1. Remove the bottom of the Orion by unscrewing the 4 Phillips screws. 2. Unscrew screw in the center of the PC boards. Carefully lift the boards up together.
-
Page 62: Chapter 9 Orion Specifications
Chapter 9 Orion Specifications 9.1 System/Display Specifications Detector compatibility Orion TH - thermal heads Orion PD-photodiode heads Orion PE-pyroelectric heads Input ranges 15nA - 1.5mA full scale in 16 ranges A to D sampling rate 15Hz A to D resolution 17 bits plus sign. -
Page 63: Head Specifications
9.2 Head Specifications HEAD MAX POWER MAX AVG. POWER ABSORBER (WATTS) DENSITY TYPE PD300/UV/IR 300mW 50W/cm² PD300-3W 50W/cm² 3A-IS 200W/cm² Int Sph PD F100A-IS 100W 200W/cm² Int Sph Ther 200W/cm² 3A-P-CAL 50W/cm² 10A-P 50W/cm² 30A-P 50W/cm² 30(150)A-HE 30(150)W 1000W/cm² HE/HE1 20KW/cm²... - Page 64 PD - Photodiode P - P type volume absorber for short pulse lasers HE/HE1- volume absorber for high energy pulses EX - Excimer type, volume absorber PE - pyroelectric metallic or black absorber BB - broadband surface absorber, high power density LP - broadband surface absorber for highest power density Absorber Max Energy Density J/cm²...
- Page 65 1.2 first release 1.3 updated damage threshold table 1.4/12.2.01/eg added BC20-SH 1.41/24.5.01/eg updated absorber data 1.42/12.6.01/eg changed size, graphs 3.27-1/31.3.05/be – new graphics + logo 7/be – Supports RS232& Orion PD supports PD200 3.36-1/07.03.0 heads 12/be New Ophir-Newport logo 3.36-2/25.03.
Need help?
Do you have a question about the ORION and is the answer not in the manual?
Questions and answers