Denon DCD-500AE CD Player Manual
- Operating instructions manual (15 pages) ,
- Service manual (58 pages)
Advertisement
- 1 NOTE ON USE
- 2 Getting Started
- 3 Accessories
- 4 Before using
- 5 About discs
- 6 About the remote control unit
- 7 Part names and functions
- 8 Connections
- 9 Operation
- 10 Turning the power on
- 11 Loading discs
- 12 Starting playback
- 13 Fast-forwarding and fast-reversing through tracks (Search)
- 14 Moving to the beginning of tracks (Skip)
- 15 Playing the desired track (Direct play)
- 16 Listening to specific tracks in a specific order (Programmed play)
- 17 Listening in random order (Random playback)
- 18 Listening to tracks repeatedly (Repeat play)
- 19 Cuing and stopping playback (Pause)
- 20 Using the timer play function
- 21 Others
- 22 Documents / Resources
NOTE ON USE

- Avoid high temperatures. Allow for sufficient heat dispersion when installed in a rack.

- Handle the power cord carefully. Hold the plug when unplugging the cord.

- Keep the apparatus free from moisture, water, and dust.

- Unplug the power cord when not using the apparatus for long periods of time.

* (For apparatuses with ventilation holes)
- Do not obstruct the ventilation holes.

- Do not let foreign objects into the apparatus.

- Do not let insecticides, benzene, and thinner come in contact with the apparatus.

- Never disassemble or modify the apparatus in any way.

- The ventilation should not be impeded by covering the ventilation openings with items, such as newspapers, tablecloths, curtains, etc.
- No naked flame sources, such as lighted candles, should be placed on the apparatus.
- Attention should be drawn to the environmental aspects of battery disposal.
- Do not expose the set to dripping or splashing fluids.
- No objects filled with liquids, such as vases, shall be placed on the apparatus.
Getting Started
Thank you for purchasing this DENON CD Player. Please read the operation instructions thoroughly in order to acquaint yourself with the CD player and achieve maximum satisfaction from it. Be sure to keep these instructions for future reference, should any questions or problems arise.
Accessories
Check that the following parts are attached in addition to the main unit:
- Operating instructions: 1
- Service station list: 1
- Remote control unit (RC-1028): 1
- R03/AAA batteries: 2
- Pin-plug cable (Cable length: Approx. 1.0 m): 1

Before using
- Handle the power supply cord carefully. Do not damage or deform the power supply cord. If it is damaged or deformed, it may cause electric shock or malfunction when used. When disconnecting the power supply cord from the wall outlet, hold the plug and do not pull on the cable.
- Do not open the top cover.
In order to prevent electric shock, do not open the top cover. If problems occur, contact your DENON dealer. - Do not place anything inside.
Prevent metal objects from entering the CD player and avoid spilling liquids on it.
Electric shock or malfunction may result. - Cautions on moving.
First, if a disc is loaded, eject it, then turn off the power, unplug the power supply cord from the power outlet and disconnect the connection cables with other devices. - Cautions on using mobile phones.
Using a mobile phone near this unit may result in noise. If so, move the mobile phone away from this unit when it is in use. - Sufficiently ventilate the place of installation. If the unit is left in a room full of the smoke from cigarettes, etc., for long periods of time, the surface of the optical pickup could get dirty, in which case it will not be able to read the signals properly.
- Store the operating instructions in a safe place. After reading the operating instructions, store them in a safe place as they could come in handy in the future.
![warning]() Note: that the illustrations in these instructions may differ from the actual unit for explanation purposes.
Note: that the illustrations in these instructions may differ from the actual unit for explanation purposes.
 NOTE:
NOTE:
- This CD player uses a semiconductor laser. To ensure stable operation, it is recommended to use the set indoors at a temperature of 5°C (41°F) ~ 35°C (95°F).
About discs
Discs usable on this set
- Music CDs
![]()

Discs with the mark at the right can be used on this set.
Note however that discs with special shapes (heart-shaped discs, octagonal discs, etc.) cannot be played. Do not attempt to play them, as doing so could damage the set.

- CD-R/CD-RW
- Some discs and some recording formats may not be playable.
- Non-finalized discs cannot be played.
![]() Finalization:
Finalization:
Finalization is the process that makes recorded CD-R/CD-RW discs playable on compatible players.
Holding discs
Do not touch the signal surface.

Loading discs
- Set the disc with the labeled side facing up.
- Make sure the disc tray is fully open when inserting the disc.
- Place the discs flatly, 12 cm discs in the outer tray guide (Figure 1), 8 cm discs in the inner tray guide (Figure 2).

- Place 8 cm discs in the inner tray guide without using an adapter.
- "NO DISC" is displayed if a disc is loaded upside down or if no disc is loaded.

Cautions on loading discs
- Only load one disc at a time. Loading two or more discs can damage the set or scratch the discs.
- Do not use cracked or warped discs or discs that have been repaired with adhesive, etc.
- Do not use discs on which the sticky part of cellophane tape or labels is exposed or on which there are traces of where labels have been removed. Such discs could get caught inside the player and damage it.
Cautions on handling
- Do not get fingerprints, oil or dirt on discs.
- Take special care not to scratch discs when removing them from their cases.
- Do not bend or heat discs.
- Do not enlarge the hole at the center.
- Do not write on the labeled (printed) surface with ball-point pens, pencils, etc., or stick new labels on discs.
- Water droplets may form on discs if they are moved suddenly from a cold place (outdoors for example) to a warm place, but do not try to dry them off using a hairdryer, etc.
Cautions on storing discs
- Be sure to remove discs after using them.
- Be sure to store discs in their cases to protect them from dust, scratches, warping, etc.
- Do not store discs in the following places:
- Places exposed to direct sunlight for long periods of time
- Dusty or humid places
- Places exposed to heat from heating appliances, etc.
Cleaning discs
- If there are fingerprints or dirt on discs, wipe them off before using the disc. If not the sound quality could be reduced and the sound may be broken.
- Use a commercially available disc cleaning set or a soft cloth to clean discs.
Gently wipe the disc from the inside towards the outside.

Do not wipe with a circular motion.

| NOTE: Do not use record spray, antistatic agents, or benzene, thinner or other solvents. |
About the remote control unit
Inserting the batteries
- Remove the remote control unit's rear cover.
![]()
- Set two R03/AAA batteries in the battery compartment in the indicated direction.
![]()
- Put the rear cover back on.


Notes on batteries
- Replace the batteries with new ones if the set does not operate even when the remote control unit is operated nearby the unit. (The attached batteries are only for verifying operation.)
- When inserting the batteries, be sure to do so in the proper direction, following the "<" and ">" marks in the battery compartment.
- To prevent damage or leakage of battery fluid:
- Do not use a new battery together with an old one.
- Do not use two different types of batteries.
- Do not short-circuit, disassemble, heat or dispose of batteries in flames.
- If the battery fluid should leak, carefully wipe the fluid off the inside of the battery compartment and insert new batteries.
- Remove the batteries from the remote if it will not be in use for long periods.
Operating range of the remote control unit
- Point the remote control unit at the remote sensor when operating it.
- The remote control unit can be used from a distance of up to about 8 meters, at a horizontal angle of up to 30° with respect to the sensor.
![]()

NOTE:
|
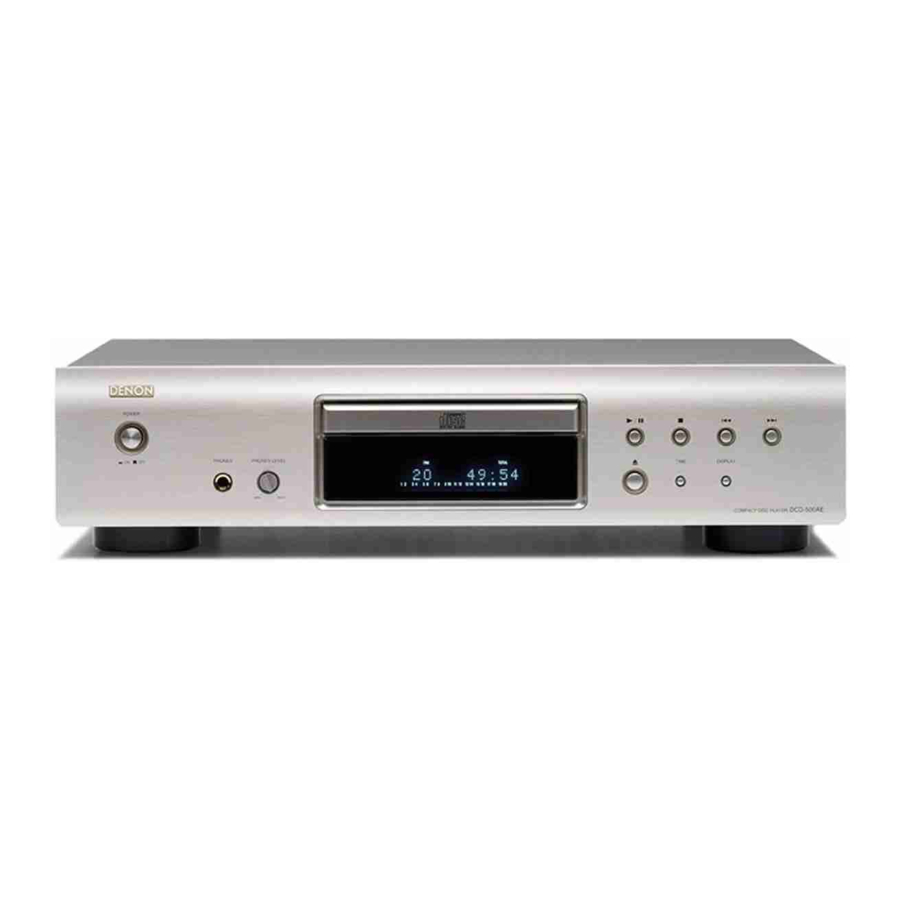
Part names and functions
For buttons not explained here, see the page indicated in parentheses ( ).
Front panel

- POWER switch (7)
- PHONES jack
Insert the headphones' plug. - PHONES LEVEL knob
Adjusts the volume of the headphones. - Remote control sensor (3)
- Display (4)
- Disc tray open/close button (
![]() ) (7)
) (7) - TIME button (7)
- DISPLAY button
![]() Switching the display brightness
Switching the display brightness
The brightness switches as shown below each time the button is pressed (and released within 1 second). - Skip buttons (
![]() ) (8)
) (8) - Stop button (
![]() ) (7)
) (7) - Play/Pause button (
![]() ) (7)
) (7) - Disc tray (2)
 Switching the display brightness
  ) (8)
) (8)
Display

- Information display
Various information is displayed depending on the operation mode.
For a music CD:
- Total number of tracks
- Total playing time
- Track number
- Elapsed time, etc.
- 20-track music calendar
- Program number
- Lights when the pause mode is set.
- Lights when a disc is playing.
- Lights when in the random play mode.
- Lights when the track number is displayed.
- Lights when in the program play mode.
- Lights when in the A-B repeat play mode.
- Lights when in the repeat play mode.
The display switches as follows each time the REPEAT button on the remote control unit is pressed.- In modes other than the folder mode:
![]()
- In modes other than the folder mode:
- Lights when the total number of tracks and total time are displayed at 1 .

Rear panel

- LINE OUT terminals (6)
- DIGITAL OUT OPTICAL terminal (6)
- Power supply cord (6)
Remote control unit

- The skip buttons (
![]() and
and ![]() ) and +10 button operate continuously when held in.
) and +10 button operate continuously when held in.
Connections
NOTE:
- Do not plug in the power supply cord until all connections have been completed.
- When making connections, also refer to the operating instructions of the other components.
- Be sure to connect the left and right channels properly (left with left, right with right).
- Making connections with the power turned on could result in noise or damage the speakers.
- Bunching the power supply cords and connection cables together could result in humming or noise.
Cable indications
Connect using the connection cables shown below.
Audio cable
- Analog connections (Stereo)
![]()
- Digital connections (Optical)
![]()


Signal direction
Audio signal

Analog connections

Digital connections
There is a protective cap over the optical digital output terminal. Remove the protective cap and insert the plug firmly until it locks.

 When connecting the optical digital output connector with an optical transmission cable (commercially available)

Match the shapes then insert firmly all the way in.
- Store the protective cap in a safe place so as not to lose it, and use it when not using the terminal.
Connecting the power supply cord

NOTE:
|
Operation

About the button names in this explanation
< > : Buttons on the main unit
[ ] : Buttons on the remote control unit
Button name only:
Buttons on the main unit and remote control unit
Turning the power on
Press < POWER > .
- When a disc is loaded, playback starts automatically.
- If no disc is loaded "NO DISC" is displayed.
To turn off the power:
Press < POWER > again.
NOTE:
|
 to stop playback before turning off the power.
Loading discs
Press ![]() to open the disc tray.
to open the disc tray.
To close the disc tray:
Press ![]() again.
again.
NOTE:
|
Starting playback
Press ![]() or
or ![]()
The "![]() " indicator lights and playback starts.
" indicator lights and playback starts.
- Once all the tracks remove recorded on the disc have been played, the stop mode is set automatically.
- TIME can be used to switch the information displayed.
![]()
- During programmed playback, the remaining time of all the programmed tracks is displayed.

To stop playback
Press ![]() during playback.
during playback.
To pause playback
Press ![]() or
or ![]() during playback.
during playback.
- The "
![]() " indicator lights and the pause mode is set.
" indicator lights and the pause mode is set.
To resume playback:
Press ![]() or
or ![]() .
.
Fast-forwarding and fast-reversing through tracks (Search)
Press and hold [ ![]() ] or [
] or [ ![]() ] during playback.
] during playback.
- Normal playback resumes when you release your finger from the button.
- The sound may be interrupted shortly when resuming normal playback after searching.

| About the button names in this explanation < > : Buttons on the main unit [ ] : Buttons on the remote control unit Button name only : Buttons on the main unit and remote control unit |
Moving to the beginning of tracks (Skip)
Press![]() or
or ![]() during playback.
during playback.
- The operation is as follows if the button is held in:
![]() : Skip to the beginning of tracks several tracks on
: Skip to the beginning of tracks several tracks on
![]() : Skip to the beginning of tracks several tracks before
: Skip to the beginning of tracks several tracks before
Playing the desired track (Direct play)
Use [NUMBER] (0 - 9, +10) to select the track.
- For track numbers 1 to 9, press the corresponding button ([1] to [9]).
For track numbers 10 and on, first press [+10] then press buttons [0] to [9].
Example: Track 4 : [4]
Example: Track 12: [+10] [2]
Example: Track 20: [+10] [+10] [0]
Listening to specific tracks in a specific order (Programmed play)
Up to 25 tracks can be programmed.
- In the stop mode, press [PROGRAM].
- "PROG" is displayed.
- Use [NUMBER] (0 ~ 9, +10) to select the track.
Example: To program tracks 3, 12, 7 to play in that order: [3] [+10] [2] [7] - Press
![]() or
or ![]()
- The tracks are played in the programmed order.
Checking the programmed tracks:
In the stop mode, press [CALL].
The tracks are displayed in the programmed order each time the button is pressed.
Clearing tracks from the program:
- Press [CLEAR] while the track you want to clear is displayed during the "Checking the programmed tracks" operation above.
- The last track in the program is deleted each time the button is pressed.
Stopping programmed playback:
In the stop mode, press [DIRECT], or press ![]() to open the disc tray.
to open the disc tray.
- Direct searching is not possible during programmed playback.
- "--: --" is displayed if the total programmed time exceeds 100 minutes.
- If the end of the track is reached while [
![]() ] is being pressed during programmed playback, the track following the currently playing track is played, regardless of the program.
] is being pressed during programmed playback, the track following the currently playing track is played, regardless of the program.
Listening in random order (Random playback)
- In the stop mode, press [RANDOM].
- The "RND" indicator lights.
- Press
![]() or
or ![]()
- During normal playback:
Tracks are selected automatically and played in random order. - During programmed playback:
The programmed tracks are played in random order. - In the all-track repeat mode:
The tracks are played once each in random order, then played again in a different order
- During normal playback:
Stopping random playback: Press [RANDOM] or [DIRECT].
- Direct searching is not possible during random playback.
Listening to tracks repeatedly (Repeat play)
Listening to all the tracks repeatedly (All-track repeat play)
- Press [REPEAT] once.
- The "RPT" indicator lights.
- Press
![]() or
or ![]()
- During normal playback:
All the tracks are played repeatedly. - During programmed playback:
The tracks are played repeatedly in the programmed order. - In the random play mode:
The tracks are played once each in random order, then played again in a different order
- During normal playback:
Stopping all-track repeat playback: Press [REPEAT] twice in a row, or press ![]() to open the disc tray.
to open the disc tray.
- In the programmed play or random play mode during all-track repeat playback, normal playback resumes when [REPEAT] is pressed once.
Listening to a specific track repeatedly (1-track repeat play)
During playback, press [REPEAT] twice in a row.
- The "RPT1" indicator lights and that track is played repeatedly.
Stopping 1-track repeat playback: Press [REPEAT] again, or press ![]() to open the disc tray.
to open the disc tray.
- 1-track repeat playback is not possible during programmed or random playback.
Listening to a specific section between two points repeatedly (A-B repeat play)
- During playback, press [A-B] at the point at which you want to start repeating (point A).
- The "A-" indicator lights.
- During playback, press [A-B] at the point at which you want to stop repeating (point B).
- The "A-B" indicator lights and the A-B section is played repeatedly.
Stopping A-B repeat playback: Press [A-B] again.
- A-B repeat playback is not possible during programmed playback or random playback.
Cuing and stopping playback (Pause)
Cuing with direct searching
- Either press
![]() twice or press
twice or press ![]() once.
once. - Use [NUMBER] (0 ~ 9, +10) to select the track.
To start playback: Press ![]() or
or ![]()
Cuing with programmed searching
- Press [PROGRAM].
- Use [NUMBER] (0 - 9, +10) to select the track.
- Either press
![]() twice or press
twice or press ![]() once.
once.
To start playback: Press  or
or 
Using the timer play function
Also refer to the operating instructions of the timer device.

- Turn on the power of the connected components.
- Switch the amplifier's input function to the function to which the player is connected.
- Load a disc in the player.
- Set the audio timer for the desired times.
- Turn the timer "ON".
- The power of the components connected to the timer turns off.
- When the set time is reached, the power of the different components automatically turns on and playback starts from the first track.
Others
Troubleshooting
If a problem should arise, first check the following:
- Are the connections correct?
- Have you operated the player according to the Operating Instructions?
If this unit is not operating properly, check the items listed in the table below. Should the problem persist, there may be a malfunction. Disconnect the power immediately and contact your store of purchase.
| Symptom | Measures | Cause |
| Disc tray does not open. |
|
|
| "NO DISC" is displayed even though a disc is loaded. |
|
|
| "00 00: 00" is displayed even though a disc is loaded. |
|
|
| Disc is not played when play button is pressed. |
|
|
| No sound is produced or sound is distorted. |
|
|
| No digital signals are output. |
|
|
| Specific section of the disc cannot be played properly. |
|
|
| Programmed playback is not possible. |
|
|
| A CD-R or CD-RW disc cannot be played. |
|
|
| Set does not operate properly when remote control unit is operated. |
|
|
Specifications
Audio performance
| |
| Channels: | 2 channels |
| Playable frequency range: | 2 Hz ~ 20 kHz |
| S/N: | 105 dB |
| Dynamic range: | 98 dB |
| Harmonic distortion: | 0.003% (1 kHz) |
| Wow & flutter: | Below measurable limits |
| Output level: | 2.0 V (10 kΩ/kohms) |
| Signal type: | 16-bit linear PCM |
| Sampling frequency: | 44.1 kHz |
| Usable discs: • Digital output | Compact Disc |
| Optical: | –15 ~ –21 dBm |
| Emission wavelength: | 660 nm |
| General | |
| Power supply: | AC 230 V, 50 Hz |
| Power consumption: | 13 W |
| Maximum external dimensions: | 434 (W) x 107 (H) x 279 (D) mm (including protruding parts) |
| Mass: | 4.0 kg |
| Remote control unit (RC-1028) | |
| Remote control type: | Infrared pulse |
| Batteries: | R03/AAA Type (two batteries) |
| External dimensions: | 49 (W) x 220 (H) x 21 (D) mm |
| Mass: | 106 g (included batteries) |
* For purposes of improvement, specifications and design are subject to change without notice.

Documents / ResourcesDownload manual
Here you can download full pdf version of manual, it may contain additional safety instructions, warranty information, FCC rules, etc.
Advertisement


Need help?
Do you have a question about the DCD-500AE and is the answer not in the manual?
Questions and answers