Table of Contents
Advertisement
Quick Links
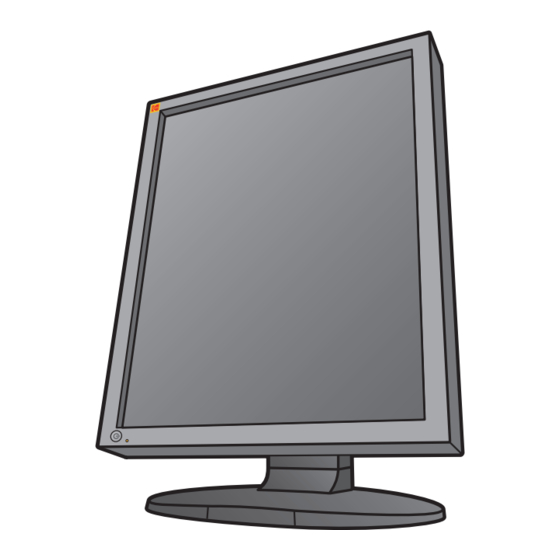
Kodak DirectView
3MP Color Display
Thank you for purchasing our Color LCD Monitor.
◆ Carefully read this User's Manual and use the
product properly. Before using it, also read
"Safety Precautions."
◆ Keep the User's Manual as close to you as
possible and in safe custody.
◆ If you have lost the manual, contact your dealer.
We will reissue a manual.
Model# DV3MC
Contents
1.Safety Precautions .................................3
2.Auxiliaries ...............................................7
3.Features .................................................8
4.How to Operate ......................................9
5.Connection Method ..............................13
6.Reference .............................................16
7.Assignment of Connector Pins .............17
8.Failure Diagnosis..................................18
9.Cleaning ...............................................19
10.Specifications .......................................20
11.Technical Support .................................22
CAT 802 6635
Advertisement
Table of Contents

Subscribe to Our Youtube Channel
Related Manuals for Kodak DirectView 3MP


Summary of Contents for Kodak DirectView 3MP
-
Page 1: Table Of Contents
Kodak DirectView 3MP Color Display Model# DV3MC CAT 802 6635 Contents Thank you for purchasing our Color LCD Monitor. 1.Safety Precautions .........3 ◆ Carefully read this User's Manual and use the 2.Auxiliaries ..........7 product properly. Before using it, also read 3.Features ..........8... -
Page 3: Safety Precautions
Safety Precautions Attention, Consult accompanying documents Dangerous Voltage, Risk of electric shock To reduce the risk of electric shock, Do not remove the back cover. No-user serviceable parts inside, Refer to qualified service Personnel. FCC Information CE Certification FCC (U.S.Federal Communications Commission) This device complies with the This equipment has been tested and found requirements of the MDD directive... - Page 4 -Read this user’s manual and properly use the unit. -You must agree that Kodak is not liable for any damage caused by any third party’s or your negligence of following the instructions of this user’s manual and misuse except those specified responsibilities for compensation accepted by law.
- Page 5 ●Do not use the attached AC adapter to ●Do not put the unit in such place where other devices (models with attached AC it is subject to direct sunlight or near adapter). any heating device. It may lead to generation of fever and/or The cabinet and/or fire.
- Page 6 Limitation of Liability ●Kodak is not liable for damages arising from fire, earthquake, actions taken by any third party, any other accident, any intended action, negligence, or misuse by user, or use under such abnormal circumstances.
-
Page 7: Auxiliaries
Auxiliaries Confirm the auxiliaries listed below are included. □ AC adapter □ USB cable □ Power supply cord (3P wall type) □ User’s Manual (this manual) □ DVI-DVI cable □ Communication cable NOTES * We recommend you to keep the packing box for transportation and the like. *... -
Page 8: Features
Features ●Use of a 20.8-inch (53cm) QXGA ultra-high-definition color LCD panel A large screen size and clear image is obtained by using a 20.8-inch (diagonal 53cm) QXGA (2048 x 1536 ) ultra-high-definition color LCD panel. Note To display the maximum resolution on DV3MC, a graphics card that can display 2048 x 1536 or 1536 x 2048 is necessary. -
Page 9: How To Operate
How to Operate 1. Names and Functions of Each Part Operating Section � � ① Power switch This turns the power of the color LCD monitor ON and OFF. ② Power indicator LED Status Power Status Color LCD Monitor Status Power is OFF The brightness stabilizing circuit is ON and the brightness is stable... - Page 10 Connection Section Portrait (shorter side at the top) � � � � � � � Left side view ③ USB upstream port Connect this port to the upstream connector from the computer. For the connection, use a USB cable 2 meters or shorter in length. ④...
- Page 11 2. Adjusting the Display Angle The screen angle can be arranged by up to 70 degrees either to the right or left, bent down by up to 3 degrees and bent up by up to 17 degrees. As indicated in the drawing below, the adjustment is con- ducted by holding the color LCD display in both hands and slowly moving it.
- Page 12 3. Rotating the LCD Panel When setting the color LCD monitor to horizontal display (landscape orientation), lift the LCD panel to the top of the tilt stand as shown in the figure below and rotate it by 90 degrees. Procedure ①...
-
Page 13: Connection Method
Connection Method 1. Confirm that the computer is turned off. 2. Connect the computer’s DVI digital video output connector and the LCD monitor's "SIGNAL" with the provided cable. When connecting the cable, do not forget to tighten the screw of the cable. 3. - Page 14 Handling the cable cover 1. Removing the cable cover Lifting the hook at the top of the cover, slowly remove the cable cover and expose the cable holders. Hook Cable cover 2. Installing the cable cover Secure cables to the cable holders on the back of the stand.
- Page 15 Antitheft security device slot This product has loaded an antitheft security device slot compliant with MicroSaver Security System of Kensington on the back of the color LCD monitor. MicroSaver security System can be purchased at PC supply shops. Antitheft security device slot Kensington is a registered brand of Kensington.
-
Page 16: Reference
Reference This unit has loaded a function compliant with DDC-2B, a VESA standard. This function reads into the set data written in the color LCD monitor internal device in advance on startup of Windows 95/98/Me/2000 or Windows XP and sets the detailed information of the color LCD monitor in the system file in order to achieve Plug&Play. -
Page 17: Assignment Of Connector Pins
Assignment of Connector Pins Pin # Signal 24-pin DVI-D Connector (female) T.M.D.S. Data2- T.M.D.S. Data2+ T.M.D.S. Data2/4 Shield T.M.D.S. Data4- T.M.D.S. Data4+ DDC Clock DIGITAL Signal Connector DDC Data T.M.D.S. Data1- T.M.D.S. Data1+ T.M.D.S. Data1/3 Shield T.M.D.S. Data3- T.M.D.S. Data3+ +5V Power Ground Hot Plug Detect... -
Page 18: Failure Diagnosis
Failure Diagnosis Check the followings before requesting repair. Countermeasure Symptom Verification Power doesn't turn on! a: Is the power cord a: Connect the power cord (see (POWER indicator doesn't connected? Pg.12). light!). b: Is the power switch ON? b: Turn the power switch on. a: Is the signal cable properly a: Properly connect the The screen is not... -
Page 19: Cleaning
Cleaning Cleaning the Cabinet and the Color LCD Monitor ●When cleaning, remove the AC adapter from the color LCD monitor and outlet for safety. ●Lightly wipe off dirt on the cabinet and LCD panel surface with a hard-wrung soft cloth soaked in a neutral cleaning solution. -
Page 20: Specifications
Specifications Product name : Color LCD Monitor Model : DV3MC Items Specifications LCD display device 53 cm (20.8-inch) Color TFT Normally Black Pixel pitch Horizontal 0.207 mm × Vertical 0.207 mm Display area Horizontal 318.0 mm × Vertical 423.9 mm Pixel 1536 ×... - Page 21 External Dimensions Portrait (shorter side at the top) ��� 【Left side view】 【Front】 Landscape (longer side at the top) ��� ��� ��� ��� 【Left side view】 【Front】 - 21 -...
-
Page 22: Technical Support
Technical Support Requesting Repair ① Read "Failure Diagnosis (Pg. 18)" carefully and check them yourself. ② In case of having abnormalities on your driver, stop operating, unplug the AC cable from the outlet, and consult dealer.Do not repair by yourself. It is very dangerous. ③... - Page 24 EASTMAN KODAK COMPANY Rochester, NY 14650, U.S.A. www.kodak.com PZZ11-885 Printed in Japan (Recycled Paper) MDL2106A-1A 031225...
Need help?
Do you have a question about the DirectView 3MP and is the answer not in the manual?
Questions and answers