Table of Contents

Related Manuals for Cameo ZENIT B200


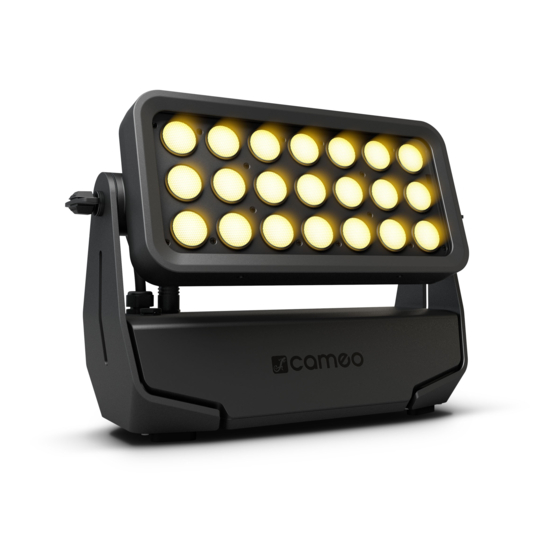
Summary of Contents for Cameo ZENIT B200
- Page 1 USER´S MANUAL BEDIENUNGSANLEITUNG MANUEL D`UTILISATION MANUAL DE USUARIO INSTRUKCJA OBSŁUGI MANUALE D‘ USO FIRMWARE VERSION 1.90 AND HIGHER ZENIT B200 ® LED BATTERY OUTDOOR WASHLIGHT CLZB200...
-
Page 2: Table Of Contents
CONTENTS / INHALTSVERZEICHNIS / CONTENU / CONTENIDO / TREŚĆ / CONTENUTO ENGLISH INFORMATION ON THIS USER MANUAL INTENDED USE DEFINITIONS AND SYMBOL EXPLANATIONS SAFETY INSTRUCTIONS CHARGING, OPERATING AND STORING BATTERIES NOTES ON PORTABLE OUTDOOR DEVICES SCOPE OF DELIVERY INTRODUCTION CONNECTIONS, OPERATING AND DISPLAY ELEMENTS OPERATION IR REMOTE CONTROL SETUP AND INSTALLATION... - Page 3 TECHNISCHE DATEN IP-SCHUTZART MINDESTABSTAND ZUR BELEUCHTETEN FLÄCHE MINDESTABSTAND ZU NORMAL ENTFLAMMBAREN MATERIALIEN ENTSORGUNG HERSTELLERERKLÄRUNGEN FRANCAIS INFORMATIONS CONCERNANT CE MANUEL D’UTILISATION UTILISATION CONFORME EXPLICATIONS DES TERMES ET DES SYMBOLES CONSIGNES DE SÉCURITÉ CHARGER, UTILISER ET STOCKER LES ACCUMULATEURS REMARQUES CONCERNANT LES APPAREILS D’EXTÉRIEUR MOBILES CONTENU DE LA LIVRAISON INTRODUCTION ANSCHLÜSSE, BEDIEN- UND ANZEIGEELEMENTE...
- Page 4 VOLUMEN DE SUMINISTRO INTRODUCCIÓN CONEXIONES, ELEMENTOS DE MANEJO Y ELEMENTOS DE VISUALIZACIÓN FUNCIONAMIENTO MANDO A DISTANCIA POR INFRARROJOS INSTALACIÓN Y MONTAJE CUIDADO, MANTENIMIENTO Y REPARACIÓN ACCESORIOS OPCIONALES TECNOLOGÍA DMX DATOS TÉCNICOS EXPLICACIÓN SOBRE LA CLASE DE PROTECCIÓN IP DISTANCIA MÍNIMA CON RESPECTO A LA SUPERFICIE ILUMINADA DISTANCIA MÍNIMA CON RESPECTO A MATERIALES NORMALMENTE INFLAMABLES ELIMINACIÓN DECLARACIONES DEL FABRICANTE...
- Page 5 ITALIANO INFORMAZIONI SUL PRESENTE MANUALE D’USO UTILIZZO CONFORME SPIEGAZIONE DI CONCETTI E SIMBOLI INDICAZIONI SULLA SICUREZZA AVVERTENZE PER DISPOSITIVI PORTATILI PER ESTERNI VOLUME DI CONSEGNA INTRODUZIONE CONNETTORI, ELEMENTI DI COMANDO E VISUALIZZAZIONE UTILIZZO TELECOMANDO A INFRAROSSI INSTALLAZIONE E MONTAGGIO PULIZIA, MANUTENZIONE E RIPARAZIONE OPTIONALES ZUBEHÖR TECNOLOGIA DMX DATI TECNICI...
-
Page 6: Information On This User Manual
We have designed this product to operate reliably over many years. Please read this User‘s Ma- nual carefully, so that you can begin making optimum use of your Cameo Light product quickly. Learn more about Cameo Light on our website CAMEOLIGHT.COM. -
Page 7: Safety Instructions
This symbol identifies hazards that can cause electric shock. This symbol identifies hazardous areas or hazardous situations. This symbol indicates hazards caused by hot surfaces. This symbol indicates hazards caused by intense light sources. This symbol indicates a device in which there are no user-replaceable parts. This symbol indicates additional information on the operation of the product. - Page 8 ATTENTION: 1. Do not switch on the device if it has been exposed to extreme temperature fluctu- ations (for example, following transport). Moisture and condensation can damage the device. Switch on the device only when it has reached room temperature. 2.
- Page 9 CAUTION: 1. Moving components such as mounting brackets may become jammed. 2. In the case of devices with motor-driven components, there is a risk of injury due to the movement of the device. Sudden movement of the device can cause shock reactions.
- Page 10 4. These luminaires contain permanently installed light sources which cannot be replaced by the user. The light source contained in this luminaire may only be replaced by the manufacturer or its service partner or a similarly qualified person. SIGNAL TRANSMISSION AND CONTROL BY RADIO (E.g.
- Page 11 TRANSMISSION VIA W-DMX WARNING: In general, wireless DMX transmission must not be used for applications involving safety-related factors that might result in personal injury or property dam- age in the event of a failure. This applies in particular to moving scene or traverse structures, DMX-controlled motors/lifts or lifting devices for operating DMX-operated platform lifts, hydraulic systems or comparable moving components.
- Page 12 DEVICES WITH BATTERY, BATTERIES AND CHARGERS DANGER: 1. Keep the device with battery away from heat sources and do not expose it to di- rect sunlight. Do not place it on or in heating devices such as microwaves, ovens or radiators. Batteries can explode if overheated. Be sure to observe the per- missible ambient and operating conditions! These can be found in the technical specifications.
- Page 13 DEVICES WITH BATTERY OR ACCUMULATOR REPLACEMENT PROVIDED BY THE USER (e.g. remote control) DANGER: Be sure to observe the manufacturer's data sheet for the batteries or rechargeable batteries used! 1. Batteries and rechargeable batteries must be kept out of reach of persons (inclu- ding children) with reduced physical, sensory or mental capabilities.
-
Page 14: Charging, Operating And Storing Batteries
CHARGING, OPERATING AND STORING BATTERIES 1. To charge permanently installed batteries, connect the unit to the power supply provided. Please note that the charging function is not deactivated by the main unit switch on all units. 2. Please refer to the technical data for the charging time required to fully charge the battery. -
Page 15: Scope Of Delivery
SCOPE OF DELIVERY Remove the product from the packaging and remove all packaging material. Please check the completeness and integrity of the delivery and notify your distribution partner immediately after purchase if the delivery is not complete or if it is damaged. Product includes: •... -
Page 16: Connections, Operating And Display Elements
Move the switch to the down position to make the floodlight ready for operation. During the start- up process, “Welcome to Cameo”, the model name and the software version will be shown con- secutively on the display. When the switch is not in the down position, the floodlight is in standby mode. -
Page 17: Operation
• When the lamp is correctly connected to the mains supply and the standby switch is in the down position, “Welcome to Cameo”, the model name and the software version are shown on the display consecutively during start-up. After this process, the lamp is ready for operation and starts in the previously enabled mode. - Page 18 • Before changing device settings, ensure that the control panel is dry and dust free, in order not to impair its functionality. • The display can be rotated through 180° by pressing UP when the main display is visible. MAIN DISPLAY After the power-up process, the lamp is ready for operation and starts in the previously activated mode.
- Page 19 3. It is also possible to create a networked group of W-DMX™ devices via W-DMX™ and to operate them in master/slave mode to use. Disconnect all devices that are supposed to form the group (Settings -> Wireless Setting -> Receive Reset). Now, in the settings (Settings -> Wireless Setting ->...
- Page 20 CONFIGURING DMX MODE (DMX Mode) Press MODE to access the selection menu. Using the UP and DOWN controls, select the menu item “DMX Mode” (observe arrow) and confirm with ENTER. In the sub-menu, you can now select between 9 different DMX operating modes with the UP and DOWN buttons. Confirm your selection with ENTER.
- Page 21 COLOUR MACROS (Colour Macro) 15 different preset colour macros are available. Select colour macro mode as per the procedure pre- viously described in SETTING OPERATION MODE and confirm with ENTER. Using the UP and DOWN controls, now select the desired colour preset (observe arrow) and confirm with ENTER (Colour Off = blackout).
- Page 22 COLOUR TEMPERATURE (Tunable White) The colour temperature mode enables you to configure the colour temperature from warm white to cold white (CCT) and the brightness (Dim) of the light directly on the device. Select the colour temper- ature mode as per the procedure previously described in SETTING STAND ALONE MODE and confirm with ENTER.
- Page 23 and confirm again with ENTER (to deactivate the timer function, please select “Off” and confirm). Press MODE three times to return to the main display. ----------- Stand Alone ----------- ------------ Timer ------------ Auto Timer On/Off Color Macro Fade In < 1min > Static Dwell Time <...
- Page 24 Settings Runtime = Increase battery life Function deactivated by up to 24 hours 4 hours - Configure battery run time from 4 hours with correspondingly 24 hours to 24 hours in 1 hour increments. reduced brightness (calculated on full with 100% battery) Wireless = W-DMX settings W-DMX...
- Page 25 Dimmer = Dimmer curve Linear Light intensity increases linearly with Curve DMX value Expo- Light intensity can be finely adjusted at nential lower DMX values and broadly adjusted at higher DMX values Logarith- Light intensity can be broadly adjusted at lower DMX values and finely adjusted at higher DMX values S-Curve...
- Page 26 LED Fre- = LED PWM frequency 800Hz / Configuration of LED PWM frequency quency 1200Hz / 2000Hz / 3600Hz / 12kHz / 25kHz IR Remote = Activate or deacti- IR remote control activated vate control by IR IR remote control deactivated remote control Factory = Reset to factory...
- Page 27 System Info Firmware = Displays device Main Vx.xx firmware Vx.xx driver Temperature = Displays tem- xx°C / xx°F perature of LED Unit °C (= display in degrees Celsius) unit °F (= display in degrees Fahrenheit) Operation Hours = Displays operat- xx:xx h Displays total operating time in hours and ing time...
-
Page 28: Ir Remote Control
IR REMOTE CONTROL Aim the infrared remote control directly at the infrared sensor on the front of the lamp. The maximum range is approximately 8 metres. In DMX and Slave modes, the remote control is deactivated. Battery for IR remote control = CR2025. The blackout button is used to switch off all LEDs, regardless of operating mode enabled Blackout... -
Page 29: Setup And Installation
SETUP AND INSTALLATION Thanks to the integrated plastic feet, the spotlight can be placed on a flat surface at a suitable location. Mounting on a truss is done with the help of an omega bracket, which is fixed in the centre of the unit base (A). - Page 30 CARE (carried out by user) WARNING! Before carrying out any maintenance work, the power supply and, if possible, all device connections must be unplugged. PLEASE NOTE! Improper care can lead to impairment of the device or even destruction. 1. Housing surfaces must be cleaned with a clean, damp cloth. Make sure that no moisture can penetrate the device.
-
Page 31: Optional Accessories
OPTIONAL ACCESSORIES CLZW300B2004B CLZW300B200SMLSD20 Barn doors – Tool-free installation by 25° diffuser spring-loaded locking pins, safety cable Tool-free installation via SNAPMAG ® included technology CLZW300B200SMLSD40 CLZW300B200SMLSD100 45° diffuser 100° diffuser Tool-free installation via SNAPMAG technology Tool-free installation via SNAPMAG ® ®... -
Page 32: Dmx Technology
DMX TECHNOLOGY DMX-512 DMX (Digital Multiplex) is the designation for a universal transmissi- on protocol for communications between corresponding devices and controllers. A DMX controller sends DMX data to the connected DMX device(s). The DMX data is always transmitted as a serial data stre- am that is forwarded from one connected device to the next via the „DMX IN“... - Page 33 Pin Assignment DMX cable with 3-pin XLR connectors: DMX cable with 5-pin XLR connectors (pin 4 and 5 are not used): Shield Shield DMX TERMINATORS (TERMINATING RESISTORS) To prevent system errors, the last device in a DMX chain needs to be equipped with a terminating resistor (120 ohm, 1/4 Watt).
-
Page 34: Technical Data
TECHNICAL DATA ITEM NUMBER: CLZB200 Product type: LED Battery Wash Light Type: Outdoor spotlight Colour spectrum LED: RGBW LED quantity: LED type: 15 W LED PWM frequency: 800 Hz, 1200 Hz, 2000 Hz, 3600 Hz, 12 kHz, 25 kHz (adjustable) Beam angle: 21°... - Page 35 ITEM NUMBER: CLZB200 Battery protection Protection against overcharging and deep discharge device: Battery charge cycles: 300 charging cycles 0% -> 100% ≅ 70% capacity Illuminance (@ 1m, 22100 lx without diffusing lens): Luminous flux (RGBW): 4500 lm Ambient temperature -15°C – +40°C when operating with internal battery: Ambient temperature...
-
Page 36: Explanation Of Ip Protection Class
EXPLANATION OF IP PROTECTION CLASS 1. An IP rating only reflects protection from solid objects and water. It does not describe general weather resistance, such as protection from UV radiation and temperature, etc. 2. The first identification digit indicates protection from dust, solid objects and contact: IP2X Protected against solid foreign bodies ≥... -
Page 37: Disposal
DISPOSAL Packaging: 1. Packaging can be fed into the reusable material cycle using the usual disposal methods. 2. Please separate the packaging in accordance with the disposal laws and recy- cling regulations in your country. Device: 1. This device is subject to the European Directive on Waste Electrical and Electronic Equipment, as amended. - Page 38 UKCA- DECLARATION OF CONFORMITY Products that are subject to Electrical Equipment(Safety)Regulation 2016, EMC Regulation 2016 or RoHS Regulation can be requested at info@adamhall.com. Products that are subject to the Radio Equipments Regulations 2017 (SI2017/1206) can be down- loaded from www.adamhall.com/compliance/ FCC STATEMENT This equipment has been tested and found to comply with the limits for a Class B digital device, pursuant to part 15 of the FCC Rules.
-
Page 39: Deutsch
Dieses Gerät wurde unter hohen Qualitätsanforderungen entwickelt und gefertigt, um viele Jahre einen reibungslosen Betrieb zu gewährleisten. Bitte lesen Sie diese Bedienungsanleitung sorgfäl- tig, damit Sie Ihr neues Produkt von Cameo Light schnell und optimal einsetzen können. Weitere Informationen über Cameo Light erhalten Sie auf unserer Website WWW.CAMEOLIGHT.COM. -
Page 40: Sicherheitshinweise
Dieses Symbol kennzeichnet Gefahren, die einen elektrischen Schlag verursachen können. Dieses Symbol kennzeichnet Gefahrenstellen oder gefährliche Situationen. Dieses Symbol kennzeichnet Gefahren durch heiße Oberflächen. Dieses Symbol kennzeichnet Gefahren durch intensive Lichtquellen. Dieses Symbol kennzeichnet ein Gerät, in dem sich keine vom Benutzer austauschbaren Teile befinden. - Page 41 WARNUNG: 1. Das Gerät darf nicht in Betrieb genommen werden, wenn es offensichtliche Beschädigungen aufweist. 2. Das Gerät darf nur im spannungsfreien Zustand installiert werden. 3. Wenn das Netzkabel des Geräts beschädigt ist, darf das Gerät nicht in Betrieb genommen werden. 4.
- Page 42 WARNUNG: 1. Verwenden Sie das Gerät nur in der vorgesehenen Art und Weise. 2. Betreiben Sie das Gerät nur mit dem vom Hersteller empfohlenen und vorgesehenen Zubehör. 3. Beachten Sie bei der Installation die für Ihr Land geltenden Sicherheitsvorschriften. 4. Überprüfen Sie nach dem Anschluss des Geräts alle Kabelwege, um Schäden oder Unfälle, z.
- Page 43 ACHTUNG: 1. Installieren und betreiben Sie das Gerät nicht in der Nähe von Heizkörpern, Wärme- speichern, Öfen oder sonstigen Wärmequellen. Sorgen Sie dafür, dass das Gerät immer so installiert ist, dass es ausreichend gekühlt wird und nicht überhitzen kann. 2. Platzieren Sie keine Zündquellen wie z.B. brennende Kerzen in der Nähe des Geräts.
- Page 44 SIGNALÜBERTRAGUNG UND STEUERUNG PER FUNK (z.B. W-DMX oder Audio-Funksysteme, Bluetooth) Die Qualität und Leistungsfähigkeit kabelloser Signalübertragungen ist generell abhängig von den Umgebungsbedingungen. Einfluss auf die Reichweite und Signalstabilität haben z.B.: • Abschirmung (z.B. Mauerwerk, Metallbauten, Wasser) • Hohes Funkaufkommen (z.B. starke W-LAN Netze) •...
- Page 45 GERÄTE MIT AKKU, AKKUS UND LADEGERÄTE GEFAHR: 1. Halten Sie das Gerät mit Akku fern von Wärmequellen und setzen Sie es nicht direkter Sonneneinstrahlung aus. Legen Sie es nicht auf oder in Heizgeräte, wie Mikrowellen, Öfen oder Heizkörper. Akkus können bei Überhitzung explodieren. Beachten Sie unbedingt die zulässigen Umgebungs- und Betriebsbedingungen! Diese finden Sie in den technischen Spezifikationen.
- Page 46 GERÄTE MIT DURCH DEN ANWENDER VORGESEHENEN BATTERIE BZW. AKKUWECHSEL (z.B. Fernbedienung) GEFAHR: Beachten Sie unbedingt das Herstellerdatenblatt der verwendeten Batterien oder Akkus! 1. Batterien und Akkus müssen außer Reichweite von Personen (einschließlich Kin- dern) mit eingeschränkten körperlichen, sensorischen oder geistigen Fähigkeiten aufbewahrt werden.
-
Page 47: Hinweise Für Ortsveränderliche Outdoor-Geräte
AKKUS LADEN, BETREIBEN UND LAGERN 1. Zum Laden fest verbauter Akkus schließen Sie das Gerät an die vorgesehene Spannungsversorgung an. Bitte beachten Sie, dass die Ladefunktion nicht bei allen Geräten durch den Gerätehauptschalter deaktiviert wird. 2. Die Ladezeit für eine vollständige Aufladung des Akkus entnehmen Sie bitte den Technischen Daten. -
Page 48: Lieferumfang
LIEFERUMFANG Entnehmen Sie das Produkt aus der Verpackung und entfernen Sie sämtliches Verpackungsmaterial. Bitte überprüfen Sie die Vollständigkeit und Unversehrtheit der Lieferung und benachrichtigen Sie Ihren Vertriebspartner bitte unverzüglich nach dem Kauf, falls die Lieferung nicht komplett oder beschädigt ist. Im Lieferumfang des Produkts sind enthalten: •... -
Page 49: Anschlüsse, Bedien- Und Anzeigeelemente
Stromnetz an. Schalten Sie den Scheinwerfer nun betriebsbereit, indem Sie den Schal- ter in die heruntergedrückte Position bringen. Während des Startvorgangs werden nacheinander „Welcome to Cameo“, die Modellbezeichnung und die Software Version im Display angezeigt. In der nicht heruntergedrückten Position des Schalters befindet sich der Scheinwerfer im Stand- by-Modus. -
Page 50: Bedienung
• Sobald der Scheinwerfer korrekt am Stromnetz angeschlossen und der Standby-Schalter in die heruntergedrückte Position gebracht ist, werden während des Startvorgangs nacheinander „Welcome to Cameo“, die Modellbezeichnung und die Software Version im Display angezeigt. Nach diesem Vorgang ist der Scheinwerfer betriebsbereit und startet in der Betriebsart, die zuvor aktiviert war. - Page 51 • Fast Access Feature: Um die Menüführung zu vereinfachen, verfügt das Gerät über eine intel- ligente Menüstruktur, die es ermöglicht, auf Menüpunkte und Untermenüpunkte, die zuletzt ausgewählt waren, direkt zugreifen zu können. 1. Durch gleichzeitiges Drücken auf MODE und ENTER gelangen Sie direkt zu dem Untermenüpunkt, der zuletzt editiert wurde und können den entsprechenden Wert augenblicklich nach Wunsch ändern (DMX-Startadresse und alle Betriebsarten).
- Page 52 W-DMX™ 1. Zum Koppeln mit W-DMX™ kompatiblen Transmittern aktivieren Sie W-DMX™ in den Geräteeinstellungen (Settings -> Wireless Setting -> W-DMX On Off -> On) und setzen das W-DMX™-Modul zurück (Receive Reset -> Yes). Starten Sie den Kopplungsprozess, wie in der Bedienungsanleitung des W-DMX™...
- Page 53 DMX-STARTADRESSE EINSTELLEN (DMX Address) Durch Drücken auf MODE gelangen Sie in das Auswahl-Menü. Mit Hilfe der Bedienfelder UP und DOWN wählen Sie nun den Menü-Punkt „DMX Address“ aus (Pfeil beachten) und bestätigen mit ENTER. Im Display wird nun ein dreistelliges Ziffernfeld angezeigt und Sie können mit Hilfe von UP und DOWN die gewünschte DMX-Startadresse einstellen.
- Page 54 AUTO-BETRIEBSART (Program 1 – Program 6) Die 6 verschiedenen Auto-Programme bestehen jeweils aus fest programmierten Farbwechsel- sequenzen, Helligkeit und Laufgeschwindigkeit sind separat einstellbar. Wählen Sie, wie zuvor unter Punkt „STAND-ALONE-BETRIEBSART EINSTELLEN“ beschrieben, die Auto-Betriebsart aus und bestätigen die Eingabe mit ENTER. Wählen Sie nun mit Hilfe von UP und DOWN eines der 6 Auto-Programme aus (Pfeil beachten) und bestätigen mit ENTER.
- Page 55 gewünschten Wert von 000 bis 255 einstellen. Bestätigen Sie mit ENTER. Drücken Sie 3x auf MODE, um zur Hauptanzeige zurückzugelangen (Mode Static). ----------- Stand Alone ----------- ---------------- Static ---------------- Auto Dimmer <255> Mode Color Macro Strobe <255> Static Static <255> Green <255>...
- Page 56 TIMER-FUNKTION (Timer) Die Timer-Funktion ermöglicht die zeitgesteuerte Kontrolle der Stand-Alone-Betriebsarten „Color Macro“, „Static“, „Tunable White“, und „User Color“ in der Art, dass die Einblendzeit (Fade In) von 0 bis 60 Minuten, die Haltezeit (Dwell Time) von 1 bis 24 Stunden und die Ausblendzeit (Fade Out) von 0 bis 60 Minuten eingestellt werden kann.
- Page 57 GERÄTEEINSTELLUNGEN (Settings) Durch Drücken auf MODE gelangen Sie in das Auswahl-Menü. Mit Hilfe der Bedienfelder UP und DOWN wählen Sie nun den Menü-Punkt „Settings“ aus (Pfeil beachten) und bestätigen mit ENTER. ---------------- Menu ---------------- DMX Address DMX Mode Stand Alone Slave Settings System Info...
- Page 58 Display = Display-Beleuchtung On Permanent an Backlight Deaktivierung nach ca. 1 Minute Inaktivität DMX Fail = Betriebszustand bei Hold Letzter Befehl wird gehalten DMX-Signal-Unter- Blackout Aktiviert Blackout brechung Full On Alle LEDs 100% Output Stand Scheinwerfer wechselt in die zuletzt aus- Alone gewählte Stand-Alone-Betriebsart AC Failure...
- Page 59 Color = Farbkalibrierung R, G, B und W mit Maximalwert 255 Calibration (Wenn eine der DMX-Betriebsarten User Individuelle Anpassung von R, G, B, und mit Factory-Kalibrie- Calibra- W mit Werten von jeweils 000 bis 255 rung aktiviert ist, tion (betriebsartübergreifend) kann keine andere Factory Werksseitige Kalibrierung von R, G, B und W...
- Page 60 AKKULAUFZEIT (Runtime) Die Akkulaufzeit kann, bei entsprechend reduzierter Helligkeit, auf bis zu 24 Stunden verlängert werden (siehe Tabelle Settings). Die Laufzeit ist dabei auf Full On und 100% Akkuladestatus berechnet. Die Laufzeit wird erheblich verlängert, wenn nicht alle Farben Rot, Grün, Blau und Weiß aktiviert werden (Full On), sondern beispielsweise nur Rot.
- Page 61 MANUELLE SPERR-FUNKTION Neben der Möglichkeit, den Scheinwerfer automatisch vor versehentlicher und unbefugter Bedienung zu schützen (siehe „Settings“ – „Autolock“), kann die Sperrung der Bedienelemente auch manuell erfolgen. Halten Sie für ca. 5 Sekunden die Bedienfelder UP und DOWN gleichzeitig gedrückt. Bei dem Versuch, Einstellungsänderungen vorzunehmen, wird nun „Locked!“ im Display angezeigt und eine Änderung der Einstellungen des Scheinwerfers über die Bedienfelder ist nicht mehr möglich.
- Page 62 IR FERNBEDIENUNG Richten Sie die Infrarot-Fernbedienung in Sichtverbindung direkt auf den auf der Vorderseite des Strahlers verbauten Infrarot-Sensor. Die maximale Reichweite beträgt ca. 8 Meter. In der DMX- und der Slave-Betriebsart sind die Funktionen der Fernbedienung deaktiviert. Batterie für die IR Fernbedienung = CR2025. Die Blackout-Taste dient dazu, alle LEDs abzu schalten, unabhängig davon, welche von der Fernbedienung kontrollierten...
-
Page 63: Aufstellung Und Montage
AUFSTELLUNG UND MONTAGE Dank der integrierten Kunststofffüße kann der Scheinwerfer an einer geeigneten Stelle auf eine ebene Fläche gestellt werden. Die Montage an einer Traverse erfolgt mit Hilfe eines Omega- Bügels, der in der Mitte der Gerätebasis befestigt wird (A). Ein Omega-Bügel ist im Lieferumfang enthalten, geeignete Traversenklemmen sind optional erhältlich. - Page 64 PFLEGE (vom Anwender durchführbar) WARNUNG! Vor jeglichen Pflegemaßnahmen müssen die Spannungsversorgung und sofern möglich sämtliche Geräteverbindungen getrennt werden. HINWEIS! Unsachgemäße Pflege kann zu Beeinträchtigung des Gerätes führen bis hin zur Zerstörung. 1. Gehäuseoberflächen müssen mit einem sauberen, feuchten Tuch gereinigt werden. Dabei ist darauf zu achten, dass keine Feuchtigkeit in das Gerät eindringen kann.
-
Page 65: Optionales Zubehör
OPTIONALES ZUBEHÖR CLZW300B2004B CLZW300B200SMLSD20 Torblende – Werkzeuglose Montage durch ge- 25° Streuscheibe federten Sperrbolzen, Sicherungsseil inklusive Werkzeuglose Montage durch SNAPMAG ® Technologie CLZW300B200SMLSD40 CLZW300B200SMLSD100 45° Streuscheibe 100° Streuscheibe Werkzeuglose Montage durch SNAPMAG Werkzeuglose Montage durch SNAPMAG ® ® Technologie Technologie CLZW300B200SMLSD6010 60°... -
Page 66: Dmx Technik
DMX TECHNIK DMX-512 DMX (Digital Multiplex) ist die Bezeichnung für ein universelles Über- tragungsprotokoll für die Kommunikation zwischen entsprechenden Geräten und Controllern. Ein DMX-Controller sendet DMX-Daten an das/die angeschlossene(n) DMX-Gerät(e). Die DMX-Datenübertra- gung erfolgt stets als serieller Datenstrom, der über die an jedem DMX-fähigen Gerät vorhandenen DMX IN- und DMX OUT-Anschlüsse (XLR-Steckverbinder) von einem angeschlossenen Gerät an das nächste weitergeleitet wird, wobei die maximale Anzahl der Geräte 32 nicht überschreiten darf. - Page 67 Steckerbelegung: DMX-Kabel mit 3-Pol XLR-Steckern: DMX-Kabel mit 5-Pol XLR-Steckern (Pin 4 und 5 sind nicht belegt.): Shield Shield DMX-ABSCHLUSSSTECKER (TERMINATOR): Um Systemfehler zu vermeiden, ist das letzte Gerät einer DMX-Kette mit einem Abschlusswider- stand zu bestücken (120 Ohm, 1/4 Watt). 3-Pol XLR-Stecker mit Abschlusswiderstand: K3DMXT3 5-Pol XLR-Stecker mit Abschlusswiderstand: K3DMXT5 Steckerbelegung:...
-
Page 68: Technische Daten
TECHNISCHE DATEN ARTIKELNUMMER: CLZB200 Produktart: LED Akku Wash Light Typ: Outdoor Scheinwerfer Farbspektrum LED: RGBW LED Anzahl: LED Typ: 15 W LED PWM Frequenz: 800 Hz, 1200 Hz, 2000 Hz, 3600 Hz, 12 kHz, 25 kHz (einstellbar) Abstrahlwinkel: 21° (40° Field) DMX-Eingang: 5-Pol XLR männlich, IP65 DMX-Ausgang:... - Page 69 ARTIKELNUMMER: CLZB200 Akku Ladezyklen: 300 Ladezyklen 0% -> 100% ≅ 70% Kapazität Beleuchtungsstärke 22100 lx (@ 1m, ohne Streu- scheibe): Lichtstrom (RGBW): 4500 lm Umgebungstempe- -15°C – +40°C ratur bei Betrieb mit internem Akku: Umgebungstempe- 0°C – +40°C ratur bei Betrieb mit Netzspannung: Gehäusematerial: Metall...
-
Page 70: Ip-Schutzart
IP-SCHUTZART 1. Eine IP-Schutzart gibt ausschließlich den Schutz gegen feste Gegenstände, sowie Wasser wie- der. Sie beschreibt keine allgemeine Witterungsbeständigkeit, wie beispielsweise Schutz gegen UV-Strahlung und Temperatureinflüsse etc.. 2. Die erste Kennziffer bezeichnet den Schutz gegen Staub, feste Gegenstände und Berührung: IP2X Geschützt gegen feste Fremdkörper mit Durchmesser ≥... -
Page 71: Entsorgung
ENTSORGUNG Verpackung: 1. Verpackungen können über die üblichen Entsorgungswege dem Wertstoffkreislauf zugeführt werden. 2. Bitte trennen Sie die Verpackung entsprechend der Entsorgungsgesetze und Wertstoffverordnungen in Ihrem Land. Gerät: 1. Dieses Gerät unterliegt der europäischen Richtlinie für Elektro- und Elektronik-Altgeräte in der jeweils geltenden aktuellen Fassung. WEEE-Richtlinie Waste Electrical and Electronical Equipment. -
Page 72: Herstellererklärungen
HERSTELLERERKLÄRUNGEN HERSTELLERGARANTIE & HAFTUNGSBESCHRÄNKUNG Adam Hall GmbH, Adam-Hall-Str. 1, D-61267 Neu Anspach / E-Mail Info@adamhall.com / +49 (0)6081 / 9419-0. Unsere aktuellen Garantiebedingungen und Haftungsbeschränkung finden Sie unter: https://cdn-shop.adamhall.com/media/pdf/Manufacturers-Declarations-CAMEO_DE_EN_ES_FR.pdf. Im Servicefall wenden Sie sich an Ihren Vertriebspartner. CE-KONFORMITÄT Hiermit erklärt die Adam Hall GmbH, dass dieses Produkt folgender Richtlinie entspricht (soweit zutreffend): Niederspannungsrichtlinie (2014/35/EU) EMV-Richtlinie (2014/30/EU) -
Page 73: Francais
Cet appareil a été conçu et produit suivant des exigences de qualité très strictes pour fonctionner pendant de nombreuses années. Veuillez lire attentivement ce manuel d’utilisation pour pouvoir utiliser rapidement et de manière optimale votre nouveau produit Cameo Light. Vous trouverez de plus amples informations sur Cameo Light sur notre site Web CAMEOLIGHT.COM. -
Page 74: Consignes De Sécurité
Ce symbole indique un danger susceptible de provoquer une décharge électrique. Ce symbole indique une zone ou une situation dangereuse. Ce symbole indique des dangers liés à des surfaces chaudes. Ce symbole signale des dangers liés à des sources lumineuses intenses. Ce symbole indique que l’appareil ne contient aucune pièce remplaçable par l’utilisateur. - Page 75 AVERTISSEMENT : 1. L’appareil ne doit pas être mis en service s’il présente des dommages apparents. 2. L’appareil ne doit être installé que lorsqu’il est hors tension. 3. Si le câble réseau de l’appareil est endommagé, l’appareil ne doit pas être mis en service.
- Page 76 AVERTISSEMENT : 1. Utilisez uniquement cet appareil conformément à l’usage prévu. 2. Utilisez uniquement cet appareil avec les accessoires recommandés et prévus par le fabricant. 3. Lors de l’installation, veillez à respecter les prescriptions de sécurité en vigueur dans votre pays. 4.
- Page 77 ATTENTION : 1. N’installez et n’utilisez pas cet appareil à proximité de radiateurs, d’accumulateurs thermiques, de fours ou d’autres sources de chaleur. Veillez à installer l’appareil de façon à assurer en permanence un refroidissement suffisant et à éviter une surchauffe. 2. Ne placez pas de sources d’ignition à proximité de l’appareil, telles que des bou- gies allumées.
- Page 78 TRANSMISSION DU SIGNAL ET COMMANDE PAR RADIO (par ex. W-DMX ou systèmes audio sans fil, Bluetooth) : La qualité et la performance des transmissions de signaux sans fil dépendent généra- lement des conditions ambiantes. Les éléments suivants ont par exemple une influence sur la portée et la stabilité des signaux : •...
- Page 79 TRANSMISSION DE SIGNAL PAR W-DMX AVERTISSEMENT : En règle générale, la transmission DMX sans fil ne doit pas être utilisée pour des applications présentant des facteurs de sécurité susceptibles d’en- traîner des dommages corporels ou matériels en cas de défaillance. Ceci s’applique en particulier aux structures de scènes ou de traverses mobiles, aux moteurs/dispositifs de levage commandés par DMX ou aux dispositifs de levage destinés au fonctionnement de monte-plateaux, de systèmes hydrauliques ou de composants mobiles similaires fonctionnant en mode DMX.
- Page 80 APPAREILS AVEC BATTERIE, ACCUMULATEURS ET CHARGEURS DANGER : 1. Gardez l‘appareil avec batterie loin des sources de chaleur et ne l‘exposez pas directement aux rayons du soleil. Ne le placez pas sur ou dans des appareils de chauffage tels que des micro-ondes, des fours ou des radiateurs. Les batteries peuvent exploser en cas de surchauffe.
- Page 81 LES APPAREILS DONT L'UTILISATEUR PRÉVOIT LE REMPLACEMENT DES PILES OU DE L'ACCU (p. ex. télécommande) DANGER : Respectez impérativement la fiche technique du fabricant des piles ou des accumulateurs utilisés ! 1. Les piles et les accumulateurs doivent être tenus hors de portée des personnes (y compris les enfants) dont les capacités physiques, sensorielles ou mentales sont réduites.
-
Page 82: Charger, Utiliser Et Stocker Les Accumulateurs
CHARGER, UTILISER ET STOCKER LES ACCUMULATEURS 1. Pour charger des batteries fixes, raccordez l‘appareil à l‘alimentation en tension prévue. Veuillez noter que la fonction de charge n‘est pas désactivée par l‘inter- rupteur principal de l‘appareil sur tous les appareils. 2. Le temps de chargement pour une charge complète de la batterie est indiqué dans les caractéristiques techniques. -
Page 83: Remarques Concernant Les Appareils D'extérieur Mobiles
REMARQUES CONCERNANT LES APPAREILS D’EXTÉRIEUR MOBILES 1. Fonctionnement temporaire ! L’équipement événementiel est conçu uniquement pour une utilisation temporaire. 2. Un fonctionnement continu ou un montage durable, en particulier à l’extérieur, peut altérer le fonctionnement, les surfaces et les joints, et accélérer la fatigue des matériaux. -
Page 84: Anschlüsse, Bedien- Und Anzeigeelemente
Embase secteur de sortie en IP65 avec cache en caoutchouc. Permet d’alimenter d’autres projec- teurs CAMEO. S’assurer que la consommation totale de tous les appareils connectés ne dépasse pas la valeur en ampères (A) indiquée sur l’appareil (mettre systématiquement le cache étanche en caoutchouc si raccord non utilisé). - Page 85 (« Welcome to Cameo »), la référence du modèle et la version du logiciel s’affichent successivement à l’écran. Lorsque l’interrupteur est poussé vers le bas, le projecteur est en mode Standby. La batterie est en cours de chargement pendant les deux états de fonctionnement à...
-
Page 86: Mode D'emploi
Standby soit poussé vers le bas, pendant la phase de démarrage, un message de bienvenue (« Welcome to Cameo »), la référence du modèle et la version du logiciel s’affichent successivement à l’écran. À l’issue de cette phase, le projecteur est opérationnel et passe au mode précédemment activé. - Page 87 NIVEAU DE CHARGE DE LA BATTERIE EN MODE STANDBY Pour charger la batterie interne, brancher le projecteur sur le secteur en utilisant le câble d’ali- mentation fourni. Le niveau de charge de la batterie est indiqué à l’écran par le pictogramme de la batterie.
- Page 88 ÉTAT W-DMX™ W-DMX™ W-DMX ™ com- W-DMX ™ com- W-DMX ™ W-DMX ™ en W-DMX ™ et W-DMX™ me récepteur me récepteur désactivé dispositif activé tant qu‘appareil mode de trans- et mode de activé, activé et dispo- et couplé, activé et couplé mission G3 transmission pas couplé...
- Page 89 RÉGLAGE DU MODE DE FONCTIONNEMENT STANDALONE Appuyer sur MODE pour accéder au menu de sélection. Utiliser ensuite les touches UP et DOWN pour sélectionner l’option de menu « Stand Alone » (voir flèche), puis confirmer en appuyant sur ENTER. Ce sous-menu permet de sélectionner les modes de fonctionnement Standalone « Auto », « Color Macro », «...
- Page 90 MACROS DE COULEUR (Color Macro) 15 macros de couleur différentes sont préconfigurées. Conformément à la procédure décrite à la section RÉGLAGE DU MODE DE FONCTIONNEMENT, sélectionner l’option de menu « Color Macro ». Pour valider la sélection, appuyer sur ENTER. Choisir la couleur voulue (preset) à l’aide des touches UP et DOWN (voir flèche).
- Page 91 TEMPÉRATURE DE COULEUR (Tunable White) Le mode Température de couleur permet de définir une température de couleur allant de blanc chaud à blanc froid (CCT), ainsi que la luminosité (Dim) directement sur l’appareil. Conformément à la procédure décrite à la section « RÉGLAGE DU MODE DE FONCTIONNEMENT STANDALONE », sélectionnez le mode température de couleur et confirmer la saisie en appuyant sur ENTER.
- Page 92 FONCTION TIMER (Temporisation) La fonction de temporisation permet le contrôle temporisé des modes de fonctionnement Standalone (autonomes) « Color Macro », « Static », « Tunable White », et « User Color » de sorte que le temps d’affichage en fondu (Fade In) soit réglable de 0 à 60 minutes, la durée de temporisation (Dwell Time) de 1 à...
- Page 93 PARAMÈTRES DE L’APPAREIL (Settings) Appuyer sur MODE pour accéder au menu de sélection. Utilisez les touches UP et DOWN pour sé- lectionner dans le menu l’élément « Settings » (voir flèche) et appuyez sur ENTER pour confirmer. ---------------- Menu ---------------- Adresse DMX DMX Mode Stand Alone Slave...
- Page 94 Display = Inversion de l'écran Rotation à 180° des éléments affichés à Reverse l’écran (par ex. en cas de montage tête en bas). Pas de rotation de l’affichage Display = Éclairage de l’écran Allumé en permanence Backlight Désactivé au bout d’env. 1 minute d'inactivité...
- Page 95 Color = Calibrage des couleurs R, G, B, W avec une valeur maximale de Calibration (Si l’un des modes de fonctionnement User Calibrage spécifique des couleurs. Ré- DMX est activé avec Calibration glage de la luminosité des 4 groupes de le calibrage d’usine, LED RGBW entre 000 et 255 (concerne un autre calibrage ne...
- Page 96 AUTONOMIE DE LA BATTERIE (Runtime) L’autonomie de la batterie peut être prolongée jusqu’à 24 heures en réduisant la luminosité (voir tableau Settings). Le calcul de l’autonomie est basé sur Full On et un niveau de charge de la bat- terie de 100 %. L’autonomie est considérablement prolongée lorsqu’une seule couleur est activée, par exemple le rouge, au lieu de toutes les couleurs (rouge, vert, bleu et blanc : Full On).
- Page 97 FONCTION DE VERROUILLAGE MANUELLE En plus de la fonction de verrouillage automatique, qui permet de protéger le projecteur contre une utilisation par une personne non autorisée (cf. « Settings » - « Autolock »), l’appareil offre également la possibilité de verrouiller manuellement les éléments de commande. Pour cela, appuyer simultanément sur les touches de fonction UP et DOWN pendant env.
-
Page 98: Télécommande Infrarouge
TÉLÉCOMMANDE INFRAROUGE Diriger la télécommande infrarouge en contact visuel direct vers le capteur infrarouge situé sur la face avant du projecteur. Sa portée maximale est d’environ 8 mètres. En mode DMX et Slave, les fonctions de pilotage par télécommande infrarouge sont désactivées. Pile de la télécommande infrarouge = CR2025. -
Page 99: Installation Et Montage
ATTENTION : 1. Lorsque vous insérez les piles et les accumulateurs, veillez à respecter la polarité (voir les illustrations dans le compartiment des piles ou sur le boîtier). 2. Vérifiez que les piles et les accumulateurs ne sont pas endommagés et n'utilisez pas de piles ou d'accumulateurs endommagés ! INSTALLATION ET MONTAGE Grâce aux pieds en plastique intégrés, le projecteur peut être posé... -
Page 100: Entretien, Maintenance Et Réparation
ENTRETIEN, MAINTENANCE ET RÉPARATION Pour garantir le bon fonctionnement de l’appareil à long terme, l’entretien et, si nécessaire, la maintenance doivent être effectués régulièrement. Les besoins en entretien et en maintenance dépendent de l’intensité et de l’environnement d’utilisation. Nous recommandons de procéder à un contrôle visuel avant chaque mise en service. En outre, nous recommandons de prendre toutes les mesures d’entretien pertinentes indiquées ci-dessous toutes les 500 heures de fonctionnement ou, en cas d’intensité... - Page 101 MAINTENANCE ET RÉPARATION (uniquement par du personnel qualifié) DANGER ! L’appareil renferme des composants sous tension. Même après la décon- nexion du réseau, il peut subsister une tension résiduelle dans l’appareil, par ex. à cause de condensateurs chargés. REMARQUE ! L‘appareil ne contient aucun module à entretenir par l‘utilisateur. REMARQUE ! Les travaux de maintenance et de réparation ne doivent être effectués que par du personnel spécialisé...
-
Page 102: Accessoires Disponibles En Option
ACCESSOIRES DISPONIBLES EN OPTION CLZW300B2004B CLZW300B200SMLSD20 Volet coupe-flux - Montage sans outil à l’aide Diffuseur 25° de goupilles de blocage à ressort, câble de Montage sans outil grâce à la technologie retenue inclus SNAPMAG ® CLZW300B200SMLSD40 CLZW300B200SMLSD100 Diffuseur 45° Diffuseur 100° Montage sans outil grâce à... -
Page 103: Technique Dmx
TECHNIQUE DMX DMX-512 Le terme DMX (Digital Multiplex) désigne un protocole de trans- port universel permettant la communication entre des appareils et des contrôleurs à ce format. Un contrôleur DMX envoie des données DMX aux appareils DMX qui lui sont connectés. Les données DMX sont transportées sous forme d'un flux série, renvoyé... - Page 104 Assignation des contacts Câble DMX avec connecteurs XLR 3 points : Câble DMX avec connecteurs XLR 5 points (les points 4 et 5 ne sont pas câblés): Shield Shield Pour éviter tout dysfonctionnement, le dernier appareil d'une chaîne DMX doit être équipé d'une résistance de terminaison (120 Ohms, 1/4 Watt).
-
Page 105: Caractéristiques Techniques
CARACTÉRISTIQUES TECHNIQUES NUMÉRO D‘ARTICLE : CLZB200 Type de produit : Batterie LED Wash Light Type Projecteurs d'extérieur Spectre de couleurs LED : RGBW Nombre de LED : Type de LED : 15 W LED Fréquence PWM : 800 Hz, 1200 Hz, 2000 Hz, 3600 Hz, 12 kHz, 25 kHz (réglable) Angle de rayonnement : 21°... - Page 106 NUMÉRO D‘ARTICLE : CLZB200 Autonomie maximale de 24 h la batterie : Temps de charge de la batterie : Dispositif de protection protection contre les surcharges et les décharges profondes de la batterie : Cycles de charge de la 300 cycles de charge 0% -> 100% ≅ 70% de capacité batterie : Intensité...
-
Page 107: Explications Relatives À L'indice De Protection Ip
EXPLICATIONS RELATIVES À L’INDICE DE PROTECTION IP 1. L’indice de protection IP est uniquement le reflet de la protection contre les corps solides et l’eau. Il ne décrit pas la résistance générale aux intempéries, comme la protection contre les rayons UV et les effets de la température, etc. 2. -
Page 108: Élimination
ÉLIMINATION Emballage : 1. Les emballages peuvent être introduits dans le circuit de recyclage par les voies de collecte habituelles. 2. Triez l’emballage conformément à la législation sur l’élimination des déchets et à la réglementation sur les matériaux recyclables en vigueur dans votre pays. Appareil : 1. -
Page 109: Déclarations Du Fabricant
DÉCLARATIONS DU FABRICANT GARANTIE DU FABRICANT ET LIMITATION DE RESPONSABILITÉ Adam Hall GmbH, Adam-Hall-Str. 1, D-61267 Neu Anspach / E-mail Info@adamhall.com / +49 (0)6081 / 9419-0. Vous trouverez nos conditions de garantie et nos clauses de limitation de responsabilité actuelles sur Internet à... -
Page 110: Español
Este equipo ha sido desarrollado y fabricado según estrictos criterios de calidad con el fin de garantizar muchos años de funcionamiento perfecto. Lee atentamente el presente manual de instrucciones para poder usar rápidamente y de forma óptima tu nuevo producto de Cameo Light. Puedes encontrar más información sobre Cameo Light en nuestro sitio web CAMEOLIGHT.COM. -
Page 111: Instrucciones De Seguridad
Este símbolo indica peligros que pueden causar una descarga eléctrica. Este símbolo indica puntos de peligro o situaciones peligrosas. Este símbolo indica peligros por la existencia de superficies calientes. Este símbolo indica peligros debido a fuentes de luz intensas. Este símbolo indica que en el equipo no hay piezas que pueda sustituir el usuario. Este símbolo identifica información complementaria sobre el uso del producto. - Page 112 ATENCIÓN: 1. No poner en marcha el equipo si ha estado sometido a fuertes fluctuaciones de temperatura (por ejemplo, tras su transporte). La humedad y el agua condensada pueden dañar el equipo. Encender el equipo únicamente después de que su tem- peratura haya alcanzado la temperatura ambiente.
- Page 113 ADVERTENCIA: 1. Utilizar el equipo únicamente de la forma prevista. 2. Utilizar el equipo solo con los accesorios previstos y recomendados por el fabrican- 3. Durante la instalación, hay que tener en cuenta los reglamentos de seguridad vigen- tes en tu país. 4.
- Page 114 ATENCIÓN: 1. No instalar ni poner a funcionar el equipo cerca de radiadores, acumuladores tér- micos, hornos u otras fuentes de calor. Asegurarse de que el equipo siempre esté instalado de modo que reciba suficiente refrigeración y no pueda sobrecalentarse. 2.
- Page 115 TRANSMISIÓN Y CONTROL DE SEÑALES POR RADIO (por ejemplo, sistemas de radio W-DMX o de audio, Bluetooth): La calidad y el rendimiento de las transmisiones inalámbricas de señales dependen, por lo general, de las condiciones ambientales. Elementos que influyen en el alcance y la estabilidad de la señal: •...
- Page 116 DISPOSITIVOS CON BATERÍA, PILAS Y CARGADORES PELIGRO: 1. Mantenga el dispositivo con la batería lejos de fuentes de calor y no lo exponga a la luz solar directa. No lo coloques sobre o dentro de aparatos de calefacción como microondas, hornos o radiadores. Las baterías pueden explotar si se sobrecalientan.
- Page 117 DISPOSITIVOS CON SUSTITUCIÓN DE PILAS O ACUMULADORES PROPORCIONA- DA POR EL USUARIO (p. e., mando a distancia) PELIGRO: Asegúrese de observar la hoja de datos del fabricante de las pilas o ba- terías utilizadas. 1. Las baterías y pilas recargables deben mantenerse fuera del alcance de las perso- nas (incluidos los niños) con capacidades físicas, sensoriales o mentales reducidas.
-
Page 118: Carga, Funcionamiento Y Almacenamiento De Las Baterías
CARGA, FUNCIONAMIENTO Y ALMACENAMIENTO DE LAS BATERÍAS 1. Para cargar las baterías instaladas permanentemente, conecte la unidad a la fuente de alimentación suministrada. Tenga en cuenta que la función de carga no se desactiva con el interruptor principal de la unidad en todas las unidades. 2. -
Page 119: Indicaciones Para Equipos Portátiles De Exterior
INDICACIONES PARA EQUIPOS PORTÁTILES DE EXTERIOR 1. Funcionamiento temporal. En principio, los equipos para eventos están diseñados solo para un funcionamiento temporal. 2. El funcionamiento continuo o la instalación permanente, sobre todo en exteriores, puede perjudicar el funcionamiento, las superficies y las juntas, así como acelerar el desgaste del material. -
Page 120: Conexiones, Elementos De Manejo Y Elementos De Visualización
Toma de salida de alimentación IP65 con tapa de sellado de goma. Sirve para suministrar corriente eléctrica a otros focos Cameo. Asegúrese de que el consumo de corriente total de todos los dispositivos conectados no supere el valor indicado en amperios (A) sobre el dispositivo (mientras no se vaya a usar, guardarlo siempre cerrado con la tapa de sellado de goma). - Page 121 «Welco- me to Cameo», la denominación del modelo y la versión del software. Si se deja el interruptor sin pulsar hacia abajo, el foco se encontrará en modo standby. Durante ambos estados operativos, la batería siempre empezará...
-
Page 122: Funcionamiento
«Wel- come to Cameo», la denominación del modelo y la versión del software. Tras este procedimien- to, el foco estará listo para funcionar y se activará en el último modo operativo empleado. - Page 123 ESTADO DE CARGA DE LA BATERÍA EN EL MODO STANDBY Para cargar la batería interna, conecte el foco a la toma de corriente mediante el cable de alimen- tación suministrado. De esa forma, el estado de carga de la batería se mostrará en la pantalla mediante el símbolo de la batería.
- Page 124 ESTADO W-DMX™ W-DMX™ W-DMX ™ W-DMX ™ W-DMX ™ W-DMX ™ W-DMX ™ y W-DMX ™ y desactivado, como receptor como receptor dispositivo como un dispo- modo de trans- modo de trans- activado, activado y activado y sitivo revelador misión G3 misión G4S no acoplado acoplado al...
- Page 125 CONFIGURAR EL MODO OPERATIVO AUTÓNOMO Pulsando MODE accederá al menú de selección. Ahora, utilice los botones UP y DOWN para seleccionar la opción de menú «Stand Alone» (indicada por la flecha) y confirme la selección con ENTER. A continuación, en el submenú seleccione con los botones UP y DOWN el modo operativo autónomo: «Auto», «Color Macro», «Static», «Tunable White»...
- Page 126 MACROS DE COLOR (Color Macro) Están disponibles 15 macros de color distintas como ajustes predeterminados. Tal como se describe en el apartado CONFIGURAR EL MODO OPERATIVO anterior, seleccione la opción del menú «Color Macro» y confirme con ENTER. Ahora, seleccione mediante los botones UP y DOWN el color deseado como ajuste predeterminado (opción marcada más abajo) y confirme con ENTER (Color Off = completamente apagado).
- Page 127 TEMPERATURA DE COLOR (Tunable White) El modo de temperatura de color permite ajustar la luz directamente en el equipo con una temperatura de color que va del blanco cálido al blanco frío (CCT) y el brillo (Dim). Tal como se describe en el apar- tado «CONFIGURAR EL MODO OPERATIVO AUTÓNOMO»...
- Page 128 FUNCIÓN DE TEMPORIZADOR (Timer) La función de temporizador permite el control por tiempo de los modos operativos autónomos «Color Macro», «Static», «Tunable White» y «User Color» ajustando el tiempo de aparición (Fade In) de 0 a 60 minutos, el tiempo de permanencia (Dwell Time) de 1 a 24 horas y el tiempo de desaparición (Fade Out) de 0 a 60 minutos.
- Page 129 CONFIGURACIÓN DEL DISPOSITIVO (Settings) Pulsando MODE accederá al menú de selección. Ahora, utilice los botones UP y DOWN para selec- cionar la opción del menú «Settings» (indicada por la flecha) y confirme la selección con ENTER. ---------------- Menu ---------------- DMX Address DMX Mode Stand Alone Slave...
- Page 130 Display = Dar la vuelta a la Giro de 180° de la imagen en pantalla Reverse pantalla (por ej. para montajes en altura) Giro de la imagen en pantalla desac- tivado Display = Retroiluminación de Permanentemente activada Backlight la pantalla Desactivación tras aproximadamente 1 minuto sin actividad DMX Fail...
- Page 131 Color = Calibración de R, G, B, W con valor máximo 225 Calibration colores User calibra- Calibración individual de colores. (Si uno de los modos tion Configuración del brillo común a los operativos DMX modos operativos de los 4 grupos de está...
- Page 132 AUTONOMÍA DE LA BATERÍA (Runtime) La autonomía de la batería se puede alargar hasta una duración de 24 horas con el brillo reducido (véase la tabla Settings). La autonomía indicada hace referencia a la batería en Full On y estando al 100 % de carga.
- Page 133 FUNCIÓN DE BLOQUEO MANUAL Además de existir la posibilidad de proteger el foco automáticamente frente a usos accidentales y no autorizados (véase «Settings» - «Autolock»), también pueden bloquearse manualmente los elemen- tos de manejo. Mantenga pulsados a la vez los botones UP y DOWN durante unos 5 segundos. Si se intenta modificar la configuración, en la pantalla aparecerá...
-
Page 134: Mando A Distancia Por Infrarrojos
MANDO A DISTANCIA POR INFRARROJOS Oriente el mando a distancia por infrarrojos de manera que esté en la línea de visión directa con la parte delantera del sensor de infrarrojos incorporado en el proyector. El rango de alcance máximo es de unos 8 metros. -
Page 135: Instalación Y Montaje
INSTALACIÓN Y MONTAJE Gracias a los pies de plástico integrados, el foco puede colocarse en una superficie plana en un lugar adecuado. El montaje en un truss se realiza con la ayuda de un soporte omega, que se fija en el centro de la base de la unidad (A). En el suministro se incluye un soporte omega; opcional- mente se pueden adquirir abrazaderas adecuadas para cerchas. - Page 136 CUIDADOS (que puede realizar el usuario) ¡ADVERTENCIA! Antes de realizar cualquier tarea para mantener cuidado el equi- po, desconectar la alimentación eléctrica y, si es posible, todas las conexiones del equipo. ¡AVISO! Un cuidado inadecuado puede provocar daños en el equipo e incluso su destrucción.
-
Page 137: Accesorios Opcionales
ACCESORIOS OPCIONALES CLZW300B2004B CLZW300B200SMLSD20 Visera giratoria: montaje sin herramientas Difusor de 25° mediante pernos de bloqueo con muelle, cable Montaje sin herramientas mediante la de seguridad incluido tecnología SNAPMAG ® CLZW300B200SMLSD40 CLZW300B200SMLSD100 Difusor de 45° Difusor de 100° Montaje sin herramientas mediante la Montaje sin herramientas mediante la tecnología SNAPMAG tecnología SNAPMAG... -
Page 138: Tecnología Dmx
TECNOLOGÍA DMX DMX-512 DMX (Digital Multiplex) es el nombre de un protocolo universal utilizado como medio de comunicación entre dispositivos y controladores. El controlador DMX envía datos DMX a los equipos DMX conectados. Los datos DMX se envían como datos serie que se transmiten de equipo a equipo a través de los conectores XLR «DMX IN»... - Page 139 Asignación de pines: Cable DMX con XLR de 3 pines: Cable DMX con XLR de 5 pines (los pines 4 y 5 no se utilizan): Shield Shield TERMINACIÓN DMX (TERMINADOR): Para evitar errores de sistema, debe conectarse una resistencia de terminación (120 ohmios, 1/4 W) en el último equipo de la cadena DMX.
-
Page 140: Datos Técnicos
DATOS TÉCNICOS NÚMERO DE ARTÍCULO: CLZB200 Tipo de producto: Luz LED de lavado a pilas Tipo: Foco exterior Espectro de color LED: RGBW Cantidad de LEDs: Tipo de LED: 15 W Frecuencia PWM del 800 Hz, 1200 Hz, 2000 Hz, 3600 Hz, 12 kHz, 25 kHz (ajustable) LED: Ángulo del rayo: 21°... - Page 141 Tipo de batería: Batería de iones de litio Máxima duración de la 24 h batería: Tiempo de carga de la batería: Dispositivo de protec- Protección contra la sobrecarga y la descarga profunda ción de la batería: Ciclos de carga de la 300 ciclos de carga 0% ->...
-
Page 142: Explicación Sobre La Clase De Protección Ip
EXPLICACIÓN SOBRE LA CLASE DE PROTECCIÓN IP 1. La clase de protección IP representa exclusivamente la protección contra objetos sólidos, así como contra el agua. No representa una resistencia general a las condiciones ambientales como, por ejemplo, protección contra la radiación UV o los efectos de la temperatura, etc. 2. -
Page 143: Eliminación
ELIMINACIÓN Embalaje: 1. Los embalajes se pueden llevar a reciclar a través de las vías de eliminación habituales. 2. Separa el embalaje conforme a las leyes de eliminación de residuos y las norma- tivas sobre reciclaje de tu país. Equipo: 1. -
Page 144: Declaraciones Del Fabricante
DECLARACIONES DEL FABRICANTE GARANTÍA DEL FABRICANTE Y EXENCIÓN DE RESPONSABILIDAD Adam Hall GmbH, Adam-Hall-Str. 1, D-61267 Neu Anspach (Alemania) / Correo electrónico: info@adamhall.com / +49 (0)6081 / 9419-0. Encontrarás las condiciones actuales de la garantía y el texto sobre la exención de responsabili- dad en la siguiente página web: https://cdn-shop.adamhall.com/media/pdf/Manufacturers-Declarations-CAMEO_DE_EN_ES_FR.pdf. -
Page 145: Polski
Należy uważnie przeczytać niniejszą instruk- cję obsługi, aby móc jak najszybciej rozpocząć prawidłową eksploatację nowego urządzenia marki Cameo Light. Więcej informacji o marce Cameo Light można znaleźć na naszej stronie CAMEOLIGHT.COM. INFORMACJE DOTYCZĄCE NINIEJSZEJ INSTRUKCJI OBSŁUGI •... -
Page 146: Zasady Bezpieczeństwa
Ten symbol oznacza zagrożenia, które mogą być przyczyną porażenia prądem elek- trycznym. Ten symbol oznacza niebezpieczne miejsca lub sytuacje. Ten symbol oznacza niebezpieczeństwa związane z gorącymi powierzchniami. Ten symbol oznacza niebezpieczeństwa związane z intensywnym źródłem światła. Ten symbol oznacza urządzenie, w którym nie ma części wymienianych przez użytkownika. - Page 147 UWAGA: 1. Nie używać urządzenia, jeśli było ono narażone na duże wahania temperatury (np. po transporcie). Wilgoć i kondensat mogą uszkodzić urządzenie. Włączyć urządze- nie dopiero wtedy, gdy osiągnie temperaturę otoczenia. 2. Sprawdzić, czy napięcie i częstotliwość sieci elektrycznej są zgodne z parametrami podanymi na urządzeniu.
- Page 148 OSTRZEŻENIE: 1. Używać urządzenia tylko zgodnie z przeznaczeniem. 2. Używać urządzenia wyłącznie z akcesoriami zalecanymi i przewidzianymi przez producenta. 3. Podczas instalacji przestrzegać krajowych przepisów bezpieczeństwa. 4. Po podłączeniu urządzenia należy sprawdzić ułożenie wszystkich kabli, aby unik- nąć szkód lub wypadków spowodowanych np. przez potknięcie. 5.
- Page 149 UWAGA: 1. Nie instalować ani nie eksploatować urządzenia w pobliżu grzejników, akumulato- rów ciepła, pieców ani innych źródeł ciepła. Upewnić się, że urządzenie jest zawsze instalowane w taki sposób, aby zapewnić wystarczające chłodzenie i nie dopuścić do przegrzania. 2. W pobliżu urządzenia nie umieszczać źródeł zapłonu, takich jak zapalone świece. 3.
- Page 150 PRZESYŁANIE SYGNAŁÓW I STEROWANIE DROGĄ RADIOWĄ (np. W-DMX lub systemy radiowe audio, Bluetooth): Jakość i wydajność transmisji bezprzewodowej zależą głównie od warunków otocze- nia. Na zasięg i stabilność sygnału mają wpływ m.in.: • Ekranowanie (np. mury, konstrukcje metalowe, woda) • Wysokie poziomy emisji fal radiowych (np. silne sieci Wi-Fi) •...
- Page 151 URZĄDZENIA Z BATERIAMI, BATERIE I ŁADOWARKI NIEBEZPIECZEŃSTWO: 1. Urządzenie z akumulatorem należy trzymać z dala od źródeł ciepła i nie wysta- wiać go na bezpośrednie działanie promieni słonecznych. Nie należy umieszczać go na lub w urządzeniach grzewczych, takich jak kuchenki mikrofalowe, piekar- niki lub grzejniki.
- Page 152 URZĄDZENIA Z MOŻLIWOŚCIĄ WYMIANY BATERII LUB AKUMULATORA PRZEZ UŻYTKOWNIKA (np. pilot zdalnego sterowania) NIEBEZPIECZEŃSTWO: Należy przestrzegać zaleceń zawartych w karcie charakterystyki producen- ta używanych baterii lub akumulatorów! 1. Baterie i akumulatory muszą być przechowywane w miejscu niedostępnym dla osób (w tym dzieci) o ograniczonych zdolnościach fizycznych, sensorycznych lub umysłowych.
-
Page 153: Ładowanie, Obsługa I Przechowywanie Akumulatorów
ŁADOWANIE, OBSŁUGA I PRZECHOWYWANIE AKUMULATORÓW 1. Aby naładować akumulatory zainstalowane na stałe, należy podłączyć urządzenie do dostarczonego zasilacza. Należy pamiętać, że funkcja ładowania nie jest wyłą- czana za pomocą głównego wyłącznika we wszystkich urządzeniach. 2. Czas ładowania wymagany do pełnego naładowania akumulatora można znaleźć w danych technicznych. -
Page 154: Uwagi Dotyczące Przenośnego Sprzętu Zewnętrznego
UWAGI DOTYCZĄCE PRZENOŚNEGO SPRZĘTU ZEWNĘTRZNEGO 1. Działanie tymczasowe! Sprzęt do organizacji imprez zasadniczo przeznaczony jest do działania tymczasowego. 2. Praca ciągła lub trwałe zamocowanie, szczególnie na zewnątrz, może prowadzić do pogorszenia funkcjonalności, uszkodzenia powierzchni i uszczelnień oraz przyspie- szonego zużycia materiału. 3. -
Page 155: Gniazda, Elementy Obsługi I Wskaźniki
Hz. Podłączanie za pomocą zawartego w zestawie kabla sieciowego (nieużywane gniazdo zawsze zabezpieczaj gumową zaślepką). POWER OUT Gniazdo wyjściowe IP65 z gumową zaślepką. Źródło zasilania dla dodatkowych reflektorów CAMEO. Całkowity pobór prądu wszystkich podłączonych urządzeń nie może przekroczyć wartości w amperach (A) podanej na urządzeniu (nieużywane gniazdo zawsze zabezpieczaj gumową zaślepką). - Page 156 Teraz przełącz reflektor w tryb pracy, wciskając włącznik. Podczas uruchamiania urządze- nia na wyświetlaczu pojawi się napis „Welcome to Cameo”, a następnie nazwa modelu i wersja oprogramowania. Jeśli włącznik nie jest wciśnięty, reflektor znajduje się w trybie standby. W obu trybach prawidłowe podłączenie reflektora do zasilania powoduje ładowanie się...
-
Page 157: Obsługa
UWAGI • Po prawidłowym podłączeniu reflektora do zasilania i wciśnięciu włącznika standby, podczas uruchamiania urządzenia na wyświetlaczu pojawi się napis „Welcome to Cameo”, a następnie nazwa modelu i wersja oprogramowania. Po tej procedurze reflektor jest gotowy do pracy i przełącza się na ostatnio wybrany tryb. - Page 158 POZIOM NAŁADOWANIA AKUMULATORA W TRYBIE STANDBY Aby rozpocząć ładowanie wewnętrznego akumulatora, podłącz reflektor do sieci elektrycznej przy pomocy zawartego w zestawie kabla. O poziomie naładowania akumulatora informuje widoczny na wyświetlaczu symbol baterii. W-DMX™ 1. Aby skojarzyć urządzenie z transmiterami obsługującymi standard W-DMX™, aktywuj tryb W-DMX™...
- Page 159 STATUS W-DMX™ W-DMX™ W-DMX ™ W-DMX ™ W DMX W-DMX ™ W-DMX ™ i tryb W-DMX ™ i tryb nieaktywne włączony jako jako odbiornik włączone i jako rewelacy- transmisji G3 transmisji G4S odbiornik, aktywowany sprzężone jne urządzenie Strzałka w górę Strzałka w górę...
- Page 160 USTAWIANIE TRYBU PRACY STAND ALONE Naciśnięcie przycisku MODE spowoduje przejście do menu wyboru. Przyciskami UP i DOWN wybierz pozycję menu „Stand Alone” (zwróć uwagę na strzałkę) i potwierdź przyciskiem ENTER. Przejdziesz do podmenu, w którym przyciskami UP i DOWN możesz wybrać jeden z następujących trybów pracy Stand Alone: „Auto”, „Color Macro”, „Static”, „Tunable White”, „User Color”...
- Page 161 Blue <100> ----------- Stand Alone ----------- ------------ Color Macro ------------ Lavender <100> Auto Color Off Mode Mauve <100> Color Macro <100> Color Macro Magenta <100> Static Amber <100> Pink <100> Tunable White Yellow Warm <100> Warm White <100> User Color Yellow <100>...
- Page 162 USTAWIENIA WSTĘPNE UŻYTKOWNIKA (User Color) Tryb „Ustawienia wstępne użytkownika” umożliwia zapisanie ustawień całkowitej jasności, strobo- skopu i zestawu kolorów R, G, B i W bezpośrednio w urządzeniu w postaci pięciu indywidualnych kolorystycznych ustawień wstępnych. Najpierw wybierz tryb „User Color” w menu i potwierdź przyciskiem ENTER zgodnie z opisem w punkcie USTAWIANIE TRYBU PRACY STANDALONE.
- Page 163 USTAWIANIE TRYBU SLAVE Naciśnij przycisk MODE, by przejść do menu wyboru. Przyciskami UP i DOWN wybierz opcję „Slave” (zgodnie ze strzałką) i potwierdź wybór przyciskiem ENTER. Połącz urządzenia slave i master (ten sam model, ta sama wersja oprogramowania) kablem DMX i włącz w urządzeniu master jeden z trybów pracy Stand-Alone (Auto, Colour Macro, Static, Tunable White, User Color).
- Page 164 Wireless = Ustawienia W-DMX W-DMX On = W-DMX włączone Setting (Wireless-DMX) On/Off On = W-DMX wyłączone Operating Receive = moduł W-DMX jako odbiornik Mode Transmit = moduł W-DMX jako nadajnik Transmit- G3 = standard transmisji G3 ting Mode G4S = standard transmisji G4S Link Link = skojarzenie z urządzeniami W-DMX.
- Page 165 Dimmer = Krzywa ściemniacza Linear IIntensywność światła wzrasta liniowo Curve wraz ze wzrostem wartości DMX Exponen- Intensywność światła można ustawić tial precyzyjnie w dolnym zakresie wartości DMX oraz ogólnie w górnym zakresie wartości DMX Loga- IIntensywność światła można ustawić rithmic ogólnie w dolnym zakresie wartości DMX oraz precyzyjnie w górnym zakre- sie wartości DMX...
- Page 166 Autolock = Automatyczna blokada Automatyczna blokada przycisków przycisków po ok. 1 minucie bezczynności. Po naciśnięciu dowolnego przycisku na wyświetlaczu pojawia się komunikat: „Locked!” Zniesienie blokady: naciśnij jednocze- śnie przyciski UP i DOWN i przytrzymaj przez ok. 5 sekund Wyłączenie automatycznej blokady przycisków = Częstotliwość...
- Page 167 INFORMACJE O SYSTEMIE (System Info) Naciśnij przycisk MODE, by przejść do menu wyboru. Przyciskami UP i DOWN wybierz opcję „System info” (zgodnie ze strzałką) i potwierdź wybór przyciskiem ENTER. ---------------- Menu ---------------- DMX Address DMX Mode Stand Alone Slave Settings System Info Odpowiednią...
-
Page 168: Pilot Na Podczerwień
PILOT NA PODCZERWIEŃ Skieruj pilot na podczerwień bezpośrednio na czujnik podczerwieni wbudowany we front reflektora. Maksymalny zasięg wynosi ok. 8 me- trów. W trybie pracy DMX oraz slave sterowanie pilotem jest nieaktyw- ne. Typ baterii do pilota na podczerwień: CR2025. Przycisk Blackout służy do wyłączenia wszystkich diod LED, niezależnie od włączo- nego trybu pracy urządzenia kontrolowane-... -
Page 169: Ustawianie I Montaż
USTAWIANIE I MONTAŻ Dzięki zintegrowanym nóżkom z tworzywa sztucznego reflektor można umieścić w odpowiednim miejscu na płaskiej powierzchni. Montaż na kratownicy odbywa się za pomocą wspornika omega, który jest mocowany w środku podstawy urządzenia (A). W zestawie znajduje się wspornik omega, opcjonalnie dostępne są... - Page 170 CZYSZCZENIE (wykonywane przez użytkownika) UWAGA! Przed każdym czyszczeniem należy odłączyć zasilanie i w miarę możliwości odłączyć wszystkie połączenia urządzenia. WSKAZÓWKA! Niewłaściwe czyszczenie może doprowadzić do uszkodzenia urządze- nia, a nawet jego zniszczenia. 1. Powierzchnie obudowy należy czyścić czystą, wilgotną ściereczką. Należy przy tym uważać, aby do urządzenia nie dostała się...
-
Page 171: Opcjonalne Akcesoria
OPCJONALNE AKCESORIA CLZW300B2004B CLZW300B200SMLSD20 Wrota reflektora – montaż bez użycia narzędzi Dyfuzor 25° za pomocą sprężynowanych trzpieni blokują- Montaż bez użycia narzędzi za pomocą cych, linka zabezpieczająca w zestawie technologii SNAPMAG ® CLZW300B200SMLSD40 CLZW300B200SMLSD100 Dyfuzor 45° Dyfuzor 100° Montaż bez użycia narzędzi za pomocą Montaż... -
Page 172: Technika Dmx
TECHNIKA DMX DMX-512 DMX (Digital Multiplex) to nazwa uniwersalnego protokołu transmisji do komunikacji między odpowiednimi urządzeniami a kontrolerami. Kontroler DMX wysyła dane DMX do podłączonych urządzeń DMX. Transmisja danych DMX następuje zawsze w formie szeregowego strumienia danych, który jest przekazywa- ny z jednego urządzenia do następnego przez znajdujące się... - Page 173 Przyporządkowanie wtyczek: Kabel DMX z 3-stykowymi wtyczkami XLR: Kabel DMX z 5-stykowymi wtyczkami XLR (pin 4 i 5 są niepodłączone): Shield Shield TERMINATOR DMX: Aby zapobiec awariom systemu, należy wyposażyć ostatnie urządzenie w łańcuchu DMX w termi- nator (120 Ω, 1/4 W). 3-stykowa wtyczka XLR z terminatorem: K3DMXT3 5-stykowa wtyczka XLR z terminatorem: K3DMXT5 Przyporządkowanie wtyczek:...
-
Page 174: Dane Techniczne
DANE TECHNICZNE NUMER ARTYKUŁU: CLZB200 Typ produktu: Lampa błyskowa LED na baterie Typ: Reflektor zewnętrzny Spektrum kolorów LED: RGBW Ilość diod LED: Typ diody LED: 15 W Częstotliwość PWM 800 Hz, 1200 Hz, 2000 Hz, 3600 Hz, 12 kHz, 25 kHz (regulowane) diody LED: Kąt wiązki: 21°... - Page 175 NUMER ARTYKUŁU: CLZB200 Maksymalny czas pracy 24 h akumulatora: Czas ładowania akumulatora: Urządzenie zabezpie- Ochrona przed przeładowaniem i głębokim rozładowaniem czające baterię: Cykle ładowania 300 cykli ładowania 0% -> 100% ≅ 70% pojemności akumulatora: Natężenie oświetlenia 22100 lx (@ 1m, bez soczewki rozpraszającej): Strumień...
-
Page 176: Objaśnienia Dotyczące Stopnia Ochrony Ip
OBJAŚNIENIA DOTYCZĄCE STOPNIA OCHRONY IP 1. Stopień ochrony IP zapewnia ochronę wyłącznie przed ciałami stałymi i wodą. Nie określa ogólnej odporności na działanie czynników atmosferycznych, takich jak ochrona przed promienio- waniem UV i wpływami temperatury itp. 2. Pierwsza cyfra oznacza ochronę przed pyłem, ciałami stałymi i kontaktem: IP2X Ochrona przed stałymi ciałami obcymi o średnicy ≥... -
Page 177: Utylizacja
UTYLIZACJA Opakowanie: 1. Opakowania można oddać do recyklingu. 2. Opakowanie należy segregować zgodnie z obowiązującymi w danym kraju pr- zepisami dotyczącymi utylizacji. Urządzenie: 1. To urządzenie podlega obowiązującej dyrektywie europejskiej w sprawie zużytego sprzętu elektrycznego i elektronicznego. Dyrektywa WEEE (w sprawie zużytego sprzętu elektrycznego i elektronicznego). -
Page 178: Oświadczenia Producenta
OŚWIADCZENIA PRODUCENTA GWARANCJA PRODUCENTA I OGRANICZENIE ODPOWIEDZIALNOŚCI Adam Hall GmbH, Adam-Hall-Str. 1, D-61267 Neu Anspach / e-mail Info@adamhall.com / +49 (0)6081 / 9419-0. Nasze aktualne warunki gwarancji oraz informację o ograniczeniu odpowiedzialności można znaleźć na stronie internetowej: https://cdn-shop.adamhall.com/media/pdf/Manufacturers-Declarations-CAMEO_DE_EN_ES_FR.pdf. W sprawie serwisu należy skontaktować się z dystrybutorem. ZGODNOŚĆ... -
Page 179: Italiano
Questo dispositivo è stato sviluppato e prodotto secondo elevati standard qualitativi per garan- tirne il regolare funzionamento per molti anni. Leggere attentamente questo manuale d‘uso per utilizzare al meglio il nuovo prodotto di Cameo Light. Per maggiori informazioni su Cameo Light, consultare il nostro sito web CAMEOLIGHT.COM. -
Page 180: Indicazioni Sulla Sicurezza
Questo simbolo indica pericoli che possono causare scosse elettriche. Questo simbolo indica punti di pericolo o situazioni pericolose. Questo simbolo indica pericoli dovuti a superfici calde. Questo simbolo indica pericoli dovuti a fonti di luce intense. Questo simbolo indica un dispositivo che non contiene parti sostituibili dall'utente. Questo simbolo indica informazioni complementari sull'utilizzo del prodotto. - Page 181 AVVERTENZA: 1. Il dispositivo non deve essere messo in funzione se presenta danni evidenti. 2. Il dispositivo deve essere installato solo in assenza di tensione. 3. Il dispositivo non deve essere messo in funzione se il cavo di alimentazione è danneggiato.
- Page 182 AVVERTENZA: 1. Utilizzare il dispositivo unicamente nelle modalità previste. 2. Azionare il dispositivo esclusivamente con gli accessori consigliati e previsti dal produttore. 3. Durante l'installazione osservare le normative sulla sicurezza in vigore nel proprio Paese. 4. Una volta collegato il dispositivo verificare tutti i cavi per evitare danni o incidenti, ad esempio per inciampo.
- Page 183 ATTENZIONE: 1. Non installare né azionare il dispositivo in prossimità di radiatori, accumulatori ter- mici, stufe o altre fonti di calore. Accertarsi che il dispositivo sia sempre installato in modo da avere un raffreddamento sufficiente ed evitare il surriscaldamento. 2. Non posizionare fonti di combustione, come candele accese, nelle vicinanze del dispositivo.
- Page 184 TRASMISSIONE E CONTROLLO DEI SEGNALI VIA RADIO (ad es. sistemi radio W-DMX o audio, Bluetooth): La qualità e le prestazioni della trasmissione wireless del segnale dipendono in gene- re dalle condizioni ambientali. Influenza sulla portata e sulla stabilità del segnale, ad es.: •...
- Page 185 DISPOSITIVI CON BATTERIA, BATTERIE E CARICABATTERIE PERICOLO: 1. Tenere il dispositivo con la batteria lontano da fonti di calore e non esporlo alla luce diretta del sole. Non collocare l‘apparecchio su o all‘interno di dispositivi di riscaldamento come microonde, forni o termosifoni. Le batterie possono esplodere se surriscaldate.
- Page 186 DISPOSITIVI CON SOSTITUZIONE DELLA BATTERIA O DELL'ACCUMULATORE DA PARTE DELL'UTENTE (ad es. telecomando) PERICOLO: Osservare la scheda tecnica del produttore delle batterie o degli accumula- tori utilizzati! 1. Le pile e le batterie ricaricabili devono essere tenute fuori dalla portata di persone (compresi i bambini) con ridotte capacità...
- Page 187 CARICA, FUNZIONAMENTO E CONSERVAZIONE DELLE BATTERIE 1. Per caricare le batterie installate in modo permanente, collegare l‘unità all‘ali- mentatore in dotazione. Si noti che la funzione di ricarica non viene disattivata dall‘interruttore dell‘unità principale su tutte le unità. 2. Per il tempo di ricarica necessario per caricare completamente la batteria, consul- tare i dati tecnici.
-
Page 188: Avvertenze Per Dispositivi Portatili Per Esterni
AVVERTENZE PER DISPOSITIVI PORTATILI PER ESTERNI 1. Funzionamento temporaneo! Le attrezzature per eventi sono concepite esclusiva- mente per un uso temporaneo. 2. L'uso continuativo o l'installazione permanente, in particolare in ambienti esterni, può compromettere il funzionamento, le superfici e le guarnizioni e causare un'ac- celerazione dell'affaticamento del materiale. -
Page 189: Connettori, Elementi Di Comando E Visualizzazione
POWER OUT Presa di uscita IP65 con tappo ermetico in gomma. Serve per l’alimentazione di altri proiettori Cameo. Tenere presente che la corrente assorbita complessiva di tutti i dispositivi collegati non deve superare il valore riportato in ampere (A) sul dispositivo (in caso di mancato utilizzo, chiudere sempre con tappo ermetico in gomma). - Page 190 Accendere il proiettore spingendo l’interruttore verso il basso. Durante il proces- so di avvio, sul display appaiono in successione il messaggio “Welcome to Cameo”, la denomina- zione del modello e la versione del software. Quando l’interruttore non viene spinto verso il basso, il proiettore si trova in standby.
-
Page 191: Utilizzo
“Welcome to Cameo”, la denominazione del modello e la versione del software. Dopo questo processo, il proiettore è pronto per l’uso e si avvia nella modalità di funzionamento precedentemente attivata. - Page 192 SCHERMATA PRINCIPALE DEL DISPLAY Dopo il processo di accensione, il proiettore è pronto per l’uso e si avvia nella modalità di funzio- namento precedentemente attivata. Compare quindi la schermata principale con le seguenti infor- mazioni: modalità di funzionamento attuale (nell’esempio, modalità di funzionamento DMX), stato W-DMX™, livello di carica della batteria e funzionamento con collegamento alla rete elettrica.
- Page 193 3. Inoltre è possibile formare un gruppo in rete di dispositivi W-DMX™ tramite W-DMX™ e utilizzarli in modalità master/slave. Anzitutto disaccoppiare tutti i dispositivi che devono forma- re il gruppo (Settings -> Wireless Setting -> Receive Reset). A questo punto nelle impostazioni (Settings ->...
- Page 194 IMPOSTAZIONE DELLA MODALITÀ DI FUNZIONAMENTO DMX (DMX Mode) Premendo MODE si accede al menu di selezione. Con i tasti UP e DOWN, selezionare la voce di menu “DMX Mode” (prestare attenzione alla freccia) e confermare con ENTER. Nel sottomenu, con i tasti UP e DOWN, è possibile selezionare le 9 diverse modalità DMX. Confermare la scelta con ENTER.
- Page 195 ------------ Stand Alone ------------ ---------------- Auto ---------------- ------------- Program x ------------- Auto Program 1 <255> Mode Color Macro Program 2 Speed <100> Auto Static Program 3 Tunable White Program 4 Speed User Color Program 5 Timer Program 6 MACRO COLORI (Color Macro) Per impostazione predefinita sono disponibili 15 macro colori diverse.
- Page 196 TEMPERATURA DEL COLORE (Tunable White) La modalità Temperatura del colore consente di impostare la luce direttamente sul dispositivo con una temperatura colore che va dal bianco caldo al bianco freddo (CCT) e la luminosità (Dim). Selezionare la modalità Temperatura del colore seguendo la procedura descritta prima in “IMPOSTAZIONE DELLA MODALITÀ...
- Page 197 PRESET UTENTE (User Color) La modalità di funzionamento “Preset utente” consente di salvare la luminosità generale, lo strobosco- pio e il mix cromatico di R, G, B e W direttamente nel dispositivo in cinque preset cromatici individuali. Selezionare la voce di menu “User Color” seguendo la procedura descritta prima in “IMPOSTAZIONE DELLA MODALITÀ...
- Page 198 Si accede così al sottomenu per l’impostazione delle seguenti voci di sottomenu (v. tabella, se- lezione con UP e DOWN, conferma con ENTER, modifica del valore o dello stato con UP e DOWN, conferma con ENTER): Settings Runtime = Prolungare l'autonomia Funzione disattivata della batteria fino a 4 hours -...
- Page 199 AC Failure = Modalità di funziona- No Action Viene mantenuto l'ultimo comando mento in caso di inter- Blackout Blackout attivato ruzione di corrente Full On Tutti i LED con emissione al 100% Stand Alone Il proiettore passa all'ultima moda- lità di funzionamento Stand-Alone selezionata Dimmer = Curva del dimmer...
- Page 200 Autolock = Blocco automatico Blocco automatico degli elementi di degli elementi di comando dopo ca. 1 minuto di inattivi- comando tà. Visualizzazione sul display dopo il test di funzionamento: "Locked!" Per sbloccare: premere contempo- raneamente UP e DOWN per ca. 5 secondi Blocco automatico degli elementi di comando disattivato...
- Page 201 INFORMAZIONI DI SISTEMA (System Info) Premendo MODE si accede al menu di selezione. Con i tasti UP e DOWN, selezionare la voce di menu „System Info“ (prestare attenzione alla freccia) e confermare con ENTER. ---------------- Menu ---------------- DMX Address DMX Mode Stand Alone Slave Settings...
-
Page 202: Telecomando A Infrarossi
TELECOMANDO A INFRAROSSI Indirizzare il telecomando a infrarossi direttamente verso il sensore a infrarossi presente nella parte anteriore del proiettore. La portata mas- sima è pari a ca. 8 metri. Nella modalità di funzionamento DMX e slave, le funzioni del telecomando sono disattivate. Batteria per il telecomando a infrarossi: CR2025. -
Page 203: Installazione E Montaggio
INSTALLAZIONE E MONTAGGIO Grazie ai piedini in plastica integrati, il faretto può essere collocato su una superficie piana in una posizione adeguata. Il montaggio su un traliccio avviene con l’aiuto di una staffa a omega, fissata al centro della base dell’unità (A). La fornitura comprende una staffa a omega, mentre in opzione sono disponibili morsetti per tralicci adatti. - Page 204 CURA (eseguibile dall'utente) AVVERTENZA! Prima di qualsiasi intervento di pulizia scollegare l'alimentazione elettrica e, se possibile, tutti i collegamenti del dispositivo. NOTA! Una pulizia inadeguata può danneggiare il dispositivo, causando anche danni potenzialmente irreparabili. 1. Le superfici dell'alloggiamento devono essere pulite con un panno umido e pulito. Assicurarsi che l'umidità...
-
Page 205: Optionales Zubehör
OPTIONALES ZUBEHÖR CLZW300B2004B CLZW300B200SMLSD20 Paraluce - Installazione senza utensili con Diffusore da 25° bulloni di bloccaggio a molla, cavo di sicurezza Montaggio senza utensili grazie alla tecnolo- in dotazione gia SNAPMAG ® CLZW300B200SMLSD40 CLZW300B200SMLSD100 Diffusore da 45° Diffusore da 100° Montaggio senza utensili grazie alla tecnologia Montaggio senza utensili grazie alla tecnolo- SNAPMAG... -
Page 206: Tecnologia Dmx
TECNOLOGIA DMX DMX512 DMX (Digital Multiplex) è la sigla di un protocollo di trasmissione uni- versale per la comunicazione tra dispositivi e controller. Un controller DMX invia dati DMX ai dispositivi DMX collegati. I dati DMX vengono sempre trasmessi come flusso di dati seriale, che viene inoltrato da un dispositivo collegato al successivo attraverso le connessioni (connetto- ri XLR) DMX IN e DMX OUT presenti per ogni dispositivo DMX compati- bile, per un massimo di 32 dispositivi. - Page 207 Configurazione dei connettori: Cavo DMX con connettori XLR a 3 poli: Cavo DMX con connettori XLR a 5 poli (pin 4 e 5 non assegnati): Shield Shield CONNETTORE TERMINALE DMX (TERMINATORE): Per evitare errori di sistema, l’ultimo dispositivo di una catena DMX deve essere dotato di una resistenza di terminazione (120 ohm, 1/4 W).
-
Page 208: Dati Tecnici
DATI TECNICI NUMERO DI ARTICOLO: CLZB200 Tipo di prodotto: Luce di lavaggio a batteria LED Tipo: Faretto da esterno Spettro cromatico LED: RGBW Quantità di LED: Tipo di LED: 15 W Frequenza PWM del LED: 800 Hz, 1200 Hz, 2000 Hz, 3600 Hz, 12 kHz, 25 kHz (regolabile) Angolo del fascio: 21°... - Page 209 NUMERO DI ARTICOLO: CLZB200 Durata massima della 24 h batteria: Tempo di ricarica della batteria: Dispositivo di protezione Protezione contro il sovraccarico e la scarica profonda della batteria: Cicli di carica della 300 cicli di carica 0% -> 100% ≅ 70% di capacità batteria: Illuminamento (@ 1m, 22100 lx...
-
Page 210: Spiegazioni Sulla Protezione Ip
SPIEGAZIONI SULLA PROTEZIONE IP 1. Un grado di protezione IP riflette esclusivamente la protezione da oggetti solidi e acqua. Non descrive alcuna resistenza agli agenti atmosferici generale, come ad esempio la protezione dai raggi UV, gli influssi termici ecc. 2. Il primo codice indica la protezione da polvere, oggetti solidi e contatto: IP2X Protetto contro la penetrazione di corpi solidi di diametro ≥... -
Page 211: Smaltimento
SMALTIMENTO Imballaggio: 1. Gli imballaggi possono essere riciclati tramite i consueti canali di smaltimento. 2. Separare l'imballaggio in conformità con le leggi sullo smaltimento e i regolamen- ti sui materiali riciclabili del proprio Paese. Dispositivo: 1. Questo dispositivo è soggetto alla Direttiva europea sui rifiuti di apparecchiature elettriche ed elettroniche e successive modifiche. -
Page 212: Dichiarazioni Del Produttore
DICHIARAZIONI DEL PRODUTTORE GARANZIA DEL PRODUTTORE E LIMITAZIONE DI RESPONSABILITÀ Adam Hall GmbH, Adam-Hall-Str. 1, D-61267 Neu Anspach / E-mail Info@adamhall.com / +49 (0)6081 / 9419-0. Le nostre attuali condizioni di garanzia e la limitazione di responsabilità sono consultabili alla pagina: https://cdn-shop.adamhall.com/media/pdf/Manufacturers-Declarations-CAMEO_DE_EN_ES_FR.pdf. -
Page 213: Dmx Control / Dmx Steuerung / Pilotage Dmx / Control Dmx / Sterowanie Dmx / Controllo Dmx
DMX CONTROL / DMX STEUERUNG / PILOTAGE DMX / CONTROL DMX / STEROWANIE DMX / CONTROLLO DMX 15 CH Full Access 16 Bit Function Values Sub-Group Dimmer 255 0% to 100% Dimmer Dimmer 255 0% to 100% fine 005 Strobe open 010 Strobe closed 033 Pulse random slow ->... - Page 214 117 White 125 Cold White Color 127 Color Jumping stop Macros Color Macros Color Jumping speed slow -> fast / color (override 1 -> 12 RGBW) Color Fading speed slow -> fast / color 1 -> 12 005 Off 006 Warm White 046 Warm White ->...
- Page 215 147 Display off (hold 3s) No function No runtime / full LED power (hold 3s) Device Set runtime 8h (hold 3S) settings Set runtime 12h (hold 3S) (please Set runtime 16h (hold 3S) Control read Set runtime 20h (hold 3S) remark Raw mode (hold 3s) Factory calibrated mode (hold 3s)
- Page 216 005 Color off 013 Red 021 Amber 029 Yellow warm 037 Yellow 045 Green 053 Turquoise Color 061 Cyan Macros 069 Blue Color Macros (override 077 Lavender RGBW) 085 Mauve 093 Magenta 101 Pink 109 Warm White 117 White 125 Cold White 127 Color Jumping stop Color Jumping speed slow ->...
- Page 217 077 No function 079 Dimmer response LED (hold 1,5 s) 081 Dimmer response halogen (hold 1,5s) 101 No function 103 Silent fan (hold 3s) 105 Auto fan (hold 3s) 123 No function 125 PWM 1 (800 Hz) (hold 3s) 127 PWM 2 (1200 Hz) (hold 3s) 129 PWM 3 (2000 Hz) (hold 3s) 131 PWM 4 (3600 Hz) (hold 3s) Device...
- Page 218 Blue 255 0% to 100% Blue White 255 0% to 100% White 005 Color off 013 Red 021 Amber 029 Yellow warm 037 Yellow 045 Green 053 Turquoise 061 Cyan 069 Blue Color 077 Lavender Macros Color Macro 085 Mauve (override 093 Magenta RGBW)
- Page 219 077 No function 079 Dimmer response LED (hold 1,5 s) 081 Dimmer response halogen (hold 1,5s) 101 No function 103 Silent fan (hold 3s) 105 Auto fan (hold 3s) 123 No function 125 PWM 1 (800 Hz) (hold 3s) 127 PWM 2 (1200 Hz) (hold 3s) 129 PWM 3 (2000 Hz) (hold 3s) 131 PWM 4 (3600 Hz) (hold 3s) Device...
- Page 220 6 CH Factory-Calibrated 16 Bit Function Values Sub-Group 255 0% to 100% Red fine 255 0% to 100% Green 255 0% to 100% Green Green 255 0% to 100% fine Blue 255 0% to 100% Blue Blue fine 255 0% to 100% 4 CH User-Calibrated 8 Bit Function Values...
- Page 221 053 Turquoise 061 Cyan 069 Blue 077 Lavender 085 Mauve 093 Magenta 101 Pink Color Color Macros 109 Warm White Macros 117 White 125 Cold White 127 Color Jumping stop Color Jumping speed slow -> fast / color 1 -> 12 Color Fading speed slow ->...
- Page 222 EN: (1*) After the adjustments have been made, set the value to 000 to avoid disturbance by endless function call. DE: (1*) Nachdem die Einstellungen vorgenommen wurden, stellen Sie den Wert auf 000 ein, um Störungen durch endlosen Funktionsaufruf zu vermeiden. FR: (1*) Une fois les ajustements effectués, réglez la valeur sur 000 pour éviter les perturba- tions par appel de fonction sans fin.
- Page 224 CAMEOLIGHT.COM Adam Hall GmbH Adam-Hall-Str. 1 | 61267 Neu-Anspach | Germany Phone: +49 6081 9419-0 | adamhall.com Adam Hall Ltd. | The Seedbed Business Centre | SS3 9QY Essex | United Kingdom REV: 09...
Need help?
Do you have a question about the ZENIT B200 and is the answer not in the manual?
Questions and answers