Table of Contents
Advertisement
Available languages
Available languages
Quick Links
Advertisement
Table of Contents

Related Manuals for iotty i3PLUS


Summary of Contents for iotty i3PLUS
- Page 1 Model: i3PLUS ID: LSW2i3 MLS2i301...
-
Page 2: Table Of Contents
English Technical specifications Important notes Multi-way (3-way via Wi-Fi) Troubleshooting Device overview Installation steps Integrations Italiano Specifiche tecniche Note importanti Deviatore Risoluzione dei problemi Panoramica del dispositivo Istruzioni di installazione Integrazioni... -
Page 3: Technical Specifications
IOTTY srl Via Del Laghetto, 18/20 33080 Porcia (PN) - ITALY iotty@iotty.com support@iotty.com Technical specifications i3 PLUS Smart Switch Model: i3PLUS ID: LSW2i3 Input: 230 Vac Frequency: 50Hz Max 5A per RL Ambient temperature: 25°C Operating temperature: from 0°C to 40°C Only works with 2.4GHz Wi-Fi band... -
Page 4: Important Notes
compliance with the RF exposure requirement, a separation distance of 20 cm between the device and the human should be maintained. Important notes Safety Precaution Incorrect installation is dangerous or illegal. Install in accordance with all national and local codes. Hire a professional electrician if you are not familiar or not comfortable with electrical work, or if the wiring in your electrical box looks different from the... -
Page 5: Multi-Way (3-Way Via Wi-Fi)
A 3-way switch allows you to control an electrical load (lamp) from 2 different locations. Thanks to the Multi-way feature, you can connect multiple iotty switches together through the Wi-Fi network and take control of the same light. For more details check: link.iotty.com/multi-way... -
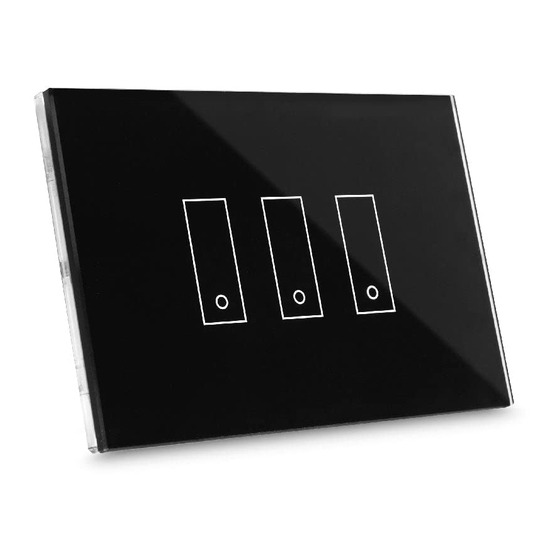
Page 6: Device Overview
It restarts the device, all settings remain saved. Switch 1 Switch 3 button It makes the iotty Wi-Fi visible again. Switch 2 Useful to re-register the device on the app, update the Wi-Fi credentials, or turn off the device Wi-Fi.. wall Distance 0.20 in •... -
Page 7: Installation Steps
Installation steps Turn off the power at the circuit breaker for the switch you are replacing. Remove your old switch and label your wires. Remember that you must have neutral wire. - Page 8 IOTTY L N RL3 RL2 RL1 Wire the iotty plate Insert the power wire into terminal L. Insert the neutral wire into terminal N. Connect the wires on RL: insert the load wire in one terminal of RL and the power wire in the other terminal of RL.
- Page 9 Electrical scheme for a load that needs a pulse to activate: = Power IOTTY = Neutral Main power L N RL3 RL2 RL1 supply 230 To set the switch properly, go to the iotty app, go to Device Settings and under “Switch Type” select “Pulse Switch”.
- Page 10 Screw the iotty switch in Push all the wires back into the wall box (do not push the wires using the back of the switch). Insert the device in the wall box and screw it in. Position the switch so that the AP and reset buttons are located...
- Page 11 Hide a key and attach the glass faceplate If you want to hide one or more keys of the plate, now is the time to insert the black paperboard found in the box. Insert it over the silkscreen of the desired key in the back of the glass plate.
-
Page 12: App
Turn on the power and register device Turn on the power at the circuit breaker. Check if the wiring was made correctly by tapping on the glass to turn on and off the light. Now the installation is complete and you can proceed to register the device. -
Page 13: Integrations
Hey Google If you need more information you can contact us at support@iotty.com or visit our FAQ section... -
Page 14: Specifiche Tecniche
Via Del Laghetto, 18/20 33080 Porcia (PN) - ITALY iotty@iotty.com support@iotty.com Specifiche tecniche i3 PLUS Interruttore Intelligente Modello: i3PLUS ID: LSW2i3 Tensione in ingresso: 230 Vac Frequenza: 50Hz Max 5A per RL Temperatura ambiente: 25°C Temperatura di funzionamento: da 0°C a 40°C Funziona solo con la banda Wi-Fi 2.4GHz... -
Page 15: Note Importanti
Per garantire la conformità con le disposizioni all’esposizione alle RF, deve essere mantenuta una distanza di 20 cm tra il dispositivo e il corpo umano. Note importanti Misure di sicurezza L’installazione scorretta è pericolosa o illegale. Installare conformemente a quanto prescritto dalle norme nazionali e locali. -
Page 16: Deviatore
Il deviatore è un tipo di interruttore che permette di accendere un punto luce da 2 diverse postazioni. Grazie alla funzionalità Deviatore via Wi-Fi, si possono connettere insieme più interruttori iotty attraverso la connessione Wi-Fi e così controllare la stessa luce da diversi punti. -
Page 17: Panoramica Del Dispositivo
Panoramica del dispositivo Pulsante mm 83,73 [in 3,296] di reset Riavvia il dispositivo, tutte le impostazioni rimangono salvate. Pulsante di AP Tasto 1 Tasto 3 Tasto 2 Rende il Wi-Fi del dispositivo nuovamente visibile. Utile per rieffettuare la registrazione del dispositivo sull’app, aggiornare le credenziali per la rete Internet o spegnere il Wi-Fi della placca. -
Page 18: Istruzioni Di Installazione
Istruzioni di installazione Stacca la corrente dal contattore principale dell’interruttore che stai sostituendo. Rimuovi il vecchio interruttore e individua i cavi. Ricorda che è necessario avere il cavo neutro. - Page 19 Corrente principale 230 Vac = Fase = Neutro = Carico/lampadina = Carico/lampadina IOTTY L N RL3 RL2 RL1 Cabla il dispositivo Inserisci il cavo della corrente nel morsetto L. Inserisci il cavo del neutro nel morsetto N. Collega i cavi su RL: inserisci in un morsetto di RL il cavo del carico e nell’altro morsetto di RL il cavo dell’alimentazione.
- Page 20 In caso di carichi che hanno bisogno di un impulso per l’attivazione: = Fase IOTTY = Neutro Corrente L N RL3 RL2 RL1 principale 230 Vac Per impostare correttamente l’interruttore, vai sulla app di iotty, sulle impostazioni del dispositivo e sotto “Tipo di tasto” seleziona “Pulsante”...
- Page 21 Avvita iotty Spingi tutti i cavi nella scatola a muro (non farlo con il retro dell’interruttore). Inserisci il dispositivo nella scatola a muro e avvitalo. Posiziona l’interruttore in modo che i pulsanti AP e reset si trovino sulla destra.
- Page 22 Nascondi un tasto e attacca il vetro Se vuoi nascondere uno o più tasti della placca, è il momento di inserire il cartoncino nero che trovi nella scatola. Inseriscilo sopra la serigrafia del tasto desiderato, nel retro della placca in vetro. Se non vuoi utilizzare il tasto scelto, potrai disattivarlo dopo la registrazione.
-
Page 23: App
Riattacca la corrente e registra il dispositivo Accendi il contattore dell’interruttore. Controlla se il cablaggio è stato fatto correttamente toccando il cerchietto per accendere e spegnere la luce. Ora l’installazione è completata e puoi procedere alla registrazione del dispositivo. - Page 24 I dispositivi iotty sono compatibili con le integrazioni seguenti works with Hey Google Se hai bisogno di maggiori informazioni puoi contattarci su support@iotty.com oppure visita le Domande Frequenti...
Need help?
Do you have a question about the i3PLUS and is the answer not in the manual?
Questions and answers