Table of Contents
Advertisement
Advertisement
Table of Contents

Related Manuals for HEADRUSH PRIME


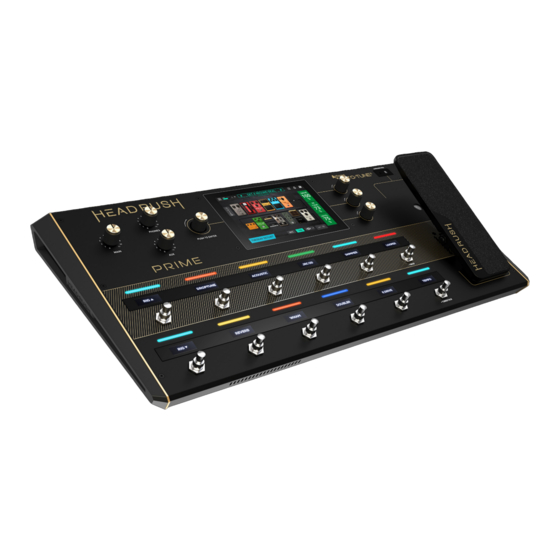
Summary of Contents for HEADRUSH PRIME
- Page 1 User Guide English Manual Version 1.0.0...
-
Page 2: Table Of Contents
(4.3.2) Signal Path ........... 14 (4.14.1) Additional Looper Settings ....42 (4.3.3) Stereo vs. Mono ........16 (4.3.4) Saving a Rig ......... 17 (4.15) HeadRush Cloud ......43 (4.3.5) Renaming a Rig ........18 (4.3.6) Deleting a Rig ........18 (4.16) USB ........... 45 (4.16.1) Transferring Files &... - Page 3 (4.19) Mic Dry Out ........51 (4.20) Global EQ .......... 52 (4.21) Global Settings ......... 53 (4.22) External MIDI Control ...... 59 (5.0) Appendix ........60 (5.1) Technical Specifications....60 (5.2) Trademarks & Licenses ..... 60...
-
Page 4: (1.0) Introduction
(1.0) Introduction (1.1) Box Contents HeadRush Prime USB Cable Power Cable Software Download Card Quickstart Guide Safety & Warranty Manual (1.2) Support For the latest information about this product (documentation, technical specifications, system requirements, compatibility information, etc.) and product registration, visit headrushfx.com. -
Page 5: (2.0) Setup
(2.0) Setup Items not listed under (1.1) Introduction > Box Contents are sold separately. IMPORTANT! In the (4.21) Global Settings menu, make sure you set the Outputs to send signal at amp level if you are using a traditional guitar amplifier, or line level (default) if you are using a full-range flat-response amplifier, mixer, PA speaker or audio interface. -
Page 6: (3.0) Features
(3.0) Features (3.1) Top Panel 1. Main Display This full-color multi-touch display shows information relevant to HeadRush Prime’s current operation. Touch the display (and use the hardware controls) to control the interface. See (4.1) Main Screen to learn how it works. - Page 7 Turn this knob to adjust the volume level of the Aux Input. Important: The audio signal from the aux input is routed directly to the outputs of HeadRush Prime without any modeling or effects applied and cannot be used by the looper. It is also unaffected by the main volume or...
-
Page 8: (3.2) Rear Panel
4. USB-B Port Connect this USB port to a computer using a standard USB cable. This connection allows HeadRush Prime to send and receive the digital audio signal to and from your computer. You can also use this connection to import or export rigs, block presets, and setlists. - Page 9 Connect this output to the footswitch input of an external guitar amplifier to toggle channels or turn reverb on and off on the amplifier using HeadRush Prime. IMPORTANT! Only connect this output to amplifiers that have a “short-to-sleeve” footswitch input. If you connect this output to any other type of footswitch input, you may cause permanent damage to your equipment.
-
Page 10: (4.0) Operation
(4.0) Operation This chapter describes HeadRush Prime’s functions. (4.1) Main Screen (4.1.1) Overview Tap to view the Menu screen and Tap and drag this bar downward to view the Tap to create Tap to view the Hardware access more features and settings. -
Page 11: (4.1.3) Reverb/Delay Tail Spillover
(4.1.3) Reverb/Delay Tail Spillover HeadRush Prime features two types of Reverb/Delay Tail Spillover: 1. If you have reverb and/or delay effect(s) active on your rig and then switch to a different rig, the effect(s) will continue to decay after switching to the second rig. -
Page 12: (4.2) Menu Screen
• Firmware Update: Tap here to enter Firmware Update mode. This will allow you to update HeadRush Prime when new firmware is available, using either a USB connection to your computer or over-the-air via Wi-Fi. -
Page 13: (4.3) Rigs
(4.3) Rigs When you are using HeadRush Prime, a rig is a preset: the combination of assigned models—the amps, cabs, IRs, clones, and effects—and the parameter settings of each of them. You can create, edit, save, and load rigs, making it easy to recall the perfect sound for each part of your performance. -
Page 14: (4.3.2) Signal Path
The signal path is the direction that the audio signal follows from your guitar, through your 14 available blocks, and ends at the outputs of HeadRush Prime. You can easily reconfigure your signal path to best suit your needs, especially when it comes to creating more complex rigs. - Page 15 Guitar: Dual Straight Path This straight signal path is the most common for users that would like to connect two guitars simultaneously while maintaining separate singal paths for each guitar. This can be useful for making easy switches between electric and acoustic guitars on stage or playing along with a friend.
-
Page 16: (4.3.3) Stereo Vs. Mono
(4.3.3) Stereo vs. Mono The outgoing signal from HeadRush Prime can be mono or stereo, depending on the models in your rig, the signal path, and which outputs you are using. An indicator near the end of the signal path indicates the current configuration. -
Page 17: (4.3.4) Saving A Rig
(4.3.4) Saving a Rig If you have made certain changes to a rig, you will see an asterisk () next to its name at the top of the screen, indicating that you have changed the rig in some way and may want to save it. You will see an asterisk if you have done any of the following: •... -
Page 18: (4.3.5) Renaming A Rig
(4.3.6) Deleting a Rig To delete a Rig, tap and drag the bar below the Rig Name to show the list of rigs on your HeadRush Prime. Then, tap the button next to the name of the rig you would like to delete, tap the trash can icon that appears, and then confirm that you would like to delete the rig. -
Page 19: (4.4) Adjusting Settings
See (4.4.3) Saving a Block Preset to learn how to save a preset after adjusting parameters. Amp (HeadRush / Revalver) The Amp category is a list of popular guitar and bass amplifiers. Preset: This is the current amp preset, which includes the model, all its settings, and its color assignment. - Page 20 Cab (HeadRush / Revalver) The Cab category is a list of popular guitar and bass amp cabinets, which contain the speakers. HeadRush Prime recreates not only the sound of the cabinet but also the type of microphone recording it. Preset: This is the current cab preset, which includes the model, all its settings, and its color assignment.
- Page 21 Effects There are many types of guitar and vocal effects available on HeadRush Prime, and their adjustable settings depend on the type of effect selected. Preset: This is the current effect preset, which includes the selected effect, all its settings, and its color assignment.
- Page 22 Guitar In blocks only. To control the Input Gain for a Vocal In block, use the Mic Input Gain knob on the rear panel of HeadRush Prime. Gate Thrsh (Threshold): This setting controls the signal level required to open the noise gate, enabling the guitar signal to be sent to the rig.
- Page 23 Out (Guitar / Vocal) These output settings control the signal sent to HeadRush Prime’s outputs: Preset: This is the current output preset, which includes all its settings. Output: This level meter indicates the current level of your output signal after the output controls shown on this screen.
-
Page 24: (4.4.3) Saving A Block Preset
These settings control mix of a split signal path. This is available only for rigs with split signal paths (see (4.3.2) Rigs > Signal Path to learn more): Preset: This is the current mix preset, which includes its settings on the right edge of the display. A Lev / B Lev (Level): These settings control the volume levels the upper (A) and lower (B) branches of the signal path. -
Page 25: (4.5) Footswitch Modes
The footswitches can be used in one of five modes: Stomp Mode, Rig Mode, Hybrid Mode, Setlist Mode, or Song Mode. The mode you are in when you power off HeadRush Prime will be the mode you are in when you power it back on. -
Page 26: (4.5.3) Hybrid Mode
(4.5.3) Hybrid Mode The upper middle four footswitches correspond Bank Rig 1 Rig 2 Rig 3 Rig 4 Looper to rigs you have saved. Press one of these footswitches to load its rig. The lower middle four footswitches correspond to blocks (amps, cabs, IRs, clones, or effects) in your signal Bank ... -
Page 27: (4.6) Hardware Assign
Hardware Assign screen. The MIDI Prog field determines the MIDI program change number of the rig. Use the Prog Change setting in the Global Settings screen to determine whether HeadRush Prime can send and/or receive MIDI program change messages (see (4.21) Global Settings >... -
Page 28: (4.6.1) Footswitches
(4.6.1) Footswitches The eight boxes in the lower-left corner represent the middle eight footswitches of HeadRush Prime. You can assign any switch-based parameters (ones with only two states) to any of the footswitches—regardless of their location in the signal chain. -
Page 29: (4.6.2) Scenes
(4.6.2) Scenes The Scene feature allows you to turn multiple blocks on or off or change multiple the presets for a block in each rig using one footswitch press. When you press the footswitch assigned to that scene, all blocks included in that scene will turn on or off, depending on how you assign them. -
Page 30: (4.6.3) Quick Parameters
(in Advanced Mode). Use the toe switch to switch between them—Expression Pedal A or B. To activate the toe switch, move the “toe end” of the expression pedal so it touches the Prime, and then press down. The expression pedal status LED will indicate A or B. - Page 31 To assign a parameter to the expression pedal: 1. If the Assign button is not on, tap it. 2. Tap a box under the Assign button. indicates an empty box. 3. In the list that appears, tap the model with the parameter you want to assign.
-
Page 32: (4.7) Hands-Free Mode
(4.7) Hands-Free Mode Hands-Free Mode enables you to adjust any of the settings on your blocks by using just the footswitches and expression pedal. To enter Hands-Free Mode, press and hold a footswitch assigned to a block for over one second. While in Hands-Free Mode, the screen will show a single parameter and its value, and the top six footswitches will correspond to six parameters of that model. -
Page 33: (4.8) File Browser
(4.8) File Browser The File Browser is a handy tool for navigating your files and folders on HeadRush Prime’s internal storage. In addition to the internal storage, any USB storage devices connected to HeadRush Prime’s USB-A port will appear along the left side of this screen. -
Page 34: (4.9) Setlists
(4.9) Setlists A song is a group of rigs that are sorted together for optimal organization. A setlist is a saved collection of songs and rigs arranged in a customized order. After being edited and saved, setlists can be loaded at a later time. This feature is useful if, for instance, you need only some of your rigs for a performance;... - Page 35 To create a setlist: 1. Tap + in the upper-right corner of the main setlist screen. 2. In the screen that appears, the left half is a list of all available rigs, and the right half is the list of songs and rigs in the setlist.
-
Page 36: (4.10) Song View
(4.10) Song View When using a setlist, you can choose to view your current rig selection as well as your position within the setlist on a simpler Song View screen. This is particularly helpful for when playing live, when you may not be making as many edits to your rigs. -
Page 37: (4.11) Practice Tool
(4.11) Practice Tool HeadRush Prime includes a convenient built-in Practice Tool that you can use to play along with songs from your HeadRush Prime’s internal storage, connected USB storage devices, or a linked Dropbox account. In addition to being able to play along with a song, you can also set loop points within a song, and use speed controls to slow it down to making learning the song easier, or use pitch controls to practice a song in different keys. -
Page 38: (4.12) Tuner
The default and most common setting for a guitar tuner is 440 Hz. • Tempo: Tap this parameter to manually set the global tempo of HeadRush Prime using the main encoder. You can alternately set this tempo by using the tap tempo footswitch. -
Page 39: (4.13) Metronome
(4.13) Metronome HeadRush Prime includes simple yet convenient built-in Metronome that you can use while practicing. To access the metronome, tap the Menu icon in the top left of the Main screen, and then tap the Metronome icon. The following parameters are available to be adjusted: •... -
Page 40: (4.14) Looper
(4.14) Looper HeadRush Prime has a built-in looper that you can use to layer your performances. While the looper’s operation is shown in the display, you can control most of it conveniently with the footswitches. The looper can hold up to 20 minutes of audio at a time across a maximum of 50 layers. - Page 41 Tip: While using the USB Transfer or Dropbox features, you can import .WAV and .MP3 audio files for the Looper by placing the files in HeadRush Primes’s /LOOPS/ directory. To edit a loop’s name, tap the folder icon in the top right corner to access the file browser, locate the loop, and then tap RENAME.
-
Page 42: (4.14.1) Additional Looper Settings
• Time Sig: Use this parameter to determine the time signature of the count-in. • MIDI Beat Clock: Set this parameter to On to set HeadRush Prime’s looper to sync to the tempo of a connected external MIDI device. Set this parameter to Off to disable sending MIDI sync. -
Page 43: (4.15) Headrush Cloud
To open HeadRush Cloud, tap the Menu icon in the top left of the Main screen, and then tap the Browser icon. The first time that you log into the HeadRush Cloud, a QR code will be shown on the screen along with a security code. Follow the directions on the screen to register for a free account. - Page 44 On the My Content tab, you can search your own uploaded content by using the search, sort, and filter features, the same as you can in the Browse tab. On the My Content tab, you can also delete content by tapping the rig or clone title to show the overlay, and then tapping the trash can icon at the top right.
-
Page 45: (4.16) Usb
File corruption may occur if the drive is not properly ejected before continuing. 7. After the drive has been ejected, tap Sync on your HeadRush Prime to "commit" any changes you made to the contents of the HeadRush drive. -
Page 46: (4.16.2) Recording
(4.16.2) Recording When HeadRush Prime’s USB port is connected to your computer, you can select and use HeadRush Prime as a 24-bit audio interface, enabling you to play audio through it or to send its audio signal to the computer. It can use sample rates of 44.1 kHz, 48 kHz, or 96 kHz. -
Page 47: (4.16.3) Reamping
Reamping is a process that adds the tone coloration of an amp to a pre-recorded audio signal—in this case, sending audio from your DAW through HeadRush Prime and then recording it back into your DAW. This is useful for saving time because you can change the sound of an already-recorded guitar track without having to manually play the same part again. -
Page 48: (4.17) Lock Screen
3 times. To customize the Screen Lock image, place a .png, .bmp, .jpg, or .jpeg file named LockScreenLogo in the root directory of the HeadRush drive while using the (4.16.1) Transferring Files and Setttings feature. -
Page 49: (4.18) Amp Cloner
1. In Step 1, you will choose the type of gear that you would like to clone: Amp & Cab, Amp / Pre-Amp, or Pedal Only. 2. In Step 2, HeadRush Prime will guide you through the process of correctly connecting your Amp or Pedal to HeadRush Prime. - Page 50 Tip: If you are cloning an Amp & Cab, it is much easier to compare the sound of your clone to the target Amp & Cab if you place your HeadRush Prime in a seperate room away from the target Amp & Cab. This can help you listen more objectively...
-
Page 51: (4.19) Mic Dry Out
(4.19) Mic Dry Out HeadRush Prime’s Mic Dry Out feature enables you to still use a microphone while using rigs that use guitar-centric signal paths (Straight Path, Middle Split, Immediate Split) that typically do not allow adding FX to the microphone input. -
Page 52: (4.20) Global Eq
(4.20) Global EQ The Global EQ screen lets you quickly apply additional equalization to all your presets without permanently saving them. These settings are especially useful when a venue, rehearsal space, or other environment has different acoustic characteristics than the room where you originally created your presets (e.g., the venue may sound “boomier,” or a rehearsal space with soundproofing may deaden some of the high end). -
Page 53: (4.21) Global Settings
Remaining Storage: This meter shows how much storage space is available in HeadRush Prime’s internal memory. If you want to increase the available memory, you can back up files to your computer or USB storage device and then delete the files from HeadRush Prime using the File Browser or the USB Transfer feature. - Page 54 Guitar Out: This setting determines where the top guitar path from a rig’s output signal is sent to. Choose XLR to send the signal to HeadRush Prime’s XLR outputs, 1/4” to send the signal to the 1/4” outputs, and Phones to send the signal to the 1/8”...
- Page 55 Vocal Dry Out: This setting determines where the dry vocal out from a rig’s output signal is sent to. Choose XLR to send the signal to HeadRush Prime’s XLR outputs, 1/4” to send the signal to the 1/4” outputs, and Phones to send the signal to the 1/8”...
- Page 56 Wi-Fi HeadRush Prime also features an integrated Wi-Fi connection, enabling you to connect your HeadRush prime to a local network so that you can receive new firmware updates, use the HeadRush Cloud to download/share new rigs and clones, or access files from a Dropbox storage account when using the File Browser.
- Page 57 • Live: The audio signal will be sent to your computer as well as to HeadRush Prime’s outputs. • DAW: The audio signal will be sent to your computer only. HeadRush Prime’s outputs will be disabled to prevent any latency while monitoring.
- Page 58 Select between Norm (normal) and Inv (inverted). Info On this tab you can view HeadRush Prime’s current firmware version, access HeadRush Prime’s license information, as well as reset all your global settings to their factory defaults by...
-
Page 59: (4.22) External Midi Control
(4.22) External MIDI Control HeadRush Prime can be controlled by incoming MIDI CC (control change) messages sent by external MIDI gear. This external MIDI gear must be connected to the 5-pin MIDI Input or the USB-B connection. If USB-MIDI gear is being connected to the USB-B port, it must be class compliant and require no software drivers to function. -
Page 60: (5.0) Appendix
Model: HG06 (5.2) Trademarks & Licenses HeadRush is a trademark of inMusic Brands, Inc., registered in the U.S. and other countries. macOS is a trademark of Apple Inc., registered in the U.S. and other countries. Windows is a registered trademark of Microsoft Corporation in the U.S. and other countries. - Page 61 Manual Version 1.0.0...
Need help?
Do you have a question about the PRIME and is the answer not in the manual?
Questions and answers
I **** connecting the effects loop thru send and return to my Marshall amp and it is not getting the signal from my Head rush effects
To connect the effects loop of your HeadRush Prime to your Marshall amp, follow these steps:
1. Connect the Send Output: Use a 1/4” cable to connect the FX Send output of the HeadRush Prime to the Return input on your Marshall amp.
2. Connect the Return Input: Use a 1/4” cable to connect the FX Return input of the HeadRush Prime to the Send output on your Marshall amp.
3. Set FX Loop Levels:
- If connecting to a rack effects processor on the amp, set the FX Loop Level to Rack (+18 dBu).
- If connecting to a stompbox-style effects loop, set it to Stomp (+6 dBu).
4. Configure FX Loop Stereo Settings:
- Enable or disable stereo for Send and Return as needed.
This setup allows you to integrate your HeadRush Prime into the effects loop of your Marshall amp for signal processing.
This answer is automatically generated
touch screen not responding..