HEADRUSH Looperboard User Manual
Hide thumbs
Also See for Looperboard:
- Quick start manual (80 pages) ,
- Quick start manual (97 pages) ,
- Quick start manual
Table of Contents
Advertisement
Advertisement
Table of Contents

Related Manuals for HEADRUSH Looperboard


Summary of Contents for HEADRUSH Looperboard
- Page 1 User Guide (English) Version 2.0.0...
-
Page 2: Table Of Contents
Table of Contents Introduction ........3 Managing Loops ......19 Loop Settings ......... 20 Box Contents ........ 3 Storage ..........25 Support ......... 3 Audio Routing ......26 Input Setup ........26 Monitor Setup ......... 27 Features .......... 4 Track Setup ........28 Top Panel ........ -
Page 3: Introduction
Introduction Box Contents Looperboard USB Cable Power Adapter Software Download Card Quickstart Guide Safety & Warranty Manual Support For the latest information about this product (documentation, technical specifications, system requirements, compatibility information, etc.) and product registration, visit headrushfx.com. For additional product support, visit headrushfx.com/support. -
Page 4: Features
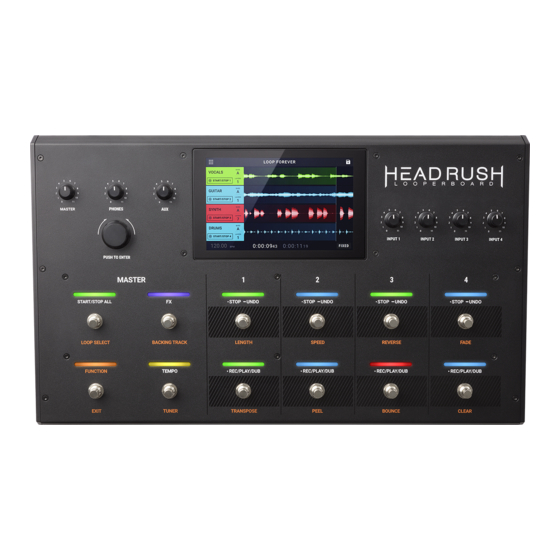
Features Top Panel 1. Touchscreen: This full-color multi-touch display shows information relevant to the HeadRush Looperboard’s current operation. Touch the display (and use the hardware controls) to control the interface. See Operation > Overview to learn how it works. 2. Encoder: Turn this encoder to scroll through the available menu options or adjust the parameter values of the selected field in the display. -
Page 5: Rear Panel
2. Power Adapter Restraint: Secure the power adapter cable to this restraint to prevent it from accidentally unplugging. 3. Power Switch: Press this button to turn the HeadRush Looperboard’s power on. Press and hold this button to turn the HeadRush Looperboard’s power off. - Page 6 Important: To avoid file loss or damage to your media, only disconnect USB and SD storage devices from HeadRush Looperboard while it is powered off. Alternatively, go to the Storage page and then tap the storage device’s eject icon.
-
Page 7: Setup
Setup Items not listed under Introduction > Box Contents are sold separately. Guitar Microphone Loudspeakers or Mixer Amplifier Drum Machine Computer Card Drive Keyboard Headphones Power Outlet... -
Page 8: Operation
Operation This chapter describes some of HeadRush Looperboard’s basic functions. Overview Timeline Page Tap here to access the Tap here to save This is the name of the loop. navigation menu. the loop. The track info boxes show each track’s name,... - Page 9 This indicator shows the amount of space used the previous page. on the currently selected storage device. On the Navigation Menu page, you can tap an icon to quickly navigate to HeadRush Looperboard’s features: • Timeline: Tap here to access HeadRush Looperboard’s timeline performance view.
-
Page 10: Recording & Playing Tracks
Recording & Playing Tracks HeadRush Looperboard lets you record audio onto four tracks and store each set of four tracks as a loop. Each track can have up to 99 layers. Each track can be a minimum of 1 second long, with no maximum length limit. - Page 11 To overdub on a track that is currently playing, press the •Rec/Play/Dub footswitch again. Tip: Use the Global Settings page to set HeadRush Looperboard to overdub immediately after recording a track (instead of just playing it). To stop a track at any point, press its •Stop/–Undo footswitch.
-
Page 12: Looper Modes
• If new tracks are shorter or longer than the primary track, HeadRush Looperboard will automatically quantize them to keep them in sync with the primary track. Tip: You can change how tracks start and stop in Sync Mode in the Track Start/Stop tab of the... - Page 13 • HeadRush Looperboard will auto-trim (or extend) the endpoints of the other looper tracks to always keep them in sync. Tip: You can change how tracks start and stop in Serial-Sync Mode in the Track Start/Stop tab of the Loop Settings Page.
-
Page 14: Importing Audio
• USB 1/USB 2/SD: These sources will appear if you have external storage connected to the respective ports on the rear panel of HeadRush Looperboard. 3. Use the touchscreen to navigate through folders, as necessary. You can search for an... -
Page 15: Fx Racks
FX Racks Applying FX On the FX Page, you can assign multiple effects (called FX Racks) at once to an audio input or looper track. Each FX Rack is made up of multiple effects that can be individually edited and toggled on the FX Rack Edit page. -
Page 16: Editing Fx
Editing FX Change FX Rack Type Load Preset Save Preset Return to FX Page Enable/Bypass Change Target FX Rack Access Individual FX Enable/Bypass Parameters Individual FX Individual FX Parameters To enable or bypass the full FX Rack, tap the Enable/Bypass button in the top-left corner of the touchscreen, underneath the back arrow. -
Page 17: Footswitch Assignment
Footswitch Assignment On the Footswitch Assign page, you can modify the functions of HeadRush Looperboard's footswitches in an FX Rack. Return to FX Page Show LED Color Settings Select LED Color Select FX Rack Trigger Behavior Assign All or Individual FX... -
Page 18: Expression Pedal Assignment
Expression Pedal Assignment In the Expression menu, you can assign up to 4 parameters, volume or panning controls to your connected expression pedal. Assign Expression Parameter Unassign Parameter Change Parameter Range To assign a parameter to the expression pedal, tap the + sign in an empty slot, and then select an FX Rack, looper track volume or looper track panning parameter to assign. -
Page 19: Managing Loops
Managing Loops Navigation Tap to save Tap to create a new loop your loop Menu Tap to load an existing loop To create a new loop (and discard unsaved changes), tap the Navigation Menu icon, and then tap New Loop icon. To save the current loop, tap the Save icon in the top right corner of the Timeline, Mixer, or Navigation Menu pages. -
Page 20: Loop Settings
Loop Settings Use the Loop Settings page to configure the settings for an individual loop. To show the loop settings, tap the Navigation Menu icon in the top-left corner of the touchscreen, and then tap the Loop Settings icon. Tempo and Click Tab: Tempo: This setting determines the tempo of the loop. - Page 21 The loop tempo can still be changed after it has been automatically detected by the first recording. When set to 1-64 Bars, HeadRush Looperboard will set that individual track to be that specific length of bars, based on the loop’s current tempo.
- Page 22 Track Start and Track Stop Tab: Track Stop: This setting determines how a track stops when using the Sync and Serial-Sync looper modes. This setting is not available for the Fixed, Serial, and Free looper modes. In the Sync looper mode, the following selections are available per track: •...
- Page 23 When this parameter is set to 100% for a track, it will not decay over time. As you decrease this parameter, HeadRush Looperboard will gradually fade out the track at this newly set rate. The lower the number, the faster the loop will decay.
- Page 24 HeadRush Looperboard functions. You can customize each track •Stop/-Undo footswitch to perform the function for one looper track or multiple looper tracks.
-
Page 25: Storage
Storage As you create and save loops, your HeadRush Looperboard's internal storage may become full. To prevent this, you can connect external USB or SD storage as needed. This gives you virtually unlimited storage of loops! To enter the Storage page, tap the Navigation Menu icon in the top-left corner, and then tap the Storage icon. -
Page 26: Audio Routing
These settings are global settings (not per loop) so that you can quickly configure HeadRush Looperboard to work best for your gear and performance settings. To show the Audio Routing page, tap the Audio Routing icon on the Navigation Menu page. -
Page 27: Monitor Setup
Monitor Setup You can use the Monitor Setup page for listening to your inputs while recording, overdubbing, and playing back loops. You can control the level of each input, as well as which output that you would like to monitor to them on. To adjust the monitor level of an input, tap and drag the white line at the top of its meter. -
Page 28: Track Setup
Track Setup To route an input to a looper track, tap the desired Input 1–4 button. When Stereo Link is enabled, Inputs 1+2 and/or Inputs 3+4 will be selected together. To select a track output mode, tap the Mono (monoaural) or Stereo (binaural) buttons. To route a track to an output, tap the desired Output 1–4 button. -
Page 29: Output Setup
Output Setup To adjust the output level of an individual output, tap and drag the white line at the top of its meter. -
Page 30: Functions
Functions Press the Function footswitch to show the Functions page in the touchscreen. The footswitch indicator will be lit orange. To select a function, press the corresponding footswitch (labeled on the top panel in orange) or tap it on the touchscreen. To exit the Functions page, press the Function/Exit footswitch. - Page 31 Reverse: Use footswitches 3–6 to adjust the playback direction of each looper track. If no looper track is recorded, the track option will be grayed out. You can also use footswitch 9 to adjust the playback direction of all looper tracks at the same time.
- Page 32 Bounce: On the first Bounce page, use footswitches 3–6 to select which tracks you would like to bounce. Then, press footswitch 9 to navigate to the next page. If the looper track is empty, the option will be grayed out. On the next Bounce page, use footswitches 3–6 to select the destination looper track for the bounce.
- Page 33 You can access these functions by using the corresponding footswitches 1–2 and 7–8 only: Loop Select: Select this option to load a loop using the footswitches. You are only able to select loops that are on the same storage device and in the same folder as the currently loaded loop.
-
Page 34: Backing Track Player
Backing Tracks can be played directly from internal storage, or from external USB/SD storage devices. Backing tracks can be loaded to the HeadRush Looperboard’s internal storage by using the Connection. See the following chapter to learn more. -
Page 35: Usb Connection
Important: When you are finished transferring contents, you must unmount/eject the HeadRush drive from your computer. 6. After the drive has been ejected, tap Sync on your HeadRush Looperboard to "commit" any changes you made to the contents of the HeadRush drive. An additional prompt will appear to confirm you have ejected the drive. -
Page 36: Recording
When connected to your computer using the USB Type-B Port, you can select and use the HeadRush Looperboard as a 24-bit audio interface, enabling you to play audio through it or send its audio signal to your computer. The HeadRush Looperboard can operate at sample rates of 44.1, 48, 88.2 or 96 kHz. -
Page 37: External Midi Control
MIDI Note messages from external MIDI gear. These MIDI messages can be received from hardware connected to the USB Type-A Ports or the 5-pin MIDI Input. Tip: You can enable or disable this feature and change the MIDI Channel used for HeadRush Looperboard to receive messages in the Global Settings menu. - Page 38 MIDI Control: Footswitch Actions (CC#3 or MIDI Note) All actions on this page are triggered by sending the listed Data Messages using MIDI CC#3 messages, or by sending MIDI note messages. Data/Note Action Data/Note Action Start/Stop/All Track 2 Half-Step Up FX 1 Toggle Track 3 Half-Step Up FX 2 Toggle...
-
Page 39: Midi Clock Receive
MIDI Clock Receive The HeadRush Looperboard can be synced to the tempo of an external MIDI device (e.g., a drum machine) while recording and playing your loops in Fixed, Sync and Serial-Sync modes. The HeadRush Looperboard can receive MIDI clock from a device connected to the traditional 5-pin MIDI Input, or from a class compliant device connected to the USB Type-A Ports on the rear panel. -
Page 40: Midi Clock Send
(e.g., a drum machine) while recording, overdubbing, and playing your loops in Fixed, Sync and Serial-Sync modes. HeadRush Looperboard can also send MIDI clock from a device connected to the traditional 5-pin MIDI Output, or from a class compliant device connected to the USB Type-A Ports on the rear panel. - Page 41 When set to Overdub, the looper track will immediately start overdubbing after the initial layer is recorded. Rec/Play/Dub After Stop: This setting determines what HeadRush Looperboard will do when a track’s Rec/Play/Dub footswitch is pressed for a stopped track. When set to Play, the looper track will begin playback of the track.
- Page 42 1/4 Output Level: This setting determines the output level of the 1/4" Outputs. When set to Line, the output level will be +18 dBu. Use this setting if you are connecting HeadRush Looperboard to a full-range, flat-response amplifier, PA speaker, mixer or audio interface. When set to Amp, the output level will be +6 dBu.
- Page 43 MIDI Thru: This setting determines the function of the MIDI Output. When set to On, MIDI sent to the HeadRush Looperboard MIDI Input will be sent directly to the MIDI Output. When set to Off, HeadRush Looperboard will only send its own MIDI information out of the MIDI output.
- Page 44 External MIDI Control: This setting determines whether HeadRush Looperboard will respond to incoming MIDI CC and MIDI Note messages. When set to On, HeadRush Looperboard will receive MIDI CC and MIDI Note messages from an external device on the selected channel.
-
Page 45: Appendix
Appendix Technical Specifications All specifications are measured at 20 kHz bandwidth. Specifications are subject to change without notice. 20 Hz – 20 kHz Inputs 1–4 Frequency Response (+0.2 dB) (balanced XLR) Dynamic Range 111 dB (A-weighted) Signal-to-Noise Ratio 110 dB (1 kHz, +4 dBu, A-weighted) THD+N 0.003%... - Page 46 20 Hz – 20 kHz Headphone Output Frequency Response (+0.2 dB) (1/4” / 6.35 mm TRS) Dynamic Range 112 dB (A-weighted) THD+N 0.008% (1 kHz, 10mW per channel into 32) Maximum Output Level +20 dBu (unloaded) (per channel into 32 Ω) 100 mW RMS Power Output 32 Ω...
-
Page 47: Trademarks & Licenses
5.5 kg Trademarks & Licenses HeadRush is a trademark of inMusic Brands, Inc., registered in the U.S. and other countries. SD is a registered trademark of SD-3C, LLC. macOS is a trademark of Apple Inc., registered in the U.S. and other countries. - Page 49 Version 2.0.0...
Need help?
Do you have a question about the Looperboard and is the answer not in the manual?
Questions and answers