Table of Contents
Advertisement
Quick Links
Advertisement
Table of Contents

Related Manuals for Ricoh WG-M2


Summary of Contents for Ricoh WG-M2
- Page 1 Fundamentals Getting Started Digital Camera Shooting Playback Operating Manual Settings Sharing External connections Appendix To ensure the best performance from your camera, please read the Operating Manual before using the camera.
- Page 2 List of accessories Rechargeable lithium-ion battery Power adapter USB cable D-LI68 D-PA164 I-USB157 Start Guide Regarding Waterproof Design Lens protector Underwater lens protector O-LP1631 O-LP1632 • The lens protector O-LP1631 is attached at delivery. • To maintain the waterproof and dustproof performance, be sure to keep the lens protector on.
- Page 3 WG-M2 Fundamentals Getting started Shooting Playback/editing Settings menu Operating with a communication device Connecting to external devices Appendix...
-
Page 4: Table Of Contents
Table of contents WG-M2 Fundamentals ......5 Shooting Extended Movie Recording ......20 Shooting high speed movies ........20 Names of parts ............5 Playback/editing ........21 LCD screen display ..........7 Screen display of playback mode ....... 8 Playing back movies and still images ....21 About the button functions ......... - Page 5 Connecting to external devices ..54 Setting the recorded pixels for movies ......35 Setting the quality level of the movie ......35 Connecting to a computer ......... 54 Setting shake reduction for movies ......36 Connecting to AV devices ......... 55 Suppressing wind noise while shooting movies ...
- Page 6 There is a possibility that the illustrations and the screen display in this manual are different from the actual ones. Regarding copyrights Images taken with this camera that are for anything other than personal enjoyment cannot be used without permission according to the rights as specified in the Copyright Act.
-
Page 7: Wg-M2 Fundamentals
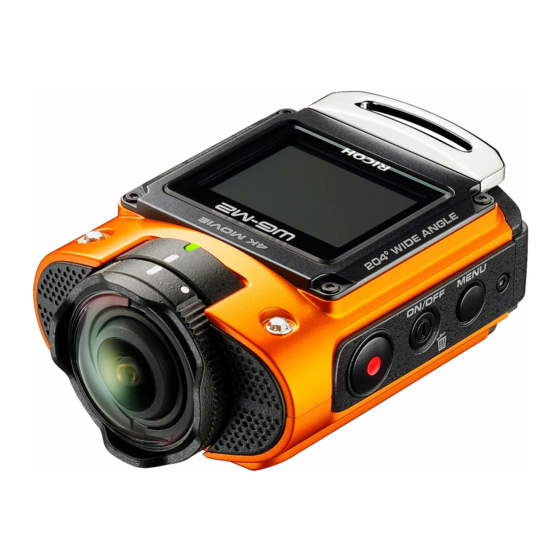
Names of parts 1 Strap lug 2 LCD screen 3 Power lamp 4 Alignment points 5 Lens protector 6 Microphone 7 Playback button/direction button (upper) 8 OK button 9 Wi-Fi button/direction button (lower) - Page 8 0 Video recording button/shutter button a Power button/delete button b MENU button c Battery/card cover d Release latch e Lock lever f Positioning hole g Tripod socket h Speaker i Lens protector lock j HDMI terminal k MicroSD card slot l USB terminal m Battery lock lever...
-
Page 9: Lcd Screen Display
LCD screen display 56:00 Shooting mode Recorded Pixels Image Effect Modes 10 EV Compensation Angle of View 11 LCD Orientation Movie SR 12 Battery level indicator Internal memory/memory card display 13 White Balance Remaining recordable time/image storage capacity 14 Sensitivity Icon while recording movies (blinks while recording movies) 15 Vibration Recorded Pixels (Movie) -
Page 10: Screen Display Of Playback Mode
Screen display of playback mode 1 / 1 2 3 4 1 Recorded Pixels (Movie) 5 Z is displayed when playing back movies shot in [Extended Movie Recording]. 2 Recorded Pixels 6 Internal memory/memory card display 3 Playback mode display 7 Battery level indicator 4 Image number/total number of images 8 Guide display (movie) -
Page 11: About The Button Functions
About the button functions In shooting mode –: Button operations (short push) disabled While in the settings menu While in the shooting screen Buttons Name While recording display display – – – Power button/delete button Press and hold: turns the power off OK button Confirms a selection Displays hidden icons... -
Page 12: In Playback Mode
In playback mode When playing back a movie While in the playback Buttons Name screen display During playback While temporarily stopped Deletes the image – Power button/delete button Press and hold: turns the power off Starts movie playback OK button (unavailable during still Temporarily stops playback Restarts playback image display) -
Page 13: Getting Started
How to remove the lens protector Attaching and removing the lens protector While pressing on the lens protector lock on the back The camera comes with two types of lens protectors. To of the camera in the maintain the waterproof and dustproof performance, be sure to direction of arrow 1, keep the lens protector on. -
Page 14: How To Attach The Lens Protector
How to attach the lens protector Installing a memory card and battery While pressing on the lens protector lock on the back Slide the lock lever in the of the camera in the direction of 1 and release direction of arrow 1, align the lock. - Page 15 • The date and time may be reset to the default settings if the While the camera is turned camera is left without the battery for a long time. • Be careful as the camera or the battery may become hot off, slowly insert the when the camera is used continuously for a long period of memory card into the...
-
Page 16: Charging The Battery
• The battery has reached the end of its service life when it Charging the battery starts to run down soon after being charged. Replace it with a new battery. • If the power lamp does not light even if the camera is Connect the supplied power adapter (D-PA164) to the camera connected to a power outlet, the battery is faulty. -
Page 17: Turning The Camera On And Off
Turning the camera on and off Initial settings Do the initial settings to use your camera for the first time after To turn the camera on purchasing it. Language settings Press and hold the button to turn the camera on. The first time you turn the camera on, the [Language/u] screen appears. -
Page 18: Date Adjustment
t Memo Date adjustment • To change the language, date, or time you have setup, refer to "Changing the display language" (p.39) and "Changing the Press the button or the button. Select the date and time" (p.38). date display style and press the button. -
Page 19: Shooting
Shooting mode Explanation Shooting mode You can shoot movies. Sound Movie can also be recorded The camera has the following shooting modes. From the simultaneously. (p.19) settings menu, select the movie or still image shooting mode for You can shoot underwater the scene that you are shooting. -
Page 20: Shooting Movies And Still Images
Shooting still images with burst shooting Shooting movies and still images Continuous still images are shot while the shutter button is Select the shooting mode according to the subject or scene and pressed (ten images are shot consecutively). shoot movies or still images. Set the [Rec.
Need help?
Do you have a question about the WG-M2 and is the answer not in the manual?
Questions and answers