Table of Contents
Advertisement
Quick Links
Advertisement
Table of Contents

Related Manuals for Bigassfans Haiku 52


Summary of Contents for Bigassfans Haiku 52
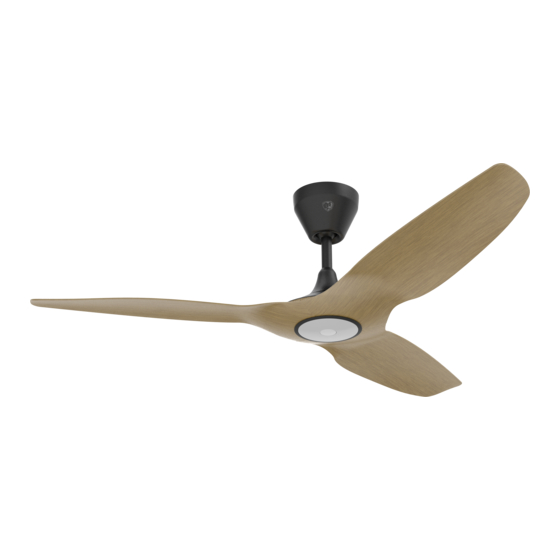
- Page 1 Haiku INSTALLATION GUIDE Guide d’installation | Guía de instalación...
-
Page 2: Table Of Contents
CONTENTS Preparation Technical specifications ����������������������������������������������������������������������������������������������������������������������������������������������������������������������������������������������������������������������������������1 Tools ����������������������������������������������������������������������������������������������������������������������������������������������������������������������������������������������������������������������������������������������������������������1 Parts Haiku S0 (Short Mount) ��������������������������������������������������������������������������������������������������������������������������������������������������������������������������������������������������������������������������������� 2 Haiku A2 (Standard Mount) ����������������������������������������������������������������������������������������������������������������������������������������������������������������������������������������������������������������������������4 Haiku X2 (Extended Mount) �������������������������������������������������������������������������������������������������������������������������������������������������������������������������������������������������������������������������� 6 Installation 1� Airfoils �������������������������������������������������������������������������������������������������������������������������������������������������������������������������������������������������������������������������������������������������������� 8 2� Lower Cover ���������������������������������������������������������������������������������������������������������������������������������������������������������������������������������������������������������������������������������������������10 3� Mounting ��������������������������������������������������������������������������������������������������������������������������������������������������������������������������������������������������������������������������������������������������12 a� Haiku S0 (Short Mount) ����������������������������������������������������������������������������������������������������������������������������������������������������������������������������������������������������������������������� 14 b�... -
Page 3: Technical Specifications
Outlet box Technical Specifications Model Diameter Weight Operating voltage Operating frequency Haiku 52 52 in� (132 cm) ≤ 14 lb (≤ 6�4 kg) 100–240 VAC, 1 Φ 50–60 Hz Haiku 60 60 in� (152 cm) ≤ 16 lb (≤ 7�3 kg) 100–240 VAC, 1 Φ... - Page 4 PARTS AND HARDWARE: HAIKU S0 SHORT MOUNT (Bamboo & Haiku 84) (Bamboo & Haiku 84) (Composite) (Composite) REV. B © 2015 DELTA T CORP. ALL RIGHTS RESERVED.
- Page 5 †† If the EMI filter is included with your fan (country dependent), please install it with your fan� ††† Safety cable is not shown� †††† Haiku 52 and Haiku 60 only� ††††† Haiku Bamboo and Haiku 84 only� HAIKU ®...
- Page 6 PARTS AND HARDWARE: HAIKU A2 STANDARD MOUNT (Bamboo & Haiku 84) (Bamboo & Haiku 84) (Composite) (Composite) REV. B © 2015 DELTA T CORP. ALL RIGHTS RESERVED.
- Page 7 If installing the fan to a junction box, only one (1) bolt and one (1) nut are needed� ††† Safety cable is not shown� †††† Haiku 52 and Haiku 60 only� ††††† Haiku Bamboo and Haiku 84 only� HAIKU ®...
- Page 8 PARTS AND HARDWARE: HAIKU X2 EXTENDED MOUNT (Bamboo & Haiku 84) (Bamboo & Haiku 84) (Composite) (Composite) REV. B © 2015 DELTA T CORP. ALL RIGHTS RESERVED.
- Page 9 †† If the EMI filter is included with your fan (country dependent), please install it with your fan� ††† Safety cable is not shown� †††† Haiku 52 and Haiku 60 only� ††††† Haiku Bamboo and Haiku 84 only� HAIKU ®...
- Page 10 INSTALL THE AIRFOILS Composite Bamboo Haiku 84 REV. B © 2015 DELTA T CORP. ALL RIGHTS RESERVED.
- Page 11 Visit www.bigassfans.com/haiku-installation-guides to view installation videos illustrating the airfoil installation process. Moving clockwise around the fan, align each airfoil with a fan hub tab and firmly press it into place� Make sure the colored stickers on the airfoils match the colors of the stickers on the fan hub� Secure the airfoils with the provided (6) airfoil screws (and grommets)�...
- Page 12 INSTALL THE LOWER COVER Bamboo Composite Haiku 84 REV. B © 2015 DELTA T CORP. ALL RIGHTS RESERVED.
- Page 13 Align the four slots on the lower cover trim with the four small round tabs on the bottom of the fan hub, and turn the trim clockwise to lock it into place� HAIKU ® BY BIG ASS FANS WWW.BIGASSFANS.COM/TECHNICAL-SUPPORT (877) BIG FANS ● ●...
-
Page 14: Haiku S0 Short Mount
MOUNT THE FAN Haiku S0 Short Mount The short mount can be installed on flat ceilings that are as low as 8 feet� This mount is available for fans with 52-inch or 60-inch diameters� Haiku A2 Standard Mount The standard mount moves air most efficiently when installed on flat ceilings ranging from 8�5–12 feet high�... - Page 15 Haiku X2: Extended Mount Haiku A2: Standard Mount Page 28 Page 20 HAIKU ® BY BIG ASS FANS WWW.BIGASSFANS.COM/TECHNICAL-SUPPORT (877) BIG FANS ● ●...
- Page 16 MOUNTING: HAIKU S0 Supplied with outlet box REV. B © 2015 DELTA T CORP. ALL RIGHTS RESERVED.
- Page 17 Loop the safety cable (b) around the mounting plate, and then secure it with the shackle (c)� Allow the fan to hang from the safety cable� This ensures there is enough space to make the wiring connections� Hardware: d. 6 mm Nylock Nut HAIKU ® BY BIG ASS FANS WWW.BIGASSFANS.COM/TECHNICAL-SUPPORT (877) BIG FANS ● ●...
- Page 18 MOUNTING: HAIKU S0 (CONT.) Wiring Diagram Wiring Diagram (with EMI Filter) AC Hot / L1 AC Hot / L1 100–240 VAC, 1 Φ, AC Neutral / L2 100–240 VAC, 1 Φ, AC Neutral / L2 50–60 Hz 50–60 Hz PE / Earth Ground PE / Earth Ground BLUE GREEN/YELLOW BROWN...
- Page 19 (connected to fan chassis) Brown Blue Green with Yellow Tracer North America Black White Green or Bare Copper European Union (EU), Brown Blue Green with Yellow Tracer United Kingdom cont. HAIKU ® BY BIG ASS FANS WWW.BIGASSFANS.COM/TECHNICAL-SUPPORT (877) BIG FANS ● ●...
- Page 20 MOUNTING: HAIKU S0 (CONT.) REV. B © 2015 DELTA T CORP. ALL RIGHTS RESERVED.
- Page 21 Slide the wiring cover trim (f) up the extension tube, aligning the tabs on the inside of the ring with the slots on the bottom of the wiring cover� Twist clockwise to snap the wiring cover trim into position as shown� HAIKU ® BY BIG ASS FANS WWW.BIGASSFANS.COM/TECHNICAL-SUPPORT (877) BIG FANS ● ●...
- Page 22 MOUNTING: HAIKU A2 Supplied with outlet box REV. B © 2015 DELTA T CORP. ALL RIGHTS RESERVED.
- Page 23 Do not fully tighten the hardware� Hardware: f. 6 x 1 x 25 mm Socket cap screw g. M6 x 1 Nylock Nut cont. HAIKU ® BY BIG ASS FANS WWW.BIGASSFANS.COM/TECHNICAL-SUPPORT (877) BIG FANS ● ●...
- Page 24 MOUNTING: HAIKU A2 (CONT.) REV. B © 2015 DELTA T CORP. ALL RIGHTS RESERVED.
- Page 25 M8 Nut f. 2 mm x 2 mm Split pin Loop the safety cable around the mounting bracket, and then secure it with the safety cable shackle (g)� cont. HAIKU ® BY BIG ASS FANS WWW.BIGASSFANS.COM/TECHNICAL-SUPPORT (877) BIG FANS ● ●...
- Page 26 MOUNTING: HAIKU A2 (CONT.) Wiring Diagram Wiring Diagram (with EMI Filter) AC Hot / L1 AC Hot / L1 100–240 VAC, 1 Φ, AC Neutral / L2 100–240 VAC, 1 Φ, AC Neutral / L2 50–60 Hz 50–60 Hz PE / Earth Ground PE / Earth Ground BLUE GREEN/YELLOW BROWN...
- Page 27 (connected to fan chassis) Brown Blue Green with Yellow Tracer North America Black White Green or Bare Copper European Union (EU), Brown Blue Green with Yellow Tracer United Kingdom cont. HAIKU ® BY BIG ASS FANS WWW.BIGASSFANS.COM/TECHNICAL-SUPPORT (877) BIG FANS ● ●...
- Page 28 MOUNTING: HAIKU A2 (CONT.) REV. B © 2015 DELTA T CORP. ALL RIGHTS RESERVED.
- Page 29 Twist clockwise to snap the wiring cover trim into position as shown� If there is not enough clearance between the wiring cover and ceiling, the screw can be moved to the lower hole on the extension tube. HAIKU ® BY BIG ASS FANS WWW.BIGASSFANS.COM/TECHNICAL-SUPPORT (877) BIG FANS ● ●...
- Page 30 MOUNTING: HAIKU X2 REV. B © 2015 DELTA T CORP. ALL RIGHTS RESERVED.
- Page 31 Slide the canopy (k) over the extension tube, temporarily resting it on the wiring cover� Hardware: b. M6 x 28 mm Bolt c. M6 x 32 mm Bolt d. M6 Nut h. M4 x 6 mm Screw i. M4 Lock washer cont. HAIKU ® BY BIG ASS FANS WWW.BIGASSFANS.COM/TECHNICAL-SUPPORT (877) BIG FANS ● ●...
- Page 32 MOUNTING: HAIKU X2 (CONT.) Supplied with outlet box REV. B © 2015 DELTA T CORP. ALL RIGHTS RESERVED.
- Page 33 Secure the mounting bracket to the outlet box with the hardware supplied with the outlet box� Note: If mounting the fan to a sloped ceiling, secure the mounting bracket so that the open side of the bracket is facing up the slope of the ceiling. cont. HAIKU ® BY BIG ASS FANS WWW.BIGASSFANS.COM/TECHNICAL-SUPPORT (877) BIG FANS ● ●...
- Page 34 MOUNTING: HAIKU X2 (CONT.) Wiring Diagram Wiring Diagram (with EMI Filter) AC Hot / L1 AC Hot / L1 100–240 VAC, 1 Φ, AC Neutral / L2 100–240 VAC, 1 Φ, AC Neutral / L2 50–60 Hz 50–60 Hz PE / Earth Ground PE / Earth Ground GREEN/YELLOW BLUE BLUE...
- Page 35 (connected to fan chassis) Brown Blue Green with Yellow Tracer North America Black White Green or Bare Copper European Union (EU), Brown Blue Green with Yellow Tracer United Kingdom cont. HAIKU ® BY BIG ASS FANS WWW.BIGASSFANS.COM/TECHNICAL-SUPPORT (877) BIG FANS ● ●...
- Page 36 MOUNTING: HAIKU X2 (CONT.) REV. B © 2015 DELTA T CORP. ALL RIGHTS RESERVED.
- Page 37 Connect the power supply wiring harness to the extension tube wiring harness� Secure the green ground wire from the extension tube to the ground wire hanging through the mounting bracket� cont. HAIKU ® BY BIG ASS FANS WWW.BIGASSFANS.COM/TECHNICAL-SUPPORT (877) BIG FANS ● ●...
- Page 38 MOUNTING: HAIKU X2 (CONT.) REV. B © 2015 DELTA T CORP. ALL RIGHTS RESERVED.
- Page 39 Secure the canopy to the mounting bracket with the (4) painted M4 x 6 mm screws� Ensure no wires or the safety cable are showing� Hardware: b. M4 x 6 mm painted screws HAIKU ® BY BIG ASS FANS WWW.BIGASSFANS.COM/TECHNICAL-SUPPORT (877) BIG FANS ● ●...
-
Page 41: Préparation / Preparación
Modelo Diámetro Peso Tensión de operación Frecuencia de operación Haiku 52 132 cm (52 po / 52 in�) ≤ 6,4 kg / ≤ 6�4 kg (≤ 14 lb) 100–240 V CA, 1 Φ / 100–240 VCA, 1 Φ 50–60 Hz Haiku 60 152 cm (60 po / 60 in�) - Page 42 COMPOSANTS ET ACCESSOIRES / PIEZAS Y ACCESORIOS: HAIKU S0 FIXATION COURTE / MONTURA CORTA (Bamboo / Bambú, Haiku 84) (Bamboo / Bambú, Haiku 84) (Composite / Compuesto) (Composite / Compuesto) REV. B © 2015 DELTA T CORP. TOUS DROITS RÉSERVÉS. / TODOS LOS DERECHOS RESERVADOS.
- Page 43 Bloc-moteur Cubo del motor ††† L’élingue de sécurité n’est pas représentée� †††† Haiku 52 et Haiku 60 uniquement� Cache-vis pour tige de prolongation (2)† (2) Cubretornillos tubo de extensión† ††††† Haiku Bamboo et Haiku 84 uniquement� Télécommande Control remoto Filtre EMI (non représenté)††...
- Page 44 COMPOSANTS ET ACCESSOIRES / PIEZAS Y ACCESORIOS: HAIKU A2 FIXATION STANDARD / MONTURA ESTÁNDAR (Bamboo / Bambú, Haiku 84) (Bamboo / Bambú, (Composite / Compuesto) Haiku 84) (Composite / Compuesto) REV. B © 2015 DELTA T CORP. TOUS DROITS RÉSERVÉS. / TODOS LOS DERECHOS RESERVADOS.
- Page 45 Cubierta inferior et un (1) écrou suffisent� Pale (3) (3) Aspas aerodinámicas ††† L’élingue de sécurité n’est pas représentée� †††† Haiku 52 et Haiku 60 uniquement� Bloc-moteur Cubo del motor ††††† Haiku Bamboo et Haiku 84 uniquement� Télécommande Control remoto Filtre EMI (non représenté)†...
- Page 46 COMPOSANTS ET ACCESSOIRES / PIEZAS Y ACCESORIOS: HAIKU X2 FIXATION LONGUE / MONTURA EXTENDIDA (Bamboo / Bambú, Haiku 84) (Bamboo / Bambú, Haiku 84) (Composite / Compuesto) (Composite / Compuesto) REV. B © 2015 DELTA T CORP. TOUS DROITS RÉSERVÉS. / TODOS LOS DERECHOS RESERVADOS.
- Page 47 ††† L’élingue de sécurité n’est pas représentée� Pale (3) (3) Aspas aerodinámicas †††† Haiku 52 et Haiku 60 uniquement� Moyeu du ventilateur Cubo del motor ††††† Haiku Bamboo et Haiku 84 uniquement� Couvre-fils Tapa del cableado Télécommande...
- Page 48 MONTAGE DES PALES INSTALE LAS ASPAS AERODINÁMICAS Composite / Compuesto Bamboo / Bambú Haiku 84 REV. B © 2015 DELTA T CORP. TOUS DROITS RÉSERVÉS. / TODOS LOS DERECHOS RESERVADOS.
- Page 49 Le site www.bigassfans.com/haiku-installation-guides propose des vidéos explicatives sur le montage des pales. En www.bigassfans.com/haiku-installation-guides encontrará videos que ilustran el proceso de instalación de las aspas aerodinámicas. En tournant dans le sens des aiguilles d’une montre autour du ventilateur, alignez chaque pale sur une saillie du moyeu du ventilateur et appuyez fermement pour les mettre en place�...
- Page 50 MISE EN PLACE DU CACHE INFÉRIEUR / INSTALE LA CUBIERTA INFERIOR Bamboo / Bambú Composite / Compuesto Haiku 84 REV. B © 2015 DELTA T CORP. TOUS DROITS RÉSERVÉS. / TODOS LOS DERECHOS RESERVADOS.
- Page 51 Luego gire el borde en el sentido de las manecillas del reloj hasta asegurarlo en su sitio� HAIKU ® DE BIG ASS FANS WWW.BIGASSFANS.COM/TECHNICAL-SUPPORT (877) BIG FANS ● ●...
-
Page 52: Haiku S0 (Fixation Courte / Montura Corta)
FIXATION DU VENTILATEUR / MONTE EL VENTILADOR Haiku S0 : fixation courte / montura corta La fixation courte peut être installée sur des plafonds non inclinés aussi bas que 2,4 m (8 pi)� Cette fixation est disponible pour les ventilateurs de 1,3 m (52 po) et 1,5 m (60 po) de diamètre� La montura corta se puede instalar en techos planos de tan solo 2�4 m (8 pies) de altura�... - Page 53 Haiku X2 : Haiku A2 : fixation longue / montura extendida fixation standard / montura estándar Page 66 / Página 66 Page 58 / Página 58 HAIKU ® DE BIG ASS FANS WWW.BIGASSFANS.COM/TECHNICAL-SUPPORT (877) BIG FANS ● ●...
- Page 54 FIXATION / MONTAJE : HAIKU S0 Fournies avec la boîte de dérivation Suministrados con la caja de distribución REV. B © 2015 DELTA T CORP. TOUS DROITS RÉSERVÉS. / TODOS LOS DERECHOS RESERVADOS.
- Page 55 (b) alrededor de la placa de montaje y luego asegúrelo con la clavija de sujeción (c)� Permita que el ventilador cuelgue del cable de seguridad� Esto asegura que los cables tengan suficiente holgura y que haya suficiente espacio para instalar el cableado� Accesorios: d. Tuercas Nylock de 6 mm HAIKU ® DE BIG ASS FANS WWW.BIGASSFANS.COM/TECHNICAL-SUPPORT (877) BIG FANS ● ●...
- Page 56 FIXATION / MONTAJE: HAIKU S0 (SUITE / CONT.) Schéma électrique (avec filtre EMI) Schéma électrique Diagrama de cableado (con filtro EMI) Diagrama de cableado Phase CA / Vivo AC (L1) Phase CA / Vivo AC (L1) 100–240 V CA / VCA, Neutre CA / Neutro AC (L2) 100–240 V CA / VCA, Neutre CA / Neutro AC (L2)
- Page 57 Verde o cobre desnudo Union européenne (UE), Marron Bleu Rayé vert et jaune Royaume-Uni / Marrón Azul Verde con línea amarilla Unión Europea (EU), Reino Unido suite cont. HAIKU ® DE BIG ASS FANS WWW.BIGASSFANS.COM/TECHNICAL-SUPPORT (877) BIG FANS ● ●...
- Page 58 FIXATION / MONTAJE: HAIKU S0 (SUITE / CONT.) REV. B © 2015 DELTA T CORP. TOUS DROITS RÉSERVÉS. / TODOS LOS DERECHOS RESERVADOS.
- Page 59 Deslice la pieza de acabado (f) por el tubo de extensión, alineando las pestañas del lado interior del anillo con las ranuras en la parte inferior de la tapa del cableado� Gire en el sentido de las manecillas del reloj para asegurar la pieza de acabado como se muestra en la figura� HAIKU ® DE BIG ASS FANS WWW.BIGASSFANS.COM/TECHNICAL-SUPPORT (877) BIG FANS ● ●...
- Page 60 / MONTAJE: HAIKU A2 FIXATION Fournies avec la boîte de dérivation Suministrados con la caja de distribución REV. B © 2015 DELTA T CORP. TOUS DROITS RÉSERVÉS. / TODOS LOS DERECHOS RESERVADOS.
- Page 61 No ajuste totalmente los accesorios� Accesorios: Tornillos de cabeza hueca M6 x 1 x 25 mm suite g. Tuercas Nylock M6 x 1 cont. HAIKU ® DE BIG ASS FANS WWW.BIGASSFANS.COM/TECHNICAL-SUPPORT (877) BIG FANS ● ●...
- Page 62 FIXATION / MONTAJE: HAIKU A2 (SUITE / CONT.) REV. B © 2015 DELTA T CORP. TOUS DROITS RÉSERVÉS. / TODOS LOS DERECHOS RESERVADOS.
- Page 63 (g)� Accesorios: b. Perno M8 c. Arandela plana 8 mm d. Arandela de seguridad 8 mm e. Tuerca M8 suite Chaveta partida 2 mm x 2 mm cont. HAIKU ® DE BIG ASS FANS WWW.BIGASSFANS.COM/TECHNICAL-SUPPORT (877) BIG FANS ● ●...
- Page 64 FIXATION / MONTAJE: HAIKU A2 (SUITE / CONT.) Schéma électrique (avec filtre EMI) Schéma électrique Diagrama de cableado (con filtro EMI) Diagrama de cableado Phase CA / Vivo AC (L1) Phase CA / Vivo AC (L1) 100–240 V CA / VCA, Neutre CA / Neutro AC (L2) 100–240 V CA / VCA, Neutre CA / Neutro AC (L2)
- Page 65 Verde o cobre desnudo Union européenne (UE), Marron Bleu Rayé vert et jaune Royaume-Uni / Marrón Azul Verde con línea amarilla Unión Europea (EU), Reino Unido suite cont. HAIKU ® DE BIG ASS FANS WWW.BIGASSFANS.COM/TECHNICAL-SUPPORT (877) BIG FANS ● ●...
- Page 66 FIXATION / MONTAJE: HAIKU A2 (SUITE / CONT.) REV. B © 2015 DELTA T CORP. TOUS DROITS RÉSERVÉS. / TODOS LOS DERECHOS RESERVADOS.
- Page 67 Gire en el sentido de las manecillas del reloj para asegurar la pieza de acabado como se muestra en la figura� Si no hay suficiente espacio libre entre la tapa del cableado y el techo, mueva el tornillo al agujero más bajo del tubo de extensión. HAIKU ® DE BIG ASS FANS WWW.BIGASSFANS.COM/TECHNICAL-SUPPORT (877) BIG FANS ● ●...
- Page 68 FIXATION / MONTAJE: HAIKU X2 REV. B © 2015 DELTA T CORP. TOUS DROITS RÉSERVÉS. / TODOS LOS DERECHOS RESERVADOS.
- Page 69 Deslice la tapa del cableado (j) sobre el tubo de extensión� Verifique que no haya ningún cable visible entre la tapa y el cubo del ventilador� Deslice la suite campana (k) sobre el tubo de extensión, apoyándola momentáneamente en la tapa del cableado� cont. HAIKU ® DE BIG ASS FANS WWW.BIGASSFANS.COM/TECHNICAL-SUPPORT (877) BIG FANS ● ●...
- Page 70 FIXATION / MONTAJE: HAIKU X2 (SUITE / CONT.) Fournies avec la boîte de dérivation Suministrados con la caja de distribución REV. B © 2015 DELTA T CORP. TOUS DROITS RÉSERVÉS. / TODOS LOS DERECHOS RESERVADOS.
- Page 71 Asegure el soporte de montaje a la caja de distribución usando los accesorios provistos con la caja de distribución� Nota: Si el ventilador se va a instalar en un techo inclinado, asegure el soporte de montaje de manera que el lado abierto del soporte quede mirando hacia arriba con la pendiente. suite cont. HAIKU ® DE BIG ASS FANS WWW.BIGASSFANS.COM/TECHNICAL-SUPPORT (877) BIG FANS ● ●...
- Page 72 FIXATION / MONTAJE: HAIKU X2 (SUITE / CONT.) Schéma électrique (avec filtre EMI) Schéma électrique Diagrama de cableado (con filtro EMI) Diagrama de cableado 100–240 V CA / VCA, Phase CA / Vivo AC (L1) 1 Φ, 50–60 Hz Phase CA / Vivo AC (L1) Neutre CA / Neutro AC (L2) 100–240 V CA / VCA, Neutre CA / Neutro AC (L2)
- Page 73 Verde o cobre desnudo Union européenne (UE), Marron Bleu Rayé vert et jaune Royaume-Uni / Marrón Azul Verde con línea amarilla Unión Europea (EU), Reino Unido suite cont. HAIKU ® DE BIG ASS FANS WWW.BIGASSFANS.COM/TECHNICAL-SUPPORT (877) BIG FANS ● ●...
- Page 74 FIXATION / MONTAJE: HAIKU X2 (SUITE / CONT.) REV. B © 2015 DELTA T CORP. TOUS DROITS RÉSERVÉS. / TODOS LOS DERECHOS RESERVADOS.
- Page 75 Conecte el arnés de cables de la fuente de alimentación al arnés de cables del tubo de extensión� Asegure el cable de tierra verde del tubo de extensión al cable de tierra que cuelga a través del soporte de montaje� suite cont. HAIKU ® DE BIG ASS FANS WWW.BIGASSFANS.COM/TECHNICAL-SUPPORT (877) BIG FANS ● ●...
- Page 76 FIXATION / MONTAJE: HAIKU X2 (SUITE / CONT.) REV. B © 2015 DELTA T CORP. TOUS DROITS RÉSERVÉS. / TODOS LOS DERECHOS RESERVADOS.
- Page 77 Asegure la campana al soporte de montaje usando los (4) tornillos M4 x 6 mm pintados� Verifique que no se vea ningún cable� Accesorios: b. Tornillos M4 x 6 mm HAIKU ® DE BIG ASS FANS WWW.BIGASSFANS.COM/TECHNICAL-SUPPORT (877) BIG FANS ● ●...
- Page 79 © 2015 Delta T Corporation dba Big Ass Solutions The information contained in this document is subject to change without notice� May be protected by one or more patents listed at www�bigasssolutions�com/patents Haiku is a trademark of Delta T Corporation, registered in the U�S� and/or other countries� Les informations contenues dans ce document sont susceptibles d’être modifiées sans préavis�...
Need help?
Do you have a question about the Haiku 52 and is the answer not in the manual?
Questions and answers