Table of Contents
Advertisement
Quick Links
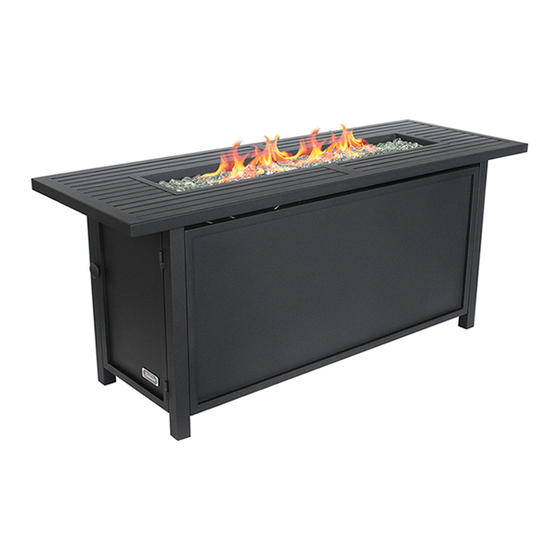
Steel Linear
Fire Table
WARNING
Improper installation, adjustment, alteration, service or maintenance can cause injury or
property damage. Read the owner's manual thoroughly before installing or servicing this
result causing property damage, personal injury or loss of life.
CAUTION
Firebowl Pan and Flame Glass are wet!
If you smell gas:
1. Shut off gas to the appliance.
3. If odor continues, keep
away from the appliance and
immediately call your gas
Do not store or use gasoline
liquids in the vicinity of this or
any other appliance.
An LP-cylinder not connected
for use shall not be stored in
the vicinity of this or any other
appliance.
For outdoor use only.
DANGER
This appliance can produce carbon monoxide
which has no odor.
Using it in an enclosed space can kill you.
Never use this appliance in an enclosed space
such as a camper, tent, car or home.
Owner's Manual
Model # 9362
Item # 952096
SKU # 50425000
DANGER
WARNING
WARNING
CARBON MONOXIDE HAZARD
Advertisement
Table of Contents

Subscribe to Our Youtube Channel
Related Manuals for Sunbeam 9362


Summary of Contents for Sunbeam 9362
- Page 1 Model # 9362 Item # 952096 SKU # 50425000 Steel Linear DANGER If you smell gas: Fire Table 1. Shut off gas to the appliance. 3. If odor continues, keep away from the appliance and immediately call your gas WARNING...
-
Page 2: Safety Information
Safety Information explosion, injury or death. WARNING • The installation of this unit must adhere to local codes or either the National Fuel Gas Code, ANSI Z223.1/NFPA54, OR CAN/CGA-B149.1, National Gas and Propane Installation Code. • THIS UNIT IS INTENDED FOR OUTDOOR USE ONLY! This product shall be used outdoors, in a ventilated space and shall not be used in any enclosed area. - Page 3 Safety Information cleaned regularly. • Inspect all elements of this heating unit before each use. If there is damage, the burner must be replaced. • Keep the hose out from any pathways to eliminate any accidental damage. (if external tank) •...
-
Page 4: Package Contents
Package Contents Before beginning assembly of product, make sure all parts are present. Compare parts with package contents list. If any parts are missing or damaged, do not attempt to assemble the product. PART DESCRIPTION QUANTITY Table Top with Burner Back Panel Left Side Panel Cross Bar... -
Page 5: Hardware Contents
Hardware Contents PART DESCRIPTION QUANTITY Burner Firebowl Pan Ignition Pin Thermocouple Bellows Gas Valve Control Knob Pulse Ignition Regulator Ignition Screen NG Air Hole Cover Heat Resistant Screen AA Battery 1-877-387-3639 Page 5... - Page 6 Hardware Contents M6x10 Bolt M6x25 Bolt M6 Washer Wrench Battery Qty. 19 Qty. 5 Qty. 24 Qty. 1 Qty. 1 SAFETY INFORMATION Please read and understand this entire manual before attempting to assemble, operate or install this appliance. If you have any questions regarding the product, please call customer service 1-877-387-3639, 8 a.m.
- Page 7 Assembly Preparation: Before beginning assembly of product, make sure all parts are present. Compare parts with package contents list and hardware contents above. If any part is missing or damaged, do not attempt to assemble the product. Contact customer service for replacement parts. Tools Required for Assembly (not included): Phillips screwdriver with medium blade 1.
- Page 8 Assembly BB CC 5. Attach the Bottom Plate (F) to Left Side Panel (C), and Right Side Panel (J). 6. Attach the Cross Bar (D) to Bottom Plate (F) and Back Panel (B) DO NOT OVERTIGHTEN as you will need to adjust the holesto ensure proper M6x10 Bolt M6 Washer alignment.
-
Page 9: Natural Gas Conversion
Natural Gas Conversion CAUTION Natural gas conversion must be performed only by a natural gas provider or service company. 1. Unscrew and disconnect propane regulator from gas valve counterclockwise using the torque wrench. Hardware Used Torque Wrench gas valve propane hose 2. - Page 10 Natural Gas Conversion 3. Connect the bellows with natural gas orifice by screwing clockwise tightly using the wrench. Then connect and tighten the natural gas orifice with inlet tube using the wrench. Natural gas orifice is painted with a black mark. Hardware Used Wrench inlet tube...
- Page 11 NOTE: Min. gas supply for input adj. 3.5 in w.c. Do not connect to a remote gas supply. Max. gas supply : 10.5 in w.c. Model: 9362 The gas pressure regulator provided with the appliance must be used. Trade name: Sunbeam This regulator is set for an outlet pressure of 11 inches water column.
- Page 12 Assembly 7. Pour the Flame Glass (K) around the burner. Ensure Flame Glass is not placed or blocking the Ignition Screen of the burner. Ignition Screen DO NOT COVER THE IGNITION SCREEN when placing the flame glass into the firebowl. Always keep ignition screen visible. 8.
- Page 13 Assembly Storage of an appliance indoors is permissible only if the cylinder is disconnected and removed from the appliance. A cylinder must be stored outdoors in a well-ventilated area out of reach of children. A disconnected cylinder must have all dust caps tightly installed and must no be stored in a building, garage or any other enclosed area. The maximum inlet gas supply pressure: 250 PSI.
- Page 14 Assembly 12. Perform Leak Test WARNING Perform all tests outdoors. NEVER leak test when smoking. Hose/Regulator Connection have been leak tested and do not leak. (I) Make 2-3 oz. of leak test solution (one part liquid dishwashing detergent and three parts water). (III) Apply several drops of solution where hose attaches to regulator.
-
Page 15: Operation
Operation Keep children away during assembly, as this item contains small parts which can be swallowed by children. Do not use indoors or inside any enclosure. Retain the assembly instructions for future reference. Installer – Please leave these instructions with the owner. For a safe heating experience, perform these checks before each use. - Page 16 Operation Caution: Do not attempt to operate until you have read and understand all Safety Information in this manual and all assembly is complete and leak checks have been performed. Before Turning Gas Supply On: enclosed area. 3. Ensure that there is no obstruction to air ventilation. Be sure all gas connections are tight and there are no leaks. 4.
-
Page 17: Care And Maintenance
Care & Maintenance you perform the following maintenance activities WARNING on a regular basis: FOR YOUR SAFETY Keep exterior surfaces clean. minutes after use. Fire table is hot to the touch. or corrosive cleaning agents. 2. While cleaning your unit, be sure to keep the area around the burner dry at all times. - Page 18 Storage CAUTION Firebowl Pan and Flame Glass are wet! to prevent water from accumulating in the Firebowl Pan and to protect exterior surfaces. direct contact with inclement weather (such as rain, sleet, hail, snow, dust and debris). Page 18...
-
Page 19: Limited Warranty
1901 Aut. Transcanadienne Dorval, QC H9P 1J1, Canada www.jaytrends.com Customer Service: 1-877-387-3639 in USA & Canada custserv@jaytrends.com © 2021 Sunbeam Products, Inc. All rights reserved. Imported by 4348125 Canada Inc. dba Jay Trends Sales, Dorval, Canada H9P 1J1 1-877-387-3639 Page 19...
Need help?
Do you have a question about the 9362 and is the answer not in the manual?
Questions and answers