Table of Contents
Advertisement
Quick Links
Scotsman Ice Systems
Installation and Operating Instructions
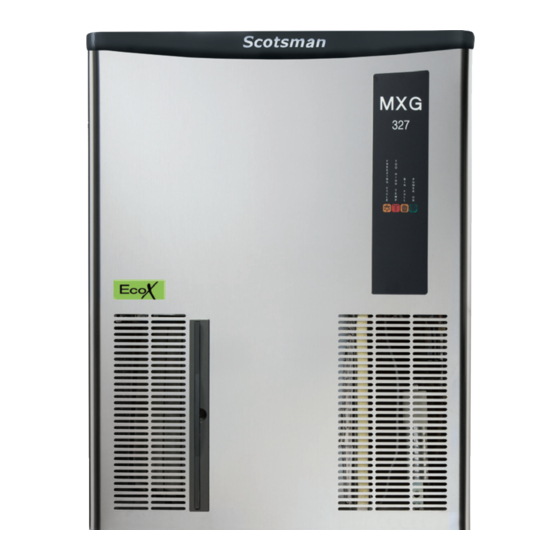
MXG 327 / 437 / 638 Models
Important Information
This equipment must be installed in accordance with all local, state, and national
regulations. This machine must be installed correctly as per these instillation
instructions. This machine must be installed by a qualified Refrigeration or Electrical
technician. A plumber should only be used to make the water connections.
THIS MACHINE IS NOT DESIGNED FOR OUTDOOR USE
LOCATION ‐
This ice machine must be level and situated in a cool dry area with
sufficient air ventilation. The ice machine is NOT to be installed in a cupboard or
with limited or restrictive airflow. The equipment should NOT be located next to
equipment that discharges or radiates hot air on or near the ice machine. NOTE:
Hotter working environments OR water temperatures will reduce the production
capacity of the machine.
Operating Specifications Below
°
Operating air temperatures Min 10
c to Max 40
°
Operating water temperatures Min 5
c to Max 35
Operating water pressure Min 1 bar to Max 5 bar
Machine side clearance Min 150mm
Machine rear clearance Min 100mm
A water filter system must be fitted to the ice machine, this will help to reduce and
control the buildup of sediment, scale, mineral and bacteria from accumulating inside
the machine. The location should have a dedicated power point, a dedicated constant
water supply and a water drainage point all within one meter of the machine.
For the ice maker to operate effectively and efficiently the machine requires
sufficient air ventilation around the machine. It requires a Minimum side clearance
of 150mm and a Minimum rear clearance of 100mm.
Contact Moffat Service Support On 1300 264 217 For Assistance
Set Up
After unboxing the machine inspect for damages. Fit the ice machine head
to the ice storage bin and secure it with the screws provided. Pull the black plastic
trim from the top of the ice machine head. Unscrew and open the front and top
panels, remove the manuals, hoses, packaging. Fit the water supply hose to the water
inlet valve on the back of the machine. Fit the water drain hose and clip to water
outlet pipe on the back of machine. Connect the opposite end of the water supply
hose to the water filter outlet. Attach the opposite end of the water drain hose to the
floor drain or tundish. Remove the ice bin sensor and stainless‐steel bracket from the
electrical area, remove the black rubber bung from the electrical area and place the
sensor through the hole into the ice bin. Remove the plastic ice chute from the food
zone of the ice machine. Bring the sensor through the ice chute hole and fix the
sensor and the sensor protector ends to the bracket as in the photo attached using
the plastic screw clips and screws provided in the service manual.
Fix the sensor to the ice machine head inside the ice bin chute hole and secure it with
a single screw in the center of the bracket. Gently pull the excess sensor wire into the
electrical panel area. Cut a slot in the rubber bung for the electrical sensor wire and
re‐fit the rubber bung. Fit the ice chute back to the machine and the front and top
panels. Re‐fit the front plastic trim panel and remove the protective plastic from the
outside of the ice machine.
°
°
c ( 24
c ideal )
°
°
c ( 18
c ideal )
Maneuver the machine into its final position. ENSURE THE MACHINE HAS THE
REQUIRED SIDE AND REAR VENTILATION CLEARANCES.
Electrical Connections
The electrical connections for this machine must comply with all local, state and
national regulations. The ice maker requires a dedicated power point. Check the
serial plate to ensure voltage requirements and plug are suitable for the wall socket
and power supply for your local area. All electrical connections and adjustments
must be undertaken by a qualified technician.
12 Point Checklist
1) Is the ice maker level?
2) Is the ambient air temperature between 10c and 40c?
3) Is there the required 150mm side clearance and 100mm rear clearance?
check there is NO other equipment next to the unit discharging hot air near
or onto the machine?
4) Have the water connections been made and checked? Is the water pressure
between 1 and 5 bars? Has the water pressure been tested?
5) Is the incoming water temperature between 5C and 35C? (optimum water
temp should be between 15c to 21c)
6) Does the machine have a 3‐stage water filter fitted?
7) Do the electrical requirements comply and has the electrical connection
been made? DO NOT TURN ON THE MACHINE.
8) Has everything been removed from inside the ice machine?
9) Has the ice bin shut off components / system been fitted correctly?
10) Has the owner been instructed on the operation and maintenance of the
machine? Has the owner been given the instillation instructions which
include the maintenance details?
11) Has the machine been cleaned and sanitized before starting up?
12) Does the customer have Moffat's service contact details?
Start Up
1) Open the water supply to the ice machine and check for water leaks.
2) Switch the power on at the wall socket and press the green light switch
button on the front of the machine.
3) The machine will enter the startup cycle for 5 minutes filling the water
trough. You will hear water trickling into the water trough.
4) After the 5‐minute filling / draining cycle is completed, the machine will start
up in the freezing cycle (Yellow light) The refrigeration system will run, and
the condenser fan will thermostat on and off during the cycle. The machine
will run for between 24 to 30 minutes making ice (depending on ambient
and water temperatures)
5) Once the ice is made and fully formed, the machine will go into a harvest
cycle until all the ice cubes have dropped into the ice storage bin.
6) When the ice bin is full, ice will block the bin shut of sensor and will shut the
ice machine down (Yellow light)
7) When ice is removed from the bin and the ice level drops, the machine will
re‐ start after a 3 x minute delay.
8) After the machine has completed 4 cycles, open the ice storage bin, and
inspect the freshly made ice cubes. They should have a small indentation at
the bottom of the cube like in diagram below.
Contact Moffat Pty Ltd on 1300 264 217 for assistance with the instillation
Advertisement
Table of Contents

Related Manuals for Scotsman MXG 327


Summary of Contents for Scotsman MXG 327
- Page 1 Scotsman Ice Systems zone of the ice machine. Bring the sensor through the ice chute hole and fix the Start Up sensor and the sensor protector ends to the bracket as in the photo attached using the plastic screw clips and screws provided in the service manual. 1) Open the water supply to the ice machine and check for water leaks. Installation and Operating Instructions 2) Switch the power on at the wall socket and press the green light switch button on the front of the machine. MXG 327 / 437 / 638 Models 3) The machine will enter the startup cycle for 5 minutes filling the water trough. You will hear water trickling into the water trough. Important Information 4) After the 5‐minute filling / draining cycle is completed, the machine will start up in the freezing cycle (Yellow light) The refrigeration system will run, and This equipment must be installed in accordance with all local, state, and national the condenser fan will thermostat on and off during the cycle. The machine regulations. This machine must be installed correctly as per these instillation will run for between 24 to 30 minutes making ice (depending on ambient instructions. This machine must be installed by a qualified Refrigeration or Electrical and water temperatures) technician. A plumber should only be used to make the water connections. 5) Once the ice is made and fully formed, the machine will go into a harvest cycle until all the ice cubes have dropped into the ice storage bin. ...
- Page 2 Maintenance, Cleaning and Sanitizing Instructions Slow production ‐ check water tap is on full, check the water filter strainer is clean on the inlet valve (remove hose to check) check water filter is clean. Is there any equipment generating heat next to the machine? (refrigerators, dishwashers, fryers, To ensure your Scotsman ice machine operates effectively, efficiently and in peak ovens) Check there is cool air ventilation around the machine. performance, the ice machine requires regular maintenance, cleaning, and sanitizing. As per Health and Safety requirements in Australia, it is the owner’s responsibility Deformed ice cubes – check water spray system is fitted correctly; check spray to ensure the ice machine is installed, maintained, and regularly cleaned as per the nozzles are clean and not blocked. Has the machine had regular cleaning and manufacture’s specifications. Ice is classed as a food product so the machine must sanitizing? when last was the machine striped and cleaned professionally? be regularly inspected and maintained to ensure the ice is clean, safe and fit for human consumption. Using a pin or pointed object, clean the spray nozzles and spray jest that spin the Water Leaks – Has the machine been sanitized regularly? A dirty blocked up machine spray bar. Reassemble the food zone components and re‐fit the water spray bar. will cause water leaks, check water filter, water hoses and drain hoses for water Cleaning Schedules leaks. Check the drain hose is securely located in a vented drain or tundish. All Scotsman ice machines require a general clean and sanitize procedure every two Mix 2 liters of water with 200mls of Moffat’s nickel safe ice machine cleaner, remove weeks to a month (depending on the location of the machine) the white evaporator plastic cover and slowly pour the cleaning solution over the top Ice machine error codes are located inside the front door panel. of the evaporator. Using a soft bristle brush, gently clean the evaporator on both All Scotsman ice machines require a major strip down, a deep clean and sanitizing sides (inside and outside) Do NOT use anything abrasive that may damage the nickel How an Ice Machine Works twice a year by a qualified technician (depending on the location of the machine it plating. (repeat for multi evaporator machines ‐ MXG‐638‐938) may require more frequent cleaning) An ice machine works by transferring heat from the water inside the ice machine, to WARNING ...
Need help?
Do you have a question about the MXG 327 and is the answer not in the manual?
Questions and answers