Advertisement
Quick Links
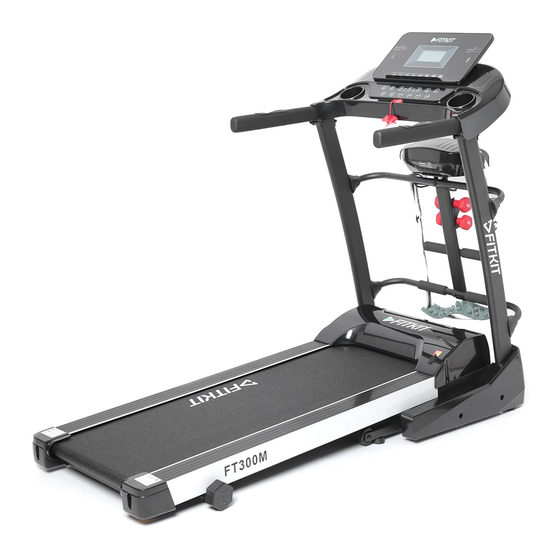
USER'S MANUAL
Model No: FT300M
Note: Following the principles of sustainable development, we may modify machines
when necessary and will not notify again. It all depends on the actual product.
Always choose a treadmill that can support at least 20 more kilograms of weight than your
current weight increases during running and walking
Advertisement

Related Manuals for FITKIT FT300M


Summary of Contents for FITKIT FT300M
- Page 1 USER’S MANUAL Model No: FT300M Note: Following the principles of sustainable development, we may modify machines when necessary and will not notify again. It all depends on the actual product. Always choose a treadmill that can support at least 20 more kilograms of weight than your...
-
Page 2: Table Of Contents
Contents 1. Product Brief ......................1 2. Security Precautions and Warnings ................2 3. Installation Instructions ..................... 5 4. Using Instructions ...................... 9 5. Routine Maintenance and Instructions ..............12... -
Page 3: Product Brief
1. Product Brief Product Name: Fitkit FT300M Motorized Treadmill Main technical parameters Parameter Names Description Input power voltage 220-240V(50~60Hz) Motor power 5HP Peak Speed 0.8-14Km/h Running surface 1200*420 mm Max user weight 110KG Expand dimension 1710*720*1360mm Function Running (sit up, massager, dumbbells and twister) -
Page 4: Security Precautions And Warnings
Accessory bag Name Name Inner hexagon wrench 6mm Silicon oil Inner hexagon wrench 5mm User manual MP3 Cable Wrench Screw M8*42 Sticker Screw M8*25 Screw M8*15 Safety key Multi-functional model accessory Name Name Screw M8*50 Massager Screw M8*35 Massager frame Screw M8*25 U-shaped tube Lock nut M8... - Page 5 ◆ Please maintain good ventilation when running. ◆ Please clamp security lock cable on your clothing to make sure the machine stops at emergency condition. ◆ If you feel not very well when using this machine, please stop and consult a doctor. ◆...
- Page 6 ---- may lead to damage to your health. ◆ This product is suitable for domestic use, does not apply to schools, gymnasium and so on. ---- Warranty voids incase the product is used apart from domestic use. ◆ Don’t use when hard objects are in clothes’ pockets. ----may cause accident or injury.
-
Page 7: Installation Instructions
3. Installation Instructions When installing, simple fix all screws first, then tighten screws when the installation of frame is done. Step 1. Put the machine on the flat ground, cut the nylon cable on the base and set the upright column and console up with the direction shown as below. - Page 8 Step 4. Take the display console out, and use combination wrench to remove the screws on the back cover. Keep the screws aside to use later. M5x20 Above are steps of single function installation,multifunctional machine needs to be installed after you complete the steps above and then continue with the following installation.
- Page 9 Step 7. Use 5# inner hexagon wrench and screw M8*50 to lock the massage frame and the massage pipe, and then tighten them with lock nut M8. M8*50 Step 8. Use M8*15 screws to fix the massager on the massage frame. Button the massage belt on the massager.
- Page 10 Step 10. Put the safety key on the position showing below. Please find the red color safety key in the accessory bag. The treadmill can only start when the safety key is put in the right position. Note: please confirm that all screws are locked uniformly according to the requirements after installation, and check no part is left out before plugging electricity.
-
Page 11: Using Instructions
4. Using Instructions Using treadmill 1) Insert the power plug properly and turn on the switch (in red color) When the light is on, there will be beep sound, and then the screen will be light up (Systems with TFT screen takes more time to enter the start interface). 2) Safety key Introduction The treadmill can only start when the safety key is put on the yellow area of the console. - Page 12 4) Console Instructions Amount of programs 3 manual programs, 12 automatic programs. Safety lock function Disconnect the security lock, "E7" shows on the screen. The treadmill stops immediately, and a beep sound is let out. Put the safety key back, all the data will be cleared in 2 seconds. Key function Start button, Stop button When the power is on, press the start button to start the treadmill.
- Page 13 Automatic program Time Set time / 10 = Running time of each period Program SPEED SPEED SPEED SPEED SPEED SPEED SPEED SPEED SPEED SPEED SPEED SPEED Translation of Error Codes Error Code Description Check and solution Communication Abnormal: Check the cable connection between the console and the control when the power is on, the border to ensure that each core is fully plugged in.
-
Page 14: Routine Maintenance And Instructions
Explosion-proof impact Possible Cause: protection: abnormal Check if the power supply voltage is 50% lower than normal voltage voltage or motor cause the ,use the correct voltage and test the machine again;check if the faulty of circuit that drive the controller has a burnt smell and replace the controller;... - Page 15 then rotate the left adjusting bolt with 1/2 turn counter-clockwise. (Picture B) ⚫ If the running belt is closer to the left, rotate the left adjusting bolt with 1/2 turn clockwise, then rotate the right adjusting bolt with 1/2 turn counter-clockwise. (Picture A) Picture A Picture B Multi-wedge Belt Tension Adjusting...
- Page 16 Scan QR code below to download cultsport APP cultsport tracks your Health data by connecting to your health equipment and The cultsport App tracks Exercise (steps), Calories burnt and Sleep besides other health data. We connect to most fitness bands so our customers do not need to invest on another product. cultsport certified panel of Nutritionists will interact (speak) and build customized plans for each customer.
Need help?
Do you have a question about the FT300M and is the answer not in the manual?
Questions and answers