
Subscribe to Our Youtube Channel
Related Manuals for Airwolf 3D HDR


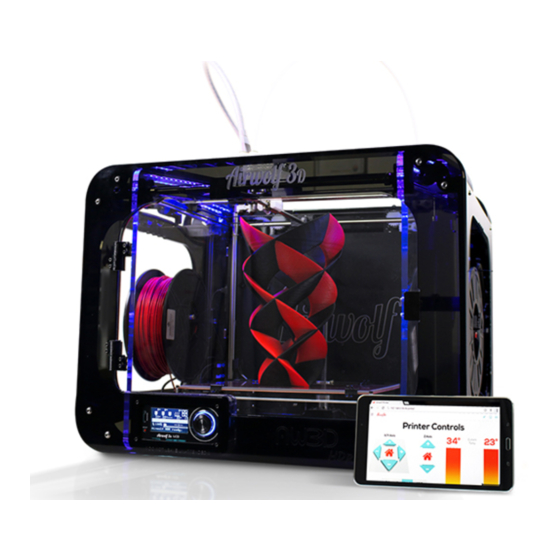
Summary of Contents for Airwolf 3D HDR
- Page 1 Phone: 949.478.2933 130 McCormick Ave. Suite 105, Costa Mesa, CA 92626 visit us at www.airwolf3d.com facebook/Airwolf3d @airwolf3d...
-
Page 2: Very Important
HDR QUICK START GUIDE PAGE Very Important Airwolf 3D has spent countless hours perfecting these print settings so that our customers have the best experience possible with their new printer. Please make sure to use these default settings when using the HDR. - Page 3 HDR QUICK START GUIDE PAGE Setup Unboxing • Remove the printer from the box. • Remove the labeled zip ties from the arms of the bed and the red rod stabilizers that hold the X-axis in place. The foam under your heat bed will be removed later in the “Wolfbox Interface”...
-
Page 4: Loading Filament
HDR QUICK START GUIDE PAGE Loading Filament • Squeeze the latch on the extruder assembly, remove the pin and set it aside, you will need it to run the printer. • Load the lament onto the spool minder. Make sure the... - Page 5 HDR QUICK START GUIDE PAGE Heat Bed Preparation For initial setup, you will be preparing the bed for use of ABS filament. For other types of filaments after initial setup, please refer to our Bed Adhesion solution found on the tech portal at www.airwolf3d.freshdesk.com...
- Page 6 Swipe from the top of the tablet screen and select the gears settings icon, then select Wi-Fi. You will need to connect to the printer’s hot spot for initial setup. The hot spot will be labelled HDR followed by your printer’s serial number. This hot spot is temporary and will be shut o at the end...
- Page 7 .STL files and G-code. • Open a Google Chrome Browser window on the tablet and type “10.10.0.1”. This will take you to the Airwolf 3D Printer setup page. • Click “Begin Setup”.
- Page 8 HDR QUICK START GUIDE PAGE Verification 1. Ensure you are set up correctly by checking that 3 icons on the top right of your screen are green. 2. Obtaining your printer’s IP Address • From the menu, go to Settings.
- Page 9 HDR QUICK START GUIDE PAGE Astroprint Interface Astroprint.com will be your dashboard for storing STL files and creating G-code. G-code is the instructions for the printer, e.g speed, temperatures, and toolpaths. Design Uploader Open AstroPrint and select "Upload Design", then navigate to the STL you'd like to upload. A new •...
- Page 10 Clicking "Make another >>" allows you to create another print file for that particular STL. Thingiverse Browse and download STL les others have created. Monitor After initial setup, this tab will display your HDR printer and will give you access to the Wolfbox Interface (page 12).
- Page 11 You can erase any printers you no longer wish to have listed in your dropdown. Do not edit any of the printer settings. Airwolf 3D has spent countless hours perfecting these • print settings so that our customers have the best experience possible with their new printer.
- Page 12 HDR QUICK START GUIDE PAGE Material Profiles During the slicing process, any printer you selected from “add filament” will be listed in this tab. You can erase any filaments you no longer wish to have listed in your dropdown. •...
- Page 13 HDR QUICK START GUIDE PAGE File Uploader This option is the same as seen on page 9. Uploading stl files here will still be sliced using Astroprint.com File Manager Upload File (stl, gcode) • Allows you to upload an STL le from your computer to your AstroPrint account and slice it into G-code.
- Page 14 HDR QUICK START GUIDE PAGE Control XY Plane (Horizontal) • X and Y movement of the hot end. • The house icon will move the hot end to its home position (front left). Z Plane (Vertical) • Z movement of the heat bed.
- Page 15 HDR QUICK START GUIDE PAGE **Removing the Foam From Under the Heat Bed** Up to this point, the foam is still under the bed. • Change the increment amount to 100mm. • Con rm the zip ties are cut o .
- Page 16 HDR QUICK START GUIDE PAGE Supplies This tab will take you to Airwolf 3D’s Store for stocking up on Wolfbite, glass, filament, etc. Settings Printer Connection • Here you can change the Baud Rate to 250000 if this step was missed previously.
- Page 17 “Turn on serial logs” should only be used if there are communication errors occurring. Support (https:/ /airwolf3d.freshdesk.com) This tab will take you to Airwolf 3D’s Tech Assistance Portal • Solutions are available for everything from Unboxing the Printer, to Maintenance and Troubleshooting.
- Page 18 HDR QUICK START GUIDE PAGE Calibration Calibration is extremely important and will drastically improve your print quality and accuracy. The printer will need to be calibrated initially out of the box, but should only require minimal adjustments from there on out.
- Page 19 HDR QUICK START GUIDE PAGE Calibrating the Heat Bed • Watch the video “HD Bed Leveling and Calibration”. As an HDR owner, you can skip to 4 minutes in. • Find this video in our Tech Portal or YouTube channel. •...
- Page 20 You can print multiple times with this method without re-applying the 3. Place glass onto heatbed and preheat. solution. Airwolf 3D assumes no liability for misuse of Wolfbite. PREMIUM GLASS BED ADHESION SOLUTION FOR PLA Use Wolfbite NANO for PLA prints.
- Page 21 130 McCormick Ave. Suite 105, Costa Mesa, CA 92626 949.478.2933 Phone: visit us at www.airwolf3d.com facebook/Airwolf3d @airwolf3d For technical support visit: https:/ /airwolf3d.freshdesk.com...
Need help?
Do you have a question about the HDR and is the answer not in the manual?
Questions and answers