Table of Contents
Advertisement
Quick Links
Advertisement
Table of Contents

Related Manuals for MyGica ATV1800E


Summary of Contents for MyGica ATV1800E
- Page 1 Android TV Box ATV1800E Quick Start Guide...
- Page 2 Keep the User’s Guide in a safe place for future reference. MyGica ATV1800E is the world’s first GMS Google Certified 4K Quad Core Smart TV Box based on the ARM Cortex A9 AMlogic S802-B Quad Core Processor, paired with the Mali-450 Octa Core GPU and powered by the Android 4.4 KitKat Operating System.
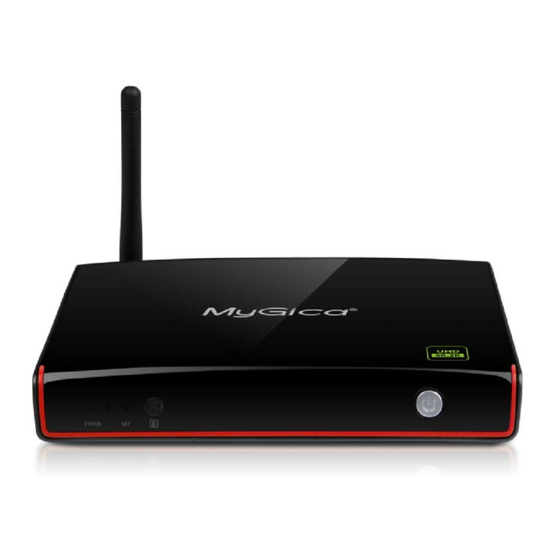
- Page 3 Product Overview Panel Introduction Connection Place ATV1800E on a flat platform near the TV, and make sure nothing block the remote control signal.
-
Page 4: Remote Controller
Remote Controller Packing List Item Description Quantity ATV1800E Power Adaptor Remote Control A/V cable RC Battery Quick installation Guide Warranty Card Please be advice, battery might not be included due to air express. After opening the box, please check carefully with the packing list, if any item is missing or damaged,... - Page 5 First Time Usage Part 1. - Power Up 1.1 - After power up, the TV will first show an animated “MyGica” logo during loading. When loading is finished, it will go to the Welcome screen. 1.2 - Welcome Screen - Follow the 4 steps to setup your ATV1800E...
- Page 6 Select your language "English is default" Adjust your screen position to fit properly onto your Television...
- Page 7 1.3 Android Launcher Menu Selection You have 2 Android Launcher Menu to choose from. For ease of use, we suggest to use the MyGica 4K HD Android Launcher. Highlight this option and select "Just Once". You will now be taken to the screen below.
- Page 8 The above screenshot is the Home Screen Menu of your ATV1800E. You will find an Icon labelled “Application” which will bring you to all of your Android Apps, as well as 8 Favorite App Icons to the right of this icon.
- Page 9 Part 2. - How to change your Favorites Icons on the Home Screen You can change the favorite applications on the Home Menu. To do so, using the IR Remote Control, move the cursor to the APP you want to change, press and hold the OK button and you will see the following screen.
-
Page 10: Part 3 - How To Change Your Settings
Control’s Arrow Keys, moving them to the far left or right of the Home Screen. The settings screenshot menu shown above, includes all the basic settings for the ATV1800E, if you want to access all other settings for the Android system, just click on “More Setting”, this will take you... -
Page 11: Ethernet Setup
To connect your box via an Ethernet connection, you must use a RJ45 Ethernet Cable, connect it to the Ethernet port on the back of your ATV1800E and then connect the other end to your Router, Ethernet Switch or Powerline Adapter. -
Page 12: Display Resolution Setting
3.4 Display Resolution Setting The Default resolution setting when you first turn on your ATV1800E is 720p Using the remote, select "HDMI Output Mode Setting" From here you can select your Video Resolution Output. The Default resolution setting when you first turn on your ATV1800E is 720p 3.4.1 Output Mode... - Page 13 3.5 Display Position Setting Using the remote, move down and highlight the "Display Position" menu option. Select OK with the remote to open this setting menu. Use the navigation keys (Left, Right, Up, Down) and OK buttons of the remote control to adjust your display position to fit your Television screen to your liking.
- Page 14 3.6 Language & input Select the Language Icon to change your language settings In here you can change to the Language of your choice, it is defaulted to "English (United States)"...
- Page 15 3.7 Date & Time Select the Date & Time Icon In here you can Set your Date, Time, Time Zone, and Time Display Format www.mygica.lk...
Need help?
Do you have a question about the ATV1800E and is the answer not in the manual?
Questions and answers