Table of Contents
Advertisement
Advertisement
Table of Contents

Related Manuals for Philips HD9880


Summary of Contents for Philips HD9880
- Page 1 HD9880 User manual...
-
Page 2: Table Of Contents
Table of contents Important Electromagnetic fields (EMF) Automatic Shut-Off Recycling Guarantee and Support Declaration of Conformity Software and firmware updates Device compatibility Factory reset Introduction General Overview Description of functions Before first use Preparations before first use Placing the removable mesh bottom Connecting the Airfryer to the NutriU App Using the Airfryer Using the food thermometer... -
Page 3: Important
• Always make sure heater is free and no food stuck in heater. Warning • If the supply cord is damaged, it must be replaced by Philips, its service agent or similarly qualified persons in order to avoid a hazard. - Page 4 • If the appliance is used improperly or for professional or semi-professional purposes or if it is not used according to the instructions in the user manual, the guarantee becomes invalid and Philips refuses any liability for damage caused. English...
-
Page 5: Electromagnetic Fields (Emf)
• Always return the appliance to a service center authorised by Philips for examination or repair. Do not attempt to repair the appliance yourself, otherwise the guarantee becomes invalid. • Always unplug the appliance after use. • Let the appliance cool down for approximately 30 minutes before you handle or clean it. -
Page 6: Declaration Of Conformity
Declaration of Conformity Hereby, DAP B.V. declares that the Airfryer HD9880 is in compliance with Directive 2014/53/EU. The full text of the EU declaration of conformity is available at the following internet address: https://www.philips.com. The Airfryer HD9880 is equipped with a WiFi module, 2.4GHz 802.11 b/g/n with a maximum output power of 92,9mW EIRP. -
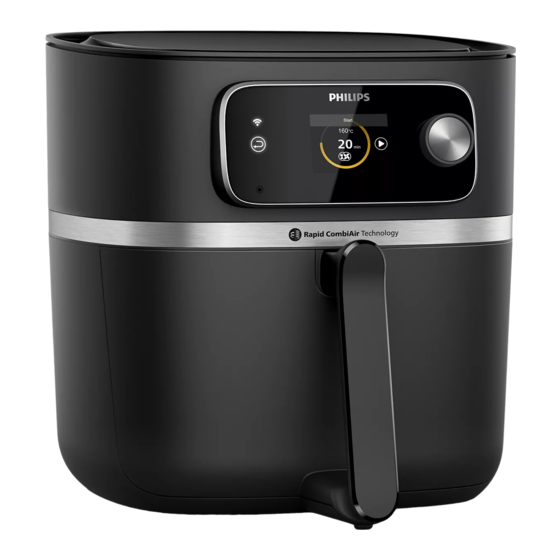
Page 7: General Overview
General Overview 1. Control panel 7. Food thermometer storage A. WiFi indicator compartment B. Return button 8. Cord storage compartment C. Rotary button 9. Air outlets D. Display 10. Air inlet 2. Food thermometer socket 11. Filling level indication 3. Drawer 12. -
Page 8: Description Of Functions
Description of functions Rotary and back button The rotary button is your central control. You can turn and press it to go through different menu options and confirm an action. Short press the rotary button: turn on the appliance. Long press the rotaty button: turn off the appliance. - Page 9 Cooking time cooking”, you can set the cooking time from 1 In cooking mode “Manual minute to 180 minutes. programs”, you do not need to set a cooking In cooking mode “Auto-Cook time as the Auto-Cook program cooks your food based on your portion sizes or desired doneness level.
- Page 10 My programs You can save your favourite Auto-Cook programs, recipe settings or manual programs”. Your list can save up to 20 entries. cooking settings under “My Select an item and start cooking right away. Cooking history history”. You can see the You can find your recently cooked items in “Cooking most recent 20 cooking history entries.
-
Page 11: Before First Use
Before first use 1. Remove all packing material. 2. Remove any stickers or labels (if applicable) from the appliance. 3. Remove the protection foil from the display. 4. Thoroughly clean the appliance before first use (see chapter "cleaning"). Preparations before first use Placing the removable mesh bottom 1. -
Page 12: Connecting The Airfryer To The Nutriu App
5. Slide the drawer back into the Airfryer by the handle. Note • Never use the pan without the basket. Connecting the Airfryer to the NutriU App Important • Make sure that your smart device is connected to your home WiFi network before you start the WiFi set-up process. - Page 13 • You can also download the NutriU app from the App Store or from the website www.philips.com/NutriU. 8. Open the NutriU app and follow the registration process. 9. Follow the steps in the app to connect your Airfryer to your WiFi and pair your Airfryer with your smart device.
-
Page 14: Using The Airfryer
Using the Airfryer Caution • This is an Airfryer that works on hot air. Do not fill the pan with oil, frying fat or any other liquid. • Do not touch hot surfaces. Use handles or knobs. Handle the hot pan with oven-safe gloves. - Page 15 5. Put the ingredients in the basket. Note • Do not overfill the basket beyond the "MAX" indication as this could affect the quality of the end result. 6. Slide the drawer back into the Airfryer. 7. Press the rotary button to turn on the appliance. 8.
- Page 16 Note • Always make sure that your food is fully cooked before serving. • Some Auto-Cook programs notify you when shaking or turning of your food is required. The Airfryer will send out a sound signal when it is time to shake or turn.
-
Page 17: Using The Food Thermometer
14. Empty the basket contents into a bowl or onto a plate. Always remove the basket from the pan to empty contents as hot oil may be at the bottom of the pan. Note • To remove large or fragile ingredients, use a pair of tongs to lift out ingredients. - Page 18 Note • Make sure the tip of the thermometer is inserted straight into the center of the thickest part of the food, not angled toward the bottom or top of it. • Make sure the thermometer is close to but not touching the bone and away from any fat or gristle.
-
Page 19: Measure The Thickness Of Your Food
Measure the thickness of your food You can use the food thermometer to measure the thickness of your food. 1. Place the food thermometer next to the food and check which marking reaches the top of the food. 2. Set the value from 1 to 6 in the Airfryer when you get asked about the thickness if you cook with an Auto-Cook program. -
Page 20: Making Home-Made Fries
Note • Depending on the food, you may be asked to set the filling level, pieces, weight, thickness and/or doneness level. • Use the markings indicated in the basket as a reference to set the correct filling level. • Before you choose the filling level, make sure that you always distribute the food evenly in the basket. -
Page 21: Making Homemade Yogurt
Making homemade yogurt 1. Mix 1 3/4 liter of milk and 3 tablespoons of yogurt in a bowl. Make sure that the fat content of the milk and of the yogurt is the same. 2. Pour 150-200ml into each small glass and close with a lid. 3. -
Page 22: Food Thermometer
Food thermometer 1. Turn the rotary button until "Food thermometer" is selected. Press the rotary button to enter this mode. 2. Adjust the desired core temperature (measured at the tip of the food thermometer) by rotating the rotary button. You can choose a temperature from 30 to 99°C. -
Page 23: Keep Warm
Food item Doneness level Core temperature Whole potato Done 92-95°C Bread Done 90-95°C Note • The suggested core temperature does not correspond necessarily to the safe minimum internal temperature of the food. • The internal temperature of the cooked food will continue to rise a few degrees after the food is taken out of the appliance. -
Page 24: Cooking History
Cooking history 1. Turn the rotary button until "Cooking history" is selected. Press the rotary button to enter this mode. 2. Turn the rotary button to the desired item. If you stay at one item, the cooking parameters pop up. 3. -
Page 25: Cleaning Table
This chapter summarizes the most common problems you could encounter with the appliance. If you are unable to solve the problem with the information below, visit www.philips.com/support for a list of frequently asked questions or contact the Consumer Care Centre in your country. - Page 26 Problem Possible cause Solution This is normal. All handles and The outside of the The heat inside knobs that you need to touch appliance becomes radiates to the during use stay cool enough to hot during use. outside walls. touch. The pan, the basket, and the inside of the appliance always become hot when the appliance is switched...
- Page 27 Problem Possible cause Solution Several appliances The Airfryer has a high wattage. are connected to Try a different outlet and check the one outlet. fuses. Some small spots can appear inside You can prevent damage by the pan of the lowering the basket into the pan Airfryer due to the properly.
- Page 28 © 2022 Philips Domestic Appliances Holding B.V. All rights reserved...
Need help?
Do you have a question about the HD9880 and is the answer not in the manual?
Questions and answers