Epson P-7000 User Manual
Multimedia storage viewer
Hide thumbs
Also See for P-7000:
- User manual (116 pages) ,
- Basics manual (72 pages) ,
- Instruction manual (46 pages)
Table of Contents
Advertisement
Quick Links
Advertisement
Table of Contents

Related Manuals for Epson P-7000


Summary of Contents for Epson P-7000
- Page 1 P-7000 User’s Guide...
- Page 2 Epson product. Epson is not responsible for any use of this information as applied to other products. Neither Seiko Epson Corporation nor its affiliates shall be liable to the purchaser of this product or third parties for damages, losses, costs, or expenses incurred by the purchaser or third parties as a result of accident, misuse, or abuse of this product or unauthorized modifications, repairs, or alterations to this product, or (excluding the U.S.) failure to strictly comply with Seiko Epson Corporation’s operating and maintenance instructions.
- Page 3 MPEG Layer-3 audio coding technology is licensed from Fraunhofer IIS and Thomson. General Notice: Other product names used herein are for identification purposes only and may be trademarks of their respective owners. Epson disclaims any and all rights in those marks.
-
Page 4: Table Of Contents
Contents Introduction Features........8 Using the Documentation. - Page 5 Viewing Videos ....... . . 32 Supported Video Formats ..... 32 Playing Videos .
- Page 6 Chapter 6 Printing Connecting the Viewer to a Printer ....60 Selecting a Photo....... . 61 Retouching a Photo.
- Page 7 Appendix A Notices and Specifications System Requirements ......81 Windows System Requirements ....81 Macintosh System Requirements .
-
Page 8: Features
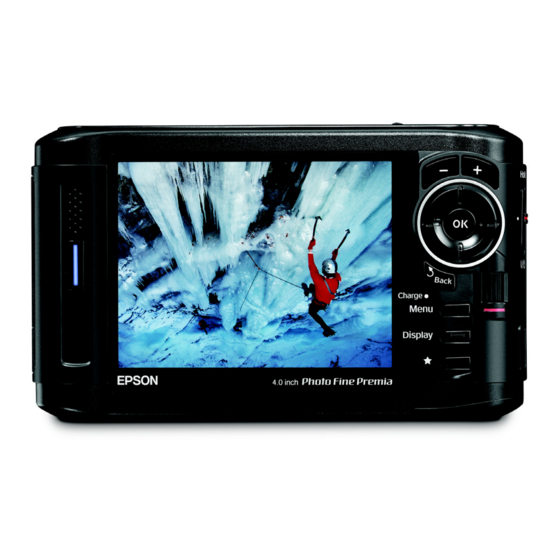
Introduction With the Epson ® P-7000 Multimedia Storage Viewer can enjoy photos, videos, and music wherever you go. Your images are displayed on Epson’s exclusive 4-inch Photo ® Fine Premia LCD in brilliant color and detail. Features ❍ Large 4-inch LCD with true Adobe ❍... -
Page 9: Chapter 1 Getting Started
Chapter 1 Getting Started Parts SD card slot CompactFlash card slot Memory card access light Headphone connector Liquid Crystal Strap hook Display (LCD) CF card slot eject button Power switch with Hold function Battery cover Host USB connector (for camera, flash drive, etc.) Device USB connector (for computer) -
Page 10: Lights And Buttons
Lights and Buttons Activity light Flashes blue during power on, printing, file transfer, and computer connection Back button Press to cancel your selection or return to the previous display or menu item Zoom buttons Press to zoom in or out, or adjust the volume for music or video Charge light... -
Page 11: Installing The Battery
Installing the Battery The viewer comes with a lithium-ion battery. Slide the battery cover to the right to open it. Insert the battery into the compartment in the direction of the arrow on the battery. Close the battery cover and slide it to the left until it clicks. -
Page 12: Removing The Battery
To charge the battery, connect the AC adapter as shown below. Connect the other end to the power cord and plug it into an electrical outlet. Caution: Do not connect the AC adapter when the battery is not installed; this can damage the viewer. Turn off the viewer before disconnecting the AC adapter. -
Page 13: Turning On The Power
Pull out the battery. Then close the battery cover. Note: If you remove the battery, the date and time settings will be erased after about one day. The next time you turn on the viewer, the date and time setting screen will be displayed. Turning On the Power Slide the power switch down as shown below, then release it. -
Page 14: Locking The Buttons
Note: If you see the Home screen instead (as shown in “Using the Home Screen” on page 15), the language has already been selected. To change it or check the date and time, select Settings on the Home screen. Then follow the instructions in “Date and Time”... -
Page 15: Using The Home Screen
Using the Home Screen Whenever you turn on the viewer, the Home screen appears. All operations can be started from this screen. Hold icon SD icon The following table summarizes the Home screen. Icon Function Battery Indicates the remaining charge in the battery. icon See “Charging the Battery”... -
Page 16: Turning Off The Power
Turning Off the Power Before you turn off the viewer, make sure the memory card access light is off. Then slide the power switch as shown below, and hold it down for a few seconds until the activity light flashes and the viewer turns off. Memory card access light Activity... -
Page 17: Chapter 2 Using Memory Cards
Chapter 2 Using Memory Cards The viewer has two memory card slots: one for ™ CompactFlash or Microdrive cards, and one for SD (Secure Digital) and MultiMediaCard cards. This chapter explains how to insert and remove memory cards and how to display and copy files. Inserting and Removing Memory Cards The viewer supports the following types of memory cards:... -
Page 18: Using The Cf Card Slot
Using the CF Card Slot You can use Type2 and 3.3V CompactFlash cards or Microdrive cards in the slot. If you have a CF Card CompactFlash adapter, you can also use other types of cards, as described in “Inserting and Removing Memory Cards” on page 17. -
Page 19: Using The Sd Card Slot
Using the SD Card Slot You can use Secure Digital, SDHC, MultiMediaCard, or MMCplus cards in the slot. SD Card Insert the memory card into the slot as shown below. Then push the memory card all the way into the slot. Caution: Make sure you insert memory cards in the correct orientation. -
Page 20: Copying Files From A Memory Card
Copying Files From a Memory Card After you insert a memory card, you can browse the files and decide what you want to do with them, or simply copy all the files on the card to the viewer. Note: If the battery power is low, copying may not be completed. Use the AC adapter when copying files. -
Page 21: Copying Selected Files
Copying Selected Files You can copy selected files directly from a memory card to a new or existing folder in My Photos or My Videos. Insert a memory card. If the Memory Card menu doesn’t open automatically, select on the Home screen, then Memory Card press In the Memory Card menu, select... -
Page 22: Creating A New Folder And Copying Files
Use the 4-way ring to highlight , then press right on the 4-way ring to select it. Videos Do one of the following: ❍ To copy the items into the selected folder, press Your items are copied. ❍ To copy the items into a new subfolder, highlight and press Create New Folder next section to enter a name for the new folder and... - Page 23 To enter a new name, use the Back to clear the current name. Then enter a new name using the 4-way ring or jog dial (highlight each character and press to enter it). ❍ To move the cursor forward or backward, press the (plus) or (minus) buttons.
-
Page 24: Chapter 3 Viewing Photos And Videos
Chapter 3 Viewing Photos and Videos After you have copied files from a memory card, you can view or play them in various ways. This chapter explains how to view photos and video files on your viewer and on a TV or projector. -
Page 25: Changing The Display
❍ By default, unsupported files are not displayed. If you want to change this setting, see “View Mode” on page 71. ❍ Thumbnails of video files that have not been played back, or have not been played back completely, are displayed with ( ) or shown in mini-thumbnail view). - Page 26 Menu Function Enhanced Displays photo images using a wider color Photo Display gamut. See page 30. Mode Playback Plays the sound memo recorded with an Sound Memo image file. Copy/Move Copies or moves files or folders. See page 21. Edit Locks files or folders (page 57), renames folders (page 54), or rotates photos (page 31).
-
Page 27: Supported Image Formats
Menu Function Settings Adjusts LCD brightness, turns the guide and key beep on or off, and sets display options for private folders and unsupported files. See pages 72 to 73. Return to Returns to the Home screen. HOME Delete Deletes files or folders. See page 55. Supported Image Formats Image Extension... -
Page 28: Zooming An Image
You see a screen like this: Use the 4-way ring or jog dial to select the image you want to view, then press . The selected image is enlarged to fill the screen. Note: If your image file contains a sound memo (WAV format), you can listen to it during full screen display. -
Page 29: Displaying Image Information
Displaying Image Information You can view image information, a histogram, and display an over- and under-exposure preview. To view the file name and date for a full-screen image, press the button. Display To view image information, and a histogram, press again: Display To view the over- and under-exposure preview, press... -
Page 30: Displaying A Wider Color Gamut
Displaying a Wider Color Gamut Images are displayed in the color space they were captured in, either sRGB or AdobeRGB. You can also display images in a wider color gamut and correct color casts, backlighting, under-exposure, and low-contrast images with Enhanced Photo Display Mode. -
Page 31: Rotating An Image
Select one of the following, then press settings as noted. ❍ Choose from 10 brightness levels. LCD Brightness: ❍ Choose the time between Slide Show Duration: slide transitions, from 1 to 30 seconds. ❍ Choose from three preset Slide Show Music: music selections or a playlist that you have created. -
Page 32: Viewing Videos
Viewing Videos The viewer supports video files in resolutions ranging from 320 × 240 pixels to 720 × 576 pixels, with file sizes up to 2GB. Supported Video Formats File Video Audio codec format codec .avi MPEG G.711, PCM, QT LPCM, ADPCM, MS ADPCM, IMA ADPCM,... -
Page 33: Playing Videos
File Video Audio codec format codec .mp4 MPEG-4 AAC-LC, PCM, (Advanced QT LPCM, Simple ADPCM, Profile) MS ADPCM, IMA ADPCM, MS IMA ADPCM, G.722, G.726 H.264/AVC AAC-LC, (Baseline QT LPCM Profile Level 1.3) Playing Videos You can transfer video files directly from memory cards as described in “Copying Files From a Memory Card”... -
Page 34: Setting The Display Mode
❍ To view information about the video, press You see a progress bar on the video. Press to view information including frame rate, bit rate, and video and audio codecs: Setting the Display Mode You can choose from five different modes to adjust the color, brightness, and contrast for various types of videos. -
Page 35: Changing The File View Mode
Connect the cable’s mini-plug to the the side of the viewer. The viewer’s LCD screen turns off. Set the TV or projector to display video input from the viewer. You can use all of the viewer’s controls to play slide shows, photos, and videos on your TV or projector. -
Page 36: Chapter 4 Playing Music
Playing Music You can transfer audio files from your computer and play them on the viewer. You can create playlists using the Epson Link2 software on your computer, or using the viewer itself. This chapter describes how to transfer and play music, and how to manage your audio files on the viewer. - Page 37 Caution: Epson Link2 uses ID3 tags to organize your music files. If the ID3 tag information is missing, these items will appear as “unknown.” The viewer will rename your files to make them playable.
-
Page 38: Supported Audio Formats
Supported Audio Formats The viewer can store up to 10,000 audio files. It supports the following audio formats without copyright protection and with a maximum file size of 200MB: Audio file Audio codec Details extensions .m4a AAC (MPEG4) Maximum bit rate: 320 kbps (8 to 48 kHz, 16 bit, stereo, mono) .mp3... - Page 39 Select a category to start playing, then press right on the 4-way ring. You can narrow your search by selecting one of the categories and navigating its subcategories using the 4-way ring. Select to include all items in the list. ❍...
-
Page 40: Setting Repeat And Shuffle Options
You can create playlists using the Epson Link2 software, or Play Mode on the viewer itself. Follow the steps below to create a playlist using Epson Link2, or see “Creating a Playlist on the Viewer” on page 41. to set the Connect the viewer to your computer as described on page 36. -
Page 41: Creating A Playlist On The Viewer
Enter a name for the playlist. Select the songs you want to add. If you want to add all the songs from an album or by an artist, you can select the album or artist. Click the down arrow in the center of the screen to add the songs to your playlist. -
Page 42: Adding Tracks To An Existing Playlist
After entering the name, select Done Select the tracks for the playlist using the 4-way ring and the button. The selected files are displayed with check marks. If you want to select all the tracks displayed, press and select Menu Select All When you have selected all the tracks you want, press... -
Page 43: Using The Equalizer
Using the Equalizer You can use the equalizer to select from 7 music type settings or create a customized setting of your own. In My Music, press the button to display the Menu pop-up menu. Select Audio Equalizer Setting Select the setting you want and press ❍... -
Page 44: Chapter 5 Managing Files
Copying Files To and From Your Computer You can use the Epson Link2 software to back up files from the viewer to your computer and copy files from your computer to the viewer. Make sure you have installed the software, following the instructions in your P-6000/P-7000 Basics guide. -
Page 45: Backing Up Files To Your Computer
44. Double-click the Epson Link2 to open the program. If you see a message that Epson Link2 has found files in your viewer’s Backup Files folder, click files. Note: Only files that haven’t already been copied will be transferred. -
Page 46: Copying Files From Your Computer To The Viewer
If you want to specify conversion settings, see “Setting Backup and Conversion Preferences” on page 47. Connect the viewer to your computer as described on page 44. Double-click the Epson Link2 to open the program. Select , or Photos Videos Music type of files you want to transfer. -
Page 47: Setting Backup And Conversion Preferences
Setting Backup and Conversion Preferences You can use the Settings window in Epson Link2 to change the folder where files from the viewer are saved on your computer. You can also change the conversion settings for video files transferred from your computer to the viewer. In Windows, you can also change the conversion settings for audio files. -
Page 48: Using The Viewer With Usb Devices
If you want to change the folder where files are backed up on your computer, you can adjust the Store Folder checkbox. You Settings. The default folder is Epson Link2 Backup in My Documents (Windows XP or 2000) or Documents (Windows Vista... -
Page 49: Connecting A Usb Device
Note: USB hubs are not supported, and some USB devices may not work without a power connection. Epson cannot guarantee the compatibility of any device. Connecting a USB Device Before you connect a USB device, connect the AC adapter to the viewer and plug it in if possible. If your USB device has an AC adapter, use it to prevent the possible loss of files during transfer. - Page 50 Do one of the following: ❍ To copy all files, select Backup USB device to , then press . The files are copied to a Viewer folder that is automatically created in the Backup Files folder on the viewer. The folder is named according to the date, for example, .
-
Page 51: Copying Files To A Usb Device
Copying Files to a USB Device You can copy all the files or selected files from the viewer to a USB device. If your USB device has an AC adapter, connect the adapter and plug it in before starting. Backing Up All Files to a USB Device This process may take some time, depending on the volume of data in the viewer. -
Page 52: Setting Folders As Private
Press the button. Menu Select , then press Copy/Move Select , then press Select and Copy Files photos are displayed with white checkboxes. Use the 4-way ring or jog dial to highlight each file you want to copy, then press the selected items are displayed with red When you are finished selecting files, press Use the 4-way ring to highlight... - Page 53 Select , then press Show Private Folders You see the Password screen: If you have already set a password for your viewer, enter the 4-digit password number using the 4-way ring, then press If you have not set a password, leave the password at the default setting, , and press 0000...
-
Page 54: Renaming A Folder
Renaming a Folder Note: Folders in Backup Files can’t be renamed. Using the 4-way ring, select a folder to rename. Press , select , then press Menu Edit Select , then press . You see the on-screen Rename keyboard: Use the (backspace) button to clear the current Back name. -
Page 55: Deleting Files And Folders
Do one of the following: ❍ To copy files to another folder, select , then press Copy Files ❍ To move files to another folder, select , then press Move Files Note: To copy or move a single file, select the file you want to copy or move, press Menu, and select Copy/Move. - Page 56 Checkboxes appear on each thumbnail image: Checkbox Use the 4-way ring or jog dial to highlight each file or folder you want to delete, and press selected items are displayed with red Press Note: To select all files and folders, press Menu and select Select all, then press OK.
-
Page 57: Locking Files And Folders
Locking Files and Folders You can lock selected files or folders so they cannot be deleted or rotated. When a file or folder is locked, the icon is displayed. Select a folder or file to lock. Press the button to display the pop-up menu. Menu Select , then select... -
Page 58: Setting A Folder Icon Or Home Screen Wallpaper
When you copy a rated file to your computer, you must use the Epson Link2 software to copy the rating information. You can then move your rated files into certain Adobe applications. - Page 59 Use the included USB cable to connect the viewer to your computer. Larger end Smaller end On the Home screen, use the 4-way ring to highlight , then press USB Device In the USB Device menu, select Monitoring begins automatically. When you’re finished, disconnect the USB cable from the viewer and computer.
-
Page 60: Chapter 6 Printing
PictBridge-compatible printer, such as the Epson Stylus Photo R380, 1440, R1900 and R2400. Check the Epson website to get the latest information on supported printers. See “Where To Get Help” on page 80. Depending on your printer model and settings, you can use the following types of paper. -
Page 61: Selecting A Photo
Connect the other end of the cable to the USB connector on the printer. Note: Disconnect the USB cable from the viewer when not operating with a computer or printer. Selecting a Photo Select on the Home screen using the Print Wizard 4-way ring or jog dial, then press Select... -
Page 62: Retouching A Photo
You see the retouch confirmation message. Do one of the following: ❍ To retouch your photo before printing, select then press You see the Retouch Settings menu. Continue with the steps below to retouch your photo. ❍ To continue without retouching your photo, select , then press Note: If the photo you selected is not supported by the viewer,... -
Page 63: Cropping A Photo
Adjust settings as necessary. After a moment, you see the results of the retouching effects. Original photo When you’re finished adjusting the settings, highlight and press to return to the Retouch Additions screen. Note: To set the Retouch Additions settings to their original values, select Return to Default, then press When you’re finished adjusting settings, select then press... - Page 64 You see a red cropping indicator. Crop your image using the following buttons: ❍ Use the (plus) and (minus) buttons to enlarge – and reduce the cropping area. ❍ Use the jog dial to make fine adjustments to the crop area. To make vertical adjustments, press up or down on the 4-way ring, then rotate the jog dial.
-
Page 65: Selecting Layout Settings
Selecting Layout Settings Select the paper size that you are printing on using the 4-way ring or jog dial, then press You see a preview of your print layout: Use the following buttons to adjust the print layout: ❍ Use the (plus) or (minus) buttons to enlarge and –... -
Page 66: Printing Your Photos
Printing Your Photos Make sure the AC adapter is connected to the viewer before you print. If the viewer can’t find the printer, make sure the printer is turned on and has paper and ink, then select to continue. Check Printer Connection On the printer confirmation screen, use the 4-way ring to change the following settings: Setting... -
Page 67: Printing Multiple Photos
Printing Multiple Photos You can print multiple photos without retouching or cropping. Select on the Home screen using the Print Wizard 4-way ring or jog dial, then press Select , then press Print Original Photo Select the folder that contains the images you want to print, then press Select the photos you want to print using the 4-way ring, then select the number of copies you want to print... -
Page 68: Creating A Watermark
Use the 4-way ring or jog dial to highlight each photo you want to print, then press the The selected items are displayed with red marks. Note: To select all files, press Menu and choose Select All JPEG Files, Select All RAW Files, or Select All Files, then press When you’re finished selecting photos, press Follow the steps in “Printing Your Photos”... -
Page 69: Using An Image As A Watermark
Select a color for the watermark, then press When the confirmation message appears, press Using an Image as a Watermark Note: You can only assign PNG format images created in Adobe Photoshop. The images must be no larger than 720 × 480 pixels and less than 10MB in size. -
Page 70: Chapter 7 Customizing Settings
Chapter 7 Customizing Settings You can change settings for displaying images, copying files, controlling the viewer’s sounds, and other functions. On the Home screen, select Settings this screen: Use the 4-way ring or jog dial to select and change any of the settings described in this chapter. -
Page 71: Power Save
Power Save Use the following options to adjust how the viewer saves power: ❍ to set when the LCD screen turns Backlight Timer dark during inactivity. You can select 1, 3, 5, 10, or 15 minutes. ❍ to set when the LCD turns off during Sleep Timer inactivity. -
Page 72: Backup Settings
Backup Settings Use these options to change how the viewer handles various Backup operations: ❍ to select what files are backed up. Backup Method Select to copy all files or Backup All Data to copy only new files. New Data ❍... -
Page 73: Sound
Sound Use these options to control the default volume for movies and music, and to set audible alerts. ❍ to turn on or off sounds made by the Guide Beep viewer when an error occurs. ❍ to turn on or off sounds made by the viewer Key Beep when you press the buttons. -
Page 74: Troubleshooting
Cannot access the hard Backup all the data to the drive. There may be a computer and contact Epson as problem with the hard described in “Where To Get drive, or it may not be Help” on page 80. -
Page 75: Problems And Solutions
Error message Description No response from the Make sure your printer is on and printer. Please check the the USB cable is connected printer. correctly. Check the printer’s manual to make sure it’s PictBridge-compatible. Turn off the viewer and wait until it cools down. -
Page 76: File Viewing Problems
File Viewing Problems The image is not displayed. Cause What to do The image format is not If an image doesn’t appear or supported. appears as supported file type. See “Supported Image Formats” on page 27. The image data is Copy the image again. -
Page 77: File Operation Problems
No sound comes out when a video is played. Cause What to do The Audio Codec of the Check the file format. See file is not supported. “Supported Video Formats” on page 32 or “Supported Audio Formats” on page 38 for details. File Operation Problems You cannot copy a file or files. -
Page 78: Printing Problems
Epson’s support website. Instructions for updating the firmware are provided online. Uninstalling Software If you need to uninstall the Epson Link2 software, follow the procedure below for Windows or on page 79 for Macintosh. Windows Click... -
Page 79: Macintosh
P-7000 Double-click the installation software icon. Select Custom Install. Select Epson Link2 On the software installation screen, select When you see a message asking you to restart, click Restart Now. Resetting the Viewer If the viewer stops working, or you want to restore its default settings, you can reset it. -
Page 80: Replacing The Battery
You can download software and documentation, get FAQs and troubleshooting advice, or e-mail Epson with your questions. Speak to a Support Representative Before you call Epson for support, please have the following information ready: ❍ Product name (Epson P-7000) ❍... -
Page 81: Appendix A Notices And Specifications
Appendix A Notices and Specifications System Requirements Windows System Requirements To use your viewer software, your system should have: ❍ A Microsoft ® Windows compatible PC with a Pentium ® III processor (1 GHz or faster recommended) ❍ Microsoft Windows 2000 Professional (SP3 or later), Windows XP, Windows XP Professional x64 Edition, or Windows Vista. -
Page 82: Safety Instructions
Do not format the hard disk from your computer or the viewer will be unusable. Epson is not responsible for backing up or recovering data. It is strongly recommended that you make your own backup files. ❍... -
Page 83: Using The Battery
If a battery is swallowed, seek medical treatment immediately. ❍ Use only an Epson lithium-ion battery for the viewer according to the instructions in this manual. ❍ Use only AC adapter model A351H and the viewer (Model G961A/G961B) to charge batteries. -
Page 84: Storing The Battery
❍ Prevent the battery from coming into contact with metal objects that could short-circuit it, such as coins or keys. ❍ Do not insert the battery into power outlets or other power sources such as car cigarette lighter sockets. ❍ Do not solder wires or terminals directly to the battery. - Page 85 ❍ The AC adapter and power cable provided are designed for use with the viewer. Do not attempt to use them with other electronic devices unless specified. ❍ Do not remove the AC adapter from this device during operations (connecting the AC adapter during operations is possible).
-
Page 86: Using A Memory Card
LCD panel is damaged in any way. ❍ If the LCD panel on the viewer is damaged, contact Epson. ❍ If the liquid crystal solution contained in the LCD panel on the viewer leaks out and gets onto your hands, wash them thoroughly with soap and water. -
Page 87: Standards And Approvals
Wash hands after handling. (provided in accordance with Proposition 65 in Cal. Health & Safety Code § 25249.5 and following) Standards and Approvals Epson P-7000 EMC: FCC Part 15 Subpart B Class CAN/CSA-CEI/IEC CISPR22 Class B AC Adapter (Model A351H) -
Page 88: Specifications
Specifications General Size: 4.0 inches Pixels: Colors: Approx. 16,770,000 2.5 inch HDD, 160GB, (148GB FAT32 available for storage) Dimensions Height: 3.5 inches (88.7 mm) (without Width: 5.9 inches (150 mm) projections) and weight Depth: 1.3 inches (33.1 mm) Weight: (approx.) including battery Temperature Operating (or... - Page 89 Electrical Input voltage DC 5.0 V Rated current Maximum 2.3 A Power 6.3 W (when using the battery) consumption 7.9 W (when using the AC adapter) Interface USB connector Two USB 2.0 (Mass Storage Class) interfaces, Full-Speed and High-Speed mode Host: Standard A Device: Mini-B A/V Out...
-
Page 90: Optional Accessories
Optional Accessories Type Lithium-ion battery, D111A Product code B32B818262 Type Multimedia Viewer Travel Pack Product code B32B818281 Notices and Specifications 90... -
Page 91: Index
Index , 9, 34 A/V Out connector AC adapter , 12 connecting connector , 84 to 86 safety , 89 specifications , 87 standards , 13 Activity light adapter, memory card , 17 AdobeRGB , 30, 71 Audio conversion , 48 copying files to viewer , 36 to 37 , 40 to 42... - Page 92 , 29 , 34 Display modes, video , 30 Display Photo Enhance , 27 DNG files Eject button Electrical specifications , 89 Epson , 37, 40, 44 to 48 Link2 , 60 printers , 80 purchasing battery , 80 technical support...
- Page 93 , 43 Equalizer Error messages , 74 to 75 Exif , 29 File formats , 38 audio , 27 image , 32 video , 72 File Operation settings Files copying from memory card , 20 to 22 copying to/from computer , 44 to 46 copying to/from USB devices , 49 to 52...
- Page 94 , 37 ID3 tags Images , 22 to 23 copying to folder , 30 displaying as a slide show displaying information , 29 display problems , 76 file formats , 27 printing , 60 to 69 , 58 rating , 31, 71 rotating , 27 to 31 viewing...
- Page 95 , 15 Memory Card icon Memory Stick , 17 Menu options , 25 to 26 Metadata , 29 Microdrive , 17 Movie Settings , 72 , 17 MultiMedia card Music , 48 conversion , 36 to 37 copying to viewer , 40 to 42 creating playlist , 43...
- Page 96 , 58 Rating photos , 27 RAW files , 9, 79 Reset button , 79 Resetting the viewer Rotating images , 31 , 82 to 87 Safety instructions , 24 Screen icons , 58 Screen saver Secure Digital , 17 cards , 9, 19 card slot...
- Page 97 , 29 Underexposure preview , 78 Updating firmware , 36, 44 to 46, 60 to 61 cable connectors USB devices connecting , 49 copying files , 49 to 52 , 48 types Video , 32 codec conversion , 48 display modes , 34 file formats , 32...
Need help?
Do you have a question about the P-7000 and is the answer not in the manual?
Questions and answers