Table of Contents
Advertisement
Quick Links
Advertisement
Table of Contents

Related Manuals for Seating Matters Sydney GoFlat


Summary of Contents for Seating Matters Sydney GoFlat
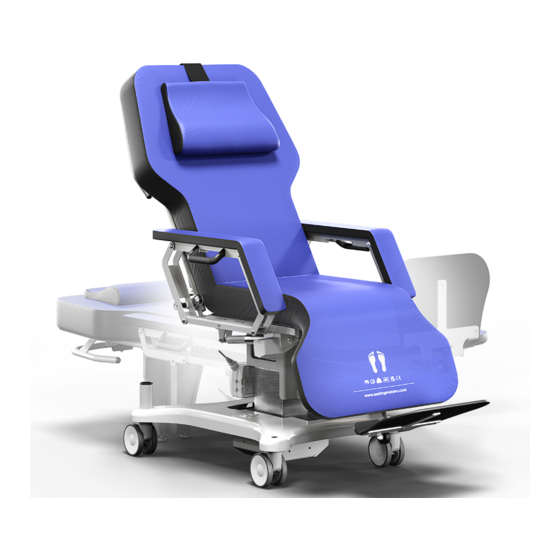
- Page 1 Sydney GoFlat Instruction Manual...
- Page 2 Terminologies Patient The person sitting in the chair. User Competent person with responsibility for the persons sitting in the chair as well as the suitability of the equipment for the Patient. The User is responsible for checking the chair for faults during the course of its use. All instructions must be read and understood before the chair may be used.
-
Page 3: Table Of Contents
Contents Technical Specification Operating Instructions Back Angle Adjustment Leg Elevation Tilt in Space Seat Height Adjustment Preset Positions Arm Adjustment Footplate Height Footplate Stowage Mattress Replacement Charging Your Chair Chair Movement IV Pole & O2 Tank Holder Installation Cleaning Instructions Safety Instructions Maintenance &... -
Page 4: Technical Specification
Technical Specification Sydney GoFlat... - Page 5 User Dimensions A Back Height 35" / 900mm B Seat Width 21" / 535mm C Seat Depth 22" / 550mm D Seat Height (High) 37" / 950mm E Seat Height (Low) 21" / 540mm Footplate Height (from seat) F High 19"...
-
Page 6: Operating Instructions
Operating Instructions Back Angle Adjustment To adjust the back recline of the chair (fig.1). To 180˚ position (fig.1a). To 96˚ position (fig.1b). (fig.1) (fig.1a) (fig.1b) -
Page 7: Leg Elevation
Leg Elevation To adjust the angle of leg rest elevation (fig.2). To horizontal (fig.2a). To -10˚ angle (fig.2b). (fig.2) (fig.2a) (fig.2b) -
Page 8: Tilt In Space
Tilt in Space To adjust the tilt angle of the chair (fig.3). To 17˚ posterior tilt angle (fig.3a). To 0˚ tilt angle (fig.3b). (fig.3) (fig.3a) (fig.3b) -
Page 9: Seat Height Adjustment
Seat Height Adjustment To adjust the seat height of the chair (fig.4). To elevate the position of the seat height (fig.4a). To lower the position of the seat height (fig.4b). (fig.4) (fig.4a) (fig.4b) -
Page 10: Preset Positions
Preset Positions To move the chair to flat transfer position and upright sitting position (fig.5). To flat transfer position (fig.5a). To upright sitting position (fig.5b). (fig.5) (fig.5a) (fig.5b) -
Page 11: Arm Adjustment
Arm Adjustment To adjust the position of the arm (fig.6). The arms of the chair are adjustable in height and can fold down to achieve a fully flat position. Disengage the spring plunger by pulling it outwards (fig.6a). With the plunger disengaged, adjust the arm to the required position. -
Page 12: Footplate Height
Footplate Height To adjust the height of the footplate (fig.7). From behind the leg rest, locate the footplate height plunger highlighted and pull the plunger backward toward the midline of the chair, to disengage the mechanism (fig.7a). While disengaged, adjust the height of the footplate and release the plunger allowing it to locate into the next available height setting (fig.7b). -
Page 13: Footplate Stowage
Footplate Stowage To stow the footplate away (fig.8). Unhook Sydney GoFlat™ calf pad strap at either side of the calf pad (fig.8a). Lift the Sydney GoFlat™ mattress, flip the footplate behind the mattress (fig.8b) and re-attach Sydney GoFlat™ calf pad straps. -
Page 14: Mattress Replacement
Mattress Replacement Removal and fitting of the Sydney GoFlat™ mattress (fig.9). Unhook Sydney GoFlat™ calf pad straps at either side of the calf pad (fig.9a). Loosen and remove yellow grip knob (fig.9b). Lift mattress upwards until retaining bolt can be removed from key slot on the back frame (fig.9c). -
Page 15: Charging Your Chair
Charging Your Chair Your chair will arrive fully charged. It is recommended to charge your chair daily to maintain battery health. Regional Plugs The charger will arrive fitted with a plug compatible with your region. To charge your chair, plug the charger into a wall socket (fig.10a). Handset Plug Holder... -
Page 16: Chair Movement
Chair Movement For control of direction and manoeuvrability while pushing the chair (fig.11c). Combination Castor The combination castor is located on the front left side of the chair (fig.11). Directional Lock Only To engage directional lock simply press the green pedal with your foot (fig.11a) and swivel the castor until it clicks into the forward line (fig.11b). - Page 17 Braking Castors To lock the chair in position (fig.12c). All other castors on the chair are total lock castors (fig.12). When engaged, the swivel and rotation of the castor will be locked. To engage the braking castor simply press the pedal with your foot until it clicks in place (fig.12b).
-
Page 18: Iv Pole & O2 Tank Holder Installation
IV Pole & O2 Tank Holder Installation To attach an IV Pole and O2 Tank Holder to the chair (fig.13). Installation Insert the base of the IV pole into either of the sockets at the head end of the chair. (fig.13a). -
Page 19: Cleaning Instructions
Dartex Cleaning Instructions Cleaning & Maintenance of Upholstery Your Seating Matters chair is upholstered with Dartex multi-stretch material. See image above for how to identify this on your chair. Dartex Multi Stretch Fabric Properties Dartex is waterproof, has the ability to be wiped clean and has biostatic (anti-mycotic) coatings to provide an impenetrable barrier to virus and bacteria. -
Page 20: Safety Instructions
The User must ensure that the chair is in If in doubt as to any the adjustments, feel good condition before use (check all nuts free to contact Seating Matters direct at and bolts are fastened, fabric in good technical@seatingmatters.com. -
Page 21: Maintenance & Servicing
Maintenance & Servicing Regularly servicing your Seating Matters chair will prevent untimely and inconvenient breakdowns, reduce repair costs and extend the chair's working life. Damage to the chair can also cause excess strain for the User and Patient. Monthly Important... -
Page 22: Recycling Policy
Recycling Policy Seating Matters are committed to reducing waste and improving our care for the environment. Where possible we have manufactured our chairs with recyclable materials. Guidance on recycling can be found below. The WEEE Directive Plastic Components The WEEE Directive, 2012/19/EC, urges... -
Page 23: Warranty
Milano (h) All metal fixings and 3 Years hinges. Sydney GoFlat (i) All welds on chair frame. Denver 1 Year The following table outlines the parts covered under components warranty; Chair Component Warranty Period Components Covered Adult Phoenix &... -
Page 24: Intellectual Property
Intellectual Property Seating Matters are at the forefront of seating research and design, therefore we take the protection of our intellectual property very seriously and have our designs, patents and trademarks protected in many jurisdictions throughout the world. The Seating Matters Trademark is Patent Pending No. - Page 25 Notes...
- Page 26 Notes...
- Page 28 Australia UK & Europe 9/256 New Line Road 300 International Dr 131 Carnamuff Road Dural Suite 100, Buffalo Limavady NSW 2158 New York, USA Northern Ireland Australia NY 14221 BT49 9JG +61 1300 001 050 +1 (905) 507 9007 +44 (0) 28 777 666 24 info@seatingmatters.com.au usa@seatingmatters.com...
Need help?
Do you have a question about the Sydney GoFlat and is the answer not in the manual?
Questions and answers