Table of Contents
Advertisement
Available languages
Available languages
Quick Links
LIBRETTO ISTRUZIONI
INSTRUCTION BOOKLET
BEDIENUNGSANLEITUNG
NOTICE D'INSTRUCTIONS
FOLLETO DE INSTRUCCIONES
Ventilatore 20cm con batteria ricaricabile
20cm Fan with rechargeable battery
Ventilator 20cm mit wiederaufladbarem Akku
Ventilateur 20cm à batterie rechargeable
Ventilateur 20cm con batería recargable
type VD200&VD220 (mod. FU02-8D)
1
Advertisement
Table of Contents

Related Manuals for Bimar VD200


Summary of Contents for Bimar VD200
- Page 1 LIBRETTO ISTRUZIONI INSTRUCTION BOOKLET BEDIENUNGSANLEITUNG NOTICE D'INSTRUCTIONS FOLLETO DE INSTRUCCIONES Ventilatore 20cm con batteria ricaricabile 20cm Fan with rechargeable battery Ventilator 20cm mit wiederaufladbarem Akku Ventilateur 20cm à batterie rechargeable Ventilateur 20cm con batería recargable type VD200&VD220 (mod. FU02-8D)
-
Page 2: Avvertenze Generali
Scansiona il codice QR per accendere alla guida rapida delle caratteristiche. Questo simbolo vi invita a leggere attentamente queste istruzioni prima dell’uso dell’apparecchio, ed eventualmente informare terzi, se necessario. Conservare il libretto per ulteriori consultazioni e per l’intera durata di vita dell’apparecchio. - Page 3 - in ambienti del tipo bed and breakfast. • Questo è un apparecchio radio che emette e/o riceve intenzionalmente onde radio a fini di radiocominicazione e/o radiodeterminazione. • Non infilare alcun utensile o le dita fra le maglie della griglia di protezione della ventola.
- Page 4 • Non usare l’apparecchio se non funziona correttamente o se sembra danneggiato; in caso di dubbio rivolgersi a personale professionalmente qualificato. • Assicurarsi che la ventola funzioni correttamente: nel caso contrario spegnere l’apparecchio e farlo controllare da personale professionalmente qualificato. •...
-
Page 5: Installazione
• Posizionare il l’apparecchio durante la ricarica lontano da altre fonti di calore, da materiali infiammabili (tende, tappezzerie, ecc.), da gas infiammabili o materiale esplosivo (bombolette spray). Verificare che lo spazio libero sia di 50cm dalla parte frontale, posteriore e 50cm ai lati. •... - Page 6 Assicurarsi che lo smartphone sia connesso alla stessa rete WiFi alla quale successivamente il dispositivo sarà associato. Prima Installazione/Configurazione 1.1 Installare l’applicazione “BIMAR Live Smart” tramite Google Play (Android) o da AppStore (iOS), oppure scansionare il codice QR qui presente. Per Android...
- Page 7 1.2 Al termine dell’installazione, icona dell’applicazione appare. Cliccare l’icona “Bimar Live Smart” per avviare l’applicazione. 1.3 Al primo accesso effettuare la registrazione e compilare le proprie credenziali: - cliccare “Registra”, confermare “Informativa Privacy”, “Sono d’accordo” per continuare - inserire il proprio numero di telefono o indirizzo email (selezionare in alto a destra per scegliere la modalità)
- Page 8 2. Per associare dispositivo allo smartphone Accendere il ventilatore tramite il tasto “ ”, premere il tasto “ ” nuovamente per cinque secondi circa: la spia lampeggia velocemente; rilasciare il tasto. Aprire APP sullo smartphone: nella prima schermata cliccare su “AGGIUGERE DISPOSITIVO”...
- Page 9 ; aprire le impostazioni del telefono WI-FI e connettere alla rete “Bimar Live Smart xxx” o “Smart Life xxx” e poi premere “connettere ora”. 2.6 Nella schermata successiva “Impostare il Wi-Fi” (vedi sotto), inserire la PASSWORD della vostra rete Wi-Fi, e cliccare sul simbolo “confermare”...
- Page 10 Nel caso le operazioni sopra descritte non procedano correttamente, necessità resettare il dispositivo, operando in questo modo: premere il tasto “ ” per cinque secondi circa: la spia lampeggia velocemente; rilasciare il tasto. Impostazioni e personalizzazioni. Aprire sullo smartphone la schermata e premere in basso a destra per personalizzare le seguenti funzioni: Gestione casa, Centro Messaggi, Centro...
- Page 11 Il dispositivo è compatibile con i controlli vocale di Amazon Alexa, Google Assistant. Aprire APP corrispondente (assicurarsi che l’account e password utilizzati corrispondano a quelli dell’applicazione “Bimar Live Smart” oppure “Smart Life”) e seguire le impostazioni. Google Home: alcuni comandi vocali base sono: “OK Google”...
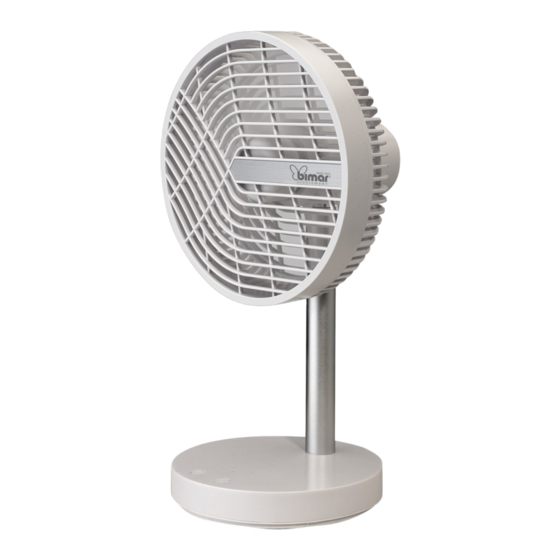
- Page 12 Descrizione L’apparecchio è dotato dai seguenti elementi di controllo e accessori: Batteria: è all’interno della base; per ricaricarla procedure come descritto: - posizionare il ventilatore su una superficie piana e ben stabile - Inserire il connettore del cavo nella porta C (1). - Inserire la spina USB nell’adattatore (non incluso nella confezione), fare attenzione ad orientare correttamente la spina nella presa USB, inserire la spina dell’adattatore nella presa di corrente.
- Page 13 I I I I I° (quinta): ventilatore funziona alla modalità “Natural” (ventilazione intermittente) e si illumina il led corrispondente. I I I I I I° (sesta): ventilatore si spegne Tasto “ ” (5): oscillazione (destra-sinistra) è attiva quando l’apparecchio è acceso, premere una volta per attivare (led corrispondente acceso) o disattivarla (led corrispondente spento).
-
Page 14: Pulizia E Manutenzione
PULIZIA E MANUTENZIONE Attenzione: prima di eseguire le normali operazioni di pulizia, togliere la spina dalla presa di corrente dell’adattatore. • Per la pulizia utilizzare un panno morbido, leggermente inumidito; non utilizzare prodotti abrasivi o corrosivi. • Non immergere nessuna parte del ventilatore in acqua o altro liquido: nel caso dovesse succedere non immergere la mano nel liquido ma per prima cosa togliere la spina dalla presa di corrente. -
Page 15: General Notices
Scan the QR code to access the quick guide of its features. Please read these instructions carefully before using the appliance, and instruct other persons using it, too, when necessary. Keep booklet and for further use. If when reading this instructions manual certain parts should remain difficult to understand, or if there is any confusion, contact the company indicated on the last page before using the product. - Page 16 • Do not insert any tool, or your fingers, into the grille protecting the blades. • This appliance can be used by children aged from 8 years and above and persons with reduced physical, sensory or mental capabilities or lack of experience and knowledge if they have been given supervision or instruction concerning use of the appliance in a safe way and if they understand the hazards involved.
- Page 17 • If the electric cord is damaged, it has to be replaced by the supplier or an authorized service center or a professionally qualified, to avoid any risks. • Do not use the appliance with a timer or a programmer or with a system that can switch on the appliance automatically, to avoid risk of fire, since a fire risk exists if the heater is covered or positioned incorrectly.
-
Page 18: Installation
Make sure that the smartphone is connected to the wi-fi network to be used for the appliance. First Installation/Setup 1.1 Install the "BIMAR life Smart" App via Google Play (Android) or AppStore (iOS), or scan the QR code provided here. For Android... - Page 19 1.2 Once installed, the app icon appears. Click the “Bimar Live Smart” icon to run the app. 1.3 The first time the app is started, register and enter your credentials: - click “Register” and confirm the “Privacy Policy Statement” with “I agree” to continue...
- Page 20 2. To pair new devices with the smartphone 2.1 Press the “ ” button to switch on, again press the " " button for about five seconds: ; release the button. the light flashes quickly 2.2 Open APP on the smartphone: in the first screen, click “ADD DEVICE” or click “ ”...
- Page 21 ; release the button. the light flashes quickly . Access the smartphone WI-FI settings and connect to the “Bimar Live Smart xxx” or “Smart Life xxx” network, then press "connect now". 2.5 In the next screen, “Set Wi-Fi” (see below), type the PASSWORD of your Wi-Fi network and click the "confirm"...
- Page 22 If the above operations do not proceed correctly, to reset the WIFI function, press the " " button for about five seconds: ; release the button. the light flashes quickly Settings and customizations. Open the smartphone screen and press in the bottom right corner to customize the following functions: Home management Message centre...
- Page 23 The device is compatible with Amazon Alexa and Google Assistant voice controls. Open the corresponding App (make sure that the account and password used are the same as those of the “Bimar Live Smart” app) and follow the settings. Google Home: some basic vocal commands are: “OK Google”...
- Page 24 Description The appliance is equipped with the following control elements and accessories: Battery: this is located inside the base. To recharge it, proceed as described: - place the fan on a flat, stable surface - Insert the cable connector into port C (1). - Insert the USB plug into the adapter (not included in the package), taking care to correctly guide the plug into the USB socket, and insert the adapter plug into the power outlet.
- Page 25 " " button (5): oscillation (right-left) is active when the unit is switched on. Press once to activate (corresponding LED will be on) or deactivate (corresponding LED will be off). Switch off the wifi function: press the oscillation button “ ”...
-
Page 26: Cleaning And Maintenance
CLEANING AND MAINTENANCE Attention: before normal cleaning, remove the plug from the socket of the adapter. • Clean the body with soft, slightly damp, cloth; do not use abrasive or corrosive products. • Do not immerse any part of the fan in water or other liquid: if this should happen, do not put your hand in the liquid, but first remove the plug from the socket. -
Page 27: Allgemeine Hinweise
Scannen Sie für die Schnellanleitung der Eigenschaften den QR-Code ein. Bitte lesen Sie vor der Benutzung des Gerätes sorgfältig diese Anleitungen und setzen Sie gegebenenfalls Dritte darüber in Kenntnis. Gebrauchsanleitung zum weitren nachschlagen nachscklagen aufbewahren. Sollten während des Lesens dieser Bedienungsanleitung Fragen aufkommen oder irgendwelche Stellen schwer verständlich sein, dann kontaktieren Sie vor dem Gebrauch des Geräts den Hersteller unter der... - Page 28 • Dieses ist ein Funkgerät, das absichtlich Radiowellen für die Funkkommunikation und/oder Funkbestimmung aussendet und/oder empfängt. • Benutzen Sie das Gerät nicht, wenn es nicht einwandfrei funktioniert oder beschädigt zu sein scheint. Im Zweifelsfall wenden Sie sich an eine Fachkraft. •...
- Page 29 • Verwenden Sie das Gerät nicht bei Umgebungstemperaturen über 40°C. • Setzen Sie das Gerät nicht der Witterung (direkte Sonneneinstrahlung, Regen usw.) aus. • Ziehen Sie nicht am Kabel, um den Netzstecker aus der Steckdose zu ziehen. • Stellen Sie das Gerät nicht um während des Gebrauches. •...
- Page 30 Vergewissern Sie sich, dass der Lüfter von der Stromversorgung getrennt ist, bevor Sie den Schutzschirm mit den Schrauben (siehe Abbildung) entfernen. Akku • Laden Sie den Akku nicht übermäßig (ein zu langer Ladezyklus von mehr als 4 Stunden) auf oder ab, da dies die Batterie beschädigen und ihre Lebensdauer verkürzen kann. •...
- Page 31 Vergewissern Sie sich, dass Ihr Smartphone mit dem gleichen WiFi-Netzwerk verbunden ist, dem das Gerät später zugeordnet wird. Erstinstallation/Konfiguration 1.1 Installieren Sie die Anwendung „BIMAR Live Smart“ über Google Play (Android), AppStore (iOS) oder Einscannen des hier gezeigten QR-Codes. Für Android...
- Page 32 1.2 Wenn die Installation abgeschlossen ist, wird das Symbol der Anwendung angezeigt. Klicken Sie auf das Symbol „Bimar Live Smart“, um die Anwendung zu starten. 1.3 Registrieren Sie sich beim ersten Zugriff und geben Sie Ihre Zugangsdaten ein: - klicken Sie auf „Registrieren“ und bestätigen Sie „Datenschutzerklärung“, „Ich stimme zu“, um fortzufahren...
- Page 33 2. So koppeln Sie das Gerät an Ihr Smartphone " ein und Drücken Sie die Taste “ ” 2.1 Schalten Sie den Lüfter mit der Taste " zirka fünf Sekunden lang: blinkt schnell; lassen Sie die Taste los. Öffnen Sie APP auf Ihrem Smartphone: Klicken Sie auf dem ersten Bildschirm auf „GERÄT HINZUFÜGEN“...
- Page 34 Sie die Tasten los; öffnen Sie die WI- FI-Einstellungen Ihres Telefons verbinden Sie es mit dem Netz “Bimar Live Smart xxx” oder “Smart Life xxx” und bestätigen Sie dann “jetzt verbinden”. 2.5 Geben Sie auf dem nächsten Bildschirm „WiFi einstellen“ (siehe unten) das PASSWORD Ihres WiFi-Netzes ein und klicken Sie auf das Symbol „Bestätigen“, um...
- Page 35 2.7 Wenn die oben beschriebenen Vorgänge nicht korrekt ausgeführt werden, muss das Gerät neugestartet werden. Gehen Sie hierfür folgendermaßen vor: Drücken Sie die Taste “ ” zirka fünf Sekunden lang: blinkt schnell; lassen Sie die Taste los. Einstellungen und Anpassungen. Öffnen Sie auf dem Smartphone den Bildschirm und drücken Sie unten rechts, um folgende...
- Page 36 Das Gerät ist kompatibel mit den Sprachsteuerungen von Amazon Alexa und Google Assistant unterstützt. Öffnen Sie die entsprechende APP (stellen Sie sicher, dass verwendeter Account und Passwort mit denen der Anwendung „Bimar Live Smart“ oder „Smart Life“ übereinstimmen) und folgen Sie den Einstellungen.
- Page 37 Beschreibung Das Gerät ist mit den folgenden Bedienelementen und Zubehörteilen ausgestattet: Akku: in der Basis; zum Aufladen gehen Sie wie beschrieben vor: - stellen Sie den Ventilator auf eine ebene und stabile Oberfläche - Stecken Sie den Kabelstecker in den C-Anschluss (1). - Stecken Sie den USB-Stecker in den Adapter (nicht im Lieferumfang enthalten), achten Sie auf die richtige Ausrichtung des Steckers in der USB-Buchse, stecken Sie den Adapterstecker in die Steckdose.
- Page 38 I I I° (dritte): Ventilator läuft mit dritter Geschwindigkeit I I I I° (vierte): Ventilator läuft mit maximaler Geschwindigkeit I I I I I° (fünfte): Ventilator arbeitet im "Natural"-Modus (intermittierende Belüftung) I I I I I I° (sechster): Der Ventilator schaltet sich ab und die entsprechende LED leuchtet auf. Taste "...
-
Page 39: Reinigung Und Pflege
REINIGUNG UND PFLEGE Achtung: ziehen Sie den Netzstecker aus der Netzsteckdose des Adapters., bevor Sie das Gerät reinigen. • Verwenden Sie zum Reinigen ein weiches, leicht feuchtes Tuch. Verwenden Sie keine scheuernden oder aggressiven Reinigungsmittel. • Kein Teil des Ventilators darf in Wasser oder andere Flüssigkeiten eingetaucht werden: Sollte dies geschehen, keinesfalls die Hand in die Flüssigkeit tauchen, sondern als Erstes den Netzstecker aus der Netzsteckdose ziehen. -
Page 40: Avertissements Généraux
Scan code QR pour accéder au menu rapide des caractéristiques. Nous vous prions de lire attentivement ces instructions avant d’utiliser l'appareil et de les divulguer à toutes les personnes qui pourraient en avoir besoin. Gardez-les a portée de main. Si à la lecture de ce manuel d'instruction certaines parties étaient difficile à... - Page 41 • Cet appareil est un appareil radio qui émet et/ou reçoit intentionnellement des ondes radio aux fins de radiocommunication et/ou radiorepérage. • Ne touchez pas l’appareil les pieds ou les mains mouillés. • N’introduisez aucun outil ni les droits entre les mailles de la grille de protection de l’hélice.
- Page 42 • N'utilisez pas l’appareil s’il ne fonctionne pas correctement ou semble endommagé ; en cas de doute, adressez-vous à un technicien spécialisé. • Ne tirez pas sur le câble pour déplacer l’appareil. • Ne déplacez pas le l'appareil quand il est en fonctionnement. •...
- Page 43 • La batterie complètement chargée s'épuisera même si la ventilateur n'est pas utilisée pendant une certaine période. • La durée de la batterie dépend de différents facteurs de type environnemental, de stockage et d'utilisation. • Si le chargeur de batterie n'est pas en fonction, débranchez la fiche de la prise de courant. •...
- Page 44 Assurez-vous que votre smartphone est connecté au même réseau Wi-fi auquel l’appareil sera ensuite associé. Première installation/Configuration 1.1 Installez l’application «BIMAR Live Smart» après l’avoir téléchargée sur Google Play (Android) ou sur AppStore (iOS), ou bien, scannez le code QR ici présent. Pour Android Pour iOS 1.2 L’icône de l’application apparaît au terme de l’installation.
- Page 45 Une page apparaît (comme sur 1.7 Une fois la personnalisation terminée l’image ci-contre) pour personnaliser correctement, la page principale, où sont présentes les fonctions suivantes, apparaît: la maison: nom, emplacement, nom pièce, puis confirmez. -Liste et gestion des appareils, répartis par pièce «...
- Page 46 ; ouvrez les paramètres du téléphone WI-FI et connectez- vous au réseau «Bimar Live Smart xxx» ou «Smart Life xxx», puis appuyez sur «connecter maintenant». 2.6 Sur la page suivante «Sélectionner Wi-fi» (voir ci-dessous), saisissez le MOT DE PASSE de votre réseau Wi-fi et cliquez sur le symbole «confirmer»...
- Page 47 2.8 Si les opérations décrites ci-dessus ne se déroulent pas correctement, il faut réinitialiser l’appareil en opérant de la façon suivante: touche « » pendant cinq secondes environ: ; relâchez la pression sur la touche. le led clignote rapidement Paramètres et personnalisations. Ouvrez la page sur votre smartphone et appuyez en bas à...
- Page 48 L’appareil est compatible avec les contrôles vocaux d’Amazon Alexa et Google Assistant. Ouvrez l’application correspondante (assurez-vous que le compte et le mot de passe utilisés correspondent à ceux de l’application «Bimar Live Smart») et suivez les paramétrages. Google Home : quelques commandes vocales de base : «OK Google»...
- Page 49 Description L'appareil dispose des éléments de contrôle et des accessoires suivants : Batterie : située à l'intérieur de la base ; pour la recharger, procéder de la manière suivante : - placer le ventilateur sur une surface plane et bien stable - Introduire le connecteur du câble dans le port C (1).
-
Page 50: Nettoyage Et Entretien
Pour réinitialiser le dispositif, enfoncer la touche pendant cinq secondes environ : la led correspondante clignote rapidement ; relâcher la touche. Pour éteindre la fonction Wifi : appuyez sur la touche pendant deux secondes environ : la led est rouge puis bleue (1 seconde environ). Pour allumer la fonction Wifi : appuyez sur la touche pendant dix secondes environ : la led est rouge puis bleue (1 seconde environ). - Page 51 • En cas de longues périodes d'inutilisation, ranger le ventilateur à l'abri de la poussière et de l'humidité ; nous recommandons d'utiliser son emballage original. • Si l'on décide de ne plus utiliser l'appareil, il est recommandé de le rendre inopérant en coupant le câble d'alimentation (s'assurer au préalable d'avoir débranché...
-
Page 52: Advertencias Generales
Escanee el código QR para visualizar la guía rápida de las características. Este símbolo lo invita a leer atentamente las presentes instrucciones antes del uso del aparato, y eventualmente informar a terceros, si es necesario. Conservar el presente manual para ulteriores consultas. Si en la lectura del presente Manual de Instrucciones de Uso algunas partes resultasen difíciles de comprender o si surgieran dudas, antes de utilizar el producto contactar la empresa a la dirección indicada en la última página. - Page 53 • Este es un aparato radio que emite y/o recibe intencionalmente ondas de radio para radiocomunicación y/o radiodeterminación. • No introducir ningún utensilio ni los dedos entre las mallas de la red de protección del ventilador. • No utilizar el aparato con una temperatura ambiente superior a los 40°C. •...
- Page 54 • Desconectar siempre el aparato de la toma de corriente antes de ensamblar, desmontar y limpiar el aparato • No dejar el aparato expuesto a los agentes atmosféricos (sol, lluvia, etc.). • No tocar el aparato con las manos o los pies mojados. •...
-
Page 55: Instalación
• Compruebe que el ventilador está desconectado de la red de alimentación antes de retirar la pantalla de protección mediante los tornillos (imagen al lado). Batería • No sobrecargue (un ciclo de carga demasiado largo, más de 4 horas) ni descargue excesivamente la batería, esto podría dañar la batería y reducir su vida útil. - Page 56 Compruebe que el smartphone está conectado a la misma red WiFi a la que posteriormente asociará el dispositivo. Primera Instalación/Configuración 1.1 Instale la aplicación “BIMAR Live Smart” buscándola en Google Play (Android) o en AppStore (iOS), opcionalmente escanee el código QR aquí presente. Para Android...
- Page 57 1.2 El icono de la aplicación aparece al final de la instalación. Haga clic en el icono “Bimar Live Smart” para iniciar la aplicación. 1.3 Durante el primer acceso regístrese y rellene con sus datos: - haga clic en “Registrar” y confirme “Privacidad”, “Estoy de acuerdo” para continuar - introduzca su número de teléfono o dirección de correo electrónico (seleccione arriba a...
- Page 58 2. Para asociar un dispositivo al smartphone y pulsar , pulse el botón “ ” durante 2.1 Encender el ventilador con la tecla unos cinco segundos el indicador luminoso parpadea rápidamente; suelte el botón. Abra APP en el smartphone: en la primera pantalla pinche en “AGREGAR DISPOSITIVO”...
- Page 59 WI-FI y conecte a la red “Bimar Live Smart xxx” o “Smart Life xxx” y luego pulse “conectar ahora”. 2.6 En la pantalla siguiente “Configurar el Wi-Fi” (véase abajo), introduzca la CONTRASEÑA de su red Wi-Fi y haga clic en el símbolo “confirmar”...
- Page 60 2.8 Si las operaciones arriba descritas no proceden correctamente, es necesario reiniciar el dispositivo, actuando de este modo: pulse el botón “ ” durante unos cinco segundos el indicador luminoso parpadea rápidamente; suelte el botón. Configuraciones y personalizaciones. Abra en el smartphone la pantalla y pulse abajo a la derecha para personalizar las siguientes funciones: Gestión casa- Centro Mensajes-Centro...
- Page 61 El dispositivo es compatible con los controles vocales de Amazon Alexa, Google Assistant. Abra la APP correspondiente (compruebe que la cuenta y contraseña utilizadas corresponden a las de la aplicación “Bimar Live Smart” o bien “Smart Life”) y siga las configuraciones. Google Home: algunos mandos vocales básicos son: “OK Google”...
- Page 62 vez terminada la carga, retirar la clavija del adaptador de la toma de corriente y el conector del puerto. Tecla (4): para encender, seleccionar las funciones (velocidad y modo Natural) deseadas o apagar el ventilador, pulsar repetidamente la tecla, cada vez que se presiona cambia: I (primera): el ventilador se enciende y funciona a la velocidad mínima II (segunda): el ventilador funciona a la segunda velocidad...
-
Page 63: Limpieza Y Mantenimiento
velocidad máxima puede funcionar ininterrumpidamente hasta 2/3 horas. Es aconsejable descargar completamente la batería del ventilador para prolongar su duración. Función power bank: la batería del ventilador (comprobar previamente su estado de carga) puede cargar un dispositivo electrónico (smartphone, tableta, etc.) a través del puerto USB (2). - Page 64 Via G.Amendola, 16/18 25019 Sirmione (BS) – ITALY www.bimaritaly.it Servizio clienti: servizioclienti@bimaritaly.it VD200 I.B._310320...
Need help?
Do you have a question about the VD200 and is the answer not in the manual?
Questions and answers