Table of Contents
Advertisement
Quick Links
Advertisement
Table of Contents

Related Manuals for KERN&SOHN TMPN 200K-1HM-A


Summary of Contents for KERN&SOHN TMPN 200K-1HM-A
- Page 1 KERN & Sohn GmbH www.kern-sohn.com Ziegelei 1 +0049-[0]7433-9933-0 72336 Balingen-Frommern +0049-[0]7433-9933-149 Germany info@kern-sohn.com Operating instructions Personal balances KERN MPN TMPN 200K-1HM-A TMPN 200K-1M-A TMPN 200K-1PM-A TMPN 300K-1LM-A Version 1.1 2022-12 TMPN_A-BAPS-e-2211...
- Page 2 Weitere Sprachversionen finden Sie online unter www.kern-sohn.com/manuals Más versiones de idiomas se encuentran online bajo www.kern-sohn.com/manuals Vous trouverez d’autres versions de langue online sous www.kern-sohn.com/manuals Further language versions you will find online under www.kern-sohn.com/manuals Trovate altre versioni di lingue online su www.kern-sohn.com/manuals Inne wersje językowe znajdą...
-
Page 3: Table Of Contents
KERN MPN Version 1.1 2022-12 Operating instructions Personal balances with BMI function Contents Technical data .................... 5 Tolerances altimeter ....................7 Declaration of conformity ................7 Appliance overview ..................8 Overview of displays .....................11 Keyboard overview ....................12 Basic Information (General) ..............13 Proper use ......................13 Non-intended product use / contraindications ............14 Warranty .......................15... - Page 4 Automatic switch-off function „AUTO OFF“ ............35 Acoustic signal when pressing button ..............37 Setting time and date ....................38 Menu ......................39 Navigation in the menu ..................39 Menu overview ......................40 Communication with peripheral devices via KUP connection ..... 42 10.1 KERN Communications Protocol (KERN Interface Protocol) .........43 10.2 Data output after pressing the PRINT button <...
-
Page 5: Technical Data
1 Technical data KERN 200K-1HM 200K-1PM Item no./ Type TMPN TMPN 200K-1HM-A 200K-1PM-A Display 6-digit Weighing range (max) 250 kg Readability (d) 0.1 kg Linearity ± 0.1 kg Display LCD with 25mm high digits Recommended adjustment 200 kg weight, not added, (Category) (M1) Stabilization time (typical) 3 sec. - Page 6 KERN 200K-1M 300K-1LM TMPN TMPN Item no./ Type 200K-1M-A 300K-1LM-A Display 6-digit Weighing range (max) 250 kg 300 kg Readability (d) 0.1 kg 0.1 kg Linearity ± 0.1 kg 0.1 kg Display LCD with 25mm high digits Recommended adjustment weight, 200 kg 200 kg (Category)
-
Page 7: Tolerances Altimeter
1.1 Tolerances altimeter Measured value (cm) Tolerance (cm) ± 0.5 < 90 ± 1.0 ± 1.0 ± 1.0 2 Declaration of conformity The current EC/EU Conformity declaration can be found online in: www.kern-sohn.com/ce TMPN_A-BAPS-e-2211... -
Page 8: Appliance Overview
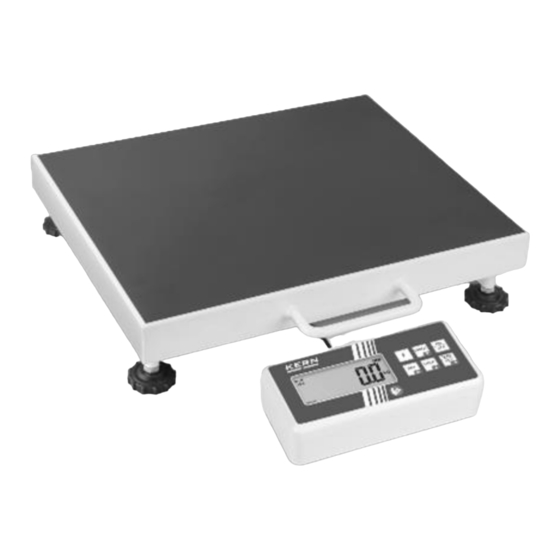
3 Appliance overview 1. Height measuring rod (MPN-HM-A models only) 2. Display Unit 3. Weighing platform (anti-slip surface) 4. Rubber feet (height adjustable) MPN-PM-A TMPN_A-BAPS-e-2211... - Page 9 MPN-M-A MPN-LM-A Secondary display at rear (MPN-HM-A and MPN-PM-A) TMPN_A-BAPS-e-2211...
- Page 10 Display unit at rear 5 Rechargeable battery/Battery compartment 6 Mains connection 7 KUP TMPN_A-BAPS-e-2211...
-
Page 11: Overview Of Displays
3.1 Overview of displays Display Designation Description Stability display Scales are in a steady state Zeroing display Should the balance not display exactly zero despite empty weighing plate, press button. Your balance will be set to zero after a short standby time. Net weight display Illuminated when net weight is displayed Illuminated after weighing scale was... -
Page 12: Keyboard Overview
3.2 Keyboard overview Button Designation Function ON/OFF button Turn on/off HOLD button Hold function/Calculation of a stable weight value In menu: • Select menu items For numeric entry: • Lowering numeric value BMI button Calculation of the Body Mass Index In menu: •... -
Page 13: Basic Information (General)
4 Basic Information (General) 4.1 Proper use This balance is used to calculate the weight of a standing person. The regularly used function of the balance consists of recognising, prevention and treatment of illnesses. As soon as a stable weighing value is reached, the weighing value can be read. The weighing scale is designed for continuous duty. -
Page 14: Non-Intended Product Use / Contraindications
4.2 Non-intended product use / contraindications • Do not use these scales for dynamic weighing processes. • Do not leave permanent load on the weighing pan. This may damage the measuring system. • Impacts and overload exceeding the stated maximum load (max) of the weighing plate, minus a possibly existing tare load, must be strictly avoided. -
Page 15: Warranty
4.3 Warranty Warranty claims shall be voided in case: • Our conditions in the operation manual are ignored • The appliance is used beyond the described uses • The appliance is modified or opened • Mechanical damage and damage caused by media, liquids, •... -
Page 16: Basic Safety Precautions
5 Basic Safety Precautions 5.1 Pay attention to the instructions in the Operation Manual Carefully read this operation manual before setup and commissioning, even if you are already familiar with KERN balances. 5.2 Preventing contamination The prevention of cross-contamination (fungal skin infections,……) requires regular cleaning of the weighing platform. -
Page 17: Preparation For Use
5.3 Preparation for use • Check the balance for damage before any use • Maintenance and re-verification The balance must be serviced and re-verified at regular intervals. • Do not use the appliance on slippery surfaces or in facilities with risk of vibration •... -
Page 18: Transport And Storage
6 Transport and storage 6.1 Testing upon acceptance When receiving the appliance, please check packaging immediately, and the appliance itself when unpacking for possible visible damage. 6.2 Packaging / return transport Keep all parts of the original packaging for a possibly required return. -
Page 19: Unpacking, Installation And Commissioning
7 Unpacking, Installation and Commissioning 7.1 Installation Site, Location of Use The balances are designed in a way that reliable weighing results are achieved in common conditions of use. You will work accurately and fast, if you select the right location for your balance. On the installation site observe the following: •... -
Page 20: Balance Assembly And Installation
7.4 Balance assembly and installation Refitting Procedure: Mount tripod (1) on tripod holder (2) at weighing platform Ensure that the cable (3) does not get clamped! Fasten tripod, using 4 screws Level balance with foot screws until the air bubble of the water balance is in the prescribed circle. - Page 21 General instructions for installing the aforementioned balance Install the personal balance at the intended location and align it using the screwed height-adjustable rubber feet, until the air bubble of the bubble level (on the weighing plate) is in the centre. Wall fixture for models TMPN-1M-A and TMPN-1LM-A: Screws for affixing the wall fixture on the display unit Position of the screws to affix the display unit to the wall...
-
Page 22: Affixing The Height Meter
7.4.1 Affixing the height meter The force necessary for extending the telescopic height meter can be adapted with the help of two adjustment screws on the tripod (see fig.). For this purpose proceed as follows: Retract the height meter completely into the tripod ... -
Page 23: Battery Operation
7.5 Battery operation As an alternative for the rechargeable battery operation, the balance offers also the possibility to be operated with 6x AA-batteries. Open the battery cover (1) at the lower side of the display unit and insert the batteries according to the example shown below. - Page 24 Insert batteries Remove the battery compartment cover at the side of the display unit (1) Remove the battery holder (2) Insert the batteries into the battery holder Insert batteries with the battery holder into the battery compartment and lock it with battery compartment cover.
-
Page 25: Rechargeable Battery Operation Using An Optional Battery Power Pack
7.6 Rechargeable battery operation using an optional battery power pack Open the battery compartment cover (1) at the base of the display unit and insert the rechargeable battery. Charge the rechargeable battery for at least 12 hours before initial use. The appearance of the symbol in the weight display indicates that the rechargeable battery is almost exhausted. -
Page 26: Mains Connection
7.7 Mains connection Power is supplied by the external mains adapter which also serves to isolate the mains supply from the scale. The stated voltage value must be the same as the local voltage. Always use genuine approved KERN power pack units as per EN 60601-1 directive. If the symbol appears in the display, the rechargeable battery will soon be exhausted. -
Page 27: Operation
8 Operation 8.1 Weighing Start balance by pressing The balance will carry out a self-test The balance is ready for operation as soon as the weight display for “0.0 kg“ has appeared. ▪ At any moment you can reset the balance to zero by pressing button. -
Page 28: Taring
8.2 Taring The tare weight of any preloads can be deducted by pressing a button so that the actual weight of the person is displayed in subsequent weighings. Place the object on the weighing plate. (example) Press , the zero display appears. „NET”... -
Page 29: Subsequent Tare Weight
8.2.1 Subsequent tare weight The balance can be tared several times successively. 8.2.2 Pretare The possibility exists to enter either a known pre-tare value via the keyboard or to store the weight of an object placed on the weighing plate as a pre-tare value. Store the weight of an object placed on the weighing plate: ... - Page 30 Enter the pre-tare value manually via the keyboard: Start balance by pressing Wait for stability display Press and keep pressed, the application menu is called up. „ApcMen“, followed by „WghMod“ is displayed Then „PtArE“ appears automatically. Acknowledge by , in the display „PT“...
-
Page 31: Hold Function
Delete pre-tare value: • Unload the weighing plate and press , the balance goes to zero display. • Or after adjustment „ManuAL“ press , „cLEAr“ appears. After that press , the pre-tare value is deleted. 8.3 HOLD function The balance has an integrated standstill function (mean value calculation). With this function it is possible to weigh people accurately even if they do not stand still on the weighing plate. -
Page 32: Calculation Of The Body Mass Index
8.4 Calculation of the Body Mass Index You need to know a person’s body height before you can calculate the BMI for that person. It should either be known or can be determined directly with the MPN-HM-A model. 8.4.1 Determing the body height (MPN-HM-A only) ... -
Page 33: Calculating Body Mass Index
8.4.2 Calculating Body Mass Index Start balance by Wait for stability display Press The most recently entered body height will be shown in centimeters, the enabled digit flashes. To enter body height, press the buttons Confirm the value entered with . -
Page 34: Classification Of Bmi Values
• Reliable calculation of BMI is restricted to a body height of 100 cm to 200 cm and a weight of >10 kg. • If weighing has to take place under unsteady conditions, the display can be stabilised via the Hold function. 8.4.3 Classification of BMI values Weight classification for adults over 18 years of age using the BMI in accordance with WHO, 2000 EK IV and WHO 2004. -
Page 35: Automatic Switch-Off Function „Auto Off
8.5 Automatic switch-off function „AUTO OFF“ The weighing scale will switch off automatically after the allotted time as long as neither the display unit nor the weighing plate is operated. • Menu settings: [AutoFF] (see chap. 9.2) In weighing mode keep simultaneously pressed, „SetuP“... - Page 36 To set a determined switch-off time, proceed as follows: As described above, call-up the menu item „ModE“ Press , „tiME“ appears, acknowledge on , select the required setting by [2 min] Weighing system will be turned off after 2 min. [5 min] Weighing system will be turned off after 5 min.
-
Page 37: Acoustic Signal When Pressing Button
8.6 Acoustic signal when pressing button The balance offers the possibility to switch off or on an acoustic signal by pressing the keys. • Menu settings: [bEEPEr] [KEYS – on/oFF] In menu call-up the menu item „bEEPEr“ Press „KEYS“... -
Page 38: Setting Time And Date
8.7 Setting time and date (only available with Real Time Clock) • Menu settings: [dAtiME] Setting date: In menu call-up the menu item „dAtiME“ Press repeatedly until the prompt for entering the year appears „YY20xx“. Enter the current year with (example) and confirm by ... -
Page 39: Menu
9 Menu Access to service menu „x10“ is locked in verified balances. To disable the access lock, destroy the seal mark and actuate the adjustment switch. Attention: After destruction of the seal the weighing system must be re-verified by an authorised agency and a new verification wire/seal mark fitted before it can be reused for applications subject to verification. -
Page 40: Menu Overview
9.2 Menu overview Menu block Menu item Available settings / explanation Main menu Submenu SEtuP RS232 mode rS232 Interface bAUd Baud rate 9600, 14400, 19200, 38400, 57600, parameter 115200, 128000, 256000, 600, 1200, 2400, 4800 dAtA Data bits: 8dbitS, 7dbitS Parity nonE, odd, EVEn PAritY Stop bits: 1Sbit, 2SbitS... - Page 41 bEEPEr KEYS Acoustic signal when pressing button Acoustic signal Acoustic signal on Acoustic signal off AutoFF Mode Settings autom. shutdown function Automatic Automatic shutdown function switched off shutdown function Automatic switch-off independent on the load on Auto the balance Automatic switch-off only with zero display onLY0 timE Setting the switch-off time...
-
Page 42: Communication With Peripheral Devices Via Kup Connection
10 Communication with peripheral devices via KUP connection Via the interfaces weighing data may be exchanged with connected peripheral devices. Issue may be made to a printer, PC or check displays. In reverse order, control orders and data inputs may be made via the connected devices. The balances of the TMPN series are equipped with a KUP connection (KERN Universal Port) as per standard. -
Page 43: Kern Communications Protocol (Kern Interface Protocol)
10.1 KERN Communications Protocol (KERN Interface Protocol) KCP is a standardized set of interface orders for KERN balances, which allows many parameters and device functions to be called up and controlled. KERN devices that have KCP can use it to connect easily to computers, industrial control systems and other digital systems. -
Page 44: Data Output After Pressing The Print Button < Manual
10.2 Data output after pressing the PRINT button < manual > Activate function: In Setup menu invoke the menu setting <Print PrMode> and confirm with button ➔. For a manual data output select the menu setting < manual > with the navigation keys ... -
Page 45: Continuous Data Output < Cont
10.4 Continuous data output < cont > Enable function and set the output interval: In Setup menu invoke the menu setting <Print PrMode> and confirm on ➔ button. For a continuous data output select the menu setting < cont > using the ... -
Page 46: Data Format
10.5 Data format In Setup menu invoke the menu setting <Print PrMode> and confirm with button ➔. Use the navigation keys to select the menu setting < format > and confirm on ➔ button. Use the navigation buttons to select the desired setting. Options: <... -
Page 47: Wlan
10.6 WLAN W-LAN standard: IEEE 802.11 b/g/n (Wi-Fi) ➢ Network log: TCP/IP with DHCP ➢ Supported encryption methods: WPA, WPA2 ➢ Transmission frequency: 2412 - 2472 MHz ➢ Maximum transmission performance: < 20dBm ➢ Application log: KCP (KERN Communications Protocol): ➢... -
Page 48: Print Function
6. Close the website 7. Connect the computer to the selected network 8. Enter the IP / Port into the target software: 23 10.7 Print function After a correct connection of the software and the balance, the weighing data can be transferred using the button on the balance. -
Page 49: Bluetooth
11 Bluetooth The balance is optionally available with Bluetooth Low Energy (BLE) and will then be visible to Bluetooth Master devices using its serial number. To access this, please use an appropriate software program / app which supports Bluetooth Low Energy (BLE). Applications exclusively using Bluetooth Classic (BLC) will not work. -
Page 50: Error Messages
13 Error messages Display Description Battery capacity exhausted Battery capacity soon exhausted Zero setting range exceeded Zero setting range not achieved Adjustment error Load instable Underload Overload Should other error messages occur, switch balance off and then on again. If the error message remains inform manufacturer. -
Page 51: Servicing, Maintenance, Disposal
14 Servicing, maintenance, disposal 14.1 Cleaning Before any maintenance, cleaning and repair work disconnect the appliance from the operating voltage. 14.2 Cleaning / disinfecting Clean weighing platform (such as the seat) as well as the casing with household detergents or commercially available disinfectants, e.g. 70% isopropanol. We recommend a disinfectant suitable for wiping disinfection. -
Page 52: Instant Help For Troubleshooting
15 Instant help for troubleshooting In case of an error in the program process, briefly turn off the balance and disconnect from power supply. The weighing process must then be restarted from the beginning. Fault Possible cause • The balance is not switched on The weight display does not glow •... -
Page 53: Adjustment
16 Adjustment As the acceleration value due to gravity is not the same at every location on earth, each display unit with connected weighing plate must be coordinated - in compliance with the underlying physical weighing principle - to the existing acceleration due to gravity at its place of location (only if the weighing system has not already been adjusted to the location in the factory). - Page 54 Press again , „cALEXt“ is displayed. (should this not be displayed, press repeatedly until „cALEXt“ is displayed Press , the required adjustment weight is shown Acknowledge by , „Zero“ is shortly displayed: Ensure that there are no objects on the weighing plate. ...
Need help?
Do you have a question about the TMPN 200K-1HM-A and is the answer not in the manual?
Questions and answers