Advertisement
Quick Links
Advertisement

Related Manuals for Ascensia Diabetes Care Contour Plus


Summary of Contents for Ascensia Diabetes Care Contour Plus
- Page 1 ® Blood Glucose Monitoring System Uses only C blood glucose test strips ONTOUR ® USER GUIDE...
- Page 2 • If your blood sugar reading is over 13.9 mmol/L , wash and dry your hands well and repeat the test with a new strip. If blood glucose monitoring system (meter, ® INTENDED USE • If your blood sugar reading is over 13.9 mmol/L , wash and you get a similar reading, call your health care professional d control solution) is intended for self-testing by dry your hands well and repeat the test with a new strip.
- Page 3 TIONS • The meter has been designed to give accurate results at temperatures between 5°C and 45°C . If you are outside meter only works with TOUR ® PRECAUTIONS • The meter has been designed to give accurate results at this range, you should not test.
- Page 4 Features Table of Contents blood glucose monitoring system is NTOUR ® Your Meter Features Table of Contents ity. You will notice this the first time you use it. Intended Use, Important Safety Information ..... i Easy: The C blood glucose monitoring system is ONTOUR ®...
- Page 5 Meter Your C Test Strip ONTOUR ® ONTOUR ® Your C Your C Meter Test Strip ONTOUR ® ONTOUR ® Data uttons Port Up/Down roll up Data Scroll Buttons d hold Port Memory Press to scroll up rolling Button Press and hold ess to Memory Press and hold...
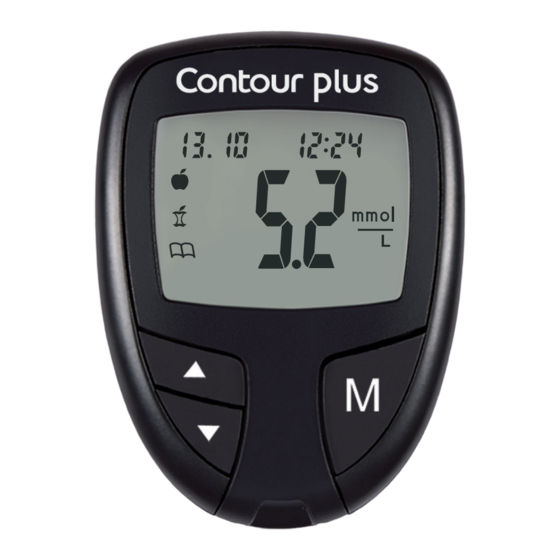
- Page 6 Meter Display Icon What it Means cture below shows all the symbols that appear Your Meter Display Icon What it Means Top area on the display presenting date and time. ur meter display. To view, with the meter off, press The picture below shows all the symbols that appear old ▲...
- Page 7 ting Ready to Test Preparing the Lancing Device Getting Ready to Test Preparing the Lancing Device The lancing device graphics are for illustration Read your C user guide, the ONTOUR purposes only. Your lancing device may look ing device insert and all instructional materials The lancing device graphics are for illustration different.
- Page 8 2. Loosen the round protective cap on a 2. Loosen the round lancet by rotating it 5. Replace the endcap. protective cap on a ¼ turn, but do not lancet by rotating it 5. Replace the endcap. remove it. ¼ turn, but do not remove it.
- Page 9 ting the Test Strip Getting the Blood Drop - Fingertip Testing move a C test strip est strip ONTOUR ® Getting the Blood Drop - Fingertip Inserting the Test Strip m the bottle. Tightly close the e the Testing 1. Remove a C test strip est strip ONTOUR...
- Page 10 4. Immediately touch the tip of the test strip to the drop of 5. After a beep, you will see the 4. Immediately touch the tip of blood. The blood is pulled meter count down 5 seconds the test strip to the drop of into the test strip through 5.
- Page 11 ected Test Result Values Alternative Site Testing (AST) – Palm Expected Test Result Values Alternative Site Testing (AST) – Palm sugar values will vary depending on food WARNING , medication dosages, health, stress, or activity. Blood sugar values will vary depending on food diabetic plasma glucose concentrations are Ask your health care professional if Alternative WARNING...
- Page 12 ng a Blood Drop for Alternative Testing 5. Maintain steady Getting a Blood Drop for Alternative pressure until a small, 1. Wash your hands and Site Testing 5. Maintain steady round blood drop the puncture site with pressure until a small, forms.
- Page 13 Ejecting and Disposing of the Used Lancet d the tip of the test strip in the blood drop until meter beeps. Do not press the tip against the 1. Do not use your Ejecting and Disposing of the Used Lancet 8.
- Page 14 trol Solution Testing Normal control solution is available separately. You can test your C meter with control solution when the ONTOUR ® Control Solution Testing Normal control solution is available separately. You can test WARNING temperature is 15°C–35°C. Always use C ONTOUR ®...
- Page 15 8. Immediately touch the 11. Compare your control test result tip of the test strip to the 8. Immediately touch the with the range printed on the test drop of control solution. 11. Compare your control test result tip of the test strip to the strip bottle or the bottom of the test with the range printed on the test strip box.
- Page 16 ing the Time, Date and Sound If you selected a 12-hour time setting, the meter allows you to set the date, Setting the Time, Date and Sound ONTOUR ® If you selected a 12-hour will now flash. Press ▲ or ▼ and sound as you like them.
- Page 17 ng the Sound Setup for Basic (L-1) and Advanced (L-2) Modes Setup for Basic (L-1) and Setting the Sound The flashing bell symbol will now appear on the display Advanced (L-2) Modes Your new C meter is pre-set for the Basic ONTOUR ®...
- Page 18 sonalising LO, HI and Post-Meal Test Reminder Setup minder Settings Personalising LO, HI and Post-Meal Test Reminder Setup To change the reminder time for post-meal testing, Reminder Settings If you selected Advanced To change the reminder press ▲ or ▼ to display the Mode ( on your display) time for post-meal testing,...
- Page 19 g the Markers If you want to mark the test result Before you remove your test strip, press ▲ or ▼ to Using the Markers If you want to mark the test result If you have set up your select the marker you want to set. The marker will flash. meter in Advanced Mode, Before you remove your test strip, press ▲...
- Page 20 ng the Reminder Feature To Cancel a Reminder Using the Reminder Feature When the reminder sounds, When the meter is off, press To Cancel a Reminder the meter will automatically M to turn on the meter. The When the reminder sounds, When the meter is off, press turn on.
- Page 21 performing a test After performing a test o Mark You Will See What It Means You Will See To Set esults To Mark You Will See What It Means You Will See To Set Results Result is marked as a Pre-Meal Press M pre-meal test.
- Page 22 ONTOUR diabetes management LUCOFACTS ELUXE high and low summary. not been tested for use with any software other ware. Ascensia Diabetes Care is not Press ▲ to view the 7-day than G diabetes management LUCOFACTS ELUXE At the top of the display you ponsible for any erroneous results from the use high and low summary.
- Page 23 Press ▼ twice to review Viewing Advanced Mode Results previous results. In Advanced Mode (L-2), you have all of the options Press ▼ twice to review Viewing Advanced Mode Results Results will be shown described in Basic Mode plus additional items previous results.
- Page 24 ing Advanced Mode Averages M to turn your meter on. Press M again to view Viewing Advanced Mode Averages 4-day average including the number of results Press M to turn your meter on. Press M again to view to obtain the average. Press ▲...
- Page 25 r Codes and Symbols Error Codes and Symbols do not resolve the problem, contact Customer If you do not resolve the problem, contact Customer e. See the back cover for contact information. Service. See the back cover for contact information. If you do not resolve the problem, contact Customer If you do not resolve the problem, contact Customer Service.
- Page 26 do not resolve the problem, contact Customer If you do not resolve the problem, contact Customer e. See the back cover for contact information. Service. See the back cover for contact information. If you do not resolve the problem, contact Customer If you do not resolve the problem, contact Customer Service.
- Page 27 nging the Batteries Changing the Batteries 4. Place new batteries under Batteries should be replaced the prongs and into the when the meter continually 4. Place new batteries under battery compartment Batteries should be replaced displays or the meter the prongs and into the with the “+”...
- Page 28 ng for Your Meter Symptoms of High or Low Blood Glucose re meter in the wallet provided whenever possible. Caring for Your Meter Symptoms of High or Low sh and dry hands well before handling to keep Blood Glucose You can better understand your test results by being •...
- Page 29 tem Specifications Sample: System Specifications frequency interference. To avoid radio frequency Venous, arterial or capillary whole blood interference, do not use the C meter near ® ONTOUR Result: Referenced to plasma/serum glucose frequency interference. To avoid radio frequency Test Sample: Venous, arterial or capillary whole blood electrical or electronic equipment that are sources of le Volume:...
- Page 30 bols Used Technical Information Accuracy ollowing symbols are used throughout the Technical Information Symbols Used ct labeling for the C blood glucose ONTOUR ® The C blood glucose monitoring system ONTOUR ® Accuracy The following symbols are used throughout the oring system (meter, lancet and lancing device was tested in 100 capillary blood samples using 600 product labeling for the C...
- Page 31 Accuracy Service Information y evaluating glucose values from fingertip capillary If you have a problem and none of the problem solving Service Information User Accuracy samples obtained by 216 lay persons showed steps in this user guide help, contact Customer lowing results: 100% within ± 0.83 mmol/L of the A study evaluating glucose values from fingertip capillary If you have a problem and none of the problem solving...
- Page 32 Some States do not allow the exclusion or limitation limitation or exclusion may not apply to you. This warranty 3. Ascensia Diabetes Care reserves the right to make gation to incorporate such changes into previously of incidental or consequential damages, so the above...
- Page 33 plies References 1. Wickham NWR, et al. Unreliability of capillary blood acement Parts Supplies References glucose in peripheral vascular disease. Practical Diabetes. 1. Wickham NWR, et al. Unreliability of capillary blood 1986;3(2):100. Replacement Parts glucose in peripheral vascular disease. Practical Diabetes. user guide 2.
- Page 34 ker (Post-meal)............30 Specifications ................... 50 Index e Testing (AST) ............15 Symptoms of High or Low Blood Glucose ........49 After Meal Marker (Post-meal)............30 Specifications ................... 50 .................. 40 Technical Information ............... 53 Alternative Site Testing (AST) ............15 Symptoms of High or Low Blood Glucose ........
- Page 35 Clinilog, Contour, Glucofacts, and the No Coding logo are trademarks and/or registered trademarks of Ascensia Diabetes Care Holdings AG. All other trademarks are the property of their respective owners. © 2020 Ascensia Diabetes Care Holdings AG. All rights reserved. 90006308 Rev. 03/20...
Need help?
Do you have a question about the Contour Plus and is the answer not in the manual?
Questions and answers
can the readings on contour blue plus be deleted
The provided context does not mention whether the readings on the Ascensia Diabetes Care Contour Plus can be deleted.
This answer is automatically generated