
Related Manuals for MSI 2000


Summary of Contents for MSI 2000
- Page 1 Programming the MicroStar 2000 Version 1.1 Gordon Anderson December 18, 2004 Rev 1.1...
- Page 2 Dedication I would like to dedicate this project to my Dad, Richard C. Anderson and my brother Dave. My Dad created my interest in RC at a very young age. This interest in RC sparked my interest and career in electronics. Without his love and support this would not have been possible.
-
Page 3: Table Of Contents
MicroStar startup………………………….. 6 General Mixer parameters…………. 23 MicroStar TEST IO startup option………… 7 VTAIL…………………………….. 24 Tachometer Module………………………...8 ELEVON………………………….. 24 MicroStar 2000 Menu Options…………….. 9 Dual Aileron………………………. 25 Entering the Calibration mode…………….. 10 Throttle Hold……………………… 26 Select Aircraft……………………… 11 Idle Up…………………………….. 27 Aircraft Name………………………... -
Page 4: Transmitter Front Switches
Transmitter Front Switches Mixer1 Mixer3 ELE Trim THT Trim ELE DR Mixer2 AIL DR RUD DR RUD Trim AIL Trim Preset Option... -
Page 5: Transmitter Top Switches
Transmitter Top Switches Charge/Comms AUTO TRIM SNAP R SNAP L ALT ARFT... -
Page 6: Microstar Startup
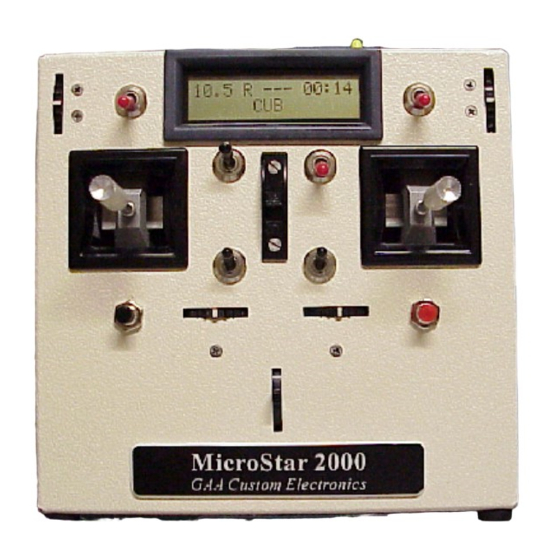
When power is first applied you will see the following signon message for After a 1 second delay this retract warning will be displayed about one second. if it has been enabled in the Options menu. MircoStar 2000 Retracts are UP! Version 1.1a Press Option R indicates RF is on, only applies when my RF deck is used. -
Page 7: Microstar Test Io Startup Option
MicroStar TEST IO startup option 1 means the switch is off or released if it’s a push button. Preset Option Port C Port D Hold down the Option and preset buttons and apply power. Hold the buttons for Press option button to 5 seconds then let go. -
Page 8: Tachometer Module
Tachometer Module When the optional Tachometer module is plugged into the accessory jack on the side of the MicroStar the second line of the display will read the detected RPM. The MicroStar detects the presents of the Tach module automatically! Example display 10.5 RA--- 00:00 2Bld RPM =... -
Page 9: Microstar 2000 Menu Options
MicroStar 2000 Menu Options These two menus apply to ALL aircraft! [Select Aircraft] [Aircraft name] [Timer] [Snap] [Servos] [Mixers] [Switch] [Options] [Shared Options] [System Setup] [Select Frequency] [Exit] [Mode] [Aileron] [AIL DR] [Buddy Box] [Minutes] [Elevator] [ELE DR] [Tables] [Seconds]... -
Page 10: Entering The Calibration Mode
Entering the Calibration mode Top level calibration menu, select the category of items you would like to adjust. 10.2 R --- 08:23 CALIBRATE KAOS Press Option Press Typical Run mode display Option Moving Aileron stick to the right advances in CALIBRATE CALIBRATE the direct of the arrows. -
Page 11: Select Aircraft
Select Aircraft Press Option CALIBRATE Aircraft #1 Select Aircraft “name” Moving Elevator stick up to advances in Aircraft #2 the direct of the arrows. “name” Moving Elevator stick down to reverses Aircraft #3 the direction. “name” Press Press Option from any Aircraft #4 Option selection to define... -
Page 12: Aircraft Name
Aircraft Name Press Press Option Option CALIBRATE Aircraft name CALIBRATE Aircraft name Press Option This blinking cursor can be moved to the right or left using the aileron stick. The character defined at the cursor can be changed using the elevator stick. After the model name is defined, press the Option button to accept the changes. -
Page 13: Timer
Timer This function allows you to define the flight timers parameters. This counter is started by pressing the option button when you are in the run mode. Pressing the option button again will stop the timer. When the timer is started again, it will start counting down from the starting value defined in this function. -
Page 14: Timer Notes
Timer notes The Flight Timer is started by pressing the Option button. The timer will beep three times at 1 minute, twice 30 seconds, once at 10 seconds and every second starting at 5 seconds. The Timer can be stopped by pressing the Option button while the Timer is counting. -
Page 15: Snap
SNAP Press Option Press Option CALIBRATE SNAP SNAP SNAP SR AIL SR AIL SNAP SNAP Use Elevator stick SR ELE SR ELE The selections shown are to increase or decrease for the Right Snap button, the percentage. Press you will see the Left Snap SNAP SNAP Option to accept... -
Page 16: Servos
Servos Press Option CALIBRATE SERVOS Moving Aileron stick to the right SERVOS Aileron advances in the direct of the arrows. Moving Aileron stick to Press Option the left reverses the direction. SERVOS Elevator To centering servo Press Option from any selection to setup. -
Page 17: Centering Servo Setup
Centering servo setup Press Option Press Option to select SERVOS Aileron Aileron Aileron RT/DWN RT/DWN 1.546mS Aileron Aileron This line will indicate Center Center 1.000mS the selected channel # Use Elevator stick to increase or decrease Aileron Aileron the value. Press LT/UP LT/UP 1.976mS... -
Page 18: Throttle Servo Setup
Throttle servo setup Press Option Press Option to select SERVOS Throttle Throttle Throttle High High 1.944mS * Use Elevator stick to increase or decrease Throttle Throttle the value. Press 1.134mS Option to accept changes. Moving Aileron stick to Throttle Throttle the right advances in the Trim Trim... -
Page 19: Non-Centering Servo Setup
Non-centering servo setup Press Option Press Option to select SERVOS Use Elevator stick High/UP High/UP 1.540mS to increase or decrease the value. Press Option to accept Moving Aileron stick to changes. Low/DWN Low/DWN 0.983mS the right advances in the direct of the arrows. Moving Aileron stick to Use Aileron stick to the left reverses the... -
Page 20: Ch8 Servo Setup
CH8 servo setup Press Option Press Option to select SERVOS 2.111mS Use Elevator stick to increase or decrease Moving Aileron stick to the value. Press the right advances in the 1.675mS Option to accept direct of the arrows. changes. Moving Aileron stick to the left reverses the direction. -
Page 21: Mixer
MIXER Press Option Press Option to select CALIBRATE Mixers To General Mixer setup Mixers MIXER 1A Mixers You will actually toggle To VTAIL setup VTAIL through 12 mixers, four for each mixer switch. MIXER 1A means its Mixers Mixer switch 1 and the To Elevon setup ELEVON first of 4 (A,B,C, and D) -
Page 22: General Mixers
General Mixers Press Option Press Option * Use the elevator stick to toggle through the channels. Mixers MIXER 1A MIXER 1A Press Option to select. To MIXER 1A From From disable, select None. Use the elevator stick to MIXER 1A MIXER 1A select witch of the 4 tables This line will indicate... -
Page 23: General Mixer Parameters
General Mixer parameters From: The From channel defines the input position data to be used by the mix function. Any of the 8 channels can be use. To disable a mixer, set the from channel to None. Table: The input channel can be translated using any function you like through the use of the look up tables. Eight tables are provided (1 through 8), or select None to disable. -
Page 24: Vtail
VTAIL ELEVON Mixers Mixers VTAIL ELEVON Press Option Press Option VTAIL ELEVON Press Option to enable Press Option to enable Enable Enable VTAIL edit. VTAIL edit. Press Option Press Option Use the aileron stick Use the aileron stick VTAIL ELEVON to toggle between to toggle between Enable... -
Page 25: Dual Aileron
Dual Aileron Press Option Press Option to select Mixers DUAL AIL DUAL AIL DUAL AIL Enable Enable Yes(No) DUAL AIL DUAL AIL Rev CH7 Rev CH7 Yes(No) Moving Aileron stick to the right advances in the direct of the arrows. Moving DUAL AIL DUAL AIL Aileron stick to the left... -
Page 26: Throttle Hold
Throttle Hold Press Option Press Option to select * Use Aileron stick to toggle between yes and no. Press Option Mixers THT HOLD THT HOLD to accept. THT HOLD Enable Enable Yes(No) Use Elevator stick to increase or decrease the value. Press THT HOLD THT HOLD Moving Aileron stick to... -
Page 27: Idle Up
Idle Up Press Option Press Option to select * Use Aileron stick to toggle between yes and no. Press Option Mixers IDLE UP IDLE UP to accept. IDLE UP Enable Enable IDLE UP IDLE UP Moving Aileron stick to Use Elevator stick the right advances in the Position A Position A... -
Page 28: Switch
SWITCH The Switch calibration function allows you to define which transmitter switch is used to activate different options on the MicroStar transmitter. The 4 main controls can also be used as switches by defining a trigger position using this option. Press Option Press Option to select... -
Page 29: Options
Options Press Option Press Option CALIBRATE Options To Auto Trim setup Options Auto Trim Options Reset Auto Trims Moving Aileron stick to the Reset Auto Trims Reset ? Yes(No) right advances in the direct of the arrows. Moving Use aileron stick to Aileron stick to the left Options Trim Zero... - Page 30 Options, continued To previous page Press Option Options To Copy Aircraft setup Moving Aileron stick to the Copy Aircraft right advances in the direct * Use aileron stick to of the arrows. Moving toggle between Yes Aileron stick to the left Options Trim Zero and No.
-
Page 31: Options Parameters Notes
Options parameters notes Reset Auto Trims This function allows you to reset the data stored in the Auto Trim data registers. This data is stored with aircraft configuration and allows unique settings for each aircraft. The Auto Trim function is using, during flight to define this data. -
Page 32: Auto Trim
Auto Trim The Auto Trim function allows the aircraft's trim to be adjusted without touching the trims! This is done by holding the flight controls in a position to make the aircraft fly straight. This function will then adjust the trims in small steps made a regular intervals. -
Page 33: Copy Aircraft
Copy Aircraft This function will copy the current aircraft settings to a aircraft number that you define. Options Copy Aircraft Press Option Copy Aircraft To AFT# Press Option Use the elevator stick to select the aircraft Copy Aircraft number you whish to To AFT# copy the current settings Press Option... -
Page 34: Shared Options
Shared Options Press Option Press Option to select CALIBRATE Shared Options To Buddy Box setup Shared Options Buddy Box Moving Aileron stick to Shared Options To Table selection Tables the right advances in the direct of the arrows. Use Aileron stick to Moving Aileron stick to toggle between yes the left reverses the... -
Page 35: Buddy Box
Buddy Box This function allows you to define the type of Buddy Box behavior the MicroStar will have, it acts as a master or a Student. In the Master mode the instructor will push the AutoTrim button to give control to the student. Two Buddy Box modes are supported;... - Page 36 Press Option Table selection Shared Options Tables Tables Table 1 Tables Table 2 Tables Moving Aileron stick to the Table 3 right advances in the direct of the arrows. Moving Tables Aileron stick to the left Table 4 reverses the direction. To Table setup Tables Table 5...
- Page 37 Table setup This line will indicate Press Option Press Option the selected Table to select Tables Table 1 Table 1 Use elevator stick to Table 1 POS 0 POS 0 increase or decrease value, press Option to accept. Table 1 Table 1 Moving Aileron stick to the POS 10...
-
Page 38: System Setup
System Setup Press Option Press Option CALIBRATE System To Volt Meter setup System TX Volt Meter System TX Alarm Voltage Moving Aileron stick to the TX Alarm Voltage Volts right advances in the direct of the arrows. Moving Use aileron stick to Aileron stick to the left toggle between Yes System... - Page 39 System Setup, continued To previous page Press Option Use elevator stick to increase or decrease System Sync Width value, press Option Moving Aileron stick to the Sync Width Width 0.200mS to accept. right advances in the direct of the arrows. Moving * Use aileron stick to Aileron stick to the left System...
-
Page 40: System Setup Notes
System Setup notes Reset Batt Timer The battery timer function is used to measure total transmitter on time. This is helpful in determining the transmitters battery status. To read the battery timer data, press the Auto Trim button. To reset this value to zero select this function. -
Page 41: Voltmeter Calibration
Voltmeter Calibration System Setup TX Volt Meter Press Option Use the elevator stick to adjust the voltage reading. TX Volt Meter Determine actual Volts 10.23 voltage with a Press Option calibrated meter. System Setup TX Volt Meter... -
Page 42: Sprom
SPROM Press Option Press Option to select System SPROM Format PRI SPROM Format PRI SPROM SPROM Format Accept ? Yes(No) Formatting... SPROM Format SEC SPROM Format SEC SPROM Format Accept ? Yes(No) Formatting... Moving Aileron stick to the right advances in the direct of the arrows. -
Page 43: Configure
Configure Press Option Press Option System Configure Output Channel 1 Configure Output Channel 1 Elevator Configure Output Channel 2 Moving Aileron stick to the Output Channel 2 Aileron right advances in the direct of the arrows. Moving Aileron stick to the left Configure Output Channel 3 reverses the direction. - Page 44 Configure, continued To previous page Press Option Configure Output Channel 7 Output Channel 7 Moving Aileron stick to the right advances in the direct of the arrows. Moving Configure Select Ail Trim Aileron stick to the left Select Ail Trim Trim 1 reverses the direction.
-
Page 45: Joystick Cal
JoyStick Cal Press System JoyStick Cal Option JoyStick Cal Aileron Moving Aileron stick to the right advances in the direct of the arrows. Moving Aileron stick to JoyStick Cal the left reverses the direction. Elevator Press Option Press Option from any selection to JoyStick Cal enter the selected function. - Page 46 JoyStick Cal, continued Centering Joy Stick calibration routine. Non-centering Joy Stick calibration routine. “Down” below means as in “Down Elevator” – push the “Down” below means as in “Down Elevator” – push the Elevator or Throttle stick toward the top of the case! Elevator or Throttle stick toward the top of the case! “Up”...
-
Page 47: Select Frequency
Select Frequency Press Option CALIBRATE Select Frequency Select Frequency 53.1 MHz Moving Elevator stick up to advances in Select Frequency the direct of the arrows. 53.2 MHz Moving Elevator stick down to reverses Select Frequency the direction. 53.3 MHz Press Press Option from any Select Frequency Option... -
Page 48: Transmitter Switch Definitions, Front
Transmitter Switch Definitions, Front Trim 2 Trim 4 Trim 3 Trim 1... -
Page 49: Transmitter Switch Definitions, Top
Transmitter Switch Definitions, Top...
Need help?
Do you have a question about the 2000 and is the answer not in the manual?
Questions and answers