Advertisement
Quick Links
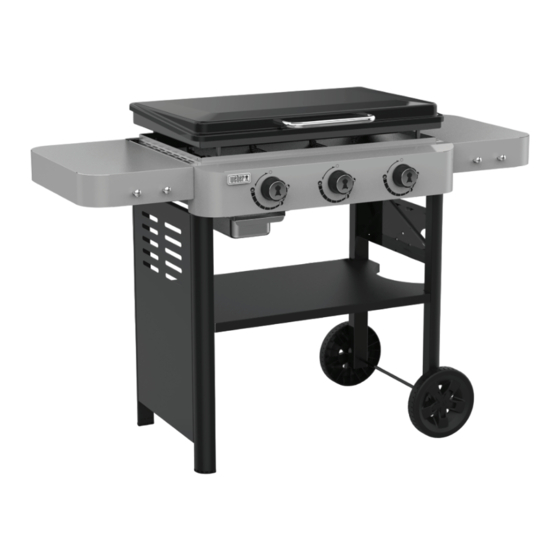
WEBER GRIDDLE 28in
LP Owner's Manual
REGISTER TODAY
Register your grill and receive special content to
make you the ultimate backyard hero.
Scan the QR code or text a photo of the camera
icon to 71403.
Or register online at weber.registria.com
Need help? Visit photoregister.com/help or text "help" to 71403
79617
11/29/22
Keep this Owner's Manual for future reference, thoroughly read through it, and
if you have any questions please contact us today.
enUS
Advertisement

Subscribe to Our Youtube Channel
Summary of Contents for Weber LP
- Page 1 Register your grill and receive special content to make you the ultimate backyard hero. Scan the QR code or text a photo of the camera icon to 71403. Or register online at weber.registria.com Need help? Visit photoregister.com/help or text "help" to 71403 79617 11/29/22 Keep this Owner’s Manual for future reference, thoroughly read through it, and...
- Page 2 (tank) after use. m WARNING: Do not use this grill unless all parts m WARNING: LP tanks must be stored outdoors out of DANGER, WARNING, and CAUTION are in place and the grill was properly assembled...
- Page 3 When you The WEBER Promise sign up for a WEBER account as part of your registration, we will deliver special grill-related content just for you to enjoy. Getting Started So, come along and join us online, on your smart device or however else you'd Important Information about LP Gas...
- Page 4 WEBER’S LIMITED WARRANTY DISCLAIMERS WEBER warrants, to the purchaser of the WEBER product (or in the case of a gift or promotional situation, the person for whom it was purchased as APART FROM THE WARRANTY AND DISCLAIMERS AS DESCRIBED IN THIS...
- Page 5 But at moderate pressure inside a container, such as a tank, LP is a liquid. As pressure is released from the tank, the liquid readily vaporizes and becomes gas.
- Page 6 LP Tank Installation The tank is hung onto the tank bracket which is located on the right side of grill. The shape of the collar assembly (the metal protective ring around the tank valve) determines one of two directions in which the tank will correctly hang on the tank scale (A).
- Page 7 Leak Checking What is a Leak Check? Once the LP tank is properly installed, it is necessary to perform a leak check. A leak check is a reliable way to verify that gas is not escaping after you connect the tank. The fuel system in your grill features factory- made connections that have been thoroughly checked for gas leaks and the burners have been flame-tested.
- Page 8 LP tank. 3) Turn the LP tank on by slowly turning the tank valve counterclockwise; wait 60 seconds (C). Note: It is important that the LP tank is turned on slowly.
- Page 9 Before You Cook SEASONING TROUBLESHOOTING SYMPTOM Season the Cooking Surface Uneven seasoned surface with thick, sticky patches of oil. Seasoning susceptible to chipping and flaking. This process takes time, so give yourself a few hours to complete it before you cook. CAUSE SOLUTION Tools Needed: Tongs, lint-free paper towels or cotton...
- Page 10 Tips For Cooking Tame the Heat Your WEBER Griddle’s cooking surface is fantastic at Temperature Setting Food generating heat – and maintaining that heat – even when it’s loaded with food. Because it’s so good at holding onto heat, it can take a while to cool down. So, Eggs - Sunny side up, over-easy, scrambled we suggest starting at lower temperatures when you’re...
- Page 11 1. Confirm that the griddle is off and completely cooled. 2. Check the hose for any signs of cracking, abrasions, or cuts (C). If the hose is found to be damaged in any way, do not use the griddle. Contact WEBER customer service for a replacement hose. Preheat the Griddle Preheating the griddle is critical to successful cooking.
- Page 12 Keeping these areas clean is essential for safe operation. Cleaning the Burner Ports 1) Once the grill and LP tank have been turned off and the grill has cooled, using BBQ mitts or gloves, remove the griddle and set aside.
- Page 13 If they are not, the flow limiting device built into the regulator will activate, limiting the flow of gas from the LP tank. 3) Turn the LP tank on by slowly turning the tank valve counterclockwise; wait 60 seconds. Note: It is important that the LP tank is turned on slowly.
- Page 14 This typically occurs when you again following the instructions in the “Operation” turn on the gas at the LP tank and one or more of the section. control knobs are not in the off position. It may also occur if you turn on the LP tank too quickly.
- Page 15 After every cook, place a thin layer of cooking contact the local retailer oil on the surface with a low lint paper towel or in your area or log onto weber.com. cotton cloth. For more information about caring for your griddle, scan the QR code: DRIP PANS...
- Page 16 WEBER GRIDDLE - 28IN LP - US - 090122 DON'T FORGET TO REGISTER weber.com U.S.: Canada: Mexico: 1-800-446-1071 1-800-446-1071 01 800 0093237 © 2022 Designed and engineered by Weber-Stephen Products LLC, 1415 S. Roselle Road, Palatine, Illinois 60067 USA.


Need help?
Do you have a question about the LP and is the answer not in the manual?
Questions and answers