
Related Manuals for shelyak UVEX PF0079


Summary of Contents for shelyak UVEX PF0079
- Page 1 UVEX Motorized PF0079 User Manual François Cochard (francois.cochard@shelyak.com) Romain Di Chiaro (romain.dichiaro@shelyak.com) 2023 February 02 Ref. DC0044 - rev B...
-
Page 3: Table Of Contents
Tables of contents TABLES OF CONTENTS ..................................3 INTRODUCTION ....................................4 PRESENTATION OF THE UVEX ..............................5 ..................................5 UT OF THE BOX UVEX................................5 VERVIEW OF THE ................................6 PTICAL RCHITECTURE UVEX ............................6 TEPS FOR TARTING WITH INSTALLING & TUNING THE INSTRUMENT ..........................7 ................................7 TTACHING THE AMERA ..............................8 TTACHING THE GUIDING MODULE... -
Page 4: Introduction
Introduction Welcome to the world of Spectroscopy with your UVEX! It was a great pleasure to design this instru- ment, and now we hope that you’ll take a lot of pleasure to use it for observing stars and other sky objects. The UVEX is a compact spectroscope, specially designed for small telescope (say up to 0.3m) –... -
Page 5: Presentation Of The Uvex
Presentation of the UVEX Out of the box Your UVEX is shipped within a box. Here are the elements that you’ll find in the case (See picture 1.1) → UVEX spectroscope → Calibration cable → A flyer that indicates where you can find this Documentation →... -
Page 6: Optical Architecture
To avoid this affect, and concentrate more light on each pixel, we’ve added a cylindrical lens at the end of the light path (close to the main camera). Demetra-UVEX is free, and can be downloaded on Shelyak website https ://www.shelyak.com... -
Page 7: Installing & Tuning The Instrument
Installing & Tuning the Instrument In this chapter, we give details on the installa- tion of each element around the UVEX. 2.1 Attaching the Camera The acquisition camera is attached to the UVEX thanks to a special adapter (included in the UVEX) . -
Page 8: Attaching The Guiding Module
2.2 Attaching the guiding module The UVEX is shipped with a guiding module Adapter . This adapter attaches the UVEX to the Guiding module, and then to the telescope. It also gives an easy access to the slit, if you need to change it or clean it. -
Page 9: Focusing The Cylindrical Lens
2.3 Focusing the cylindrical lens. As explained in section 1.3, we’ve added a cy- lindrical lens to compensate most part of the na- tural astigmatism of the Czerny-Turner architec- ture. Without this lens, the spectrum of a star would be vertically large and fuzzy. For best results - ie a star spectrum must be a thin line - the cylindrical lens must be focused on your camera. -
Page 10: Changing The Grating
2.5 Changing the grating. → Remove gently the grating holder, and put it immediately in a protection box. Make sure that no dust can cover the grating surface, and The UVEX is shipped with a 600g/mm grating, make sure to never put your finger on the optical but there are other grating densities available surface. -
Page 11: Installation On The Telescope
The balancing of the mount must be prefer- ably made after all the cables are in place. Figure 2.1 5 – Check the grating direction Figure 2.17 – The UVEX on the te lescope Figure 2.1 6 – Install the new grating 2.6 Installation on the telescope. -
Page 12: Using The Uvex
You’ll have to used your preferred tool for this func- dark image instead of a spectrum. tion. A good solution that we often use at Shelyak is Important note: if you’re selecting a ’red’ re- PHD2 gion of the spectrum (say above 750nm), there may be some order overlapping. -
Page 13: Uvex Motors - How It Works
These buttons & LEDs are mainly used when brate the position to 0°. installing and testing the module. Once the instal- lation is done, the normal usage is through the SPOX is a Shelyak external device to control calibration lamps. - Page 14 The focus position has a mechanical range of 8mm. In this case, there are mechanical stopper in both directions, but there is NO RISK to damage any element if you go up to these ends. The worst that can happen is to lose the calibration (this is easy to redo).
-
Page 15: Controlling The Uvex Motors Module
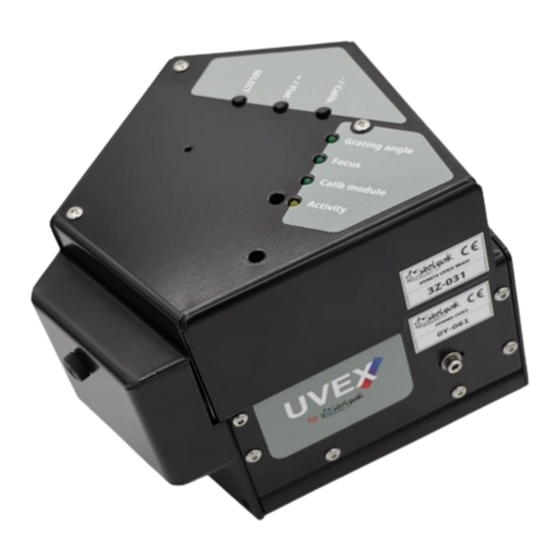
There are three buttons on the top face: UVEX Motors module is to use the USIS Controller — “Select” button is to switch from one feature software, that you can find on Shelyak Instruments to the next one: “Grating angle”, “Focus”, and website “Calib module”. -
Page 16: Remote Control
Let’s see the different pos- Figure 5.3 sible ways to do it. 5.2.1 Using the “USiS controller soft- ware”. The “USIS controller” software module is available Shelyak Instruments website (https ://www.shelyak- instruments.com/Web/Logiciel/UsisController/). It runs under Windows (win 10 or above). Download the setup file (the name is like ’Setup USIS... -
Page 17: Using Demetra
’set’ button. 5.2.2 Using DEMETRA. Demetra is the recommended software to op- erate your UVEX. It is designed and edited by Shelyak Instruments. It covers from spectra acquisition to data reduction, and manages your whole observing session. -
Page 18: Using Usis Protocol
5.2.3 Using USIS protocol. If, for any reason, you don’t want (or cannot) use the USIS Controller or Demetra, you can use directly the USIS protocol. This is the basic protocol used to communicate between the computer and the UVEX Motors module. You’ll find more details about the USIS protocol in appendix G. -
Page 19: Appendix
When used with the guiding module, the slit must be replaced by the one coming with the guiding module. This is a mirror slit. Different slits width can be bought at Shelyak. Figure A.1 The resolution power R is given by R = λ/∆λ,... - Page 20 (see fig. A.4). special adapter. The standard UVEX includes an adapter for ZWO cameras (such as ASI183 or ASI294). Other adapters are available at Shelyak Instruments for QHY and Atik cameras. Because of the compact optical layout, there is a strong constraint on the camera back focus: it must be of 13mm maximum.
- Page 21 Figure A.5 – Dimensions of the UVEX...
-
Page 22: Appendix B: Changing The Slit
Appendix B: changing the slit You can easily access and change the slit of the UVEX. First, you can loosen the 2 small screws at- taching the slit itself, and rotate it to the position you choose. After the slit selection, we recommend to take images to control that the emission or absorption lines are vertical. - Page 23 Third, you can return the external slit holder (After removing the slit holder) to install a fiber optic connector (available in option at Shelyak). See figure B.4 and B.5. Figure B.4 – Remove the external slit holder Figure B.5 – Return the e xternal slit holder to...
-
Page 24: Appendix C: Installing The Order Filter
filter that will cut all light below 500nm. Such filter is available at Shelyak Instruments. The UVEX can hold such an order filter, right after the slit. To install it, proceed as follows: →... -
Page 25: Appendix D: Screws Functions
Appendix D: screws functions. The UVEX contains a lot of screws; of course each of them has a precise function. Some screws can be manipulate for tuning, but the other must not be loosen or removed – they are part of the structure of the instrument. -
Page 26: Appendix E: Tuning M1 Mirror Tilt
Appendix E: tuning M1 mirror tilt. In normal conditions, you should never have to tune the M1 mirror tilt, because the instrument is tuned in our factory. But we never and we prefer to give you all the details to do it if needed. All the UVEX optics is contained in a plane, and then the spectrum is ’absolutely’... -
Page 27: Appendix F: Updating The Firmware
“Bootsel” mode. update the firmware is given by the Pico rules. The USIS command is: You can download the latest firmware version from the Shelyak website (UVEX product page) .This is SYSTEM;REBOOT* a file with .uf2 extension. Running this command will have the same ef- fect as pressing the “Bootsel”... - Page 28 Figure F.3...
-
Page 29: Appendix G: Usis Protocol
Appendix G: USIS protocol. The protocol is a serial communication on the USB port. It can be used by sending commands on the serial port, and listen to the replies. This can The USIS protocol is designed to control any be done by using a serial console (like Putty under spectroscopy device in a standard way.
Need help?
Do you have a question about the UVEX PF0079 and is the answer not in the manual?
Questions and answers