Table of Contents
Advertisement
Quick Links
Advertisement
Table of Contents

Related Manuals for shelyak Alpy 600


Summary of Contents for shelyak Alpy 600
- Page 3 Alpy 600 spectroscope User Guide Olivier Thizy (olivier.thizy@shelyak.com) François Cochard (francois.cochard@shelyak.com) February 2014 Ref. DC0016 - rev B...
-
Page 4: Table Of Contents
1.3 Alpy 600 elements ........ - Page 5 7.2 Alpy 600 with a DSLR camera ........
-
Page 6: Introduction
Alpy 600: use the Alpy 600 module alone to produce high – First, use the Alpy 600 in slit mode (as it is con- quality spectra, but adding the guiding and/or cal- figured in our factory), during daylight. - Page 7 fit your own needs & observations. These are the main modules : – The Alpy 600 is the main module. It is the spec- troscope itself. It can be used in different config- urations, to cover most applications in astronomy &...
-
Page 8: Discover Your Alpy 600
CCD camera. The pack- KAF400 6.9 mm 3790 Å 6825 Å age contains the Alpy 600, as well as a tool set and a 9 mm 3650 Å 7380 Å 10 mm 3650 Å... - Page 9 µm also included : hole 3mm, slit 300µm, 100µm 50µm, hole 25µm Slit length except for hole 25µm Mechanical interface M42 x 0.75 Standard T-mount (or T2) thread Table 1.1: Alpy 600 specifications Figure 1.1: Alpy 600 dimensions (in mm)
-
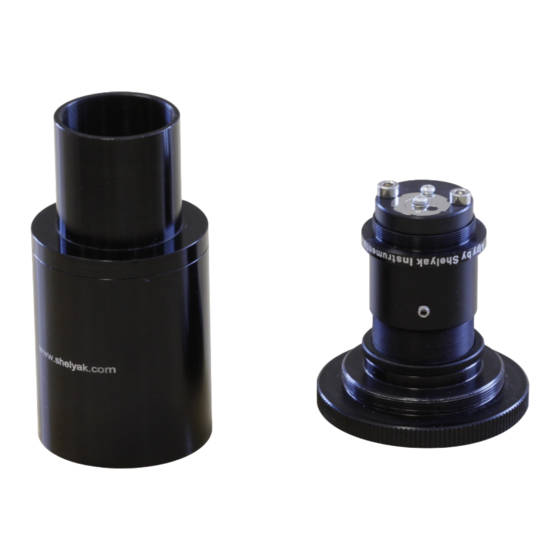
Page 10: Mechanical Interfaces
Loosen the three small screws around the spectro- scope body, and remove the Alpy 600 core element : 1.4 Mechanical interfaces The Alpy 600 uses several standard threads for me- chanical interfaces, to adapt the instrument to your own setup. -
Page 11: Visual Observation
CHAPTER 1. DISCOVER YOUR ALPY 600 You’ll see your first spectrum. Look at different sources, to see the different spectra types : A tungsten lamp has a continuous spectrum: The thread around the slit is of SM1 type: external diameter 1,035" (26,29mm), 40 threads/inch (pitch A power saving lamp has several bright emission = 0.635mm). -
Page 12: Alpy 600 Principle
A grism is a combination of a grat- ing and a prism. The grating spreads out the light, but The principle of the Alpy 600 is as follows. A point also deviates the beam by a significant angle. Using a... -
Page 13: Different Slits
find easily the star you’re looking for. To do that, you can totally remove the slit from the Alpy 600, but it is better to keep in position the “3mm hole” : this way, you’ll limit the optical aberrations at the field edges - and you’ll not lose the slit (third line). - Page 14 Alpy 600 - user guide Standard slit : 25µm Hole 25µm Hole 3mm Wide slit 300µm Table 1.3: Alpy 600 slits...
- Page 15 CHAPTER 1. DISCOVER YOUR ALPY 600 outer screw, and tighten carefully the two screws. The slit is a fragile component - take extra care when changing its position, and make sure that you can move it freely, before turning Cleaning the slit Over the time, there can be some dust on the slit.
-
Page 16: Alpy 600 - Spectroscopy In Slit Mode
Alpy 600 - Spectroscopy in slit mode In the previous chapter, you’ve looked at lamp spec- tra using the Alpy 600. Now, you probably want to take a picture of what you’ve seen, either to share it with others, or to make measurements. This is the purpose of this chapter. - Page 17 CHAPTER 2. ALPY 600 - SPECTROSCOPY IN SLIT MODE Put the Alpy 600 core element in the body. It can turn The first point to check is that the image is not satu- freely : this will be used to put the spectrum horizon- rated.
- Page 18 To do that, fix the the CCD camera firmly (we often use a small hand-vice), take the Alpy 600 core element in one hand to keep it in place, and turn the body with the other hand.
- Page 19 CHAPTER 2. ALPY 600 - SPECTROSCOPY IN SLIT MODE Description Images Sun light Halogen lamp (flat field lamp of the Alpy calibration module) Candle light Argon / Neon (Alpy calibration module) Neon lamp Argon (Habitat lamp) White LED Power saving lamp...
-
Page 20: Color Or Black & White
To make the conversion from image to profile, you must use spectral data re- duction software. Alpy 600 is provided with ISIS soft- ware, which is one recommended tool. This docu- Then, click the button “Next”; ISIS switches to the ment isn’t a tutorial of ISIS (refer to the ISIS doc-... -
Page 21: Reference Images
CHAPTER 2. ALPY 600 - SPECTROSCOPY IN SLIT MODE Click on the "Next" button. Isis switches to the "3. This is your first Sun spectrum profile ! There are a Calibration" tab. Check that “Tilt angle”, “Smile Y”, “X lot of absorption lines - each of them is the signature coordinate of line at wavelength”... -
Page 22: Offset Image
Alpy 600 spectra. You do not have to rebuild your dark frame every night; you can create your library of dark frames taken at different temperatures and use it for several months. -
Page 23: Flat Field Spectrum
CHAPTER 2. ALPY 600 - SPECTROSCOPY IN SLIT MODE 2.4.3 Flat field spectrum A flat field spectrum is obtained by illuminating the spectroscope with a continuous spectrum of white light. Ideally, it should be a lamp that has the same energy level in each wavelength. -
Page 24: First Pass : Raw Profile
Alpy 600 - user guide The profile is significantly different from the initial one made with no reference images at all. This differ- Also create a cosmetic file, which records all the hot ence is mainly due to the flat field correction. - Page 25 CHAPTER 2. ALPY 600 - SPECTROSCOPY IN SLIT MODE the wavelengths above, select “absorption line” and click on the first radio button (matching 3933 Å): In the bottom area, you have the RMS error re- sulting from the calibration. It should be around few Å(here, the error is of 3,7 Å)
-
Page 26: Third Pass : Response Curve Correction
Alpy 600 - user guide Click on the "Display" button for reloading the sun 2.5.4 Third pass : Response curve profile. Then click on the “Response” button. A re- correction sponse panel appears : select the G2V profile as refer- The whole instrument, including telescope (if any), ence. - Page 27 CHAPTER 2. ALPY 600 - SPECTROSCOPY IN SLIT MODE Now, move the cursor in the continuum panel to You can see that the result is excellent - much of the smooth the profile, and remove all the noise in the detail that we could suspect to be noise is in fact the profile:...
-
Page 28: Alpy 600 - Stellar Spectroscopy In Slitless Mode
So far, you’ve worked with the Alpy 600 in slit mode. Ideally, you should do the same with the stars. But there is a problem: when using a slit spectroscope, the only field you get is the slit. -
Page 29: Recording A Star Spectrum
Now look through the Alpy 600 core element, and focus the telescope to give a very thin spectrum. Turn the Alpy 600 in such a way that the spectrum is horizontal, with blue on the left and red on the right. - Page 30 T-mount thread (M42x0,75mm). If your telescope includes a 2” eyepiece holder, you can Assemble the external body and the eyepiece ring remove the Alpy 600 eyepiece ring and replace on the Alpy 600: it by a T-mount to 2” adapter (optional).
-
Page 31: Stars Observation
You should see something like this: You can rotate the Alpy 600 in the eypiece holder : the spectrum remains horizontal in the image. This is nor- mal: the orientation of the spectrum only depends on spectroscope position vs the CCD camera. -
Page 32: Data Reduction
Alpy 600 - user guide a spectrum like this: Here is the list of the reference images you need to take in slitless mode, to ensure a proper data reduc- tion: – 7 offset image or more (same as before) –... -
Page 33: Third Pass
CHAPTER 3. ALPY 600 - STELLAR SPECTROSCOPY IN SLITLESS MODE wavelength Line 3835 Å Hη (eta) 3889 Å Hζ (dzeta) 3970 Å Hǫ (epsilon) 4102 Å Hδ (delta) 4340 Å Hγ (gamma) 4861 Å Hβ (beta) 3.4.3 Third pass 6563 Å... - Page 34 Alpy 600 - user guide This response curve is very embossed. This is different from what you saw on the Sun, without the flat correction, all the flat field details were smoothed. Save the profile, and re-run the data reduction pro- cess, including the response file name (in “2.
-
Page 35: Star Spectra In Slit Mode
Alpy guid- ing module to your Alpy 600. This is a device which shows you the entrance of the slit: you can see the star you are observing. You can use this image to move the star onto the slit and track it. - Page 36 This is applicable only for bright Tracking the star stars. You’ve been able to put the star in the Alpy 600 slit... now, you have to keep it there during the whole Also, with some experience, and if your telescope is observation.
-
Page 37: Next Steps
CCD, and reduce the noise. spectrum comes mainly from the spectroscope itself. The best way to improve SNR is then to increase The resolving power of the Alpy 600 is approximately the Signal. It can be done by several ways: R=600 around Hα. -
Page 38: Wavelength Calibration
Alpy 600 - user guide 5.1.3 Wavelength calibration 5.1.6 Instrumental Response curve Take special care when performing the wavelength We have already described a simple way to get the calibration. Normally, you should have an RMS smaller Instrumental Response curve with ISIS. In fact, this than 0.5 Å. -
Page 39: Exposure Time
If you are looking for target and observing pro- that you can reach professional quality, with just as grams, you can look at the Shelyak Instruments web- much rigour. You can even contribute to research in site : we’ve listed many ideas, ranging from from easy... -
Page 40: Typical Observing Session
Typical observing session Here is a summary of a typical observing session, to ensure data quality and productivity. It is a basic checklist that you can use every time you observe. Preparation – Start-up the equipment, and cool down the acqui- sition camera (max 80% of cooling power), –... -
Page 41: Appendix
During the night, you can observe and control the times. If you’re using your Alpy 600 for astronomi- star position vs the slit: cal observations, the Alpy guding module is almost mandatory. -
Page 42: Dslr Camera Barlow Adapter
ficiency of your observations. 7.1.3 DSLR camera barlow adapter The Alpy 600 has a short backfocus, to comply with compact CCD cameras. However, in some conditions, a longer backfocus is required. This is the case for DSLR camera usage. -
Page 43: C-Mount Camera Adapter
CHAPTER 7. APPENDIX bayer matrix effect...), using a DSLR camera makes astronomical spectroscopy accessible with a low bud- get. How to use a DSLR camera with the Alpy 600 is described in section 7.2 below. 7.1.4 C-mount camera adapter Most CCD cameras are today using T-mount thread (M42 x 0.75mm). - Page 44 Focusing the Alpy 600 more sensitive than a DSLR camera. It means that for the same result, you will need ten times longer We suggest installing your DSLR camera on a tri- pod. Focus the Alpy 600 with the same method as for...
- Page 45 (there is the Bayer matrix to manage). Note that the over- sampling in the DSLR camera configuration means that the Bayer matrix has no effect in practice on the Alpy 600 spectra resolution.
Need help?
Do you have a question about the Alpy 600 and is the answer not in the manual?
Questions and answers