Table of Contents
Advertisement
Quick Links
RAYSTECH (PTY) LTD.
RT-5100S
Residential ESS Manual
About RT-5100S ESS
RT-5100S can be installed in Parallel, more attention should be paid for the DIP and
address selection following with part 5.3.2.
About this Manual
The Manual is intended for theRT-5100S Residential ESS, the hybrid inverter and any
other equipment is not included.
Advertisement
Table of Contents

Related Manuals for RAYSTECH RT-5100S

Summary of Contents for RAYSTECH RT-5100S
- Page 1 RT-5100S Residential ESS Manual About RT-5100S ESS RT-5100S can be installed in Parallel, more attention should be paid for the DIP and address selection following with part 5.3.2. About this Manual The Manual is intended for theRT-5100S Residential ESS, the hybrid inverter and any...
-
Page 2: Table Of Contents
Contents 1 Safety Instructions ..........................- 1 - 1.1 Important Safety Instructions ....................- 1 - 1.2 Warnings in this Document ....................- 1 - 1.3 Battery handing guide ......................- 1 - 1.4 Response to emergency situations ..................- 1 - 1.4.1 Leaking batteries .......................- 2 - 1.4.2 Fire ............................ - Page 3 5 Battery Installation..........................- 10 - 5.1 Package items ......................... - 10 - 5.2 Checks before installation ....................- 11 - 5.3 Installation the battery ......................- 11 - 5.3.1 Connect with 51.2Vdc Inverter ...................- 11 - 5.3.1.1 Wall mounting .................... - 11 - 5.3.1.2 Ground installation..................
-
Page 4: Safety Instructions
A warning describes a hazard to equipment or personnel. It calls attention to a procedure or practice, which, if not correctly performed or adhered to, could result in damage to or destruction of part or all of the RAYSTECH equipment and/or other equipment connected to the RAYSTECH equipment or personal injury. -
Page 5: Leaking Batteries
RAYSTECH customer careline or your distributor for technical assistance. 1.4.4 Damaged battery If the battery damaged, please contract RAYSTECH customer careline or your distributor for help as soon as possible, because damaged battery is dangerous and must be handled with extreme caution. Damaged battery is not suit for use and may pose a danger to people or property. -
Page 6: Installers
48h 1.5 Installers RAYSTECH Energy Storage battery is suggested to be installed by skilled worker or electrician. A skilled worker is defined as a people who had been trained and qualified electrician or had all of the following skills and experience: ... -
Page 7: Exploded Views Of Battery
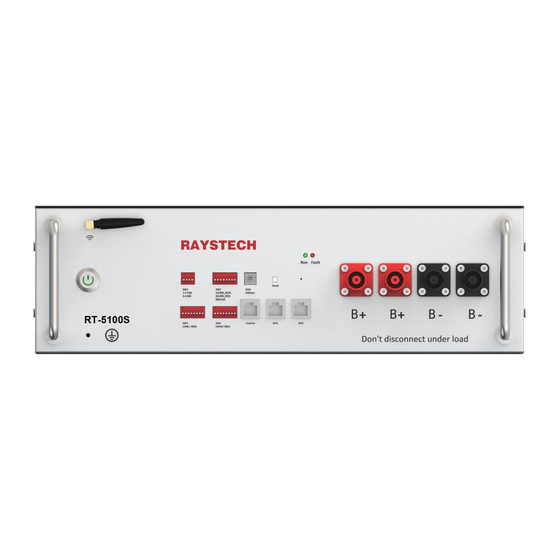
Hanrzd Class of Dangerous Goods Transportation UN38.3 Testing Conditions Based on Temperature 25℃ at The Beginning of Life. Total Energy/Usable Energy Measured Under Specific Conditions From RAYSTECH 0.2C CC/CV 2.2 Exploded views of battery 2.3 Indicator and ports - 4 -... -
Page 8: Communication Interface Plat(Dvc-A2 Voltage
There are two LED indicators on the front of the battery to show its operating status. Table 2-1 Designations on the battery Item Designation Definition Running Battery normally working without fault Fault Battery is in a warning state, see troubleshooting in Chapter 8 2.4 Communication interface plat(DVC-A2 voltage)... -
Page 9: Features
2.6 Features The RAYSTECH Residential ESS has following features: Energy storage unit: This battery is suit for PV solar system compatibility. Battery management system (BMS): The battery built-in BMS monitor. It prevents the battery from running outside of the design, limitations. -
Page 10: Guidance For Disconnection Of Batteries During Shipment
If the package is deemed to be not shippable, the contents shall be promptly collected, segregated, and either the consignor or consignee contacted. 2) The DC circuit of RAYSTECH Residential ESS has been disconnected before outgoing. 3) A precautionary label had been affixed to the shipping carton to alert individuals as to the battery within the package have been disconnected;... -
Page 11: Installation Process
Minimal dust and dirt in the area. No corrosive gases present, including ammonia and acid vapor. The RAYSTECH Residential ESS is rated at IP20, so the battery could be installed indoor. If the ambient temperature is outside the operating range, battery will protect itself by shutting down. -
Page 12: Tools
NOTICE Make sure that the cross-sectional area of charging cables is 25 to 35 A breaker between RAYSTECH battery and inverter was recommended to install, and the breaker’s min. current should be over 150A or following with local regulations. -
Page 13: Network Cable
4.6 Network cable If needed, the network cable should be made like this diagram. But the network cable between battery and Inverter should be made following the definition of Inverter. If available, use a LAN cable tester to check whether the cable is faulty. 4.7 Storage If the battery is not to be installed immediately, or removed from operation and needs to be stored for a long period, please choose an appropriate location to... -
Page 14: Checks Before Installation
LED lights on, measure the voltage at the terminal interface with a voltmeter. If the voltage is lower than 48 V, do not use the battery and contact RAYSTECH customer careline or your distributor. 5.3 Installation the battery... -
Page 15: Ground Installation
Note: if more than 4 batteries installed, a cabinet recommended to be selected for the battery’s stable. 5.3.1.2 Ground installation Meanwhile, RT-5100S battery also could be installed on floor, the installation step as following: 1. Fix the bracket to battery’s mounting holes one by one. -
Page 16: Address Selection Of Master And Slave Battery(Ies) Connection
2. If more power and energy needed, 2 to 4 batteries could be installed in one stack. 3. If the number of batteries at the range of 5 to 8, a cabinet is recommended to be selected. 5.3.2 Address selection of Master and Slave battery(ies) connection - 13 -... - Page 17 WARNING Please make sure the SW2 DIP switch selected correctly, if the battery connected in Parallel mode, but select SW2 DIP8 at ON position, probably lead serious fault even dangerous. Connected Set of SW2 Address Set battery Group (SW3) Parallel connect number —...
-
Page 18: Cable Connections
Slave 2 Slave 3 Slave 4 Slave 5 Master Slave 1 Slave 2 Slave 3 Slave 4 Slave 5 Slave 6 Master Slave 1 Slave 2 Slave 3 Slave 4 Slave 5 Slave 6 Slave 7 5.4 Cable connections WARNING Before connecting battery with inverter, please make sure that no - 15 -... -
Page 19: Cable Connection For Parallel Connection
inverter connected or the inverter is turned off. NOTICE 5.4.1 Cable connection for Parallel connection 5.4.1.1 Ground installation For parallel installation, please pay attention on Cable connection, and the DIP8 of SW2 no need to be changed and stayed on Initial Factory state. 5.4.1.2 Wall mounting For wall mounting, the battery connection number should be less than... -
Page 20: Configuration
If parallel connecting multiple batteries, please set the DIP switches as following: 6.1 Configure device WIFI The RAYSTECH Residential ESS has a built-in WIFI module to use with the RAYSTECH APP. The WIFI setting of battery should be as following 6.2 Register your account... - Page 21 warning and other functions. It is uploaded to the battery network through the battery management system. Comprehensive management of mobile phone query system to create a more comfortable battery management experience for users Search Smart BESS on Google Play Store 6.2.1.2 Function User registration: the user registers the...
- Page 22 Manually install the downloaded (2)IOS installation Smart BESS installation package Open IOS's own application store Search for Smart BESS in the APP Store Enter the Smart BESS application details page, click GET to install Wait for the installation of the Smart ...
- Page 23 6.2.2.2 User Login Enter the Register page, enter the user After successful registration, it will name, email, and six-digit string automatically return to the login page, password, click T&Cs and Privacy enter the registered user name and policy, you can view the user password, and click Login to log in agreement, agree to the agreement to confirm the check, and then click...
- Page 24 Services 6.2.2.4 WIFI Distribution Network 6.2.2.5 Add Battery Select WiFi Config to configure the After the battery is connected to the battery network. Before operation, network, select Add Battery to add the please pay attention to connecting to battery, click it to enter the automatic the WIFI with network code scanning page, scan the bar...
- Page 25 The battery overview details page displays the current battery cell data 6.2.2.6 Battery Management Voltage(V), Current(A), Temperature( After completing the distribution ℃), SOC, and the single cell voltage of network and adding batteries, click My the battery is displayed under Cell Battery to view the information of the Voltage.
- Page 26 charge and discharge history at any enter the password reset interface, time point enter the current user name in the User Name column, and enter the battery ID bound by the current user for Battery id or scan the code to enter the battery ID.
-
Page 27: Settings For Can /485 Bus Pins
1) Check battery voltage level is above 48V If battery voltage is under 48V contact your distributor or RAYSTECH after service customer careline for help. 2) Press and HOLD the panel button for about 4s, after four seconds the indicator lights will turn on. -
Page 28: Shutting Down Battery
2) If the battery fault light on, please check the Troubleshooting number in Homepage in your RAYSTECH APP, if the code is 0x1***, this problem would be recovered by itself. But if the code is 0x2*** or 0x3***, please contact the RAYSTECH after service customer careline or your distributor for help. -
Page 29: Firmware Update
0x1007 Cell over discharge warning 0x1008 Cell over charge warning 0x1009 Battery charge with over temperature warning 0x1010 Battery discharge with over temperature warning 0x1011 Battery charge with under temperature warning 0x1012 Battery discharge with under temperature warning 0x2001 Battery under voltage protection 0x2002 Battery and cell over discharge protection 0x2003... - Page 30 The Period of Performance Guarantee will continue on any repaired unit. In the event of a replacement units then the Period of Performance guarantee will transfer to the replacement unit. In no event will RAYSTECH be liable for any consequential, incidental or punitive damages - 27 -...
- Page 31 Damage or impairment to the Products resulting from any of following activities are NOT covered by this Warranty: Installation or use with any devices not approved as compatible by RAYSTECH. Failure to install or use the battery in the way intended, or as demonstrated in the installation manual including incorrect-installation of cables and connections.
- Page 32 RAYSTECH guaranteed which performance is equal to or higher than replaced device. If the product is no longer sold in the market, RAYSTECH would replace it with different kind of product with equal or higher functions and performances, or the residual annual depreciation value of the buyer paid price within the time limit for performance guarantee.
- Page 33 FIXED unit and would credit the cost of returning the unit to us for testing (based on standard acceptable logistical costs). Out Of Warranty In the event the Product is out of warranty, RAYSTECH may (in its discretion) provide certain after-sales service to Original Buyer, but all the costs and expenses, such as parts, labour costs and travel expenses, shall be borne by Original Buyer.
-
Page 34: Red Declaration Of Conformity (Doc)
OTHER (incl. Art. 3(3) and voluntary specs): N/A Accessories: N/A Software: N/A Technical file held by: RAYSTECH (PTY) LTD. Place and date of issue (of this DoC): Du Teddy ......Signed by or for the manufacturer: ................. (Signature of authorised person) Name (in print): ..............
Need help?
Do you have a question about the RT-5100S and is the answer not in the manual?
Questions and answers