Table of Contents
Advertisement
Quick Links
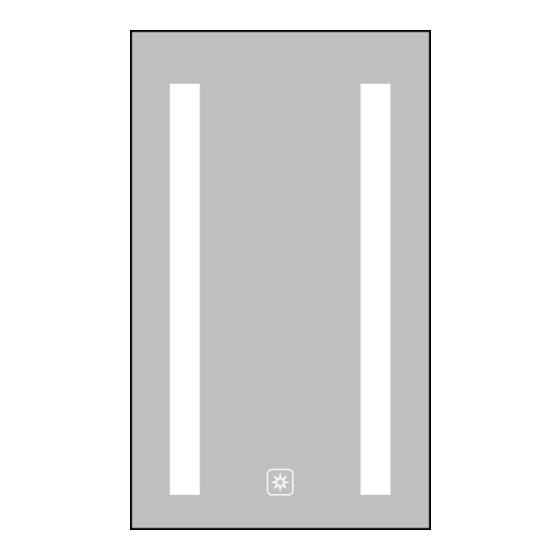
Mirrored Cabinet
Installation Guide
Installation Guide
CONGRATULATIONS
You've purchased the finest mirrored cabinet available from the global leader in mirror technology. This mirrored cabinet
is quick and easy to install and is designed and manufactured to offer you years of enjoyment.
Please read these instructions thoroughly before beginning installation. If you have any questions, please contact our
Customer Service team at 425.776.4946 or customer.support@electricmirror.com.
APPLICATION
These installation instructions apply to the mirrored cabinets listed below:
Ambiance™ (AMB2)
TABLE OF CONTENTS
1. REVIEW IMPORTANT SAFETY INSTRUCTIONS ................................................................................................................. 2
2. UNPACK YOUR MIRRORED CABINET ................................................................................................................................... 2
3. DETERMINE THE CABINET LOCATION ................................................................................................................................. 3
4. PREPARE THE WALL FOR HANGING ....................................................................................................................................4
5. PREPARE THE ELECTRICAL ...................................................................................................................................................... 9
6. CONNECT THE ELECTRICAL .................................................................................................................................................... 11
7. INSTALL THE CABINET DOOR ................................................................................................................................................ 13
8. ADJUST AND LEVEL THE DOOR ........................................................................................................................................... 15
9. INSERT THE SHELVES ................................................................................................................................................................ 16
10. CLEAN THE MIRROR .................................................................................................................................................................. 16
ELECTRIC MIRROR®
425.776.4946
|
|
electricmirror.com
sales@electricmirror.com
Ascension™ (ASC2)
|
© 2023 Electric Mirror. All rights reserved.
ELECTRIC MIRROR®
ELECTRIC MIRROR®
Simplicity™ (SIM2)
|
0123.5.U
Page 1
Advertisement
Table of Contents

Related Manuals for Electric Mirror Ambiance AMB2


Summary of Contents for Electric Mirror Ambiance AMB2
-
Page 1: Table Of Contents
7. INSTALL THE CABINET DOOR ..............................13 8. ADJUST AND LEVEL THE DOOR ............................15 9. INSERT THE SHELVES ................................16 10. CLEAN THE MIRROR .................................. 16 ELECTRIC MIRROR® 425.776.4946 electricmirror.com sales@electricmirror.com © 2023 Electric Mirror. All rights reserved. 0123.5.U Page 1... -
Page 2: Review Important Safety Instructions
*The cabinet glass is fragile. Keep edge protectors in place and rest the cabinet on a cushioned surface. Do not place it on a hard surface. ELECTRIC MIRROR® 425.776.4946 electricmirror.com sales@electricmirror.com © 2023 Electric Mirror. All rights reserved. 0123.5.U Page 2... -
Page 3: Determine The Cabinet Location
For surface mounted cabinets: mount the cabinet to wall studs or a similarly prepared surface. III. Measure your cabinet door (not the cabinet, as the door is larger) for exact dimensions and mark the location on the wall. ELECTRIC MIRROR® 425.776.4946 electricmirror.com sales@electricmirror.com © 2023 Electric Mirror. All rights reserved. 0123.5.U Page 3... -
Page 4: Prepare The Wall For Hanging
Pre-drill holes or use wall anchors as necessary. Secure the mounting cleat to the wall based on this location. II. Attach the bottom cleat to the underside of the cabinet body. ELECTRIC MIRROR® 425.776.4946 electricmirror.com sales@electricmirror.com © 2023 Electric Mirror. All rights reserved. 0123.5.U Page 4... - Page 5 The ganging kit is inserted between the two cabinet bodies, as shown below. From the center side of the two cabinet bodies, remove the decorative side panels (See 4B for details). ELECTRIC MIRROR® 425.776.4946 electricmirror.com sales@electricmirror.com © 2023 Electric Mirror. All rights reserved. 0123.5.U Page 5...
- Page 6 I. Remove the decorative mirror side panels by removing the screws from the top and the bottom of the cabinet body, then discard the side panels. ELECTRIC MIRROR® 425.776.4946 electricmirror.com sales@electricmirror.com © 2023 Electric Mirror. All rights reserved. 0123.5.U Page 6...
- Page 7 The inner sides of the cabinet must be mounted to wall studs or framing. CAUTION: THERE MAY BE HIDDEN WIRING IN THE WALL. TURN OFF POWER BEFORE CUTTING ANY HOLES. ELECTRIC MIRROR® 425.776.4946 electricmirror.com sales@electricmirror.com © 2023 Electric Mirror. All rights reserved. 0123.5.U Page 7...
- Page 8 IV. Insert the cabinet body into the recessed opening. Ensure the front flange of the cabinet body is flush to the wall. Screw the cabinet body into the wall studs or frame using the mounting holes on both inner sides of the cabinet body. ELECTRIC MIRROR® 425.776.4946 electricmirror.com sales@electricmirror.com © 2023 Electric Mirror. All rights reserved. 0123.5.U Page 8...
-
Page 9: Prepare The Electrical
There are two entry points into the cabinet. The bottom entry is generally used for recessed installation, and the back is used for surface mount. ELECTRIC MIRROR® 425.776.4946 electricmirror.com sales@electricmirror.com © 2023 Electric Mirror. All rights reserved. 0123.5.U Page 9... - Page 10 The Simplicity (SIM) cabinet requires one unswitched 120V 60Hz circuit. When bringing out the wiring, leave a 1-foot whip. Ascension & Ambiance (two circuits) Simplicity (one circuit) ELECTRIC MIRROR® 425.776.4946 electricmirror.com sales@electricmirror.com © 2023 Electric Mirror. All rights reserved. 0123.5.U Page 10...
-
Page 11: Connect The Electrical
For the appropriate wiring configuration, see the image below for your cabinet. Wago connectors are provided where necessary. Simplicity (SIM) or other non-lit cabinet *Outlet needs to be on a GFCI protected circuit. ELECTRIC MIRROR® 425.776.4946 electricmirror.com sales@electricmirror.com © 2023 Electric Mirror. All rights reserved. 0123.5.U Page 11... - Page 12 (including the use of an on/off wall switch) *Outlet needs to be on a GFCI protected circuit. Ambiance (AMB) or another cabinet with wall dimming ELECTRIC MIRROR® 425.776.4946 electricmirror.com sales@electricmirror.com © 2023 Electric Mirror. All rights reserved. 0123.5.U Page 12...
-
Page 13: Install The Cabinet Door
I. Insert the hinges on the door into the hinge receivers on the cabinet body. II. Hinges are secure when you hear the mechanical click. ELECTRIC MIRROR® 425.776.4946 electricmirror.com sales@electricmirror.com © 2023 Electric Mirror. All rights reserved. 0123.5.U Page 13... - Page 14 II. Ensure the slot on the connector (from the door) lines up with the tab of the receiver (cabinet body). III. Rotate the nut on the cable head clockwise to secure it to the cabinet. ELECTRIC MIRROR® 425.776.4946 electricmirror.com sales@electricmirror.com © 2023 Electric Mirror. All rights reserved. 0123.5.U Page 14...
-
Page 15: Adjust And Level The Door
Gaps between the mirrored cabinet and door should be uniform. Close the door to inspect the results of the previous step. Readjust the hinge(s) as necessary until the door is parallel to the cabinet. ELECTRIC MIRROR® 425.776.4946 electricmirror.com sales@electricmirror.com © 2023 Electric Mirror. All rights reserved. 0123.5.U Page 15... -
Page 16: Insert The Shelves
Be sure to dry all joints and edges thoroughly to be certain no water or cleaner comes into contact with the edge or back surface of the mirror. ELECTRIC MIRROR® 425.776.4946 electricmirror.com sales@electricmirror.com © 2023 Electric Mirror. All rights reserved. 0123.5.U Page 16...
Need help?
Do you have a question about the Ambiance AMB2 and is the answer not in the manual?
Questions and answers