
Subscribe to Our Youtube Channel
Related Manuals for Pentair SMART UV EU18-U


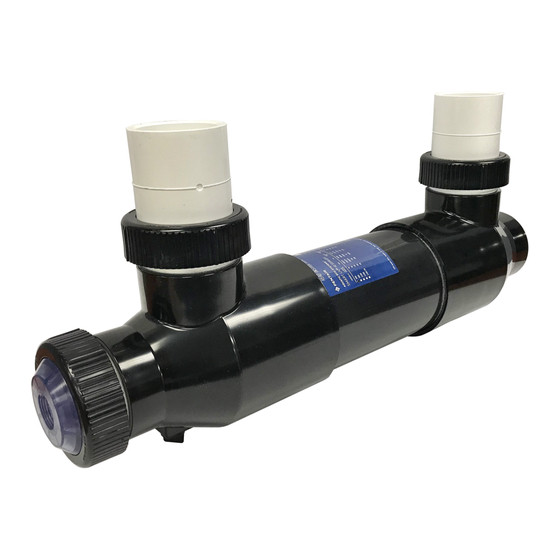
Summary of Contents for Pentair SMART UV EU18-U
- Page 1 SMART UV® SYSTEM INSTALLATION AND USER'S GUIDE IMPORTANT SAFETY INSTRUCTIONS READ AND FOLLOW ALL INSTRUCTIONS SAVE THESE INSTRUCTIONS...
- Page 2 Phone: 407.886.3939 Web: PentairAES.com This document is subject to change without notice. All indicated Pentair trademarks and logos are property of Pentair. Third party registered and unregistered trademarks and logos are the property of their respective owners. © 2023 Pentair. All Rights Reserved. Pentair.com P/N 02934-INS-SMART REV.
-
Page 3: Table Of Contents
TABLE OF CONTENTS Important Warning and Safety Instructions ..4 Maintenance ............16 Warranty Information ..........5 Quartz Sleeve Cleaning ........16 System Features and Specifications ...... 6 Winterizing ............16 SMART UV Features .......... 6 Lamp Connector Removal ........ 17 ®... -
Page 4: Important Warning And Safety Instructions
Warns about hazards that may cause death, of the following situation, DO NOT attempt repairs yourself. Call serious personal injury, or major property Pentair customer service department at 877-347-4788 for services or damage if ignored. discard the appliance. Warns about hazards that may or can cause... -
Page 5: Warranty Information
If in doubt consult a qualified electrician. WARRANTY INFORMATION PENTAIR warrants to the original purchaser, the SMART UV Systems The UV lamp has a 90-day warranty on the electrical operation only. to be free from defects in workmanship or materials for a period of 1 The warranty is only in effect provided the equipment is installed year from the date purchase on power supply and all gaskets seals. -
Page 6: System Features And Specifications
SYSTEM FEATURES AND SPECIFICATIONS All SMART UV System models are packaged SMART UV Features ® complete, with all necessary components that are Our GPH T-5 and T-6 low pressure lamps, convert required to operate the unit. When unpacking, it is approximately 30% of their electrical input watts into recommended to perform a complete component UV-C output watts. -
Page 7: Pre-Installation Inspection
PRE-INSTALLATION INSPECTION All SMART UV units are packaged complete, with Power Supplies ® all necessary components that are required to The power supply can either be a cylinder “POD” operate the unit. When unpacking your SMART UV or a rectangle style. Below are the ballasts that are System, we recommend that a complete component currently used with the SMART UV line. -
Page 8: Quartz Sleeve And Uv Lamp Inspection
PRE-INSTALLATION INSPECTION Quartz Sleeve and UV Lamp Inspection – When Packed in Tube SMART UV Systems are packaged with their quartz ® sleeve assembly pre-assembled inside the UV vessel. The UV lamp is packaged separately in a corrugated tube. The Quartz Sleeve Assembly must be removed from the UV vessel and inspected for damage prior to installation. -
Page 9: Installation
INSTALLATION Assembly Instructions Improper assembly may result in water 1. Position the QSM retaining nut and QSM blue damage electrical components unsafe compression gasket over the open end of the conditions. The manufacturer is not responsible for quartz sleeve. The blue compression gasket is a damage cause by improper re-assembly of these parts. -
Page 10: Installation And Operation
INSTALLATION 7. With the quartz sleeve assembly properly in place, Mounting the Vessel the quartz sleeve retaining module will sit flush Note: The way UV vessels are against the top of the UV vessel. mounted/positioned plays very important role in the unit’s performance and degree of safety. -
Page 11: Mounting The Power Supply
INSTALLATION Horizontal Vessel Mounting Mounting the Power Supply Mount the SMART UV System horizontally with the Depending on the style of power supply cylinder or inlet/outlet facing up. If the unit is mounted but not rectangle the SMART UV System’s power supply ®... -
Page 12: Mandatory Leak Test
INSTALLATION Mandatory Leak Test 5. If moisture is detected on the paper towel the quartz sleeve’s rubber gasket has failed to achieve A leak test must be performed each time the quartz a seal and must be re-assembled; repeat the sleeve is installed inside the unit’s vessel or when the leak test until a seal is achieved. -
Page 13: Uv Lamp Installation
INSTALLATION Ground Fault Circuit Interrupter A 4” Space between 4-Pin (4) and Gray Power Supply Adapter (3) must be maintained. The proper positioning (GFCI) Protection is important for UV effectiveness. This unit must be wired in conjunction 1. The 3/8-inch Threaded Watertight Cord Connector with a properly grounded, Ground Fault Circuit (1) is adjustable. -
Page 14: Smart Uv Installation And Operation
Larger Sized Ponds (above 5,000 Gallons) Using ® Surface Skimmer and Pressurized Filter SMART UV Systems are used in a variety of applications. Pentair encourages the consideration This system is simple yet it achieves critical filtering installation/operation recommendations goals, such as good water circulation for increased provided here. - Page 15 OPERATION NOTE: Before gluing piping or reducer bushing into NOTE: Before gluing piping or reducer bushing into the UV’s union or socket, remove the quartz sleeve the UV’s union or socket, remove the quartz sleeve assembly to prevent glue from dripping onto the assembly to prevent glue from dripping onto the quartz sleeve.
-
Page 16: Maintenance
UV-C light transmittance not covered under warranty. through the glass and into the water. Pentair recommends shutting the UV system down Cleaning frequency is also dependent on how well when the temperature consistently falls below 40°F water is being filtered before reaching the SMART (4°C). -
Page 17: Lamp Connector Removal
MAINTENANCE Lamp Connector Removal 7. Using a “new” 4-pin lamp connector, push the power cord’s tinned wires into the holes of In the event that you would need to replace you the connector making sure that they are firmly 4-pin lamp connector, follow these steps: attached. -
Page 18: Troubleshooting
TROUBLESHOOTING Paper Towel Leak Test Indicates a Leak 1. Turn off the pump at the circuit breaker and be sure all flow to the unit has been stopped. 2. Refer to page 9 for “Quartz Sleeve Assembly” and page 13 for “UV Lamp Installation” (in reverse order) to disassemble the unit. -
Page 19: Replacements Parts
REPLACEMENT PARTS PARTS ITEM # KITS ITEM # UV Lamp Quartz Sleeve Module – QSM EU18-U (18 WATT) FL-2536-IP Includes 6 thru 8 Z000-005 EU25-U (25 WATT) FL-2542-IP QSM O-Ring BN70-232 EU40 (40 WATT) FL-1957-IP QSM Gasket 960409 EU65P (65 WATT) FL-2529-IP Quartz Sleeve 960563... -
Page 20: Smart Ho Uv (Before 8/20/2020)
REPLACEMENT PARTS (BEFORE 8/20/2020) PARTS ITEM # KITS ITEM # UV Lamp Quartz Sleeve Module – QSM E50S (50 WATT) FL-2538-IP Includes 7 thru 11 Z000-005 E80S (80 WATT) FL-2997-IP QSM O-Ring BN70-232 E120S (120 WATT) FL-2998-IP QSM Gasket 960409 E150S (150 WATT) FL-2999-IP Quartz Sleeve... -
Page 21: Smart Ho Uv
REPLACEMENT PARTS FOR MODEL # E50S, E80S, E120S, E150S PARTS ITEM # KITS ITEM # UV Lamp Quartz Sleeve Module – QSM E50S (50 WATT) FL-2538-IP Includes 5, 8 523382-AQ E80S (80 WATT) FL-2997-IP Quartz Sleeve Gasket 960563 E120S (120 WATT) FL-2998-IP Union Assembly E150S (150 WATT) - Page 22 NOTES SMART UV® SYSTEM Installation and User's Guide...
- Page 23 NOTES SMART UV® SYSTEM Installation and User's Guide...
- Page 24 Phone: 407.886.3939 Web: PentairAES.com This document is subject to change without notice. All indicated Pentair trademarks and logos are property of Pentair. Third party registered and unregistered trademarks and logos are the property of their respective owners. © 2023 Pentair. All Rights Reserved. Pentair.com...
Need help?
Do you have a question about the SMART UV EU18-U and is the answer not in the manual?
Questions and answers