
Related Manuals for Yoke P613 PH


Summary of Contents for Yoke P613 PH
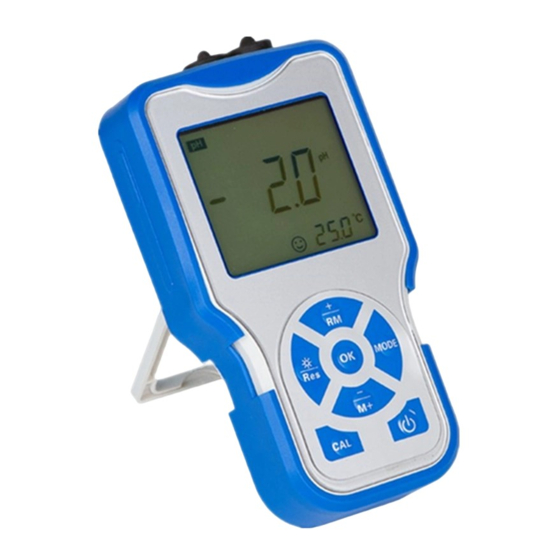
- Page 1 Shanghai Yoke Instrument Co.,Ltd. Model P613 PH /Conductivity Meter Operation Manual...
-
Page 2: Table Of Contents
Table of Contents 1. Brief Introduction -----------------------------------------------------------------------------------1 2. Technical Parameters ------------------------------------------------------------------------------ 2 3. Instructions to the Meter ---------------------------------------------------------------------------3 3.1. LCD Display --------------------------------------------------------------------------------------3 3.2. Operation Keys -----------------------------------------------------------------------------------4 3.3. The Storage, Recall and Elimination of the Measuring Information ----------------------5 4. P/H Measurement ----------------------------------------------------------------------------------6 4.1. - Page 3 1. Brief Instruction: Thanks for buying and using the model P613 pH / mV / Conductivity Meter (the following called “meter” in short). Before using this meter, please read the operation manual carefully in order to help use and maintain it correctly. On the basis of improving instrument of performance constantly, we reserve the right of changing the content of this manual and accessories in case of not notifying in advance.
-
Page 4: Technical Parameters
1.4.Automatic identification of PH buffer solution and conductivity calibration solution, user can choose anyone from three series of buffer solutions: Europe & U.S.A. series, NIST series, and China series,can be a point, two and three points to calibrate the way to facilitate customer selection. - Page 5 2.3. Conductivity: Conductivity: (0.00 - 19.99)μS/cm (20.0 - 199.9)μS/cm (200 - 1999)μS/cm (2.00 - 19.99) mS/cm Measuring range (20.0 - 199.9) mS/cm TDS: (0 - 100) g/L Salinity : (0 - 100) ppt Resistivity: (0 - 100) MΩ · Resolution 0.01/0.1/1μS/cm 0.01/0.1 mS/cm Accuracy Meter:±1.0% FS, connect meter with electrode:±1.5% FS...
-
Page 6: Instructions To The Meter
3. Instructions to the Meter: 3.1. LCD Display: ① —— Parameters mode icon ② —— Measuring value ③ — — Serial number and icon as measuring value to be stored and recalled, and indication icon for special state. M+ — measuring value to be stored icon; RM — reading to be recalled icon; ④... - Page 7 3.2.2. — Calibration key (a) When in the measurement state, press this key to enter into calibration mode. (b)When in the non - measurement state, the key is returned as the exit key. 3.2.3. — Function key (a)When in pH measurement mode, Short-time press (time<1.5s) switch the measuring parameters, the meter will display →...
-
Page 8: Ph Measurement
determine the current choice. 3.3. The Storage, Recall and Deletion of the Measuring Information: 3.3.1. Store the measuring information: In the measuring mode, when the measuring data is stable and appear the “ ”, key(≤1.5s), LCD will display “ M+ ” icon and storage serial short-time press number, and meanwhile memory all the measuring information. -
Page 9: Meter Calibration
4.1.3.Insert the PH composite electrode and the temperature electrode into the corresponding interface. 4.2. Meter Calibration: 4.2.1. Press to enter into calibration mode, LCD displays the twinkling “ ” indicate to enter into the first point calibration. 4.2.2. Wash the pH electrode in purified water and dry it, then immerge it into the pH7.00 buffer solution, rock the electrode holder and then still, waiting for the data stable and appear “... -
Page 10: Ph Solution Test
4.2.5.Calibration description: (a) This meter can adopt random one-point, two-point or three-point automatic calibration, after the first point calibration (see item 4.2.2.), press to exit calibration mode and enters into measuring mode. The indication icon “ ” will appear on the lower left corner of LCD. -
Page 11: Parameter Setting
4.4. Parameter Setting: 4.4.1. pH measuring parameter setting schedule (Chart (4-1)) Chart (4-1) Prompt Parameter Setting Items Parameters Mark Manual temperature (0-99.9)℃ compensation setting Resolution selection 0.1pH/0.01pH pH standard buffer solution CH、USA、NIST selection Temperature unit setting ℃ ℉ Purified water,Ammonia OFF-ON added purified water pH restitution... - Page 12 (c) Press key to enter into next parameter setting or press key to return to measuring mode. 4.4.3. Resolution selection (P2) (a) Press key in the mode P1 choose P2 , press key enters into mode P2, see picture (4-3). (b) Press to choose resolution : 0.1→0.01;...
- Page 13 4.4.5. Temperature unit ℃/℉ setting (P4) (a) Short press key in mode P3 to choose mode P4,press key enters into P4 see picture (4-5). (b)Press key to choose temperature unit: ℃ or ℉ ,press determines and returns; (c) Press key to enter into next parameter setting or press return to measuring mode.
- Page 14 (b) Press key to choose the time of back light auto power off,press key determines and returns; (c) Press key to enter into next parameter setting or press key to confirm and return to measuring mode. 4.4.8. Auto power off time setting (P7) (a) Press key in mode P6 to choose mode P7,press key enters into P7 see...
-
Page 15: Considerations
4.5. Considerations: 4.5.1. Calibration times of meter rely on the sample, electrode performance and required accuracy. For high accurate measurement ( ≤ ±0.02pH), which should be calibrated immediately with high accurate standard buffer solution, for general accuracy measuring ( ≤ ±0.1pH), which can be used almost one week or long time once be calibrated. - Page 16 4.5.7. The sensitive glass bulb in the front of combination electrode should not touch with hard things, any broken and rough will make the electrode invalidity. Before and after measuring, the electrode should be washed with purified water, and dry electrode after washing, don’t clean glass bulb with tissue for it will effect stability of electrode potential and enlarge response time.
-
Page 17: The Self-Diagnose Information
4.5.9. pH electrode using period is about 1 year, but its life will be shortened if using condition is poor or incorrect maintenance. So it should be replaced immediately after electrode become aging or invalid. 4.5.10. When it appears an abnormal reading when calibration or displaying, please set P8 as “ON”... -
Page 18: Mv Measurement
5. mV Measurement: 5.1. Press key to turn on, and short press to switch to mode; 5.2. Connect the ORPC composite electrode or the ion composite electrode (sold separated),the electrode is washed and dried in pure water and immersed in the measured solution., slowly stir and then still. -
Page 19: Conductivity Test
Note: (a) The meter has been calibrated before leaving factory, so generally users can use it directly. (b) The standard solution method is aimed at the long time use of conductance electrode, which leads to inaccuracy of conductance constant. The new conductance electrode has been calibrated before being released. Its constant is marked on the electrode and input constant before use. - Page 20 6.4.2. This meter has an unique one-point calibration function, to choose one calibration solution based on the principle of the water samples and calibration solution conductivity as close as possible, in general the most common calibration solution is 1413 μS/cm. Use the equipped DJS-1 conductivity electrode (K=1), and do calibrate with 1413 μS/cm calibration solution, can use within the range of less than 100 mS/cm.
-
Page 21: Parameter Setting
the standard solution.)Please set the settings in the parameter settings P1 and P2(See the 6.5.2, 6.5.3 in P18and P19)。 6.4.4. The temperature compensation coefficient of the meter setting is 2.00%/℃ by producer. However, the conductivity temperature coefficient is different for solution of different variety and concentrations, the user can refer chart (6-2), as well as the data which they own get in the experiment, to set in the parameters setting of P5. - Page 22 Chart (6-3) Prompt Mark Parameter Setting Items Parameter Electrode constant selection 0.20-5.00 0.1, 1.0, 10 Setting of constant coefficient of electrode Manual temperature (0-99.9)℃ compensation setting CH USA Calibration solution series selection Selection of temperature 0.00%-9.99% compensation coefficient Selection of datum 25℃...
- Page 23 6.5.3. Electrode constant coefficient selection (P2) (a) Under P1 mode to short press the chooseP2,Press enter into P2 mode, see picture (6-2); (b) Press key to change the constant setting,press key determine the current set value. (c) Press key to enter into the next parameter setting or press key return to measuring mode.
- Page 24 press enter into P5 mode, shown as picture (6-5); (b) Press key constant coefficient of change,long press these two settings can be changed quickly,press key determine the current set value. (c) Press key to enter into the next parameter setting or press key return to measuring mode.
-
Page 25: Considerations
(c) Press key to enter into next parameter setting or press key to confirm and return to measuring mode. 6.5.10.Auto power off time setting (P9) (a) Under P8 mode to press key choose P9, press enter into P9 mode, shown as picture (6-9); (b) Press key to choose auto power off time , press... - Page 26 6.6.2.Recommend calibrating one time every month under the normal circumstances; The use of the conductance electrode after a period of time also needs to be calibrated once. 6.6.3. Keeping the conductivity electrode clean and wash it with purified water, then throw off the water on it before and after testing.
-
Page 27: Meter's Complete Kit
7. Meter’s Complete Kit: 1unit 7.1. Model P613 pH/ Conductivity meter 7.2. E-201-9 composite electrode 7.3 DJS-1 Conductivity electrode 7.4. T-10-Q temperature electrode 7.5 Standard buffer solution (4.00, 7.00, 10.1) 1set 7.6 spare AA battery 2 pc 7.7. Manual 7.8. Carrying case 8.
Need help?
Do you have a question about the P613 PH and is the answer not in the manual?
Questions and answers