Advertisement
Produced under license of Ferrari S.p.A. The name FERRARI, the PRANCING HORSE device,
all associated logos and distinctive designs are property of Ferrari S.p.A. The body designs of
the Ferrari cars are protected as Ferrari S.p.A. property under design, trademark and trade
dress regulations.
Licensee: RASTAR (HK) INDUSTRIAL COMPANY LIMITED
Manufacturer: FUJIAN XINGHUI BABY SUPPLIES CO., LTD
Add : North Area, Zhaoan Industrial Park, Zhangzhou, Fujian, China.
Http://www.rastar. com
08.06.827000.001460
Advertisement
Table of Contents

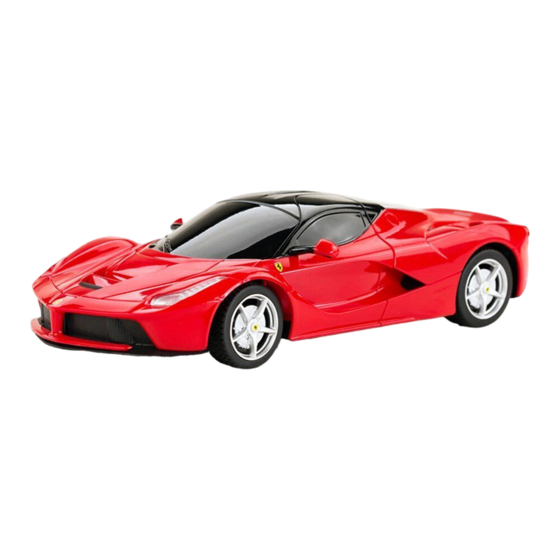
Summary of Contents for rastar LaFerrari
- Page 1 Ferrari S.p.A. The body designs of the Ferrari cars are protected as Ferrari S.p.A. property under design, trademark and trade dress regulations. Licensee: RASTAR (HK) INDUSTRIAL COMPANY LIMITED Manufacturer: FUJIAN XINGHUI BABY SUPPLIES CO., LTD Add : North Area, Zhaoan Industrial Park, Zhangzhou, Fujian, China.
- Page 2 Ride-on Instruction The packing has to be kept since it contains important information.
-
Page 3: Specification
SPECIFICATION Size 121.9 x 60.4 x 51.3 cm For child 37 - 96 months old Max.weight loaded 30 kg Net Weight 18.08 kg Power Rechargeable Speed D1 (2-3)km/h | D2 (3-4)km/h Battery 12V 7Ah lead-acid Input:AC100-240V 50Hz/60Hz | Output:DC15V 1000mA Power supply Subject to the nameplate of the charger Charging period... - Page 4 The serial number of all spare parts showed as “(NO.)” in the following descriptions. If the quantity and shape of some spare parts in this manual are different from that of products you buy, it might be because some parts of the car you buy already have been installed or because we reduce setup steps and quantities of spare parts for making the installing easier.
- Page 5 ASSEMBLY 1.Install battery and power supply Put the storage battery into the battery compartment. Plug the interface to the jack connect the terminal black terminal respectively anode andcathode of battery. (Notice: make sure they are correctly connected,red to red, black to black, otherwise, it will Interface Jack cause short-circuit.)
- Page 6 3.lnstall steering wheel Remove the protector (5) at the upside of the axes, which is non-functional but only for protecting use during the transportation. Please dispose properly. Please install the steering wheel (1) to the specific place and use Screw (9) and Hexnut (10) to screw it tightly after you make sure the steering wheel is in the right place.
-
Page 7: Replace Battery Of Transmitter And Steering Wheel
Steps of Wheel Installation: Set the wheel into the iron shaft straight until you hear a "click" sound and unable to pull the wheel back. It means the wheels are successfully installed. If you want to dismantle the wheel, pressing the wheel cover to remove the wheel. Replace battery of transmitter and steering wheel 1.Replace battery of transmitter and corrosion if long terrin storage. -
Page 8: Normal Operation
30 days. This will ensure the normal use of the battery,otherwise,the battery can not be charged. For safety, please ONLY use the battery supplied by Rastar or Rastar Baby, whichhas been protected with polarity anti-reverse structure. -
Page 9: Steering Wheel
OVERCURRENT PROTECTOR Overcurrent protector is installed under the seat. Motherboard is equipped with automatic recovery fuse. When it is overloaded or improper used, disabling the motor, the fuse will automatically disconnect the power. To reset, just turn off the key switch and wait 30 seconds, the fuse will automatically recovered. - Page 10 Volume under voltage Switch indicator Spare Switch Headlight Radio control/ is under the Switch Keyless Battery operated dash board start button Mode Switch Accelerator/ Gear Shift Play built-in Sound Indicator Pedal Switch Ride-on Function Press the Start button to start the vehicle. Forward at high speed: put the Gear Switch in D2 gear and step on pedal switch, the ride-on will move forward at high speed.
- Page 11 ON/OFF function Red (yellow) button inside is for OPEN/CLOSE function of car door. When pushing the button backward and pulling the button upward to the top, the door will open (Please see Picture 15). If you want to close the door, pis gently push the door downward, when you hear the click sound and cannot not pushing/pulling the...
- Page 12 This ride-on can not be overloaded. The maximum loading capacity is 30 kilograms. This ride-on is for children age between 37months old - 96months old. Some accessories of ride-on may be damaged by improper operation. Do not suddenly use forward-reverse switch during running. It can only be used when the ride-on is stopped.


Need help?
Do you have a question about the LaFerrari and is the answer not in the manual?
Questions and answers