Table of Contents
Advertisement
Quick Links
Advertisement
Table of Contents

Related Manuals for Electrolux EQE6879A


Summary of Contents for Electrolux EQE6879A
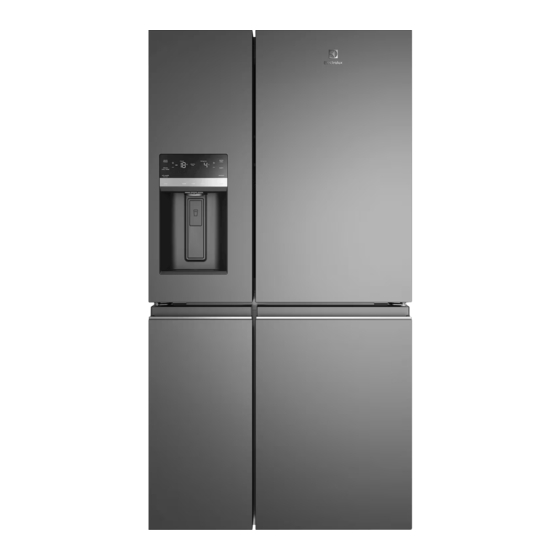
- Page 1 EQE6879A Refrigeration User Manual...
-
Page 2: Table Of Contents
WE’RE THINKING OF YOU WE’RE THINKING OF YOU Thank you for choosing Electrolux. We have designed this product to make your life simpler and deliver impeccable performance for many years. Please spend a few minutes reading this document to get the best WE’RE THINKING OF YOU... -
Page 3: Safety Information
ENGLISH SAFETY INFORMATION Note: You must read these warnings carefully WARNING before installing or using the refrigerator. If R600a refrigerant warning you need assistance, contact your customer care centre. The manufacturer will not accept This appliance contains flammable liability, should these instructions or any other R600a refrigerant. - Page 4 GENERAL WARNINGS • When transporting and installing the refrigerator, care should be taken to ensure Read the following carefully to avoid damage that no parts of the refrigerating circuit are or injury. It is important to use your refrigerator damaged.
-
Page 5: Description Of The Appliance
ENGLISH 2. DESCRIPTION OF THE APPLIANCE Ice Maker Snack Zone compartment FlexSpace™ drawer Air distributor - Multiflow Upper fixed door bin Freezer drawer Air filter Internal tank FlexSpace™ door bin Flip up glass shelf FlexStor™ dairy bin Freezer door bin Slide/fold glass shelf FlexStor™... -
Page 6: Installing Your New Appliance
3. INSTALLING YOUR NEW APPLIANCE Unpacking When positioned in a corner area, spacing of right side at least 260 mm and left side at ENVIRONMENT least 355 mm on the hinge side will allow the Most of the packing materials doors to open enough to enable the removal of are recyclable. - Page 7 To make final door height adjustments: Anti-Tip Legs Alignment (if necessary) 1. Insert Electrolux 10mm wrench into the shaft • All four corners of the cabinet must rest firmly of the lower hinge. on the floor 2. To lower door: turn adjustment screw clockwise.
-
Page 8: Control Panel
4. CONTROL PANEL 4.1 External User interface BUTTON DESCRIPTION PRIMARY FUNCTION / ICON Activates a faster rate for freezing food in the freezer. QUICK FREEZE Deactivates after 12 hours. Quickly chills a drink inside the freezer compartment. Touch the Drinks Chill Key, a time value will display on... - Page 9 ENGLISH BUTTON DESCRIPTION PRIMARY FUNCTION / ICON Maximum energy efficiency when the user is away from the appliance for an extend period. Conserves energy by increasing the time between automatic defrost. Manually turned on/off It also turns off automatically when the user opens one of those doors/drawers or press the lever (dispenser) after 30 HOLIDAY minutes from the time it was turned on.
- Page 10 4.2 TASTESEALFLEX control panel BUTTON DESCRIPTION PRIMARY FUNCTION / ICON The interface will automatically lock after 3 seconds without any inter- Unlock action. Press and hold 3 seconds to unlock the interface. A tone will sound to confirm your choice.
-
Page 11: Setting Cooling Temperatures
ENGLISH 5. SETTING COOLING TEMPERATURES Note: The recommended settings for a product Door Open installed in a kitchen is 3˚C for the fresh food If a door has been left open for 5 minutes or compartment and -18˚C for the freezer. more, an alarm will sound and the d oor open indicator will illuminate on the display. -
Page 12: Automatic Ice & Water Dispenser
6. AUTOMATIC ICE & WATER DISPENSER Dispenser Using the ice maker after installation Before making ice for the first time, be sure to prime the water supply system. Air in new plumbing lines can result in two or three empty ice maker cycles. - Page 13 ENGLISH Turning the ice maker on and off CAUTION If the water supply to your refrigerator IMPORTANT is softened, be sure the softener is Your ice maker is turned on at the properly maintained. Chemicals from factory so it can work as soon as you a water softener can damage the ice install your refrigerator.
- Page 14 CAUTION Never use an ice pick or similar sharp instrument to break up the ice. This could damage the ice bin and dispenser mechanism. To loosen stuck ice, use warm water. Before replacing the ice bin, make sure it is completely dry.
-
Page 15: Storage Featureser
ENGLISH 7. STORAGE FEATURESER CAUTION 2. With front half fully below back half, lift front To avoid personal injury or property d of shelf to flip it upwards toward the back of amage, handle tempered glass shelves the cabinet. carefully. Shelves may break suddenly if nicked, scratched or exposed to sudde n temperature change. - Page 16 To remove the FreshSeal Crisper for Note: It can be difficult to pull out the cleaning: collapsible bin. Some force may be required. 1. Pull the drawer out until it stops. To move door bin along a rail: 2. Lift the front slightly and remove the drawer.
- Page 17 ENGLISH Freezer storage The middle drawers in the FlexSpace™ and freezer can be mounted up to three height To remove freezer and FlexSpace shelves and positions and can also invert 90 degrees drawers: allowing storage of bottles in the FlexSpace™. All freezer and FlexSpace shelves and drawers are removable.
-
Page 18: General Information
8. GENERAL INFORMATION 8.1 CLEANING YOUR REFRIGERATOR Water Tank Assembly Clean the inside of the water tank regularly with WARNING a soft cloth, unscented mild soap and rinse BEFORE CLEANING: Turn the thoroughly with lukewarm water to completely refrigerator off at the power point and remove any soap residue. - Page 19 ENGLISH 8.2 CHANGING THE FILTER Door seals Always keep door seals clean by washing them with a mild detergent and warm water, followed Air Filter (select models) by a thorough drying. Sticky food and drink can The air filter is located in the top center of the cause seals to stick to the cabinet and tear when fresh food compartment.
-
Page 20: Food Storage Guide
9. FOOD STORAGE GUIDE RECOMMENDED STORAGE TIMES FOR FRESH FOODS * CATEGORY PRODUCT STORAGE TIPS REFRIGERATOR ULTRA CHILL FREEZER MEAT Sausages and 1-2 Days 3-5 Days 2-3 Months Keep cold meat at the back of the Mince refrigerator where it is coldest. -
Page 21: Troubleshooting
ENGLISH 10. TROUBLESHOOTING Concern Potential Cause Common Solution Automatic Ice Maker Ice maker is not • Ice maker is turned off. • Turn on ice maker. For the fresh food ice maker, making any ice. • Refrigerator is not connected press ice maker on-off button once. - Page 22 Concern Potential Cause Common Solution Dispenser (Ice & Water) Ice dispenser is • Ice has melted and frozen • Remove ice container, thaw, and empty the jammed. around auger due to contents. Clean container, wipe dry, and replace in infrequent use, temperature proper position.
- Page 23 Digital Temperature Setting Display Digital temperature • Electronic control system • Call your Electrolux service representative, who can displays an error. has detected a performance interpret any messages or number codes flashing problem.
-
Page 24: Noises
10. NOISES 11. NOISES Appliance noise Appliance noise Your new refrigerator may make sounds that your old one didn’t make. Because the Your new refrigerator may make sounds that your old one didn’t make. Because the sounds sounds are new to you, you might be concerned about them. Most of the new sounds are new to you, you might be concerned about them. - Page 25 ENGLISH...
- Page 28 www.electrolux.com/shop...
Need help?
Do you have a question about the EQE6879A and is the answer not in the manual?
Questions and answers
What does this warning light mean?
On the Electrolux EQE6879A, the warning light flashes and an audible warning tone is played when the display is locked. In this locked state, you cannot change any settings or dispense ice or water.
This answer is automatically generated