
Related Manuals for RIX AURORA Series


Summary of Contents for RIX AURORA Series
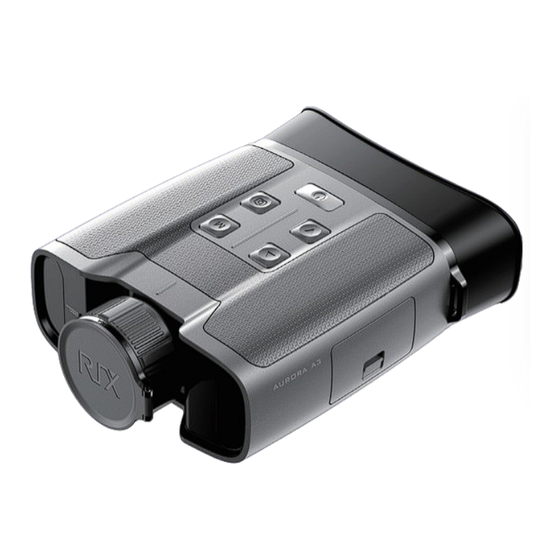
- Page 1 AURORA Series Thermal Imaging Binoculars User Manual v1.0 Visir Inc. (510)988-5580 info@rix-nv.com...
- Page 2 AURORA Series A3R features laser rangefinding. Do not aim the rangefinding laser at an eye directly or by transmitting through a reflective surface (for example, specular reflection). (FCC ID: 2A7ZZ-2G-00)...
- Page 3 Package Contents Calibration Product Overview Photographing and Video Recording Product Features Status Bar Components and Buttons Shortcut Menu Button Operations Main Menu Power Supply Wi-Fi External Power Supply Product Updates and APP Instructions Power On Technical Check Digital Zoom Maintenance PIP Function Troubleshooting Stadiametric Rangefinder...
-
Page 4: Technical Specifications
Model Type Uncooled Vox Resolution 384×288 Detector Pixel size 12μm Parameters NETD ≤50mk Technical Specifications Frame rate 50Hz Objective lens 35mm F-number Optical Parameters Optical Magnification 4×~16× * The actual service time depends on the use Digital Zoom 1×/2×/3×/4× frequency of photographing, video-recording, Type OLED Wi-Fi usage, and other functions. -
Page 5: Package Contents
As infrared thermal imaging does not need an external light source and is not affected by intense light illumination, the AURORA series works well in observing targets covered by various obstacles (such as tree branches, tall grass, shrubs) no matter in days with severe weather conditions (rain, snow, fog, haze, etc.) or night. -
Page 6: Product Features
Product Features Extra-large 2.69" display Digital zoom: 1×/2×/3×/4× ● ● Large eyepiece for comfortable binocular observation PIP function ● ● High image quality Built-in Wi-Fi module, mobile application (iOS and Android) ● ● Built-in and external battery, ultra-long battery life Image enhancement ●... -
Page 7: Button Operations
Button Operations Button Status Press Press and hold Power on the device Home screen Standby Power on the device Power button Standby mode Cancel Standby Main menu interface Return to the upper menu without saving changes Home screen Digital zoom Turn on/off... -
Page 8: Power Supply
Power Supply The AURORA series has built-in rechargeable lithium-ion batteries, each with a service life of ten hours. It also supports replaceable AA batteries, and can hold up to eight batteries at a time. Please charge the device before first use. (Note: When this device is charged with the power adapter, only the internal battery is charged, not the external battery. - Page 9 Safety Precautions • When not used for a long time, the device needs to be partially charged and should not be fully charged or out of battery. • When the device is brought from a cold environment to a warm environment, do not charge it immediately. Please wait 30‒40 minutes for the device to warm up.
-
Page 10: External Power Supply
External Power Supply The AURORA series can be powered with an external power supply, such as a mobile charge pal. • Connect the external power supply to the Type C port of the AURORA series. • The device switches to external power supply and its built-in battery pack is charged at the same time. -
Page 11: Digital Zoom
• On the Home screen, press the Up button circularly to switch between zoom in options (1× to 4×). • The corresponding magnification is displayed in real time on the left side of the display. • For the AURORA series, the 1× to 4× zoom options displayed correspond to the visual magnification of 4×, 8×, 12×, and 16×. - Page 12 Stadiametric Rangefinder The AURORA A3 model integrates a leading stadiametric rangefinder function, which can estimate the rough distance between you and your prey based on the known heights of targets. • On the Home screen, press the Down button to turn the stadiametric rangefinder function on/off.
- Page 13 files are named after time, so it is recommended to set the system date and time in the Main Menu before using the photographing and video recording functions, or to synchronize the system date and time in the settings of the RIX NV App.
- Page 14 Photographing • On the Home screen, press the Photo button to take a photo. The image freezes for 0.5 sec with a camera icon flashing on the upper left corner. After the image is taken, the icon disappears. • The images taken are saved in the built-in memory storage. Video Recording •...
-
Page 15: Status Bar
• Connect the device to a computer through the data cable. • Power on the device. • Double-click My Computer on the desktop, double-click to open the device named "RIX", then double-click to open the device named "AURORA_Storage" to access its memory. -
Page 16: Shortcut Menu
Shortcut Menu In the shortcut menu, you can quickly adjust the basic configurations for commonly used functions. These include image mode, scene mode, screen brightness, and image enhance- ment. • On the Home screen, press the M button to enter the shortcut menu; •... - Page 17 Main Menu On the Home screen, press and hold the M button to enter the main menu. Press the Up/Down button to switch menu options. Main Menu Options and Descriptions Turn Wi-Fi on/off ● Press and hold the M button to enter the main menu. ●...
- Page 18 During the use of the thermal imager, defective pixels may appear, such as bright or dark spots of constant brightness visible on the image, which need to be removed with the help of the Defect Pixels Calibration function. ● Press and hold the M button to enter the main menu. ●...
- Page 19 Upgrade firmware ● Press and hold the M button to enter the main menu. Firmware Update ●Press the Up/Down button to select the "Upgrade" function option. ●Press the M button to automatically upgrade the firmware when the device has the upgrade package in its memory. Restoring factory default settings ●...
- Page 20 Wi-Fi The AURORA series has a built-in Wi-Fi module, which enables the wireless connection to external devices (computers and smartphones) via Wi-Fi. • In the main menu, enable Wi-Fi on the device (for details of specific operations, refer to the operations of main menu functions).
-
Page 21: Technical Check
You can update the firmware program through the APP, or go to the official website to download. About APP • You can go to the official website (www. rix_nv.com) or search for “RIX+” in the App Store to download and install the APP. Technical Check You are encouraged to perform a technical check over the device before each use to verify: •... -
Page 22: Maintenance
Maintenance Product maintenance should be performed at least twice a year and include the following: • Wipe the outer surfaces of metal and plastic parts with a cotton cloth to remove dust and dirt. Silicone grease may be used, if possible. •... - Page 23 Possible Cause(s) Solution Fault The thermal imager cannot start. The battery is out of charge. Charge the battery The device cannot be powered by an The USB cable is damaged. Replace the USB cable external power supply. The external power supply is insufficient. If necessary, check the external power supply Images are too dark.
Need help?
Do you have a question about the AURORA Series and is the answer not in the manual?
Questions and answers