Advertisement
Quick Links
Specification
Input: 125VAC 60Hz
Frequency: 908.42 MHz
Loading: 15A 1875W RESISTIVE OR
GENERAL PURPOSE
5A MAX 625W TUNGSTEN
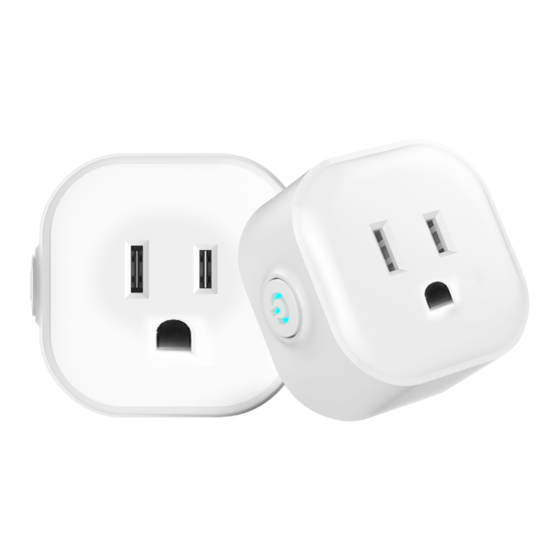
Z-Wave mini smart plug
1/3 HP
Temperature Range: 32° F~104° F
• MP21Z •
Indoor use in dry location
LED indicator
Blue: Light status indicator
Blue: ADD / Inclusion
Purple: Remove / Exclusion
Red: Network Failure / Over-temperature Warning
Program button
Press 1x: Manually
Press 3x: Z-Wave Network configuration
Reset: Press the button twice then hold it for 10 seconds
Features:
1. Z-Wave control on/off.
2. Z-Wave controlled AC outlet for standard incandescent lighting, CFL/LEDs,
fans or small appliances(1875W Resistive Max).
3. Grounded 3-wire power connection for safety.
4. Remembers and restores on/off status after power failure.
5. Built-in Z-Wave Plus signal repeater to extend network range.
6. S2 security and 700 Z-Wave chip for reliable wireless communication.
7. Work with all certificated Z-Wave controllers.
Z-WAVE INTEROPERABILITY
This product can be included and operated in any Z-Wave network with other Z-Wave certified devices from other
manufacturers and/or other applications. All non-battery operated nodes within the network will act as repeaters regardless
of vendor to increase the reliability of the network. This Device supports Lifeline (association group 1) supporting 1 node for
lifeline communication. Group 1 must be assigned the Node ID of the primary controller where unsolicited notifications will
be sent. The Z-Wave controller should set this association automatically after inclusion. Lifeline association only supports the
"Device Reset Locally" function.
Adding Device To Z-Wave Network for QR CODE
Scan here for SmartStar inclusion
Note: DSK Code can be found on the packaging box.
Do not remove or damage them.
Notes:
1. Plug the device you want to control into the Z-Wave Smart plug controlled outlet.
NOTE: Plug directly into the outlet, do not use with power strip.
2. Your device may need to be within 100 feet of the controller to be included. If so, include the device to the network
within 10 feet of the controller and relocate it to the desired position in your home. Be sure to refresh the network if the
device is included in this manner.
100 feet
Z-Wave Network Configuration
Adding Device To Z-Wave Network
1. Follow the instructions for your Z-Wave certified controller to add a device to the Z-Wave network.
2. Once the controller is ready to add your device, press the Manual/ Program button on the smart plug 3 times quickly.
The blue LED will flash quickly. Auto-add mode: LED will flash within 30 seconds after the first plug.
Now, you have completed control to turn your fixture ON / OFF according to groups, schedules and interactive automation
programmed by your controller. If your Z-Wave certified controller features remote access, you can control your fixture
from your mobile devices.
Again: If you have issues with pairing / including, please move the device as close as possible to the hub and try again--you
can move to your final location when completed.
Note: If adding fails, please reset the device: click the button twice quickly then hold it at least 10 seconds.
This operation could be done when manual control is functional--single press can turn on/off the lamp.
To Remove The Device
1. Follow the instructions for your Z-Wave certified controller to remove a device from the Z-Wave network.
2. Once the controller is ready to remove your device, press the manual / program button on the smart plug 3 times quickly.
To Return The Device To Factory Defaults
Manual: Click the button twice quickly then hold it at least 10 seconds.
Host reset: Remove it from hub, the device will be restore to factory default.
Association Group
(LED flashes twice when the configuration parameter changed.)
Support 2 groups, each group max support 5 devices
Group 1 lifeline
Group 2 Left outlet send basic set.
Please contact us if you have any questions:
www.minoston.com
ask@minoston.com
Parameter Settings
LED Indicator
This parameter can access you to choose the LED indicator to be on when the switch(light) is on/off, or LED indicator
remains on/off all times.
(LED flashes twice when the configuration parameter changed.)
Operation: quickly press 6x: change parameter
Parameter =1, size =1 byte,
value=00(default) --- LED is On when switch(light) is On.
value=01--- LED is On when the switch(light) is Off.
value=02 --- LED is disabled
Auto Turn-Off Timer
This parameter can access you to set a timer to make the switch turn off automatically after the switch turns on.
The numberentered as value corresponds to number of minutes. Operation: Set up on the hub.
(LED flashes 3 times when the configuration parameter changed.)
--- Parameter =2, Size=4,Value: 0– 65535(minutes);
Value=0(default) disable
Auto Turn-On Timer
This parameter can access you to set a timer to make the switch turn on automatically after the switch turned on.
The numberentered as value corresponds to number of minutes. Operation: Set up on the hub.
(LED flashes 3 times when the configuration parameter changed.)
--- Parameter =4, Size=4,Value: 0– 65535(minutes);
Value=0(default) disable
Advertisement

Related Manuals for Minoston MP21Z


Summary of Contents for Minoston MP21Z
- Page 1 Now, you have completed control to turn your fixture ON / OFF according to groups, schedules and interactive automation Temperature Range: 32° F~104° F • MP21Z • programmed by your controller. If your Z-Wave certified controller features remote access, you can control your fixture Indoor use in dry location from your mobile devices.
- Page 2 Restores state after power failure FCC NOTE: The manufacturer is not responsible for any radio or TV interference caused by unauthorized This parameter can access you to set the switch to be on/off after power failure. modifications to this equipment. Such modifications could void the user’s authority to operate the equipment. (LED flashes twice when the configuration parameter changed.) —...
Need help?
Do you have a question about the MP21Z and is the answer not in the manual?
Questions and answers