Table of Contents
Advertisement
Quick Links
Advertisement
Table of Contents

Related Manuals for BlastPro BP-9-SP


Summary of Contents for BlastPro BP-9-SP
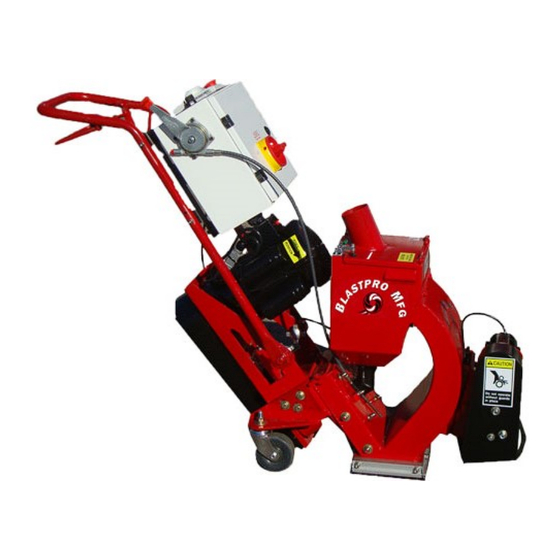
- Page 1 BP-9-SP MACHINE MANUAL KEEP WITH MACHINE...
-
Page 2: Table Of Contents
Table of Contents Applications ......................3 Specifications ......................3 Manufacturer ......................4 General ......................... 4 Work Site Assessment & Inspection ..............4 Start-Up Procedures ..................... 6 Operational Safety Procedures ................8 Shut-Down Procedures ..................8 Maintenance Procedures ..................9 Operating Instructions ..................10 Transportation ..................... -
Page 3: Applications
Specific advantages of the BP-9-SP include that fact that it as well as all of its parts are made in the United States. As a result, there is typically no lead time when ordering parts. -
Page 4: Manufacturer
(warehouse, parking garage, tunnels, etc.), then gasoline can never be used as the fuel source for the shot blasting machine. This is because carbon monoxide, which is a byproduct all internal combustion engine, can be extremely hazardous ® © 2011 Blastpro Manufacturing Inc. - Page 5 The work area must be checked for these materials before work can begin. Blastpro manufacturing, inc. does not warrant its equipment to be suitable for, or approved for, removing dangerous materials.
-
Page 6: Start-Up Procedures
& with all of its components. Make certain that all personnel follow all safety instructions & programs required by their company & by the worksite. • Before putting the BP-9-SP in operation, make certain that the belt guards are in good condition. - Page 7 BP-9-SP throws shot which could present a serious danger if the shot hopper door is not properly closed. • Make certain that the blast seals of the BP-9-SP are not worn out. As these seals provide the suction that is required by the machine, they will become dislodged if they become worn out.
-
Page 8: Operational Safety Procedures
Operational Safety Procedures When operating the machine, perform the following safety procedures: • The BP-9-SP shall not be put into use unless it is attached to an appropriate exhaust hose & dust collector. • Never operate the machine while the electrical panel door is open. -
Page 9: Maintenance Procedures
• Make certain that electrical equipment is inspected regularly. • All other repairs must be completed by competent, qualified personnel. • Failure to replace loose or damaged parts could cause damage to the equipment and/or serious injury or death to the operator. ® © 2011 Blastpro Manufacturing Inc. -
Page 10: Operating Instructions
6. Make certain that all electrical components are free of damage or excessive wear. 7. Make certain that the exhaust hose has no holes, leaks, deformities, or restrictions present. ® © 2011 Blastpro Manufacturing Inc. - Page 11 27. If test area appears to have been blasted unevenly, then go to the section in this manual that addresses “Setting the Blast Pattern.” After adjusting the blast pattern to a satisfactory degree, proceed to step #27. ® © 2011 Blastpro Manufacturing Inc.
- Page 12 First, take into consideration the size of shot being used. If this does not resolve the problem, then check ® © 2011 Blastpro Manufacturing Inc.
-
Page 13: Transportation
Also, the machine may only be lifted by using the suspension eyelets; forklifts should never to be used to transport the shot blasting machine. ® © 2011 Blastpro Manufacturing Inc. -
Page 14: Dust Collector Function
The combined effect of contact with steel shot traveling at high rates of speed & exposure to concrete dust causes these parts to deteriorate. As a result, the operator or maintenance personnel should inspect the machine wear parts ® © 2011 Blastpro Manufacturing Inc. -
Page 15: Blast Wheel Removal & Installation
8. Install the new control cage that was included with the wheel kit. Rotate the wheel by hand to be sure that the control cage & the wheel do no touch. The initial window setting for the control cage should be between 8:30 & 10:30. ® © 2011 Blastpro Manufacturing Inc. -
Page 16: Fault Diagnostics
11. See the section in this manual about “Setting the Blast Pattern” before adjusting the control cage. Only blast wheels manufactured by Blastpro Manufacturing, Inc. should be used by the shot blasting machine. Other blast wheels that have not been tested by Blastpro Manufacturing, Inc. - Page 17 & into the work area. The shot blasting machine is not blasting Slow machine down so that a deeper profile is created. properly. ® © 2011 Blastpro Manufacturing Inc.
- Page 18 & are is emitting concrete dust. clean. If necessary, replace filters in dust collector. Attach an end cap into open port. Also, check electrical Fan motor overload trips. system. ® © 2011 Blastpro Manufacturing Inc.
-
Page 19: Schematics
BP-9-SP Machine Manual Schematics ® © 2011 Blastpro Manufacturing Inc. - Page 20 BP-9-SP Machine Manual ® © 2011 Blastpro Manufacturing Inc.
- Page 21 BP-9-SP Machine Manual ® © 2011 Blastpro Manufacturing Inc.
-
Page 22: Warranty Registration Information
Blastpro Manufacturing, Inc., 6021 Melrose lane, Oklahoma City, OK 73127, within ten (10) days of acquiring Blastpro products in order to qualify for the one year limited warranty contained in the sales agreement. Blastpro provides as a limited warranty to original purchasers of Blastpro equipment, purchased within &... - Page 23 Under no circumstances shall Blastpro be liable to the original purchaser or any other person for any direct, indirect or consequential damages...
-
Page 24: Warranty Registration Card
Cut Here Warranty Registration Card To ensure that your Blastpro machine is covered under warranty, please fill in the following information & mail it to BlastPro Manufacturing, Inc. 6021 Melrose Lane, Oklahoma City, OK 73127, or Fax to 405-495-1331. The following boxes must be...
Need help?
Do you have a question about the BP-9-SP and is the answer not in the manual?
Questions and answers