Table of Contents
Advertisement
Advertisement
Table of Contents

Subscribe to Our Youtube Channel
Related Manuals for Frontpoint WIRELESS DOORBELL CAMERA


Summary of Contents for Frontpoint WIRELESS DOORBELL CAMERA
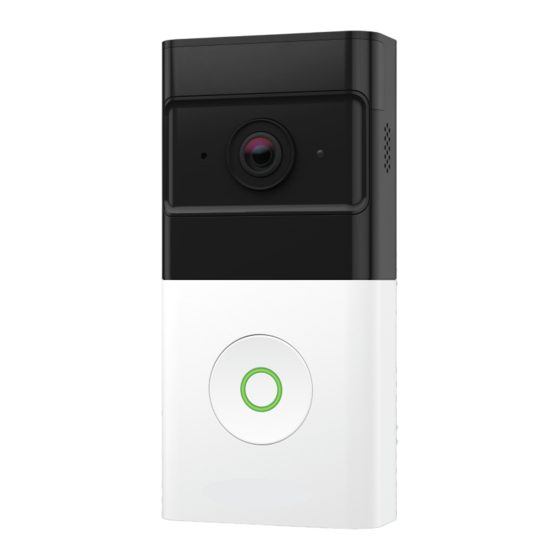
- Page 1 WIRELESS DOORBELL CAMERA USER GUIDE...
-
Page 2: Table Of Contents
TABLE OF CONTENTS Overview ........3 PART I: Setup App Setup ........4 Installation ........9 Configuration ......15 PART II: Usage Live and Saved Video ....18 Two-Way Audio ......18 Charging the Battery ....19 LED Reference Guide ....20 ......23 Troubleshooting... -
Page 3: Overview
WIRELESS DOORBELL CAMERA USER GUIDE The Frontpoint Wireless Doorbell Camera is a top-of-the-line solution to bring you enhanced features and high resolution- with ultimate flexibility. Within this user guide, you’ll learn how to set it up and take advantage of features like: •... -
Page 4: Part I: Setup App Setup
Only after the Smart Chime has been installed and added to your account, follow the steps below: 1. Activate the Wireless Doorbell Camera’s battery: A. Detach the battery from the Wireless Doorbell Camera by sliding it downwards, away from the rest of the camera body. (See the illustration to the right.) Peel off the blue film (shown below) from the top of the battery. - Page 5 3. Grab your phone and log into the Frontpoint app on your mobile phone, selecting “Keep me Logged In” until setup is complete. 4. Tap on the navigation menu ( ) in the corner of the Frontpoint app. Select “Add Device”...
- Page 6 APP SETUP (Continued) 4. Follow the on-screen instructions to add the Wireless Doorbell Camera to your account. A. The first step will ask you to hold down the Doorbell button for 45+ seconds until it finishes flashing blue and begins flashing white*- don’t forget this step! *If the button LED won’t begin flashing blue, charge the battery as per page 19.
- Page 7 (The absence of this page does not indicate a problem.) Depending on your phone type, refer to the appropriate section below: A. iOS device: Tap “Cancel” and select “use without internet” to remain connected to the doorbell’s network. Return to the Frontpoint app to finish the setup.
- Page 8 A. Android device: Tap the three dots in the top right corner and select “Use this network as is” to remain connected to the temporary network. Return to the Frontpoint app to finish the setup. • When firmware updates are available, your camera will update automatically but it may take an additional 15 minutes to complete setup.
-
Page 9: Installation
2. Mounting the Standard Mounting Bracket (and Optional Mounting Wedge, if needed). 3. Attaching the Wireless Doorbell Camera. In addition to the components included in the box, you will need a power drill, a drill bit (either 1/4" or 1/8”, explained below), and pencil. If you also have a level and measuring tape, it will help. - Page 10 Frontpoint app. • Check the Live View of the Wireless Doorbell Camera to ensure you are satisfied with the field of view. Make sure you can see low enough for where packages would be placed and high enough for where faces would be seen.
- Page 11 Mounting The Standard Mounting Bracket (And Optional Mounting Wedge) To complete installation for the Standard Mounting Bracket without the use of the Optional Mounting Wedge (recommended for most homes), please follow the instructions below. For those using the Optional Mounting Wedge, please skip to the following section (page 12).
- Page 12 INSTALLATION (continued) Optional Wedge Setup: 1. Hold the Optional Mounting Wedge at the predetermined location. If possible, use a level to ensure the mount is parallel with the ground. Use a pencil to mark where the two screws will go, indicated in the image below. Once marked, you can set aside the Optional Mounting Wedge until Step 4.
- Page 13 Optional Mounting Wedge so the four holes line up. 7. Screw in each of the 4 mini screws by hand until secure. Attaching The Wireless Doorbell Camera Because the Wireless Doorbell Cameras doesn’t ship fully charged, you may opt to charge your battery at this time.
- Page 14 INSTALLATION (continued) 2. Push the Wireless Doorbell into the slots and slide down, until the camera clicks into place. 3. Slide the latch to the left on the bottom of the bracket to lock and secure the Wireless Doorbell in place. To remove the Wireless Doorbell from the bracket, first slide the latch on the bottom of the bracket to the right to unlock it.
-
Page 15: Configuration
Now that your Wireless Doorbell is up and running, let’s get it configured according to your preferences. Activate Push Notifications To turn on push notifications for your Wireless Doorbell Camera, follow the steps below: Log in to your account on the Frontpoint app. - Page 16 (continued) 5. Tap “Add”. 6. Tap “Video Analytics”. 7. Select your Wireless Doorbell Camera and tap Next in the top right corner to start the setup. 8. Follow the remaining steps as prompted to fully customize your Video Analytics rule.
-
Page 17: Part Ii: Usage
PART II: USAGE... -
Page 18: Live And Saved Video
Wireless Doorbell Camera! The below steps outline key functionalities. VIEW LIVE AND SAVED VIDEO To view live and saved video from your Wireless Doorbell Camera in the Frontpoint app, follow the steps below: 1. Tap “Doorbell Camera” in the navigation menu ( ). -
Page 19: Charging The Battery
4. Refer to “Battery Level” to see the current percentage. To charge the Wireless Doorbell Camera’s battery, follow the steps below: 1. Remove the battery from the camera body: A. Unlatch the bottom of the Standard Mounting Bracket. -
Page 20: Led Reference Guide
CHARGING THE BATTERY (continued) 4. The charging LED, found on the top of the battery, will be solid orange while the device is charging. The charging LED will turn solid green when the battery is fully charged. (A fully depleted battery will take approximately 12-14 hours to recharge.) 5. - Page 21 Failure Charging Remove the charging cable and re-attempt charging after an hour. If you see the same behavior, please contact Frontpoint Support. Solid green or solid Alternating yellow and red The battery’s internal orange temperature is either too hot or Under too cold.
- Page 22 LED behavior when the Wireless Doorbell Camera is fully assembled: Doorbell Button Mode Description LED Behavior Standby or The camera is in standby mode (normal operation) or the battery is drained and requires recharging. Flashing white The camera is in Wi-Fi pairing mode. To enter this mode,...
-
Page 23: Troubleshooting
How can I see my Doorbell Camera in the mobile app if I have multiple? http://redirect.frontpointsecurity.com/WirelessDBTroubleshooting For any other questions or to chat with a live support agent: Tap Support in the navigation menu of the Frontpoint mobile app -OR- frontpoint.com/support...
Need help?
Do you have a question about the WIRELESS DOORBELL CAMERA and is the answer not in the manual?
Questions and answers