Table of Contents
Advertisement
Advertisement
Chapters
Table of Contents

Related Manuals for Creality Sonic Pad


Summary of Contents for Creality Sonic Pad
- Page 1 V4.0 Creality Sonic Pad User Manual SHENZHEN CREALITY 3D TECHNOLOGY CO., LTD.
- Page 3 In addition, you can visit our official website at www.creality.com to find relevant software/hardware information, contact details, opera- tion, and warranty instructions.
-
Page 4: Table Of Contents
Catalogue 01. Product Description 02. Packing list 03. Interface and button description 04. Operation Precautions 05. First use 06. Daily use 07. Connect multiple printers 08. System upgrade 09. Advanced options 10. Time lapse video 11. Slicing software displays previews and thumbnails 12. -
Page 5: Product Description
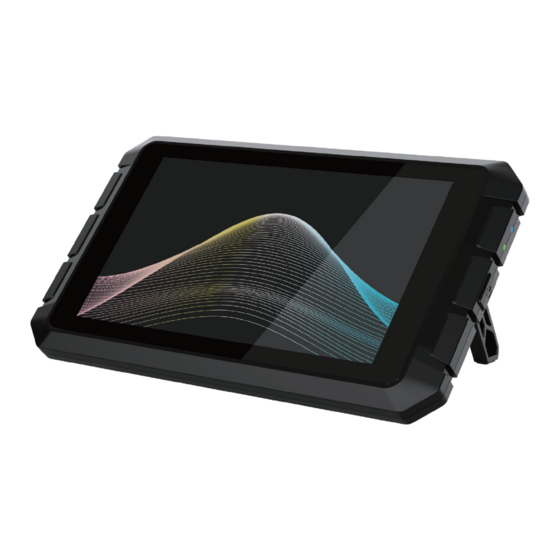
1. Product Description When the Creality Sonic Pad is connected to the FDM printer via a USB cable, it becomes the core system of the printer. Hardware Specifications T800 USB 2.0 interface Screen resolution & size 1024x600 & 7 Inch Wi-Fi protocol IEEE 802.11b/g/n... - Page 6 1. Creality Sonic Pad 2. 12V power adapter (including adapter) x1 3. G-sensor data cable x1 4. G-sensor x1 5. USB cable x1 6. USB drive x1 7. MicroUSB to MiniUSB connector x1 8. MicroUSB to Type-C connector x1 9. Instructions x1 10.
-
Page 7: Operation Precautions
Creality will not be responsible for any violators' legal liability under any circustance. 5. First use 1. Device connection 1.1 Connect the Creality Sonic Pad to the AC110V/220V power supply using the power adapter. - Page 8 SENSOR 1.2 Connect the Creality Sonic Pad USB1 port to your printer (use the correct adapter if necessary) with a USB cable. (The first printer must be connected to the USB1 port of the Sonic pad, otherwise it will not connect).
- Page 9 2.4.2 Add a network(optional) 2.4.3 The network connection is completed(optional) 2.6 Device Rename 2.5 Privacy setting, click next after reading and agree by selecting the checkbox 2.7 Printer firmware flashing (upgrade via SD/TF card) 2.7.1 Select printer model(users need to open up the printer to check the mother- board chip model.
- Page 10 2.7.3 Write the firmware to the SD/TF card, then insert the SD/TF card into the printer, click Next step. 2.7.4 After the printer is powered on, the Creality Sonic Pad will automatically connect to the printer. (the firmware in SD/TF will be automatically flashed after the printer is powered on) 2.7.5 After the printer firmware is flashed, click Restart.
- Page 11 flashing guide page. Please connect the printer to the screen terminal with a USB cable. 2.8.3 After clicking Next step, the Creality Sonic Pad will start flashing the firmware to the printer and wait for the flashing to complete. 2.9 Printer firmware flashing (update BootLoader) Please note that if the printer with atmega1284p chip cannot successfully flash ...
-
Page 12: Daily Use
3. Functional self-check After the printer firmware is flashed, the Creality Sonic Pad will automatically restart the printer. After restarting, it will enter the function self-test and follow the on-screen instructions. After the self-test is completed, click Start your experience, the screen will save the relevant user configuration, and the system will be reload-... - Page 13 1.3 Enter printing interface, the printer starts to print, and the screen will display printing information such as estimated time. 1.4 Parameters can be adjusted during the printing process, the specific parameters are shown in the figure. Note: Parameter adjustment can only be performed after the printer starts printing, and cannot be adjusted during the preparation process (such...
- Page 14 1.7 If you need to terminate the print process, you can click 1.8 Creality Sonic Pad will jump to the following interface after Emer- gency Stop, you need to manually click Restart to restore the connec- tion. 2. Slicing file management 2.1 Enter the gcode selection page and perform the following opera-...
- Page 15 3. Using assistant 3.1 Click the icon at the top of the page to enter the using assistant interface. 3.2 In the using assistant interface, you can view FAQ and export system logs.
-
Page 16: Connect Multiple Printers
7. Connect multiple printers 1. Add the first 3D printer (must be connected to the Sonic pad's USB 1 port), click Pick Printer at the top of the page. 2. Add a new printer and select the corresponding USB port (up to 4 printers can be connected). -
Page 17: System Upgrade
1.2 Click System Upgrade and follow the on-screen prompts. After the upgrade is complete, the system will restart automatically. 2. USB drive upgrade 2.1 Please go to https://www.creality.com/pages/download Ecosystem to download the corresponding upgrade file. Decompression it and copy to the root directory of the USB drive. -
Page 18: Advanced Options
9. Advanced options 1. Display macros Click the button to display/hide the macro functions. (left sidebar and in the control interface). 2. Console Click the button to show/hide the console. 3. HOTEND PID calibration Click to enter the calibration page, set the hotend calibration tempera- ture, click to start calibration, and confirm that the calibration is com- pleted according to the prompts, the system will automatically save. - Page 19 5. Measuring resonances Adjust the extrusion parameters and upper temperature limit according to the printer configuration. Go to Other settings, Advanced options, and click Measuring resonances. 5.1 Similar to Ender-3 S1 hotbed on the Y axis. 5.1.1 Enter the vibration compensation page, select the current machine type and click Next step.
- Page 20 5.1.3 When the sensor status is OK, click the Start test. 5.1.4 After the printer is reset to zero, the X-axis vibration compensation detection will start. 5.1.5 After the X-axis vibration compensation detection is completed, click Next step. 5.1.6 Install the sensor on the Y-axis as shown and click Next step.
- Page 21 5.1.7 Wait for the Y-axis vibration compensation detection to be completed. 5.1.8 The sensor bracket can be removed after the Y-axis vibration compensation test is completed. 5.1.9 After the vibration compensation test is completed, please remove the sensor and disconnect the cable (the data has been saved). 5.2 Similar to Ender-5 Plus hot bed not on Y-axis 5.2 1Enter the vibration compensation page, select the current machine type and click Next step.
- Page 22 5.2.2 After connecting and installing the sensor as shown, click Next step. 5.2.3 When the sensor status is OK, click the Start test. 5.2.4 After the printer is reset to zero, the X-axis vibration compensation detection will start. 5.2.5 After the vibration compensation test is completed, please remove the sensor and disconnect the cable (the data has been saved).
- Page 23 6. Automatic detection The self-test items can be freely selected. After selecting, click to start the detection and follow the guidance to complete the detection. After completion, you need to save the configuration. 7. Flip the screen Click OK and the screen will flip 180°. 8.
- Page 24 10. Time lapse video 1. Power off the Creality Sonic Pad before connecting the camera to the USB interface. Power it on then enter the Configure page and click the camera. 2. Go to the Camera page, click the camera icon, and check Connect camera;...
- Page 25 4. In the associated printer option, you can switch the USB port and take photos corresponding to the associated printer. 5. After the shooting is completed, a time lapse video file will be auto- matically generated. Click the icon in the lower right corner to view. 6.
- Page 26 11. Slicing software displays previews and thumbnails 1. Ultimaker Cura 5.1.0 1.1 Add thumbnails on Ultimaker Cura 5.1.0, select "Extensions" - "Post Processing" - "Modify G-code". 1.2 After entering, select the post-processing script shown in the figure (‘’Add a script’’-’’Create Thumbnail), and a red dot will appear in the post-script prompt box next to the slice button.
- Page 27 3.1 Added thumbnails and previews on SuperSlicer 2.3.57. In expert mode, you can add custom size thumbnails and previews in "Printer Settings" - "Thumbnails" - ''Size for gcode''. 4.1 Add thumbnails and preview images on Creality Print, select "Tool" - "Manage Printer" to enter the printer management interface.
- Page 28 4.2 In the printer management interface, check "Generate preview", and select the preview image size to add a preview image of a custom size. 12. Adaptation of other models 1. User-defined printer configuration process 1.1 Configure the printer firmware using the Printer Firmware Tool in the Creality Sonic Pad.
- Page 29 1.2 Configure the printer.cfg file Please check the configuration tutorial on the official website https://www.creality.com/pages/download Ecosystem 1.3 Configure user-defined models on the Creality Sonic Pad. 2. Printer Firmware Tools Entry. 2.1 When a printer is connected. Go to Configure---Other Settings---Printer Firmware Tools.
- Page 30 firmware via a USB cable. 4 Configure user-defined models. 4.1 Insert the USB drive into the Creality Sonic Pad and click Next step. (Please upgrade the printer firmware and configure printer.cfg file first, and connect the printer to the Creality Sonic Pad via a USB cable)
- Page 31 4.2 After detecting the printer.cfg file, click Loaded. 4.3 Printer self-check will be performed after successful loading. 4.4 After entering the self-test process, please follow the instructions on the screen. After the self-check is completed, the system will be restarted. After the restart is completed, you can enter the home page and start using it.
- Page 32 3. Fluidd LAN background login. Make sure that the PC and the Creality Sonic Pad are in the same local area network, enter the obtained IP address of the Creality Sonic Pad into the browser, or the local area network domain name spad-DN.lo- cal(DN is the first four digits of the screen serial number).
- Page 33 4. Mainsail LAN background login Make sure that the PC and the Creality Sonic Pad are in the same local area network, add: 8819 after the obtained IP address and enter it into the browser. (Example: http://172.23.214.236:8819). 14. SSH account...
- Page 34 2. If it prompts "download failed" when the network is normal, please check whether the storage of Creality Sonic Pad is more than 500MB. If the storage is insufficient, please try to clean up some of the slice files or time-lapse video files to ensure that the available space is more than 500MB before trying to upgrade.
- Page 35 3. Check whether the configuration file matches correctly; 4. Check whether the USB connection is stable. 5. Check whether the current version of the Creality Sonic Pad software is the latest version. Abnormal reading of U drive 1. Check whether the USB drive is normal, insert the USB drive into the computer, try to repair the USB drive file system or format, or replace the USB drive and try again;...
- Page 36 The SD card is inserted into the printer, but the corresponding file cannot be found in the Creality Sonic Pad? Please save the file in a USB disk and insert it into the Creality Sonic Pad USB interface to read the corresponding file.
- Page 37 Open the printer setting option of the slicing software, and add the G90 command before the other motion commands in the initial Gcode. It is recommended to use the Creality Print slicing software, and the required starting Gcode instructions have been added by default.
- Page 38 Join the Facebook Community https://www.facebook.com/groups/sonicpad +86 755 3396 5666 cs@creality.com...
- Page 39 V4.0 Creality Sonic Pad 使用说明书 深 圳 市 创 想 三 维 科 技 股 份 有 限 公 司...
- Page 40 感谢您选择创想三维的产品。 为了您使用方便,请您在使用之前仔细阅读本 说明书,并严格按照说明书的指示进行操作。 创想三维团队时刻准备为您提供优 质的服务。 在使用过程中无论遇到什么问题, 请按照说明书结尾所提供的电话、 邮 箱与我们进行联系。 您还可以登陆创想三维官网 (www.creality.com) 寻找相关软硬件、联系方 式、 设备操作、 设备保养等信息。...
- Page 41 目 录 一. 产品说明 二. 包装清单 三. 接口及按键说明 四. 运行注意事项 五. 首次使用 六. 日常使用 七. 连接多台打印机 八. 系统升级 九. 高级设置 十. 延时摄影 十一. 切片软件显示预览图和缩略图 十二. 自定义机型适配 十三. WEB操作端的使用 十四.SSH账户 十五. FAQ...
-
Page 42: 一. 产品说明
一. 产品说明 Creality Sonic Pad 通过USB数据线连接FDM 3D打印机后,变为打印机 工作的核心系统。 硬件规格 T800 运行内存 存储内存 USB 2.0 接口 1024x600 & 7 Inch 屏幕分辨率&尺寸 IEEE 802.11b/g/n WIFI 协议 100M LAN 口 PS/2 Gsensor 接口 DC 2.5 电源接口 输入电压 二. 包装清单... - Page 43 1. 主机 x1 2. 12V电源适配器( 含转接头 )x1 3. G-sensor 数据线 x1 4. G-sensor 5. USB连接线 x1 6. U盘 x1 7. MicroUSB 转 MiniUSB x1 8. MicroUSB 转 Type-C x1 9. 说明书 10. 螺丝包 x1 M3*8自攻螺丝 M3*8机牙螺丝 M3*6机牙螺丝 三. 接口及按键说明 Reset G-sensor 接口...
-
Page 44: 四. 运行注意事项
USB 1 系统状态灯 电源指示灯 M3安装孔 电源开关 USB 2 M3安装孔 四. 运行注意事项 1.请严格按本说明书使用产品,避免造成意外的人身伤害和财产损失; 2.请将本机放置在通风、阴凉、少尘的环境中,远离易燃易爆物或高热源 环境; 3.请使用本机附带的电源适配器,防止造成机器损坏; 4.请勿将本产品放置在震动或者其它不稳定的环境中; 5.请定期在断电的情况下用干布对机身做清洁; 6.使用者应遵守设备所在地国家、地区法律法规,恪守职业道德,注意安 全,严禁将我司的产品或设备使用在任何非法用途上。如有违反,产生的相关 法律责任我司概不负责。 五. 首次使用 1. 设备连接 1.1先连接Creality Sonic Pad电源线,再将适配器接入AC110V/220V。 SENSOR... - Page 45 1.2 USB数据线一端连接Creality Sonic Pad USB 1接口 (第一台打印机必须连 接USB1接口,否则无法连接) ,另一端连接3D打印机 (请选择相应的打印机转 接头) 。 USB 1 SENSOR 2. 开机设置 连线完成后,按下Creality Sonic Pad电源按键,进入开机引导操作(按引导指 示顺序进行产品配置)。 2.1 开机画面 2.2 选择语言 2.3 选择地区 2.4.1 网络设置(此步骤可跳过) 2.4.2 添加网络(接上一步,跳过则无此步骤) 2.4.3 网络连接完成(接上一步,跳过则 无此步骤)...
- Page 46 2.5 隐私政策,用户阅读同意后点击下一步。 2.6 设备重命名。 2.7 打印机固件烧录(通过SD/TF卡升级) 2.7.1 选择机型(用户需要拆开打印机查看主板芯片型号)。 2.7.2 以Ender-3 S1机型为例,选择机型后进入刷机引导页面,请自行准备读卡 器及存储卡,用于打印机刷机使用。 2.7.3 将固件写入SD/TF卡,然后将SD/TF卡插入打印机后, 点击下一步。...
- Page 47 2.7.4 打开打印机电源后,Creality Sonic Pad将自动连接打印机(打印机开机 后会将SD/TF中的固件自动刷入)。 2.7.5 打印机固件刷写完成,点击重启。 2.8 打印机固件烧录(通过USB数据线升级) 2.8.1 选择机型(atmega 2560等芯片无法通过SD/TF卡升级主板) 2.8.2 以CR10 V3机型为例,选择机型后进入刷机引导页面,请用USB 数据线将打印机连接到音速屏。...
- Page 48 2.8.3 点击下一步后,Creality Sonic Pad开始给打印机刷写固件,等待刷写完成。 2.9 打印机固件烧录(更新BootLoader) 请注意,芯片型号为atmega1284P 的机型,如果无法成功刷新固件,需要先 更新主板的BootLoader,再刷新固件,更新BootLoader教程请在官网查看: https://www.creality.com/pages/download Ecosystem 3. 功能自检 打印机固件刷写完成后,Creality Sonic Pad会自动重启打印机,重启后进入功 能自检,按照屏幕指示进行操作。自检完成后,点击立即体验,屏幕将会保存 相关的用户配置,并重载系统,进入主页面后,即可开始使用本产品。...
-
Page 49: 六. 日常使用
六. 日常使用 1. 打印 1.1 进入主页面,点击“ 打印”。 1.2 选择本地或U盘中保存的gcode文件,点击 打印此文件。 1.3 进入打印界面,打印机开始工作,界面中会显示预计时间等打印信息。 1.4 打印过程中可调整参数,具体参数如图所示。 注意:参数调整只有在打印机正式开 始打印后才能进行调整,准备过程中 (如加热中)无法调整 。... - Page 50 1.5 点击运动参数进入界面,可调整运动参数上限(实际速度请按照切片参数设 置为准)。 1.6 打印过程中可选择暂停/停止打印,暂停后可继续打印,停止打印则会退出 打印界面,进入主界面。 1.7 打印过程中如需立即停止工作,可点击 。 1.8 急停后Creality Sonic Pad会跳到如下界面,需要手动点击重启图标恢复连 接。...
- Page 51 2. 切片文件管理 2.1 进入gcode选择界面,可进行以下操作。 管理gcode文件,U盘和本地文件可以相互复制及删除。 可选择文件排序类型。 模型预览区域可查看切片文件详情。 点击 可以直接打印此gcode文件。 3. 使用帮助 3.1 点击页面顶部的 图标可进入使用帮助界面。 3.1 使用帮助界面可以查看FAQ与导出系统日志。...
-
Page 52: 七. 连接多台打印机
七. 连接多台打印机 1. 首先连接第一台3D打印机(必须连接USB 1接口),点击页面顶部的切换设 备。 2. 添加新设备,选择对应的USB接口(最多连接4台打印机)。 3. 以CR-6 SE为例,选择机型后,按照连流程连接新打印机。 4. 连接成功后,在切换设备界面点击进入设备即可操控对应设备。... -
Page 53: 八. 系统升级
5. 在切换设备界面点击设备管理可进入设备管理界面,点击 图标可编辑设 备名称和删除设备。 八. 系统升级 1. 在线升级 1.1 在首页页面,依次进入“配置”——“其他设置”,查看系统是否有新版本发布。 1.2 点击系统升级,按屏幕提示操作,升级完成后,系统会自动重启。 2. U盘升级 2.1 请到 https://www.creality.com/pages/download Ecosystem 下载对应的升级文件,解压后复制至U盘根目录,插入本机后会自动弹出升级提 示,按引导升级。... -
Page 54: 九. 高级设置
九. 高级设置 1. 显示宏 点击 按钮可显示/隐藏宏功能(左侧栏和控制界面内)。 2. 命令行 点击 按钮可显示/隐藏命令行。 3. PID喷头检测 点击进入检测页面,设置喷头检测温度后,点击开始检测,根据提示确认检测完 毕后,系统会自动保存。 4. PID热床检测 点击进入检测页面,需要设置热床检测温度后,点击开始检测,根据提示确认检 测完毕后,系统会自动保存。... - Page 55 5.振动补偿 传感器安装支架下载地址:https://www.creality.com/pages/downloadEco- system。进入配置,高级设置,点击振动补偿。 5.1类似Ender-3 S1热床在Y轴上机型。 5.1.1进入振动补偿页面,选择当前机器类型后点击下一步。 5.1.2 按图所示连接和安装传感器后,点击下一步。...
- Page 56 5.1.3 等待传感器确认正常后,点击开始检测。 5.1.4等待打印机归零后开始X轴振动补偿检测 5.1.5 X轴振动补偿检测完毕后点击下一步 5.1.6 按图所示将传感器安装至Y轴后点击下一步...
- Page 57 5.1.7 等待Y轴振动补偿检测完成。 5.1.8 Y轴振动补偿检测完成后即可拆除传感器支架。 5.1.9振动补偿检测完成后请将传感器拆下,断开线缆连接(数据已保存)。 5.2类似Ender-5 Plus热床不在Y轴机型 5.2.1进入振动补偿页面,选择当前机器类型后点击下一步。...
- Page 58 5.2.2 按图所示连接和安装传感器后,点击下一步。 5.2.3 等待传感器确认正常后,点击开始检测。 5.2.4等待打印机归零后开始振动补偿检测。 5.2.5振动补偿检测完成后请将传感器拆下,断开线缆连接(数据已保存)。...
- Page 59 6. 自动检测 自检项可自由选择,选取后,点击开始检测,跟随引导即可完成检测,完成后 需要保存配置。 7. 屏幕翻转,点击确定,屏幕将翻转180°。 8. 获取硬件串口ID,点击获取,获取主板串口ID,用于自定义机型参数设置。 9. 挤出配置,按照打印机配置调整挤出参数与温度上限。...
- Page 60 十. 延时摄影 1. 在关机状态下,将摄像头连接到Creality Sonic Pad USB接口,进入配置页 面点击摄像头。 2. 进入摄像头页面,点击摄像头图标,勾选连接摄像头;点击此页面右下角的 标志,进入设置页面。 3. 点击启动后自动连接,摄像头会在Creality Sonic Pad 开机时启用,点击启 用延时摄影,摄像头工作时,将对打印的模型按照设置的层数和渲染方式进行 拍照。...
- Page 61 4. 在关联打印机选项可切换USB接口,拍摄对应打印机的照片。 5. 拍摄完毕后会生成延时摄影文件,点击此页面右下角 图标进入查看。 6. 进入延时摄影文件存放文件夹,展示文件缩略图和打印信息,点击展示列表 可进入文件管理模式。 7. 进入文件管理模式,可选择播放,导出,删除视频。...
- Page 62 十一. 切片软件显示预览图和缩略图 1. Ultimaker Cura 5.1.0 1.1添加缩略图,选择“扩展”-“后期处理”-“修改G-code。 1.2 按图所示添加后期处理脚本,成功后脚本提示框会出现红点提示。 1.3 切片完成后,以ufp格式导出,使用U盘或WEB端上传Creality Sonic Pad 将自动生产带预览图的切片G-code文件。 2. PrusaSlicer 2.4.2 2.1 添加缩略图和预览图,在“打印机设置”中修改“G代码缩略图”大小,即可添 加自定义大小的缩略图和预览图。...
- Page 63 3. SuperSlicer 2.3.5 3.1 添加缩略图和预览图,在“打印机设置”中修改 “缩略图大小”,即可添加自 定义大小的缩略图和预览图。 4. Creality Print 4.1 添加缩略图和预览图,选择“工具”-“管理打印机”,进入打印机管理界面。...
- Page 64 4.2 打印机管理界面勾选“是否生成预览图”,并选择预览图大小,即可添加自 定义大小的预览图。 十二. 自定义机型适配 1. 自定义机型配置流程 1.1 升级打印机固件 可通过Creality Sonic Pad内的打印机固件工具配置打印机固件。 1.2 配置printer.cfg 配置教程请在官网查看 https://www.creality.com/pages/download Ecosystem 1.3 在Creality Sonic Pad上配置自定义机型。 2. 打印机固件工具入口 2.1 已连接打印机时 进入配置---其他设置—打印机固件工具。...
- Page 65 2.2 未连接打印机时 2.2.1选择机型界面,选择其他机型。 2.2.2 主板固件编译。 3. 配置固件 3.1请按照主板参数配置选项后点击生成。...
- Page 66 3.2 生成固件后导出。 3.3 按提示导出U盘或者通过USB数据线升级打印机固件。 4. 配置自定义机型 4.1 将U盘插入Creality Sonic Pad后点击下一步 (请先升级打印机固件和配置printer.cfg,并将打印机与Creality Sonic Pad通 过USB数据线连接)。 4.2 检测到printer.cfg文件后点击载入。...
- Page 67 4.3 载入成功后将进行打印机自检。 4.4 进入自检流程后,请按照屏幕指示操作。自检完成后会重启系统,重启完 成进入主页面后,即可开始使用自定义机型。...
- Page 68 十三. WEB操作端的使用 1. 获取Creality Sonic Pad IP地址 进入”配置-网络设置-无线网络/有线网络”,获取Creality Sonic Pad当前局域 网IP地址。 2. 获取Creality Sonic Pad序列号(DN号) 3. 登录fluidd局域网后台 确定PC和Creality Sonic Pad在同一局域网的情况下,将获取到的IP地址输入 到浏览器,或使用局域网域名spad-DN.local,DN为屏幕序列号前四位。 (示例:http://172.23.214.236或http://spad-8888.local)...
- Page 69 4. 登录mainsail局域网后台 确定PC和Creality Sonic Pad在同一局域网的情况下,在获取到的IP地址后增 加:8819并输入到浏览器 (示例:http://172.23.214.236:8819) 十四. SSH账户 账号:creality 密码:creality SSH 指令格式 :ssh creality@172.23.209.153 (示例,请按照WEB端的说 明获取IP地址)。...
- Page 70 十五. FAQ 请登录官网查看更多常见问题的解决办法: https://www.creality.com/pages/faq?spm=..page_1934481.header_1.1 Ecosys- 为什么会出现在线升级失败? 1. 检查网络是否正常,需要保证网络正常才可下载升级包; 2. 网络正常的情况下如果提示“下载失败”,请查看本机是否有大于500MB空间,如空间不足,应尝试清理 部分切片文件或延时摄影视频文件保证可用空间大于500MB再尝试升级; 3.网络正常且可用空间足够时若还提示“升级失败”,需联系售后处理。 打印过程中终止打印? 1.检查打印机与Creality Sonic Pad连接是否正常; 2.检查Creality Sonic Pad和打印机电源连接是否正常。 延时摄影为什么没有拍摄成功? 1. 进入配置-摄像头查看是否有实时画面,如无画面应先开启; 2. 确认摄像头为通用摄像头,并已打开实时画面; 3. 进入配置-本机信息查看本机容量是否不足; 4. 检查是否已开启延时摄影,延时摄影拍摄频率是否设置正确(频率应小于切片层数)。 谐振补偿自动侦测时,振动传感器应该安装在什么位置?有无方向要求? 振动传感器应该安装于打印喷头上,可以使用我司提供的模型文件打印支架,然后使用螺丝紧固于支架 上,无方向要求。 为什么打印的模型边缘质量不好?切片时加速度、速度设置多少合适? 可参考我司提供的切片软件配置参数,默认支持的机型(Ender-3 V2 / Ender-3 S1 / Ender-3 S1 Pro)可直接在切片软件中导入对应的参数配置文件。...
- Page 71 为什么一直无法成功连接打印机? 1.检查打印机是否通电; 2.检查打印机固件是否为正确的版本; 3.检查配置文件是否正确匹配; 4.检查USB连接是否正常; 5.检查当前Creality Sonic Pad软件版本是否为最新版本。 为什么打印错层? 1.检查X,Y轴电机是否正常,皮带是否松动; 2.确认切片打印速度和加速度是否超过打印机正常范围,适当调整打印速度和加速度(可参考我司提供的 切片参数)。 为什么打印时拉丝严重? 需要确认切片文件相关参数(是否启用回抽,回抽距离,回抽速度,打印速度等)与连接的打印机机型是 否匹配,如不匹配需要重新调整参数并重新切片。 为什么无法连接WIFI网络? 1. 可尝试搜索其他WIFI并尝试连接,确认是否可以正常连接;当前设备支持WPA2的加密方式,不支持 WPA3,且只支持2.4G频段; 2. 检查密码正确性,检查路由器是否正常。 如何将延时摄影文件传输到PC上? 1.fluidd下载:PC浏览器打开设备WEB页(参照使用说明),在延时摄影菜单下下载; 2.U盘下载:插入U盘后,在配置-摄像头-延时摄影视频-视频详情页面点“导出”按钮,导出视频文件到U 盘,再从U盘复制到PC上。 为什么我的摄像头连接上之后无法正常使用? 1.Creality Sonic Pad默认开机加载摄像头设备;如果在开机后再插入摄像头,选中摄像头并选择启用 后,摄像头显示已启用,等待2分钟方可出现画面(有时需要再切换一下页面),或插入摄像头后重启 Creality Sonic Pad后可出现画面; 2.某些摄像头是定制化摄像头,未采用YUV和Mjpeg格式输出,可尝试更换摄像头再使用; 3.拔出摄像头改用U盘查看USB是否正常,如不正常请联系售后处理。 针对非默认机型如何编译固件及修改配置文件? 请参考我司提供的打印机适配指引链接。 开机引导或一键换机时Ender3 V2机型无法连接如何处理? 开机引导或一键换机选择机型时应根据实际状况选择,主板版本需拆机查看,Ender-3 V2机型的四种选择对...
- Page 72 为什么把SD卡插入打印机,在Creality Sonic Pad找不到对应文件? 请将文件存于U盘,插入Creality Sonic Pad USB接口,便可读取到相应文件。 如何选择摄像头? 自行选择通用摄像头或参考本司提供的推荐摄像头列表 1 罗技920 2 罗技C270i 3 HIKVISION DS-E12 4 蓝色妖姬T3300 5 PHILIPS SPL6506BM 6 炫光M600 为什么断电后无法续打? 音速屏暂时不支持断电续打功能。 如何生成延时摄影文件? 文件打印完成后才会生成摄影文件,打印中途停止,断电,拔出摄像头等,都无法生成延时摄影文件。 暂停打印后,恢复继续打印时,报错超范围? 打开切片软件的打印机设置选项,在起始Gcode中其他运动指令前加入G90指令。 推荐使用Creality Print切片软件,已默认添加需要的起始Gcode指令。 如何导入用户自定义配置文件? 使用WebUI,进入配置文件选项,点击上传用户自定义配置文件。 为何打印过程中调整Z轴高度后,打印完毕才弹出提示框,提示保存? 打印过程中,调整Z轴对当前打印是生效的,打印过程中保存的话会触发SAVE_CONFIG,使得打印机断 连,导致打印失败,所以调整为打印完毕后保存。 如何导出日志? 1.处于首页或打印中页面:插入U盘,点击“配置”--“其它设置”--“导出日志”,选择好导出位置后点导出 按钮,默认导出位置为U盘根目录 2.处于断连页面:插入U盘,点击“设置”-“导出日志”,选择导出位置后点导出按钮,默认导出位置为U盘...
- Page 74 中 国 制 造 加入Facebook社区 https://www.facebook.com/groups/sonicpad 400-6133 882 cs@creality.com...
Need help?
Do you have a question about the Sonic Pad and is the answer not in the manual?
Questions and answers
why is the blue light on my sonic pad flashing