Nokia N97 User Manual
Nokia n97: user guide
Hide thumbs
Also See for N97:
- User manual (343 pages) ,
- Service manual (20 pages) ,
- Quick start manual (7 pages)
Table of Contents
Advertisement
Quick Links
Advertisement
Table of Contents

Related Manuals for Nokia N97


Summary of Contents for Nokia N97
- Page 1 Nokia N97 User Guide Issue 2...
- Page 2 Nokia Corporation. Other product and company names mentioned herein may be trademarks or tradenames of their respective owners. Reproduction, transfer, distribution, or storage of part or all of the contents in this document in any form without the prior written permission of Nokia is prohibited.
- Page 3 Nokia's licensors. The availability of particular products and applications and services for these products may vary by region. Please check with your Nokia dealer for details and availability of language options. This device may contain commodities, technology or software subject to export laws and regulations from the US and other countries.
-
Page 4: Table Of Contents
Antenna locations...20 Switch the device on and off...21 Charge the battery...21 Headset...22 Attach wrist strap...23 Touch screen actions...23 Write text...24 Lock the keys and touch screen...27 Nokia Switch...28 Your device...30 Welcome...30 Home screen...30 Display indicators...32 Shortcuts...33 Search...34 Volume and loudspeaker control...35 Offline profile...35... - Page 5 About GPS...78 Assisted GPS (A-GPS)...78 Hold your device correctly...79 Tips on creating a GPS connection...79 Position requests...80 Landmarks...80 GPS data...81 Positioning settings...82 Nokia Maps...83 Maps...83 Network positioning...83 Compass...84 Move on a map...84 Display indicators...85 Find locations...85 Plan a route...86 Save and send locations...86 View your saved items...86...
- Page 6 Drive to your destination...88 Traffic information...89 Travel guides...89 Maps settings...89 Internet settings...89 Navigation settings...90 Route settings...90 Map settings...90 Update maps...91 Nokia Map Loader...91 Camera...92 Activate the camera...92 Image capture...92 Video recording...96 Camera settings...97 Photos...99 About Photos...99 View images and videos...99 View and edit file details...100...
- Page 7 Green tips...141 Save energy...141 Recycle...141 Save paper...141 Learn more...141 Accessories...142 Battery and charger information...143 Battery and charger information...143 Nokia battery authentication guidelines...144 Taking care of your device...145 Recycle...145 Additional safety information...147 Small children...147 Operating environment...147 Medical devices...147 Hearing aids...148 Vehicles...148 Potentially explosive environments...149...
-
Page 8: Safety
Safety Read these simple guidelines. Not following them may be dangerous or illegal. Read the complete user guide for further information. SWITCH ON SAFELY Do not switch the device on when wireless phone use is prohibited or when it may cause interference or danger. -
Page 9: Network Services
You may also access other third- party sites through your device. Third-party sites are not affiliated with Nokia, and Nokia does not endorse or assume liability for them. If you choose to access such sites, you should take precautions for security or content. -
Page 10: Shared Memory
If you suspect the device is not working properly, take it to the nearest authorised service facility. ActiveSync Use of the Mail for Exchange is limited to over-the-air synchronisation of PIM information between the Nokia device and the authorised Microsoft Exchange server. -
Page 11: Find Help
● the user guide. Your documents and files are not deleted in the reset. If the issue remains unsolved, contact Nokia for repair options. See www.nokia.com/repair. Before sending your device for repair, always back up the data in your device. -
Page 12: Additional Applications
Additional applications There are various applications provided by Nokia and different third-party software developers that help you do more with your device. These applications are explained in the guides that are available on the product support pages at www.nokia.com/support or... -
Page 13: Software Updates Using Your Pc
Updating the software may also improve the device performance. Nokia Software Updater is a PC application that enables you to update your device software. To update your device software, you need a compatible PC, broadband internet access, and a compatible USB data cable to connect your device to the PC. -
Page 14: Remote Lock
If you forget the code and your device is locked, your device will require service and additional charges may apply. For more information, contact a Nokia Care point or your device dealer. Personal Unblocking Key (PUK) code and PUK2 ●... -
Page 15: Free Memory
prolong the operating time of your device, select Packet data connection When > The Maps application downloads new map ● information when you scroll to new areas on the map, which increases the demand on battery power. You can prevent the automatic download of new maps. - Page 16 Images and video clips in Photos. Back up the files ● to a compatible computer.
-
Page 17: Get Started
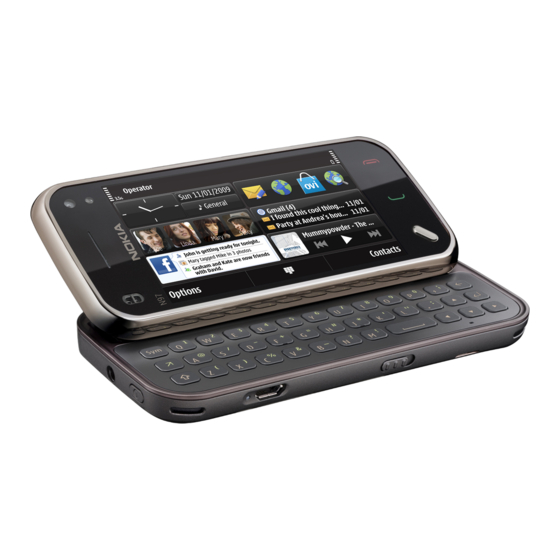
Get started Note: The surface of this device does not contain nickel in the platings. The surface of this device contains stainless steel. Keys and parts (front) — Proximity sensor — Earpiece — Touch screen — Menu key — Call key —... -
Page 18: Keys And Parts (Sides)
— Volume down/Zoom out key — Capture key Keys and parts (top) — Power key — Nokia AV connector (3.5 mm) for compatible headsets, headphones, and TV-out connectors Insert the SIM card and battery Always switch the device off and disconnect the charger before removing the battery. -
Page 19: Memory Card
Memory card Use only compatible microSD cards approved by Nokia for use with this device. Nokia uses approved industry standards for memory cards, but some brands may not be fully compatible with this device. Incompatible cards may damage the card and the device and corrupt data stored on the card. -
Page 20: Insert The Memory Card
Insert the memory card A memory card may be already inserted in the device. If not, do the following: Remove the back cover of the device. Insert a compatible memory card in the slot. Ensure that the contact area on the card is facing down and towards the slot. -
Page 21: Switch The Device On And Off
12345. If you forget the code and your device is locked, your device will require service and additional charges may apply. For more information, contact a Nokia Care point or your device dealer. To switch off the device, press the power key briefly, and select Switch off!. -
Page 22: Headset
To use the headphones with a remote control unit, connect the unit to the Nokia AV Connector in the device, then connect the headphones to the unit. -
Page 23: Attach Wrist Strap
Close the back cover. Touch screen actions Important: Use only a stylus approved by Nokia for use with this device. Using any other stylus may invalidate any warranty applying to the device and may damage the touch screen. Avoid scratching the touch screen. -
Page 24: Write Text
If you tap a file or similar item once, it is not opened, it becomes highlighted. To see the options available for the item, select Options icon from a toolbar. Select In this user documentation, to open applications or items by tapping them once or twice, you "select" them. -
Page 25: Keyboard Input
In the text input view, to switch between the available text input modes, tap , and select the desired input mode. The input methods and languages supported by the handwriting recognition vary by region. Keyboard input Keyboard Your device has a full keyboard. -
Page 26: Touch Input Settings
Latin characters, tap the corresponding icon, if available. To write special characters, write them as you would normally. You can also tap in the right pane of the input area, and select a desired character from the pop-up table. To delete characters or move the cursor back, swipe backwards (see Figure 1). -
Page 27: Lock The Keys And Touch Screen
— Close - Closes on-screen keypad keypad). — Input menu - Opens the touch input menu, which includes commands such as Activate predictive text Writing language. — Text input indicator - Opens a pop-up window, in which you can turn predictive text input modes on or off, change the character case, and switch between letter and number mode. -
Page 28: Nokia Switch
Transfer content You can use the Switch application to copy content such as phone numbers, addresses, calendar items, and images from your previous Nokia device to your device. The type of content that can be transferred depends on the model of the device from which you want to transfer content. - Page 29 If you cannot send an item, depending on the type of the other device, you can add the item to the Nokia folder, to C:\Nokia or E:\Nokia in your device. When you select the folder to transfer, the items are synchronised in the corresponding folder in the other device, and vice versa.
-
Page 30: Your Device
Settings wizard — Configure various settings of ● your device. Phone switch — Transfer content, such as contacts ● and calendar entries, from a compatible Nokia device. E-mail setup — Configure e-mail settings. ● Home screen About the home screen... -
Page 31: Music Player In The Home Screen
To move an item, select Options select the desired item, and drag and drop it to a new location. Remove an item from the home screen Select Options Edit content and the item to be > removed. Select Options Remove >... -
Page 32: Display Indicators
By adding the Share online widget to your home screen, you can quickly access your favourite Share online feed. In the home screen, select content Options > > online. Select the feed you want to add. You may need to register to a service of your service provider before you are able to add a feed. -
Page 33: Shortcuts
A packet data connection is active in a part of the network that supports EGPRS (network service). indicates that the connection is on hold and connection is available. The icons indicate that EGPRS is available in the network, but your device is not necessarily using an EGPRS connection to transfer data. -
Page 34: Search
To enter accented letters, for example á, press the sym key and then the A key repeatedly until á is displayed. To change the writing language, press key. Search About Search Select Menu Applications > Search enables you to use various internet-based search services to find, for example, websites, and images. -
Page 35: Volume And Loudspeaker Control
Volume and loudspeaker control Warning: Listen to music at a moderate level. Continuous exposure to high volume may damage your hearing. Do not hold the device near your ear when the loudspeaker is in use, because the volume may be extremely loud. -
Page 36: Fast Downloading
Ovi (network service) Open Ovi with Nokia N97 Ovi is your door to different Nokia services. For a tour and more information, browse to www.ovi.com with your computer. About Ovi Store... -
Page 37: Make Calls
Make calls Proximity sensor Your device has a proximity sensor. To prevent accidental selections, the touch screen is disabled automatically during calls when you place the device next to your ear. Do not cover the proximity sensor, for example, with protective film or tape. -
Page 38: Voice And Video Mailboxes
To switch between the active and the held call, select Tip: When you have only one active voice call, to put the call on hold, press the call key. To activate the call, press the call key again. To send DTMF tone strings (for example, a password), select Options Send... -
Page 39: Make A Conference Call
Make a conference call Your device supports conference calls between a maximum of six participants, including yourself. Make a call to the first participant. To make a call to another participant, select Options call. The first call is put on hold. >... -
Page 40: Voice Dialling
To end the active call, press the end key. To end both calls, select Voice dialling Your device automatically creates a voice tag for the contacts. To listen to the synthesised voice tag, select a contact and Options Voice tag >... -
Page 41: During A Video Call
In the home screen, select to open the dialler, and enter the phone number. Select Options Call Video > > The secondary camera on the front is used by default for video calls. Starting a video call may take a while. If the call is not successful (for example, video calls are not supported by the network, or the receiving device is not compatible), you are asked if you want to try a normal call or send a message... -
Page 42: Video Sharing
Video sharing Use video sharing (network service) to send live video or a video clip from your mobile device to another compatible mobile device during a voice call. The loudspeaker is active when you activate video sharing. If you do not want to use the loudspeaker for the voice call while you share video, you can also use a compatible headset. -
Page 43: Share Live Video Or Video Clips
Enter the SIP address in the format username@domainname (you can use an IP address instead of a domain name). If you do not know the SIP address for the contact, you can use the phone number of the recipient, including the country code, to share video (if supported by the network service provider). -
Page 44: Accept An Invitation
video sharing view and to continue sharing, in the home screen, select Options Accept an invitation When someone sends you a video sharing invitation, the invitation message displays the sender’s name or SIP address. If your device is not set to silent, it rings when you receive an invitation. -
Page 45: Monitor All Communication Events
Log duration — Select the time how long the ● communication information is saved in the log. If you select log, no information is saved in the log. Call duration Select Menu Applications > Log. > To view the approximate duration of your last call, dialled and received calls, select Call Note: The actual invoice for calls and services... -
Page 46: Contacts (Phonebook)
Contacts (phonebook) To open Contacts, select Menu You can save and update contact information, such as phone numbers, home addresses, or e-mail addresses of your contacts. You can add a personal ringing tone or a thumbnail image to a contact. You can also create contact groups, which allow you to send text messages or e-mail to many recipients at the same time. -
Page 47: Contact Cards
In the contacts list, select a contact. Select Options > Defaults. Select a default to which you want to add a number or an address, and select Assign. Select a number or an address you want to set as a default. -
Page 48: Copy Contacts
To define a call text for a contact, select the contact and Options Add call alert text. Tap the text field to > enter the call text, and select To add an image for a contact saved in the device memory, select the contact, and an image from Photos. -
Page 49: Contact Groups
When fixed dialling is activated, calls may be possible to the official emergency number programmed into your device. You need your PIN2 code to activate and deactivate fixed dialling or edit your fixed dialling contacts. Contact your service provider for your PIN2 code. Select Options and from the following:... -
Page 50: Messaging
Messaging Messaging main view Select Menu Messaging > To create a new message, select Tip: To avoid rewriting messages that you send often, use texts in the Templates folder in My folders. You can also create and save your own templates. -
Page 51: Messaging Inbox
a message may vary depending on the receiving device. Check the size limit of e-mail messages with your service provider. If you attempt to send an e-mail message that exceeds the size limit of the e-mail server, the message is left in the Outbox folder, and the device attempts to resend it periodically. -
Page 52: Multimedia Messages
Multimedia messages Important: Exercise caution when opening messages. Messages may contain malicious software or otherwise be harmful to your device or PC. You may receive a notification that a multimedia message is waiting in the multimedia message centre. To start a packet data connection to retrieve the message to your device, select When you open a multimedia message ( see an image and a message. -
Page 53: Retrieve E-Mail Messages
When you open the mailbox, the device asks if you want to connect to the mailbox. To connect to your mailbox and retrieve new e-mail headers or messages, select Yes. When you view messages online, you are continuously connected to a remote mailbox using a data connection. -
Page 54: View Messages On A Sim Card
the server when deleting the message from your device and the remote mailbox. It there is no connection to the server, the header is deleted when you make a connection from your device to the remote mailbox again to update the status. To delete an e-mail from the device and the remote mailbox, select Options... -
Page 55: Multimedia Message Settings
Some or all message centres or access points may be preset for your device by your service provider, and you may not be able to change, create, edit, or remove them. Text message settings Select Menu Messaging Options > Text message. -
Page 56: Connection Settings
Allow anonymous msgs. ● want to reject messages from an anonymous sender. Receive adverts — Select whether you want to ● receive multimedia message advertisements. Receive reports — Select whether you want the ● status of the sent message to be shown in the log (network service). -
Page 57: Retrieval Settings
Security — Select the security option used to secure ● the connection to the remote mailbox. Port — Define a port for the connection. ● APOP secure login (for POP3 only) — Use with the ● POP3 protocol to encrypt the sending of passwords to the remote e-mail server while connecting to the mailbox. -
Page 58: Automatic Retrieval Settings
Retrieval amount — Define how many new e-mail ● messages are retrieved to the mailbox. IMAP4 folder path (for IMAP4 only) — Define the ● folder path for folders to be subscribed. Folder subscriptions (for IMAP4 only) — Subscribe ● to other folders in the remote mailbox, and retrieve content from those folders. -
Page 59: Mail For Exchange
Select from the following: Save sent messages — Select whether you want ● to save copies of the text, multimedia, or e-mail messages that you send to the Sent folder. Number of saved msgs. — Define how many sent ● messages are saved to the sent folder at a time. -
Page 60: Connectivity
Connectivity Your device offers several options to connect to the internet or to another compatible device or PC. Data connections and access points Your device supports packet data connections (network service), such as GPRS in the GSM network. When you use your device in GSM and UMTS networks, multiple data connections can be active at the same time, and access points can share a data connection. -
Page 61: Wireless Lan
A roaming agreement is an agreement between two or more service providers to enable the users of one service provider to use the services of other service providers. Operator selection — Select Automatic ● device to search for and select one of the available networks, or Manual to manually select the... -
Page 62: Wlan Internet Access Points
A WLAN connection is established when you create a data connection using a WLAN internet access point. The active WLAN connection ends when you end the data connection. You can use WLAN during a voice call or when packet data is active. You can only be connected to one WLAN access point device at a time, but several applications can use the same internet access point. -
Page 63: Wireless Lan Settings
In the ad hoc operating mode, devices can send and receive data directly with each other. Wireless LAN settings Select Menu Settings Connectivity > Wireless LAN Options > Settings. > Select from the following: Show WLAN availability — Select whether ●... -
Page 64: Create Access Point Groups
Connection name — Enter a name for the ● connection. Data bearer — Select the data connection type. ● Depending on the data connection you select, only certain setting fields are available. Fill in all fields marked with Must be defined fields can be left empty, unless your service provider has instructed otherwise. - Page 65 Prompt password — If you must enter the ● password every time you log in to a server, or if you do not want to save your password in the device, select Yes. Password — A password may be needed to make ●...
- Page 66 WLAN security mode — Select the encryption ● used: WEP, 802.1x (not for ad hoc networks), or WPA/WPA2. If you select encryption is used. The WEP, 802.1x, and WPA functions can be used only if the network supports them. Homepage —...
-
Page 67: Active Data Connections
Active data connections Select Menu Settings Connectivity > Connection mgr.. In the active data connections view, you can see the open data connections: data calls packet data connections wireless LAN (WLAN) connections Note: The actual invoice for calls and services from your service provider may vary, depending on network features, rounding off for billing, taxes, and so forth. -
Page 68: Security Tips
Remote Control Profile (AVRCP), Advanced Audio Distribution Profile (A2DP). To ensure interoperability between other devices supporting Bluetooth technology, use Nokia approved accessories for this model. Check with the manufacturers of other devices to determine their compatibility with this device. Features using Bluetooth technology increase the demand on battery power and reduce the battery life. -
Page 69: Pair Devices
Do not pair with or accept connection requests from an unknown device. This helps to protect your device from harmful content. Send data using Bluetooth connectivity Several Bluetooth connections can be active at a time. For example, if you are connected to a compatible headset, you can also transfer files to another compatible device at the same time. -
Page 70: Block Devices
an accessory, select Options device. Paired devices are indicated by To set a device as authorised or unauthorised, select from the following: Set as authorised — Connections between your ● device and the authorised device can be made without your knowledge. You will not be asked for authorisation or acceptance separately. -
Page 71: Usb
Ask on connection want to change the mode during an active connection, select USB connection mode PC Suite — Use Nokia PC applications such as Nokia ● Ovi Suite, and Nokia Software Updater. Mass storage — Transfer data between your device ●... -
Page 72: Administrative Settings
Administrative settings Select Menu Settings > settings. To set the online time for the data call connection, select Data call. The data call settings affect all access points that use a GSM data call. Packet data settings Select Menu Settings >... -
Page 73: Internet
Internet With the Web browser, you can view hypertext markup language (HTML) web pages on the internet as originally designed. You can also browse web pages that are designed specifically for mobile devices, and use extensible hypertext markup language (XHTML), or the wireless markup language (WML). -
Page 74: Browser Toolbar
once. To end the connection, press and hold the end key. Browser toolbar The browser toolbar helps you select frequently used functions of the browser. To open the toolbar when browsing, select the arrow in the bottom right corner. From the toolbar, select from the following: Expand toolbar —... -
Page 75: Content Search
To update a web feed, in the Web feeds view, select a feed and Options Web feed options > To define whether the web feeds are updated automatically, in the Web feeds view, select Edit > Edit. This option is not available if one or more feeds are marked. -
Page 76: Connection Security
To delete the information the network server collects about your visits to various web pages, select Options Clear privacy data > Connection security If the security indicator ( ) is displayed during a connection, the data transmission between the device and the internet gateway or server is encrypted. - Page 77 Java/ECMA script — Enable or disable the use of ● scripts. Java/ECMA script errors — Select whether you ● want to receive script notifications. Open while downloading — Select whether you ● want to be able to open a file while it is being downloaded.
-
Page 78: Positioning (Gps)
With the help of assisted data, your device can obtain the GPS position faster. Your device is preconfigured to use the Nokia A-GPS service, if no service provider-specific A-GPS settings are available. The assistance data is retrieved from the Nokia A-GPS service server only when needed. -
Page 79: Hold Your Device Correctly
Assisted GPS > Disable. You must have an internet access point defined in the device to retrieve assistance data from the Nokia A-GPS service over a packet data connection. The access point for A-GPS can be defined in positioning settings. A wireless LAN (WLAN) access point cannot be used for this service. -
Page 80: Position Requests
If you are indoors, go outdoors to receive a better ● signal. If you are outdoors, move to a more open space. ● Ensure that your hand does not cover the GPS ● antenna of your device. If the weather conditions are bad, the signal ●... -
Page 81: Gps Data
GPS data GPS data is designed to provide route guidance information to a selected destination, position information about your current location, and traveling information, such as the approximate distance to the destination and approximate duration of travel. Select Menu Applications Location >... -
Page 82: Positioning Settings
Positioning settings Select Menu Applications > Positioning. Positioning methods Select from the following: Integrated GPS — Use the integrated GPS receiver ● of your device. Assisted GPS — Use Assisted GPS (A-GPS) to receive ● assistance data from an assistance data server. Bluetooth GPS —... -
Page 83: Nokia Maps
Some maps may be available in your device or memory card. You can also use the Nokia Map Loader PC software to download maps. To install Nokia Map Loader to a compatible PC, see www.nokia.com/ maps. -
Page 84: Compass
Compass Select Menu > Maps. Your device has an internal compass. When the compass is enabled, the circle around the compass is green, and the map view rotates automatically according to the direction to which the top of the device is pointing. The compass is active by default. -
Page 85: Display Indicators
To zoom in and out on the map, select + and -. Display indicators The GPS indicator shows the availability of the satellite signals. One bar is one satellite. When the device tries to find satellite signals, the bar is yellow. When the device receives enough data from the satellites for GPS to calculate your location, the bar turns green. -
Page 86: Plan A Route
Example: To find restaurants close to your location, select Options Eat & Drink > Restaurants. Example: To find a specific hotel, select Options Search > > Accommodation. Enter the name of the hotel in the search field, and select Plan a route Select Menu >... -
Page 87: Navigate To The Destination
To view the selected location on the map, select map. To add the location to a route, tap the location, and select Add to route. > History To check which locations you have searched for on the map, select History. To view the selected location on the map, select map. -
Page 88: Walk To Your Destination
Walk to your destination The walking route ignores any possible limitations to car navigation, such as one-way streets and turn restrictions, and includes areas such as pedestrian zones and parks. It also prioritises walkways and smaller roads, and omits highways and motorways. The route is drawn to the map, and the arrow indicates the direction. -
Page 89: Traffic Information
To stop navigating, select Stop navigation. Traffic information Select Menu > Maps. The real-time traffic information service provides information about traffic events that may affect your travel. The traffic information service is an extra service that you can purchase and download into your device, if available in your country or region. -
Page 90: Navigation Settings
To select whether to allow Maps to open an internet connection when you start the application, select online at start-up. To select the access point to be used when connecting to the internet, select Default access To select whether to be notified when your device registers to a network other than your home network, select Roaming... -
Page 91: Update Maps
Nokia Map Loader, as Nokia Map Loader uses the Maps information to check which version of the maps to download. To install Nokia Map Loader to a compatible PC or Mac, go to http://maps.nokia.com, and follow the instructions on the screen. -
Page 92: Camera
Camera Your device supports an image capture resolution of 2592x1944 pixels (5 megapixels). The image resolution in this guide may appear different. To ensure good quality photos, wipe the camera lens carefully with a cleaning cloth. Activate the camera To activate the camera, open the lens cover. If the camera is active in the background, and the lens cover is open, press the capture key to activate the camera. -
Page 93: On-Screen Controls And Indicators For Still Image Capture
dark images and blurry images. Increasing the light sensitivity may also increase the image noise. — Adjust contrast (images only). Adjust the difference between the lightest and darkest parts of the image. — Adjust sharpness (images only). The screen display changes to match the settings you define. -
Page 94: Location Information
— Capture mode indicator — Zoom slider. To turn the zoom slider on and off, tap the screen. — Capture icon. Tap to capture an image. — Flash mode. Tap to change settings. — Capture settings. Tap to change settings. —... -
Page 95: After Capturing An Image
— Location information is available. Location ● information is added to the file details. Files with location information are indicated by the Photos application. After capturing an image After you capture an image, select from the following options (available only if you have selected Settings Show captured image >... -
Page 96: Video Recording
To make your own scene suitable for a certain environment, scroll to User In the user defined scene you can adjust different lighting and colour settings. To copy the settings of another scene, select Based on scene mode desired scene. To save the changes and return to the scenes list, select Back. -
Page 97: Video Recording On-Screen Controls And Indicators
Video recording on-screen controls and indicators The video viewfinder displays the following: — Capture mode indicator — Audio mute on indicator — Capture icon. Select to record video clips. — Video light indicator — Recording settings. Select to change settings. —... -
Page 98: Video Settings
Memory in use — Select where to store your ● images. Show GPS info — To add GPS location coordinates ● to each image file, select On. Receiving a GPS signal may take time, or the signal may not be available. Auto-rotate images —... -
Page 99: Photos
Photos About Photos Select Menu Photos and from the following: > Captured — View all the images and video clips you ● have captured. Months — View images and video clips categorised ● by the month they were captured. Applicable only for content captured or recorded with your device. -
Page 100: View And Edit File Details
View and edit file details Select Menu > Photos. To view and edit the properties of an image or a video clip, select the file, Options following: Title — View the thumbnail image of the file and ● the current file name. To edit the file name, select the file name field. -
Page 101: Albums
Create a new album. Albums Select Menu Photos and Albums. > With albums, you can conveniently manage your images and video clips. To create a new album, select To add an image or a video clip to an album, select the item and Options Add to... -
Page 102: Tv-Out Mode
TV-out mode To view the captured images and recorded video clips on a compatible TV, use a Nokia Video Connectivity Cable. Before viewing the images and video clips on a TV, you may need to configure the TV-out settings and aspect ratio. -
Page 103: Edit Images
Edit images Image editor To edit an image, in Photos, scroll to the image, and select Options > Edit. To add effects to your images, select effect. You can crop and rotate the image; adjust the brightness, colour, contrast, and resolution; and add effects, text, clip art, or a frame to the image. -
Page 104: Image Print
The recommended connection method is WLAN. To upload a file from Photos to an online service, select Menu Send For more information on the application and compatible service providers, see the Nokia product Options Print > support pages or your local Nokia website. -
Page 105: Music
Music Warning: Listen to music at a moderate level. Continuous exposure to high volume may damage your hearing. Play a song or a podcast Select Menu Music Music library. > > To play a song or a podcast: Select categories to navigate to the song or podcasts you want to hear. -
Page 106: Playlists
To return to the home screen and leave the player playing in the background, press the end key. To close the player, select Options Playlists Select Menu Music Music library > > To view details of the playlist, select Playlist details. -
Page 107: Transfer Music From A Computer
You may be asked to select the access point to use when connecting to the Nokia Music Store. Select as the connection In the Nokia Music Store, you may be able to edit the settings by selecting FM transmitter About the FM transmitter >... -
Page 108: Play A Song Using Fm Transmitter
To list the previously used frequencies, select Options Nokia Podcasting Options > With the Nokia Podcasting application (network service), you can search, discover, subscribe to, and > On, and enter a frequency that is Options > Exit. Settings Connectivity >... -
Page 109: Search Podcasts
Next update time ● automatic update. Automatic updates only occur if a specific default > access point is selected and Nokia Podcasting is running. If Nokia Podcasting is not running, the automatic updates are not activated. Download limit (%) ●... - Page 110 To search for podcasts, select Podcasting and Search, and enter the desired keywords. Tip: The search service looks for podcast titles and keywords in descriptions, not specific episodes. General topics, such as football or hip- hop, usually give better results than a specific team or artist.
-
Page 111: Play And Manage Podcasts
Downloads After you have subscribed to a podcast, from directories, search, or by entering a web address, you can manage, download, and play episodes in Podcasts. To see the podcasts you have subscribed to, select Podcasting > Podcasts. To see individual episode titles (an episode is a particular media file of a podcast), select the podcast title. -
Page 112: Fm Radio
Some podcasts provide the opportunity to interact with the creators by commenting and voting. To connect to the internet to do this, select View comments. FM radio Listen to the radio Select Menu Music > Radio. > The FM radio depends on an antenna other than the wireless device antenna. -
Page 113: Videos
Videos You can download and stream video clips over the air from compatible internet video services (network service) using a packet data or WLAN connection. You can also transfer video clips from a compatible PC to your device to view them. Downloading videos may involve the transmission of large amounts of data through your service provider's network. -
Page 114: Video Feeds
amounts of data through your service provider's network. For information about data transmission charges, contact your service provider. To schedule an automatic download for video clips in a service, select Options Schedule downloads. New video clips are > automatically downloaded daily at the time you define. -
Page 115: Transfer Videos From Your Pc
Transfer videos from your PC Transfer your own video clips from compatible devices using a compatible USB data cable. Only video clips which are in a format supported by your device are shown. To view your device on a PC as a mass memory device where you can transfer any data files, connect using a USB data cable. -
Page 116: Personalise Your Device
Personalise your device You can personalise your device by changing the standby mode, main menu, tones, themes, or font size. Most of the personalisation options, such as changing the font size, can be accessed through the device settings. Change the look of your device Select Menu Settings... -
Page 117: 3-D Tones
3-D tones Select Menu Settings Personal > to a profile, and select Options > Personalise. With 3-D tones, you can enable three-dimensional sound effects for ringing tones. Not all ringing tones support 3-D effects. To enable a 3-D effect that is applied to the ringing tone, select 3-D ringing tone effect effect. -
Page 118: Applications
Applications Calendar To open the calendar, select Calendar views To switch between month, week, day, and to-do note view, select Options Change view > view, Week, or To-do. To change the starting day of the week, the view that is shown when you open the calendar, or the calendar alarm settings, select Options To go to a certain date, select... -
Page 119: Clock
To define the period after which the calendar alarm sounds again when set to snooze, select Settings Alarm snooze time. > Manage calendar entries To delete several events at a time, open the month view, and select Options Delete entry >... -
Page 120: Realplayer
To set your current location, scroll to a location, and select Options Set as current > your device is changed according to the selected location. Ensure that the time is correct and matches your time zone. RealPlayer With RealPlayer, you can play video clips or stream media files over the air without saving them to the device first. -
Page 121: Recorder
You may receive RealPlayer settings in a special message from your service provider. For more information, contact your service provider. To select the settings for the video, select Settings > Video. To select whether to use a proxy server, to change the default access point, and to set the port range used when connecting, select Options... -
Page 122: Office
When the mass memory is reformatted, all data in the > Find. Enter a search memory is permanently lost. Back up data you want to keep before formatting the mass memory. You can use Nokia PC Suite to back up data to a compatible Options Organise >... -
Page 123: Currency Converter
PC software because it may cause degraded performance. Formatting does not guarantee that all confidential data stored in the device mass memory is permanently destroyed. Standard formatting only marks the formatted area as available space and deletes the address to find the files again. The recovery of formatted or even overwritten data may still be possible with special recovery tools and software. -
Page 124: Make Calculations
and add exchange rates. The default base currency is Home. The rate of the base currency is always 1. Select Options Currency > The default name for the currency items is Foreign. To rename a currency, select currency. Add the exchange rates for the currencies, and select Done. -
Page 125: Settings For Active Notes
off the device does not clear the memory. You can recall the last saved result the next time you open the Calculator application. Zip manager Select Menu Applications Office > > With Zip manager, you can create new archive files to store compressed ZIP formatted files;... -
Page 126: Adobe Reader
Adobe Reader Select Menu Applications Office Adobe > > > PDF. With Adobe Reader, you can read PDF documents with your device; search for text in the documents; modify settings, such as zoom level and page views; and send PDF files using e-mail. -
Page 127: Settings
Settings Some settings may be preset for the device by your service provider, and you may not be able to change them. Phone settings Date and time settings Select Menu Settings Phone > time. Select from the following: Time — Enter the current time. ●... -
Page 128: Language Settings
To view details of a voice, open the voice tab, and select the voice and Options Voice > voice, select the voice and To delete languages or voices, select the item and Options > Delete. Message reader settings To change the message reader settings, open the Settings tab, and define the following: Language detection —... -
Page 129: Slide Settings
TV-out settings To change the settings for a TV-out connection, select TV-Out and from the following: Default profile ● activated each time you connect a Nokia Video Connectivity Cable to your device. Phone TV aspect ratio > ● Normal close. -
Page 130: Application Settings
TV system — Select the analogue video signal ● system that is compatible with your TV. Flicker filter — To improve image quality on the ● screen of your TV, select On. The flicker filter may not diminish image flicker on all TV screens. Application settings Select Menu... -
Page 131: Certificate Management
Nokia Care point or your service provider. Phone autolock period — To avoid unauthorised ● use, you can set a time-out after which the device automatically locks. A locked device cannot be used until the correct lock code is entered. To turn off the autolock period, select None. -
Page 132: Restore Original Settings
contain correct, authentic, or trusted certificates for increased security to be available. Certificates have a restricted lifetime. If "Expired certificate" or "Certificate not valid yet" is shown, even if the certificate should be valid, check that the current date and time in your device are correct. View certificate details —... -
Page 133: Notification Lights
If your device has OMA DRM-protected content, to back up both the activation keys and the content, use the backup feature of Nokia Ovi Suite. Other transfer methods may not transfer the activation keys which need to be restored with the content for you to be able to continue the use of OMA DRM-protected content after the device memory is formatted. -
Page 134: Application Manager
Bluetooth connectivity. You can use Nokia Application Installer in Nokia Ovi Suite to install an application to your device. Icons in Application manager indicate the following: Application mgr.. -
Page 135: Remove Applications
details. Control the use of digital certificates in Certificate management. If you install a file that contains an update or repair ● to an existing application, you can only restore the original application if you have the original installation file or a full backup copy of the removed software package. -
Page 136: Application Manager Settings
the removed software package. If you remove a software package, you may no longer be able to open documents created with that software. If another software package depends on the software package that you removed, the other software package may stop working. Refer to the documentation of the installed software package for details. -
Page 137: Call Barring
Summary after call — Set the length of a call to be ● displayed after the call. Speed dialling — Activate speed dialling. ● Anykey answer — Activate anykey answer. ● Line in use — This setting (network service) is ●... -
Page 138: Troubleshooting
A: This is a characteristic of this type of display. Some displays may contain pixels or dots that remain on or off. This is normal, not a fault. Q: Why can't my Nokia device establish a GPS connection? A: Establishing a GPS connection may take from a couple of seconds to several minutes. - Page 139 Q: How do I turn the wireless LAN (WLAN) off on my Nokia device? A: The WLAN on your Nokia device turns off when you are not connected or trying to connect to another access point, or not scanning for available networks.
- Page 140 > If this does not help, switch the device off and then on again. Q: Can I use my Nokia device as a fax modem with a compatible PC? A: You cannot use your device as a fax modem. However, with call diverting (network service), you can divert incoming fax calls to a fax number.
-
Page 141: Green Tips
Disable unnecessary sounds, such as keypad and ● ringing tones. Recycle Most of the materials in a Nokia phone are recyclable. Check how to recycle your Nokia products at www.nokia.com/werecycle, or with a mobile device, www.nokia.mobi/werecycle. Recycle packaging and user guides at your local recycling scheme. -
Page 142: Accessories
Accessories Warning: Use only batteries, chargers, and accessories approved by Nokia for use with this particular model. The use of any other types may invalidate any approval or warranty, and may be dangerous. In particular, use of unapproved chargers or batteries may present a risk of fire, explosion, leakage, or other hazard. -
Page 143: Battery And Charger Information
When the talk and standby times are noticeably shorter than normal, replace the battery. Use only Nokia approved batteries, and recharge your battery only with Nokia approved chargers designated for this device. Use of an unapproved battery or charger may present a risk of fire, explosion, leakage, or other hazard. -
Page 144: Nokia Battery Authentication Guidelines
If you cannot confirm authenticity or if you have any reason to believe that your Nokia battery with the hologram on the label is not an authentic Nokia battery, you should refrain from using it, and take it to the nearest Nokia authorised service centre or dealer for assistance. -
Page 145: Taking Care Of Your Device
Taking care of your device Your device is a product of superior design and craftsmanship and should be treated with care. The following suggestions will help you protect your warranty coverage. Keep the device dry. Precipitation, humidity, and all ● types of liquids or moisture can contain minerals that will corrode electronic circuits. - Page 146 Check product environmental information and how to recycle your Nokia products at www.nokia.com/werecycle, or www.nokia.mobi/werecycle. The crossed-out wheeled-bin symbol on your product, battery, literature, or packaging reminds you that all electrical and electronic products, batteries, and accumulators must be taken to separate collection at the end of their working life.
-
Page 147: Additional Safety Information
Additional safety information Small children Your device and its accessories may contain small parts. Keep them out of the reach of small children. Operating environment This device meets RF exposure guidelines when used either in the normal use position against the ear or when positioned at least 1.5 centimetres (5/8 inch) away from the body. -
Page 148: Hearing Aids
Turn the wireless device off immediately if there is ● any reason to suspect that interference is taking place. Follow the manufacturer directions for the ● implanted medical device. If you have any questions about using your wireless device with an implanted medical device, consult your health care provider. -
Page 149: Potentially Explosive Environments
that all wireless device equipment in your vehicle is mounted and operating properly. Do not store or carry flammable liquids, gases, or explosive materials in the same compartment as the device, its parts, or accessories. Remember that air bags inflate with great force. -
Page 150: Certification Information (Sar)
0.66 W/kg. Use of device accessories may result in different SAR values. SAR values may vary depending on national reporting and testing requirements and the network band. Additional SAR information may be provided under product information at www.nokia.com. -
Page 151: Index
Index access codes 13 access points 62, 63 groups 64 accessories 129 active notes 125 settings 125 alarm calendar note 118 alarm clock 119 albums media 101 anniversary notes 118 answering calls 38 antennas 20 application manager 134 settings 136 application settings 130 applications 134 assisted GPS (A-GPS) 78... - Page 152 settings 136 video calls 40 camera assigning images to contacts 95 flash 95 image mode 93 image quality 97 indicators 93 location information 94 options 95 recording 97 scenes 95 self-timer 96 sending images 95 sequence mode 96 settings 97 video mode 96 video quality 98 capture settings...
- Page 153 85 indicators 85 internet settings 89 map settings 90 navigating 87 navigation settings 90 network positioning 83 Nokia Map Loader 91 route settings 90 routes 86 saved items 86 saving locations 86 sending locations 86 settings 89 traffic information 89...
- Page 154 107 muting sound 38 my music 105 navigation tools 78 network settings 60 news feeds 74 Nokia Map Loader 91 Nokia Music Store 107 Nokia support information 11 notes 121 notification light 133 offline profile 35 outbox, message 50...
- Page 155 radio 112 listening 112 stations 112 RealPlayer 120 recording settings in camera 92 recording video clips 96 red-eye removal 103 rejecting calls 38 remote lock locking device with SMS remote mailbox 52 remote SIM mode 70 removing applications 135 ringing tones 116 three-dimensional 117 roaming 60 scenes...
- Page 156 home screen support resources 11 Symbian applications 134 synchronisation of data 67 text messages receiving and reading 51 replying to 51 sending 50 settings 55 SIM messages 54 themes 116 time and date 119 to-do notes 118 tones 116 ring settings 117 top keys 18 transferring content 28 troubleshooting 138...
Need help?
Do you have a question about the N97 and is the answer not in the manual?
Questions and answers