Table of Contents

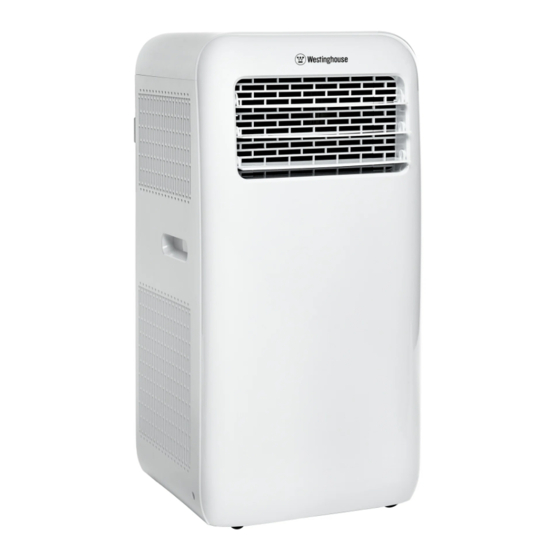
Summary of Contents for Westinghouse WPAC12000
- Page 1 USER MANUAL WPAC12000 PORTABLE ROOM AIR CONDITIONER READ THIS MANUAL IN ITS ENTIRETY BEFORE INSTALLING AND/OR OPERATING THE TRANSFER SWITCH If you have questions or need assistance, please call customer service at 855-944-3571.
-
Page 2: Table Of Contents
Place of Purchase: ALL RIGHTS RESERVED All rights reserved. No reproduction allowed in any form IMPORTANT: Keep your purchase receipt for trouble- without written permission from Westinghouse Outdoor free warranty coverage. Power Equipment. DANGER Read this manual before using or performing maintenance on this product. -
Page 3: Introduction
Thank you for choosing Westinghouse! PLEASE READ BEFORE RETURNING THIS PRODUCT FOR ANY REASON. If you have a question or experience a problem with your Westinghouse purchase, call us at 855-944-3571 to speak with an agent. SAVE THIS MANUAL FOR FUTURE REFERENCE. - Page 4 R32 l Do not insert any objects into the air conditioner. has very good thermodynamic features and high energy efficiency. The units therefore need less filling. 4 | Westinghouse Outdoor Power Equipment...
-
Page 5: Components
AC power supply. Remove the drain plug to allow condensate water to REMOTE CONTROL drain freely from the unit. Use the remote control to operate the air conditioner from a distance. Westinghouse Outdoor Power Equipment | 5... -
Page 6: Assembly
Unplug the air conditioner. l Place the exhaust connector on one end of the exhaust duct and turn clockwise to secure. 6 | Westinghouse Outdoor Power Equipment... -
Page 7: Operation
Do not operate the air conditioner in a humid environment. Shows the set temperature in cooling mode. l Please keep air inlet and air outlet clean, no obstacles. l Reserved space around the air conditioner: 30cm (12 in.) Westinghouse Outdoor Power Equipment | 7... - Page 8 2°F (1°C) within one hour and 4°F (2°C) within two hours. the temperature in cool mode and adjust timer or sleeper After the second hour, the unit will operate at the elevated settings. temperature. 8 | Westinghouse Outdoor Power Equipment...
-
Page 9: Care And Maintenance
Clean outer case, grille, and air filters. hazard. l Drain the chasis. l Replace the filter and filter door. l Verify that the window panel assembly is in good condition. If the window panel assembly is damaged contact customer service. Westinghouse Outdoor Power Equipment | 9... -
Page 10: Accessories
Use only recommended or equivalent replacement parts. Using an incorrect or incompatible part might create a hazard that could result in serious personal injury. These accessories available for purchase. Contact Westinghouse customer service toll-free at 1 (855) 944-3571. Filter .................................. 111001060343 Charcoal Filter Insert ............................... - Page 11 This is normal and does not indicate a problem. The Liquid can be heard The unit was just turned on or turned off. noise is caused by refrigerant moving inside the air moving inside the unit conditioner. Westinghouse Outdoor Power Equipment | 11...
-
Page 12: Warranty
Westinghouse Outdoor Power Equipment, LLC if we find it necessary to contact you. Your receipt for purchase including date, model and serial number must be maintained and presented to a Westinghouse Outdoor Power Equipment, LLC Authorized Service Dealer for warranty service. Proof of purchase rests solely with you, the original purchaser. - Page 13 Some states do not allow the exclusion or limitation of incidental or consequential damages, so the above limitation may not apply to you. This warranty gives you specific legal rights. You also have other rights from state to state. Westinghouse Outdoor Power Equipment, LLC’S ONLY LIABILITY SHALL BE THE REPAIR OR REPLACEMENT AS STATED ABOVE.
-
Page 14: Illustrations
DISCLAIMERS All information, illustrations, and specifications in this manual were in effect at the time of publishing. The illustrations used in this manual are intended as representative reference views only. We reserve the right to make any specification or design change without notice. FIG. - Page 15 FIG. 2 FIG. 3 NEEDED TO ASSEMBLE AND OPERATE AIR CONDITIONER A - Screw B - Cord Hook FIG. 4 NEEDED TO ASSEMBLE AND INSTALL WINDOW VENT KIT CORRECT A - About 24 in. (60.96 cm) B - About 51 in. (129.54 cm) FIG.
- Page 16 FIG. 6 FIG. 9 A - Exhaust Connector B - Exhaust Duct C - Window Clip A - Foam Seal (Adhessive) B - Width FIG. 7 FIG. 10 A - Foam Seal (Adhessive) B - Height A - Groove B - Exhaust Duct FIG.
- Page 17 FIG. 12 FIG. 15 FIG. 17 A - Window Panel B - Exhaust Cover FIG. 13 A - Window Panel FIG. 18 A - Fixed Clip B - Mounting Plate C - Adjustment Panel FIG. 16 A - Fixed Base B - Window Panel FIG.
- Page 18 FIG. 24 FIG. 23 FIG. 20 A - 120V Grounded Outlet A - 12 in. (30 cm) B - Grounded Plug A - Bracket FIG. 25 FIG. 21 CONTROL PANEL A - Timer Button D - Mode Button A - Exhaust Duct B - Fan Speed Button E - On/Off Button B - Window Panel...
- Page 19 FIG. 32 FIG. 27 FIG. 29 A - Rear Filter Door B - Filter FIG. 30 A - Filter FIG. 28 FIG. 31 A - Drain Plug FIG. 33 A - Rear Filter Door B - Filter A - Charcoal Filter Insert (Not Included) B - Filter...
- Page 20 ™ & © 2021 Westinghouse Electric Corporation © 2021 Westinghouse Outdoor Power Equipment, LLC All Rights Reserved. WPac12000 REV01 05/27/22...


Need help?
Do you have a question about the WPAC12000 and is the answer not in the manual?
Questions and answers