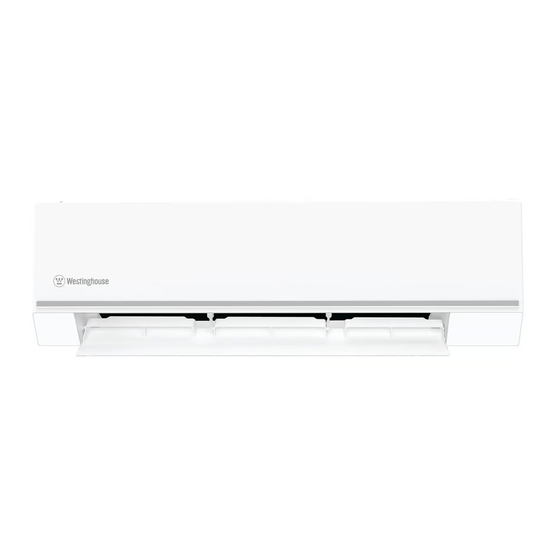
Westinghouse WSD73HWA User Manual
Hide thumbs Also See for WSD73HWA:

Advertisement

User Manual
WSD27HWA
WSD73HWA
WSD36HWA
WSD91HWA
WSD51HWA

Advertisement

Table of Contents
loading
Need help?

Need help?

Do you have a question about the WSD73HWA and is the answer not in the manual?

Questions and answers

Subscribe to Our Youtube Channel

Summary of Contents for Westinghouse WSD73HWA

  • Page 1 User Manual WSD27HWA WSD36HWA WSD51HWA WSD73HWA WSD91HWA...
  • Page 2: Table Of Contents

    CONTENTS 1. SAFETY INSTRUCTIONS ..................3 2. PRODUCT DESCRIPTION ................... 5 3. INDOOR UNIT DISPLAY ..................6 4. REMOTE CONTROLLER ..................6 5. REMOTE CONTROLLER DESCRIPTION ............. 8 6. HOW TO USE THE REMOTE CONTROLLER ............ 11 7. HOW TO USE THE INDOOR UNIT..............16 8.
  • Page 3: Safety Instructions

    • If you notice an unusal situation, such as a burning smell, please switch off 1.1 Children and Vulnerable the power to the air conditioner and contact an Westinghouse service People Safety agent. If this abnormal status continues the air conditioner may be damaged or...
  • Page 4 product is not used for an extended unit or place heavy things on it. It may period of time. Accumulated dust may cause damage or injury. • Do not attempt to repair the air conditioner • Select the most appropriate by yourself.
  • Page 5: Product Description

    ENGLISH 2. PRODUCT DESCRIPTION All the pictures in this manual are for explanation purposes only. The actual shape of the indoor unit you purchased may be slight different on front panel and display window. The actual shape shall prevail. Air inlet Air Outlet Air inlet (side) Air inlet (rear)
  • Page 6: Indoor Unit Display

    3. INDOOR UNIT DISPLAY TEMPERATURE indication lamp • Displays the setting or room temperature when the unit is operational. • Displays the malfunction code when fault occurs. • Displays the feature when a feature is activated. ECO feature indication lamp •...
  • Page 7 ENGLISH 4.2 Location of the Remote Controller • Keep the remote controller where its signal can reach the receiver of the indoor unit (a maximum distance of 8 m is allowed). • When the remote controller sends out a signal, the symbol will blink on the display.
  • Page 8: Remote Controller Description

    5. REMOTE CONTROLLER DESCRIPTION 25 26 27 28 29 RG10C(E2)/BGEF 1. ON/OFF BUTTON 3. SET BUTTON Press the button to switch on or off the Press the button to select some advance unit functions. 2. MODE BUTTON Press the button to set the operation See section “How to use the remote mode: AUTO, COOL, DRY, HEAT and controller“...
  • Page 9 ENGLISH 5. FAN BUTTON 11. FRESH BUTTON Press the button to set the fan speed: Press the button to enable/disable the AUTO, LOW, MEDIUM and HIGH. Default fresh function. Default setting: OFF. setting: AUTO. In the AUTO and DRY 12. SELF CLEAN BUTTON mode, fan speed can not be set.
  • Page 10 23. DIFFUSE DISPLAY 30. ECO DISPLAY Displays when Diffuse function is enabled. Displays when Eco function is enabled. 24. SELF CLEAN DISPLAY 31. °C/°F DISPLAY Displays when Self Clean function is °C/°F can be switched by pressing enabled. button at the same time for 3 seconds.
  • Page 11: How To Use The Remote Controller

    ENGLISH 6. HOW TO USE THE REMOTE CONTROLLER Ensure the unit is plugged in and power is available. The OPERATION indicator on the display panel of the indoor unit illuminates. Basic Operation 1. Press the ON/OFF button (A) to start the air conditioner.
  • Page 12 Timer Operation Timer Operation Press the Timer button to set the auto-on Timer On time ad the auto-off time of the unit. Example of Timer on setting 1. Press the Timer button. The Timer on symbol and time will show on the display. 2.
  • Page 13 ENGLISH 2. Continue press the Timer button to set the turn off time to 5 hours. 3. Both the Timer on and Timer off indicators display on the remote controller, the combined Timer setting is activated. 4. Then the unit will turn on at 12:30 PM and turn off at 15:00 PM.
  • Page 14 5. ECO function • Press the Set and OK buttons to deactivate the Follow Me feature, In Cool mode, press ECO button to enter refer to Set function desctription for the details. Under cooling mode, press the button, • If the memory feature is the remote controller will adjust the inactivated, “OF“...
  • Page 15 ENGLISH 11. Diffuse function (optional) 1ºC Press the Set button to activate the 1ºC Diffuse function. This feature avoids direct Tem. Cooling 1hour 1hour 12. Sleep function Tem. Press the Set button to activate the Sleep Heating function. When you activate the Sleep 1ºC function, the economic running function 1ºC...
  • Page 16: How To Use The Indoor Unit

    7. HOW TO USE THE INDOOR UNIT otherwise it might cause discomfort or cause uneven room temperatures. 2. Adjust the horizontal louver using the remote controller. 3. Adjust the vertical louver using the remote controller. 4. Adjust the vertical louver manually Range (For models without 3D Swing function).
  • Page 17: Operating Temperature

    ENGLISH 8. OPERATING TEMPERATURE COOL mode HEAT mode DRY mode Room Temperature 17°C - 32°C 0°C - 30°C 10°C - 32°C Outdoor Temperature 0°C - 50°C -5°C - 24°C 0°C - 50°C IMPORTANT! 2. If the air conditioner runs for a long time 1.
  • Page 18: Cleaning And Maintenance

    10. CLEANING AND MAINTENANCE 10.1 Before Maintenance Turn the system off before cleaning. To hand-held vacuum. clean, wipe with a soft, dry cloth. Do not use bleach or abrasives. WARNING! Power supply must be disconnectd before cleaning the indoor unit. •...
  • Page 19 ENGLISH 10.7 Pre-season Inspection • An air conditioner without air of the room, which would cause 1. Check that the wiring is not broken off malfunctions by accumulation. or disconnected. WARNING! you operate the air conditioner. 4. Check if the air outlet or inlet is blocked after the air conditioner has not been 10.5 Replacing the Filters used for a long time.
  • Page 20: Operation Tips

    11. OPERATION TIPS The following events may occur during 5. Abnormal noise of the air normal operation. conditioner 1. Protection of the air conditioner • You may hear a low hissing sound Compressor when the compressor is running or has just stopped running.
  • Page 21 ENGLISH air conditioner decreases accordingly. • For the unit without Auto-restart At the same time, heat loading of feature, when the power restores, the the air conditioner increases due to OPERATION indicator on the indoor unit larger difference between indoor and outdoor temperature.
  • Page 22: Troubleshooting

    12. TROUBLESHOOTING OPERATION (RUN) indicator The unit may stop operation or other indicators continue or continue to run in a safety condition(depending on models). Waiting for about 10 minutes, the fault may be recovered automati- If one of the following code ap- cally, if not, disconnect the power pears on the display area: and then connect it in again.
  • Page 23 (c) ‘ASC’ means Electrolux’s authorised serviced centres; anyone other than an Electrolux authorised repairer or ASC; (d) ‘Westinghouse’ is the brand controlled by Electrolux Home Products Pty (iv) normal wear and tear; Ltd of 163 O’Riordan Street, Mascot NSW 2020, ABN 51 004 762341 in (v) power surges, electrical storm damage or incorrect power supply;...
  • Page 24 WESTINGHOUSE are trademarks of Westinghouse Electric Corporation. Used under license. All Rights Reserved. ver2_July2024...

Table of Contents