Advertisement
Advertisement
Table of Contents

Related Manuals for LAVAZZA CLASSY Pro LB 1200 USA


Summary of Contents for LAVAZZA CLASSY Pro LB 1200 USA
- Page 1 CLASSY Pro Instructions...
- Page 2 Congratulations! Dear Customer, we would like to congratulate you on purchasing the Lavazza CLASSY PRO machine. Thank you very much for trusting our brand! Please read these instructions carefully before operating the coffee machine. This manual gives explanations on how to use, clean and keep the machine in perfect working conditions.
-
Page 3: Important Safety Instructions
Contact the Lavazza by qualified staff Customer Service to report any malfunction 24. To disconnect the machine, first set it to the or damage affecting the machine. - Page 4 CLASSY PRO holder and at the bottom of the Lavazza CLASSY PRO holder. To avoid the risk of injury, do not put your fingers in the Lavazza CLASSY PRO assembly housing. CAUTION: Very hot water is found in the Lavazza CLASSY PRO holder during the brewing phase.
-
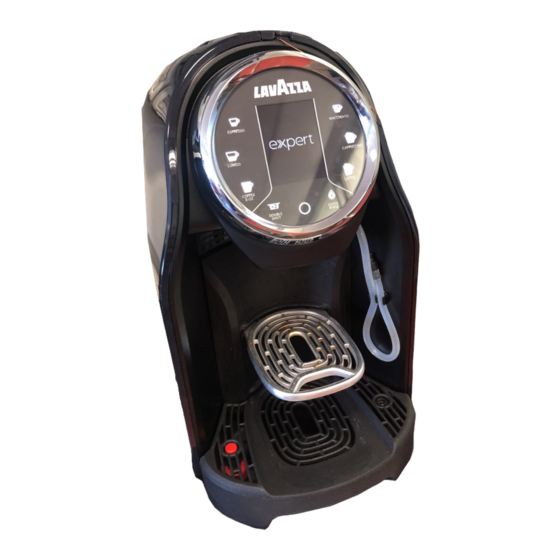
Page 5: Components And Controls
COMPONENTS AND CONTROLS Water tank cover Capsule loading lever Display Control unit Water tank Milk tube Used capsule drawer Mug/cup rest grid Drip tray drawer Drop drawer float Power supply cable... - Page 6 COMPONENTS AND CONTROLS CONTROL UNIT MACCHIATO selection ESPRESSO selection LUNGO selection CAPPUCCINO selection COFFEE 8 oz. selection LATTE selection DOUBLE SHOT coffee function Arrow DOWN to scroll through menu Arrow UP to scroll through menu SYSTEM CLEAN ON/stand-by key...
-
Page 7: Preparing The Machine
PREPARING THE MACHINE Rinse the tank before use. The manufacturer is not liable for damages Fill the water tank only with fresh, non-carbon- resulting from: ated drinking water. • incorrect use and / or improper use of the machine; The cover can be lifted to fill the tank directly. •... - Page 8 PREPARING THE MACHINE Press the MULTIFUNCTION button After the heating phase the machine on the dis- power on the machine. play asks if the water filter is present. Select Yes / No. At first start-up or in the event of lack of wa- ter in the hydraulic circuit, the machine will run for a few seconds the trigger cycle, the display will show the following animation...
- Page 9 PREPARING THE MACHINE BEVERAGE PREPARATION Insert the other end of the milk tube into the PRESETTING hole on the cup rest grid. The coffee machine features two positions, for espresso cup or big cup (or glass) respectively. To use a big cup, place the mug (or glass) di- rectly onto the plate at the bottom.
- Page 10 Lift the pod loading lever until it locks into posi- tion to open the pod fitting compartment. Put a LAVAZZA Blue or Expert capsules into pod-holder. Never put fingers or objects in the pod-holder. Only LAVAZZA Blue or Expert capsules or compatible must be introduced in the pod-holder.
- Page 11 PREPARING THE COFFEE LUNGO SELECTION ESPRESSO SELECTION Place the big cup on the cup rest grid,. Position the espresso cup on the cup rest grid. Press the LUNGO (3 US fluid oz.) button Press the ESPRESSO (1 US fluid oz.) button to to start delivery.
- Page 12 Press the COFFEE 8 oz. button to start brewing. When the capsule loading handle is open, insert the LAVAZZA specific x2 coffee capsule in the The machine will stop delivery automatically appropriate pod-holder. when the programmed measure is reached. During supply, the COFFEE 8 oz.
- Page 13 Press the double shot coffee function icon If after supply, the water inside the tank falls below the minimum level, the machine will show the following animation. Fill the water tank up to the MAX level indi- cated. Then the espresso and milk keys will light up.
- Page 14 Position the cup on the cup rest grid. tion to open the pod fitting compartment. Press the MACCHIATO button to start Put a LAVAZZA Blue or Expert capsules into brewing. the pod-holder. The machine draws the milk from the bottle, through the tube, then the heating cycle is started.
- Page 15 PREPARING THE BEVERAGE LATTE SELECTION CAPPUCCINO SELECTION Position the mug or glass on the cup rest grid. Position the mug on the cup rest grid. Press the LATTE button to start brewing. Press the CAPPUCCINO button to start brewing. The machine draws the milk from the bottle, The machine draws the milk from the bottle, through the tube, then the heating cycle is started.
- Page 16 ON steadily. Lift the pod loading lever until it locks into posi- tion to open the pod fitting compartment. Put a Lavazza Blue or Expert capsule into the capsule fitting compartment. Once the desired amount of coffee has been ob- tained, stop the supply by releasing the button.
- Page 17 ON steadily. Lift the pod loading lever until it locks into posi- tion to open the pod fitting compartment. Put a Lavazza Blue or Expert capsule into the capsule fitting compartment. Macchiato Place the bottle containing the milk near the machine.
-
Page 18: Maintenance And Cleaning
MAINTENANCE AND CLEANING MAINTENANCE AND CLEANING SYSTEM CLEAN Disassemble all parts (details see below) and clean it with brushes kit. The MILK CLEANING function must be performed every day. To stat press the “System clean” on control unit. Disasemble tube and connector, use brush. Follow the display’s instructions to complete the cleaning cycle. - Page 19 MAINTENANCE AND CLEANING Clean the components with cold or lukewarm The machine will start the milk system cleaning cycle. water, then dry it and refit it correctly. During milk system cleaning, the display will show the following animation. Place a large empy glass under the spout. At the end of the cleaning cycle, empty the glass used for cleaning solutions.
- Page 20 MAINTENANCE AND CLEANING CLEANING THE SPENT POD DRAWER, Remove the pod drawer and empty the ex- THE DROP DRAWER hausted pods. The display will show the following animation Empty the liquids in the drop drawer. to indicate that the used capsule drawer is full. Empty and reinsert it.
-
Page 21: Machine Menu
MACHINE MENU MACHINE MENU PRODUCT VOLUME The “Product volume” parameter allows to adjust To open the machine menu, press and keep pressed the MULTIFUNCTION button for 5 the dosage amount of each beverage. seconds at least. • ESPRESSO In the machine menu you can change the param- •... - Page 22 It is not possible to dispense beverages until the descaling cycle will be completed. We recommend that you should use LAVAZZA DESCALING products to descale the machine. Do not use vinegar to decalcify the machine. Once the descaling is started, it will have to The display will show the following animation.
- Page 23 During the descaling cycle, the display will show the following animation. Remove the tank and pour the entire contents of the LAVAZZA descaling bottle, and add water to the level indicated on the tank. In the event of power supply failure during...
- Page 24 MACHINE MENU Remove the drop drawer and the exhausted Press the MULTIFUNCTION button pod drawer, then empty the container used for confirm. the descaling solution. The display will show the following animation. During the the rinse cycle, the display will show the following animation.
- Page 25 MACHINE MENU CLEANING Press the MULTIFUNCTION button to confirm. The “Clean” function allows to start the ma- The machine will start rinsing the milk tube. chine washing cycles. During milk tube rinsing, the display will show the Frother rinsing ➤ following animation.
- Page 26 MACHINE MENU SETTINGS SERVICE Select the “Settings” option, then press the MUL- Select the “Service” option, then press the MUL- TIFUNCTION button to display and change TIFUNCTION button to display the errors the machine settings. reported by the machine. Unit information List of errors ➤...
-
Page 27: Troubleshooting
Top up the tank with fresh 4 - No water in the tank. drinking water. Non-ok: go to step 5 Ok: call solved. Insert Lavazza capsule or 5 - Capsule not present. Non-ok: machine being compatible. serviced. Press one of the buttons and check the operation Ok: call solved. - Page 28 Non-ok: go to step 4 operate manually to remove the capsule from the duct. Ok: call solved. 4 - Capsule not Use Lavazza capsules or Non-ok: machine compatible. compatibles. being serviced. Ok: call solved. 1 - Tank not inserted Insert the tank correctly.
- Page 29 1 - Machine damaged. Non-ok: machine machine. VALVE TIMEOUT”. being serviced. Ok: call solved. 1 - Capsule not Use Lavazza capsules or The coffee flows out compatible. compatibles. Non-ok: go to step 2 too fast and no creamy Ok: call solved.
-
Page 30: Communication Module
As regards the faults not covered by the above table, or if the suggested actions do not remedy the faults, contact the nearest Lavazza Authorized Service Centre. COMMUNICATION MODULE The communication module installed emits radio waves with the following characteristics: •... - Page 32 Luigi Lavazza S.p.A. - Via Bologna 32, 10152 Torino - Italia LB 1200 USA - Preliminary - Ed. 2019-10...
Need help?
Do you have a question about the CLASSY Pro LB 1200 USA and is the answer not in the manual?
Questions and answers