Table of Contents
Advertisement
Advertisement
Chapters
Table of Contents

Summary of Contents for Daytona E-VIBALL
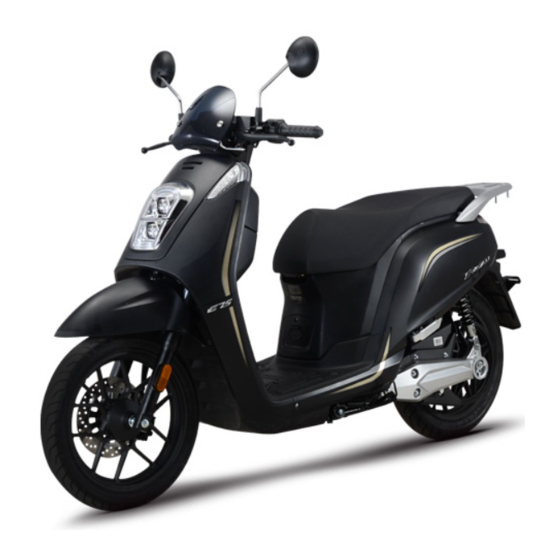
- Page 1 DAYTONA E-VIBALL User manual...
- Page 2 Preface This USER MANUAL introduces the basic operating method and repairing method, please read it carefully and thoroughly. Correct operating, maintenance and repairing could reduce the trouble of motorcycle and keep the motorcycle in its best performance. The service station of our company, which set up everywhere, would be glad to offer more detailed instructions and help, to offer the convenient for your motorcycle.
- Page 3 Important note Due to rapid improvement of our product, pictures and contents in this manual may be different with actual motorcycle. Take the actual motorcycle as standard.
-
Page 4: Table Of Contents
Contents Safety driving Vehicle identification number Parts installation position Important parts system Driving instruction Service and maintenance Main technical data... -
Page 5: Safety Driving
Safety driving Safety driving rules…………………………………………………………………5 Protective measures…………………………………………………………………6 Vehicle refit caution………………………………………………………………6 Loading of goods……………………………………………………………………7 Attachment installation………………………………………………………………8 Safety use of the headlight………………………………………………………8... -
Page 6: Safety Driving Rules
Safety driving rules 4. Strictly observe the local traffic Before riding, Check regulation. motorcycle and make sure that is in ● Over speed driving is the reason of good condition. many accidents, so driving speed must 2. The driver must passed the be limited to the range allowed by examination held by traffic controlling traffic condition and road condition;... -
Page 7: Protective Measures
Vehicle refit caution Protective measures Refitting the motorcycle or replacing 1. For your safety, the rider and the original device at will, would leave passenger should take on safety suits, motorcycle dangerous wear helmet, dust proof glasses and situation. The customer must obey the gloves etc. -
Page 8: Loading Of Goods
Loading of goods 4. After mounting goods, inspection must be carried out to prevent the goods 1. Handle feeling will change with from falling or losing. load and no load. Be careful, when the 5. Do not put the goods on the load is overweight, the handle is easy to handlebar, cushions or fender. -
Page 9: Attachment Installation
Attachment installation Safety use of the headlight customer installs The headlight is cooled by air during attachment which is not verified by our riding , no cover such as a poncho company, the attention should be paid allowed to cover headlight surface to the following points: preventing from deformation due to 1. -
Page 10: Vehicle Identification Number
Vehicle identification number Vehicle identification number……………………………………………………10 ……………………………………………………11 Product standard number... - Page 11 Vehicle identification number VIN and motor number are the numbers should be remembered by customer, it is convenient to register or order the parts. 1. VIN is engraved on main pipe of frame front part (Lift VIN cover, you can see it); ①VIN 2.
- Page 12 Product standard number 3. Motor number is engraved at side of the motor at body bottom; Q/ML J021009 ③Motor number...
-
Page 13: Parts Installation Position
Parts installation position Head part…………………………………………………………………………13 Frame left Side…………………………………………………………………14 Frame right Side…………………………………………………………………15... - Page 14 Head Parts ①Ignition switch ②Start, gear button ③Accelerator grip ④Front braking lever ⑤Double flash switch ⑥Meter ⑦Overpass switch ⑧Rear braking lever ⑾ Horn, constant cruising button ⑨Dimmer switch ⑩Turning switch...
- Page 15 Frame left side ①Side stand ② Main stand ③Left rear foot step ④Rear handhold...
- Page 16 Frame Right side ①Charging port ② Right rear foot step ③ Met-in box(Open the seat)...
-
Page 17: Important Parts System
Important parts system Instrument panel and signal system………………………………………………17 Braking system………………………………………………………………20 Controlling system…………………………………………………………………25 Other Parts…………………………………………………………………………35... -
Page 18: Instrument Panel And Signal System
Instrument panel and signal system... - Page 19 ⑦Blue tooth indicator:It comes ①Left turn indicator:Turn on left on while your mobile phone connected turning light switch, it flashes. ②Hi with Smart controlling box. Beam indicator: When ⑧Battery 2 power indicator:This Hi-Beam headlamp is lit, it is comes on. ③Speedometer/Trouble code :...
- Page 20 ⑩GPRS signal strength: When the (14)Constant speed cruise indicator : When the vehicle is in mobile phone and smart controlling box are normally connected, the GPRS constant cruise mode, this indicator signal is strong and this indicator is comes on. always on, when the signal is weak, this (15) Mileage display:Display the indicator will flashes.
-
Page 21: Braking System
Braking system 2. Check the wear condition of the hydraulic This model brake disk; combined brake system or front/rear 3. Front braking lever and rear hydraulic brake system, When buying, braking lever must have some please take actual motorcycle resistance. reference. - Page 22 Rear brake lock When parking, grasp rear brake lever, then push rear brake lock lever forward to brake the rear wheel.
- Page 23 Check brake fluid 1. Rest the motorcycle vertically; 2. Check the right side front brake reservoir lie to handlebar is in level position or not, check the fluid level whether it is higher than LOWER mark or not; 3. Check the left side rear brake reservoir lie to handlebar is in level position or not, check the fluid level whether it is higher than LOWER mark...
- Page 24 Cautions: ■Braking fluid should be handled properly, it may damage plastic parts and paint surface. ■When refill the braking fluid,make sure the reservoir is in level position then remove the reservoir cap, otherwise the fluid will flow out. ■Use DOT3 or DOT4 braking fluid in fully sealed container only. ■Do not mix the pollutants such as oil, mud or water into reservoir.
- Page 25 Wear of the braking system Before riding, you should check front and rear braking system: Check the thickness of braking pad and disk, check the wear mark on each braking pad, if any braking pad wears to its wear mark, you have to replace both braking pads.
-
Page 26: Controlling System
Controlling system This motorcycle equipped with a smart key and an emergency mechanical key. Emergency mechanical key Emergency mechanical key is used to open the seat in case of emergency. Insert the emergency mechanical key into the seat lock hole at the bottom left of the rear of the seat and rotate ①Emergency mechanical key clockwise to open the seat lock. - Page 27 Smart key Button function ①Unlock Press this button to unlock the system, blue light of ignition switch comes on, ignition switch can be operated. ②Search for Press this button, turning lights flash all and there is buzzer sound after 5 seconds.
- Page 28 Notice : ■ Smart key has electrical Caution: circuit on it, it may not work normally ■ If the smart key is stuck with fuel, if the electrical circuit damaged. wax or grease, please wipe it off ■ Do not let the smart key falling to immediately to avoid cracking or the ground, or put heavy stuff on the warping.
- Page 29 Operation before driving Ignition switch and steering head lock 1. Bring the smart key to 1.5m away Unlocking the system,turn ignition from the vehicle. switch to following positions: 2. Press ignition switch knob for “ ” (Locked) : The steering head 0.5s above it match with the smart key, After matching, the blue light of the locked, vehicle has no power, vehicle...
- Page 30 Operation after driving handlebar should be slightly turned until lock tongue extend into lock hole and press the button again to perform the 1. Ignition switch can turn directly locking action. from “ ” to “ ” , meantime, the 4.
- Page 31 Antitheft warning function 3.When the vehicle is in antitheft 1.When the vehicle is in non “ ” warning function mode , If there is position (The blue light flashing) , Press abnormal vibrating and pushing or lock button of the key,the buzzer beeps ignition switch abnormal, the buzzer and left and right turning light will beep and once and left and right turning light...
- Page 32 stable, keep the handlebar angle, press Left handlebar switch the button, and the vehicle will start the ①Over-pass switch cruise mode. Press this switch, Hi-beam light goes on, release button, Low-beam light goes on. When over passing, repeat to press overpass button to improve safety.
- Page 33 Right handlebar switch ①Double flash switch emergency occurred, motorcycle must be stopped or parked, press this button all turning lights flash, at this time ignition switch is at“ ” position. ② Gear switch button Press this button to switch between different gears.
- Page 34 Power-off switch Power-off switch located at the front of met-in box under the seat. You can see it when the seat is open. If the vehicle is not used for more than three days, the power-off switch should be turned off. At this time, the vehicle electronic control system will no longer work, which can effectively avoid...
-
Page 35: Other Parts
Other parts Front glove boxes Push small lid of the front glove box to open front left glove box. Max. loading capacity:1.0kg. ①Front left glove box Caution: ②Front right glove box ■ Do not exceed the Max. loading capacity, otherwise, it may affect motorcycle operating stability. - Page 36 Met-in box Located under the seat. Open and Caution: close methods please refer to see the ■ Do not exceed the max. limits of Met-in box loading capacity. Otherwise, seat lock. it’ll affect stability of the motorcycle Max. loading capacity:5.0kg. operation.
- Page 37 Caution: USB port Only ignition switch turn to “ ” ■ USB port is located in front left position, USB can charge the device. glove box. ■ Do not use USB charging when raining, washing motorcycle or in wet Provide 5V 2A charging power environment.
-
Page 38: Driving Instruction
Driving Instruction ………………………………………………………39 Inspection before riding …………………………………………………………………40 Start driving ……………………………………………………………41 Driving operation ………………………………………………………………………42 Braking ………………………………………………………………………43 Parking... -
Page 39: Inspection Before Riding
Inspection before riding Without prior driving inspection is 4. Battery: Check battery plug to see main reason for accidents and damages. whether it loose or not. You must spend some times to do some 5. Front fork/cushions : Check necessary inspection before your riding. whether the front fork is loose or not, This not only removes hidden danger is the handlebar stuck? Make sure that... -
Page 40: Start Driving
Start driving Starting procedures Warning: ■ To prevent motorcycle sudden rush out after starting, rear braking ①Return the side stand lever must be grasp tightly before ②Brake rear brake starting. ③ Turn ignition switch knob ■ Braking light will goes on when braking. -
Page 41: Driving Operation
Driving operation Note: ■You should review safety-driving Before driving, check every parts to rules in this manual before driving. ensure it works normal then drive. ■Must remember to let main stand 1. Make sure accelerator grip is close and side stand returned. Ensure they do and rear brake applied before you return not fall off during driving. -
Page 42: Braking
Braking Using both front and rear brake please when applying the brake. After accelerator grip returned, hold the front and rear braking lever both tight to brake. Notice ■ Braking power will be reduced when front brake or rear brake applied only. -
Page 43: Parking
Parking 1. When approaching the parking area, turn on the winker in advance and look for coming vehicle from behind and side, return the accelerator grip and apply the brake slowly to turn on the braking light to warn the coming vehicle from behind. 2. -
Page 44: Service And Maintenance
Service and Maintenance ……………………………………………………………………………45 Tire Charging……………………………………………………………………………47 Lithium battery……………………………………………………………………50 Fuse……………………………………………………………………………55 Side stand…………………………………………………………………………56 …………………………………………………57 Storeage for long time parking... -
Page 45: Tire
Tire Tire inflating pressure should be proper. Crack, damage and abnormal wear of the tire will cause handlebar unsteady even tire blown, replace at time. The tire pressure should be checked when it is in cold state,please replace tire according to following table. Inflated pressure in cold state Tire specification (kPa) - Page 46 Tire replacement Tire wears Please use genuine tire, this can Tire wears to its limits, it is very ensure motorcycle operability, brake dangerous for driving. The tire must be ability, durable and comfortable. Please same tire replaced when tire wears to wear mark. specification recommend in User’s Manual.
-
Page 47: Charging
Charging Out of board charging Take the battery out, insert the charger plug into battery charging port, the red light of the charger is always on to remind you of ongoing charging. On-board charging 1. Put the battery into battery chamber. - Page 48 Charging environment 6. During the charging process, the 1. Please use the original charger of aluminum shell charger the battery for charging, do not use other temperature rise effect, and the surface brands or models of chargers for temperature is higher, which is a normal charging.
- Page 49 Notes on charger use 5. If the indicator is abnormal or 1. The charger can be used only there is rare delicacy or charger shell is indoor. overheat during charging process, stop 2. It is strictly prohibited to charge in charging immediately charger...
-
Page 50: Lithium Battery
Lithium battery Before using battery 1. Please confirm that the battery This model adopts the structure of model is the original battery of the two lithium battery packs, and the motorcycle before use. Do not use specification of single lithium battery batteries of other brands or models at pack is 61.2V 28.6Ah. - Page 51 The attenuation degree of the battery Caution: ■ Waste batteries shall not be usable capacity varies under disassembled without authorization temperature. The specific reference and shall be recycled by relevant attenuation degree is 70% at -10℃, 85% professional departments. at 0℃,100% at 25℃. If the battery has peculiar smell, heating, deformation...
- Page 52 Storage environment completely exhausted and irreversible damage may occur. For such problems, 1. If the battery is placed on battery failure will not be within the motorcycle, it will consume the battery scope of guarantees. power in real time due to the operation The most suitable storage of smart system and alarm system.
- Page 53 vehicle (with the power plug removed), Using cautions of the battery the maximum safety period is three months. Otherwise, the battery may lose 1.For the first use, please exhaust the power and cannot be repaired. battery power as much as possible, and 5.
- Page 54 4. The actual capacity of the battery Cautions: and the display of the meter will deviate ■A void the battery from raining with the increase of battery usage times. or flushing, and do not soak the Please fully discharged the battery battery in water.
-
Page 55: Fuse
Fuse Warning: If the fuse often burned due to ■ Prohibit using other rating fuse, short circuit or overloading of electrical this will damage motorcycle’s system,please ask your local dealer or electrical system , even worse cause service station to repair it for you, when the fire. -
Page 56: Side Stand
Side stand The side stand uses not only for support the motorcycle when stopping, but also as a safety mechanism shut down switch,when the side stand is not returned, the vehicle cannot be operated. Caution: ■ When driving on muddy road, please wash side stand shut down ①Side stand switch in times. -
Page 57: Storeage For Long Time Parking
Storage for long time parking Restore to use Storage and maintenance 1. Take the cover off and clean the The motorcycle parked for long time motorcycle. must be stored against moist, sunlight, 2. Recharge the battery and install it; rain prevent from accidental... - Page 58 Cleaning Cleaning motorcycle Warning: periodically will be a help of keeping ■ Washing with high-pressure the painting coat bright, this make you water maybe damage some parts. can find the worn, damage and leakage The following parts cannot be troubles of the parts. washed with water: Ignition switch, 1.
-
Page 59: Main Technical Data
Main technical data Main technical data……………………………………………………………60... - Page 60 Main technical data DY3000DT Item Data Item Data 1841±55 Overall length(mm) Propulsion Motor Driving type Rated output Power 684±20 Overall width (mm) (kw) Max. speed 1132±33 Overall height (mm) (km/h) 1260±34 Wheelbase (mm) Climbing ability Battery range Vehicle kerb mass (kg)...
- Page 61 Main technical data DY1500DT Single battery type Item Data Item Data 1841±55 Overall length(mm) Driving type Propulsion Motor Rated output Power 684±20 Overall width (mm) (kw) E25:25 Max. speed 1132±33 Overall height (mm) (km/h) E45:45 1260±34 Wheelbase (mm) Climbing ability Vehicle kerb mass Battery range (kg)...
- Page 62 Main technical data DY1500DT Two battery type Item Data Item Data 1841±55 Overall length(mm) Driving type Propulsion Motor Rated output Power 684±20 Overall width (mm) (kw) E25:25 Max. speed 1132±33 Overall height (mm) (km/h) E45:45 1260±34 Wheelbase (mm) Climbing ability Vehicle kerb mass Battery range (kg)...
Need help?
Do you have a question about the E-VIBALL and is the answer not in the manual?
Questions and answers